Using the new features – Create a formula (preview) and Explain this formula we can now easily write, edit, and understand formulas in Power Apps.
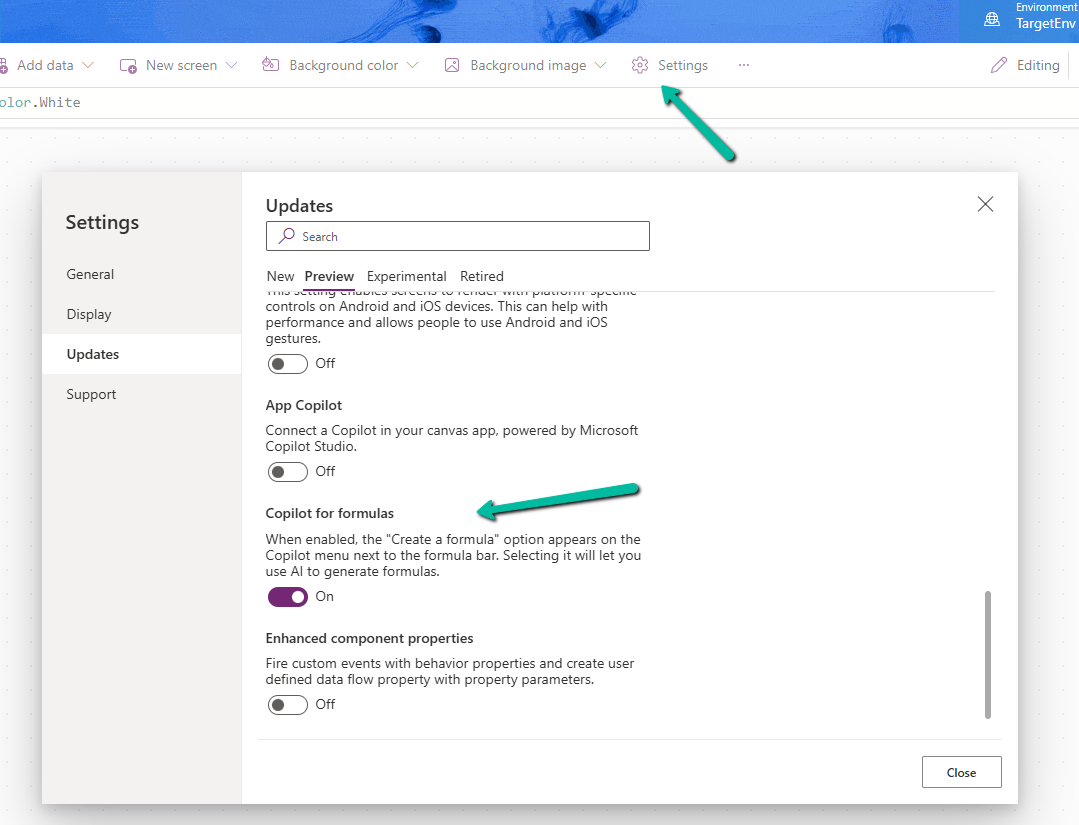
To enable it, navigate to switch on – Settings >> Updates >> Preview >> Copilot for formulas
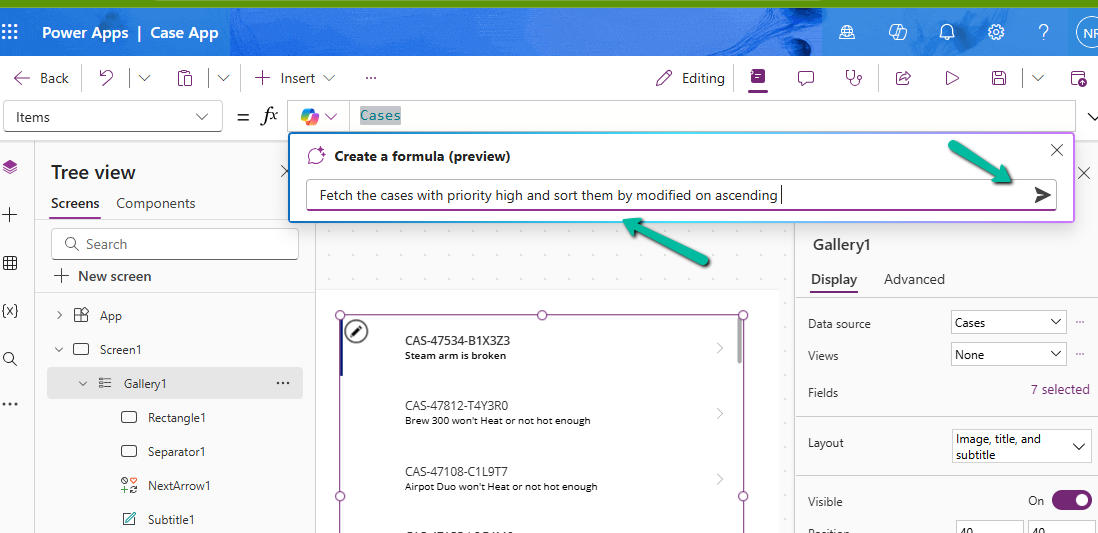
Here in the sample app below, we are trying to set the Items property of the Gallery using Create a formula. Here our gallery control is bound to Cases as the data source.
We can describe what formula we need in plain language.
We can see it generating the formula for us. We have the option to Apply, Discard, and Copy it.
Here we have applied the generated formula.
Another example is where we are setting the Text property.
Here instead of the customer name it considered the Customer Contacted field. So basically we need to review the formula generated.
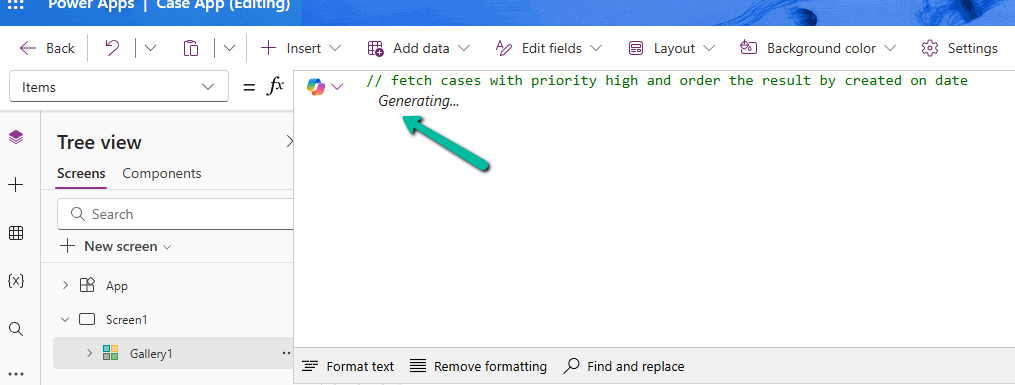
We can also generate formula from code comments as show below. Simply type the comment and wait for formula to be generated or otherwise press Enter.
The result
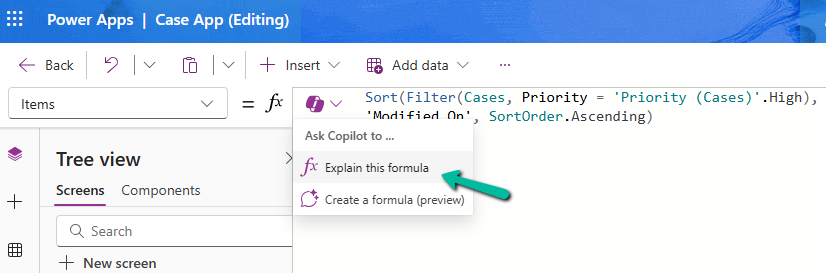
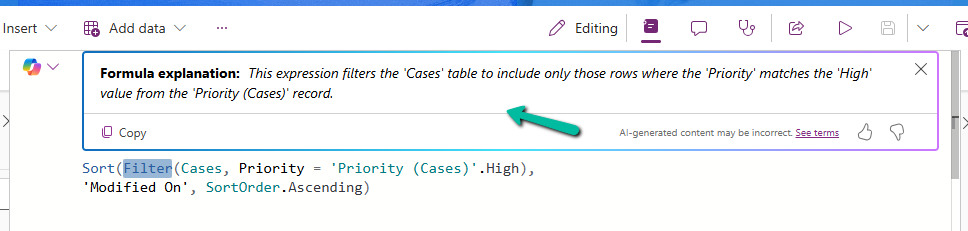
Next using Explain this formula we can use the copilot’s ability to explain the formula in plain language.
The result
We can also select specific parts of the formula for explanation.
Below we have selected the Filter keyword and Explain this selection option.
Field Suggestions by Copilot for Canvas Apps apply to Gallery, Form Table controls both classic and modern for Dataverse, SharePoint, or SQL Server data source. It analyzes the schema of the table selected and recommends up to 10 fields that also include a maximum of 10 required fields of that table.
Let us see it in action.
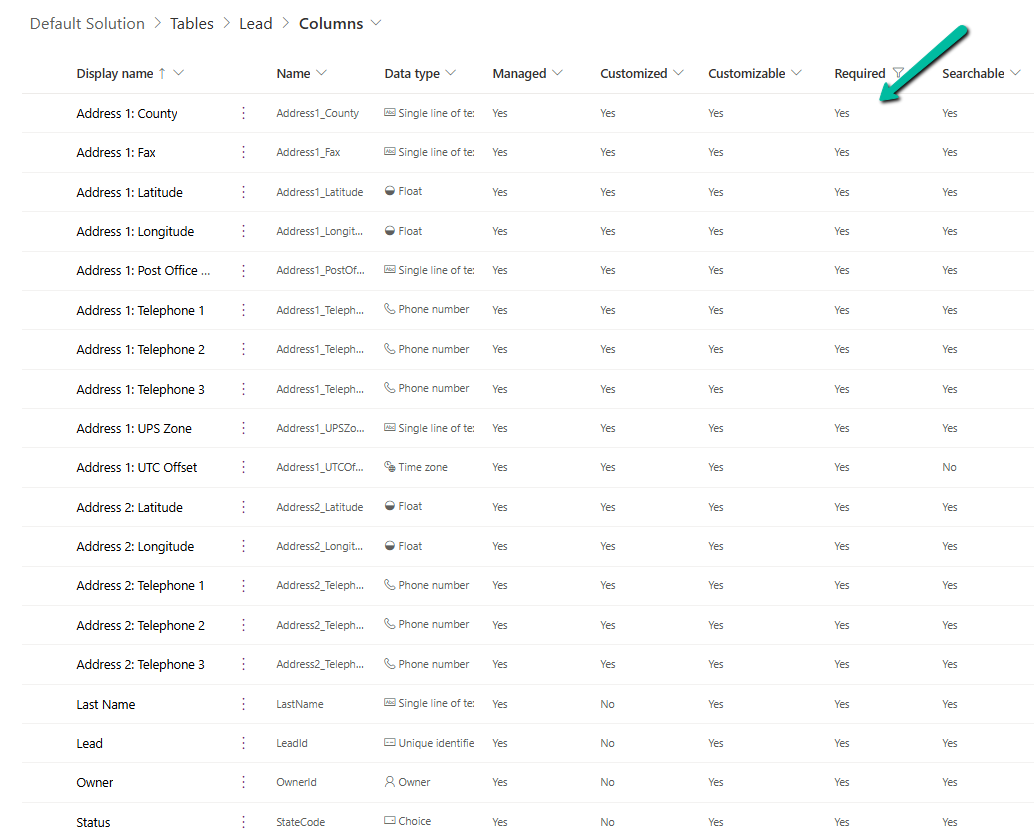
Below we have the following fields defined as required fields in the lead table.
Now inside CanvasApp when we insert and bind the Modern Form / Table or the classic Edit Form / Display Form, Data Table to the lead table it automatically suggests the fields for binding.
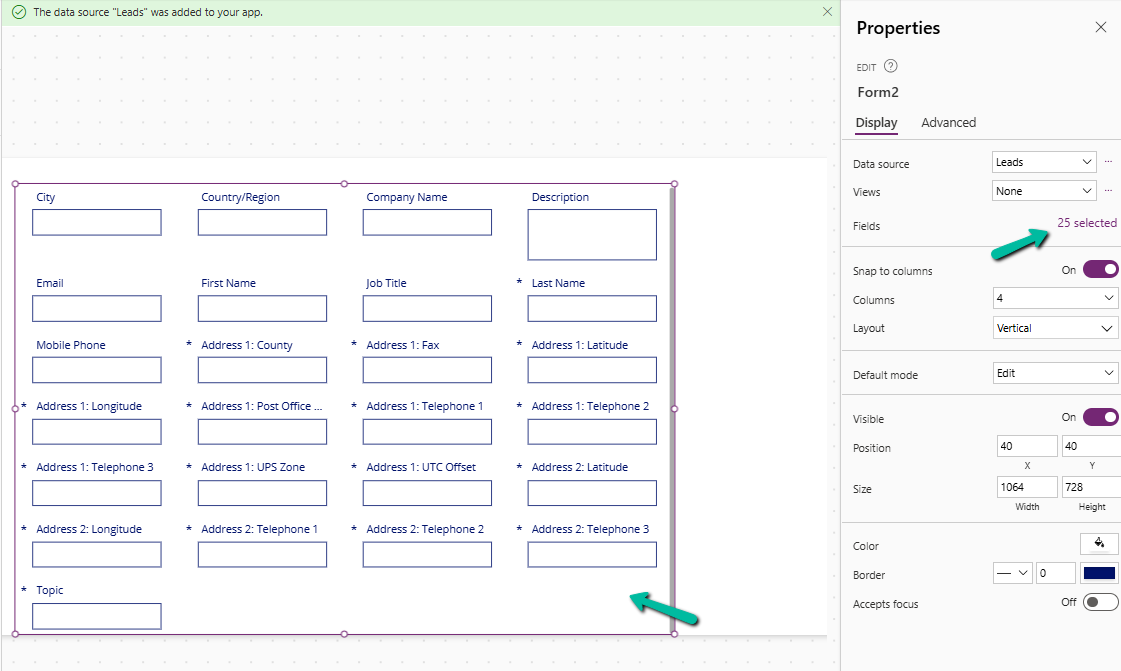
Here we have selected Lead as the Data Source for the Edit form or Form (modern) control.
Here we can see it suggesting all the required fields of the lead along with other key fields of lead like City, Country, Email, First Name, etc.
In the case of Table, we can see it suggesting the following 10 fields.
In the case of a custom table with very few fields in it, it suggested the below fields for Form and Table control.
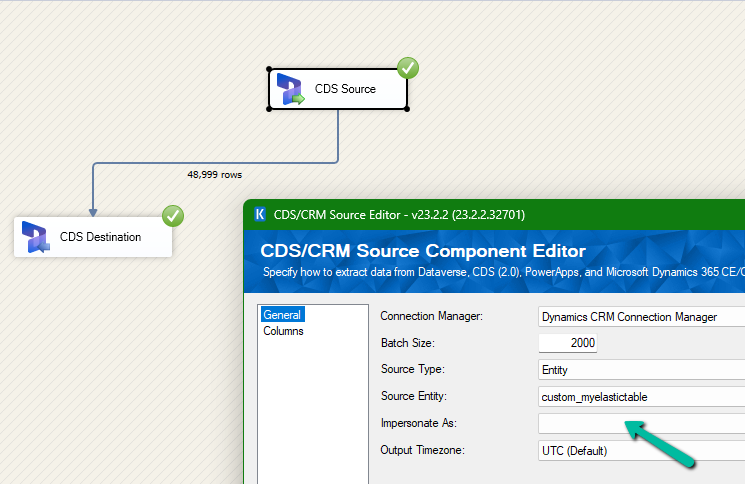
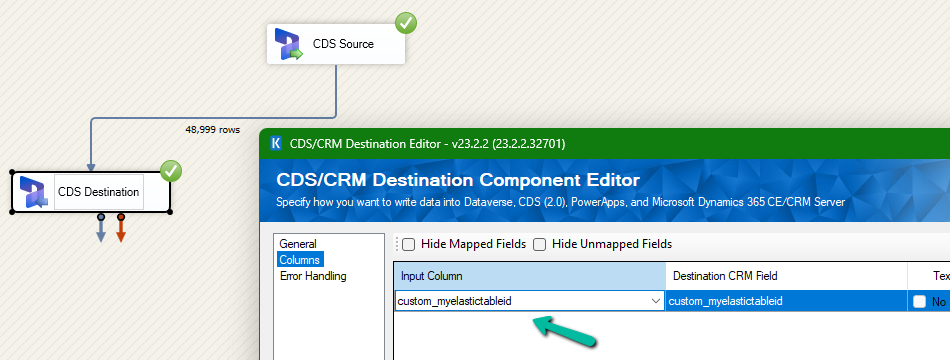
We had mapped the primary field for deletion and the package was also showing success.
However back in our CRM / Sales Hub app, we saw that none of the records were deleted (total – 48999)
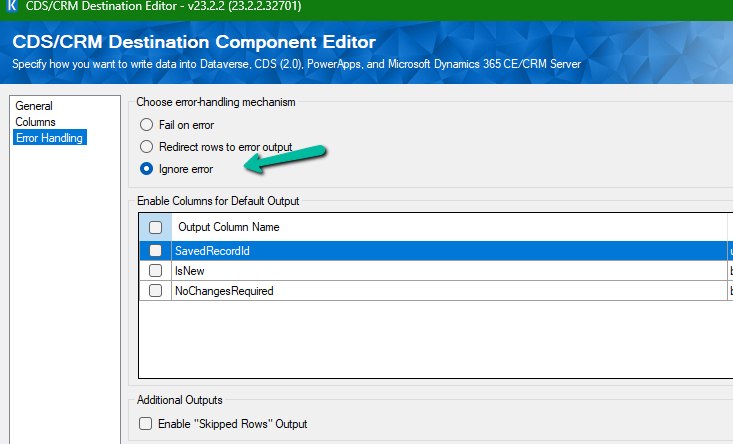
The reason it was showing success is that we had specified the Ignore Error option in our CDS Destination component.
Then we created 2 more records but didn’t specify the partition ID for them.
This time on the successful run of the package we can see those 2 new records getting deleted for which we didn’t specify any partition ID i.e. Test 1 and Test 2 records were deleted successfully.
If we check the Microsoft docs it mentions that we need to include the partition ID using the alternate key to delete those records using the DeleteMultiple request.
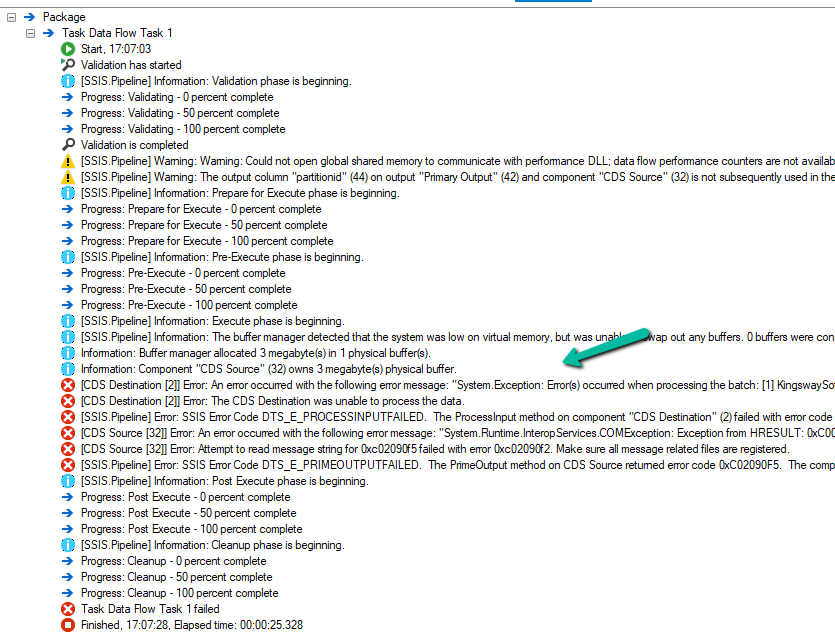
Could not find a way to specify an Alternate Key in the CDS Destination component for the Delete message and if we try deleting the records one by one instead of using the DeleteMultiple request we get the below error.
[CDS Destination [2]] Error: An error occurred with the following error message: “System.Exception: Error(s) occurred when processing the batch: [1] KingswaySoft.IntegrationToolkit.DynamicsCrm.WebAPI.WebApiServiceException: The remote server returned an error: (404) Not Found. (Error Type / Reason: NotFound, Detailed Message: {“error”:{“code”:”0x80040217″,”message”:”The HTTP status code of the response was not expected (404).\n\nStatus: 404\nResponse: \n{\”error\”:{\”message\”:\”Could not find item ‘b3a70971-9674-ef11-a671-6045bdfe58ee’.\”,\”details\”:[{\”message\”:\”\\r\\nErrors : [\\r\\n \\\”Resource Not Found. Learn more: https://aka.ms/cosmosdb-tsg-not-found\\\”\\r\\n]\\r\\n\”}]}}”}}) (SSIS Integration Toolkit for Microsoft Dynamics 365, v23.2.2.32701 – DtsDebugHost, v16.0.5270.0)System.Net.WebException
As expected, using CrmServiceClient also if we do not include partitionid we will get the below error for the records that have partition id specified.
The HTTP status code of the response was not expected (404).
Response:
{“error”:{“message”:”Could not find item ‘b3a70971-9674-ef11-a671-6045bdfe58ee’.”,”details”:[{“message”:”\r\nErrors : [\r\n \”Resource Not Found. Learn more: https://aka.ms/cosmosdb-tsg-not-found\”\r\n]\r\n”}]}}
Here we can specify the partitionId parameter to delete those records having the partitionId specified in the DeleteRequest
For DeleteMultiple Request we need to provide the alternate key as shown below.
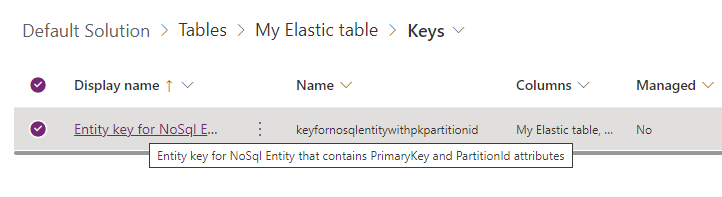
We will have the alternate key auto-created by the system when we create an elastic table.
Sample Code –
var myServiceClient = new CrmServiceClient(connectionString);
var query = new QueryExpression("custom_myelastictable");
query.ColumnSet.AddColumns("custom_name", "partitionid");
var myElasticTableCollection = myServiceClient.RetrieveMultiple(query);
var lstEntityRefCollection = new EntityReferenceCollection();
// Delete Request
foreach (var elasticTable in myElasticTableCollection.Entities)
{
var deleteRequest = new DeleteRequest();
deleteRequest.Target = new EntityReference("custom_myelastictable", elasticTable.Id);
deleteRequest.Parameters["partitionId"] = elasticTable.Attributes["partitionid"];
var response = myServiceClient.Execute(deleteRequest);
}
// DeleteMultiple Request
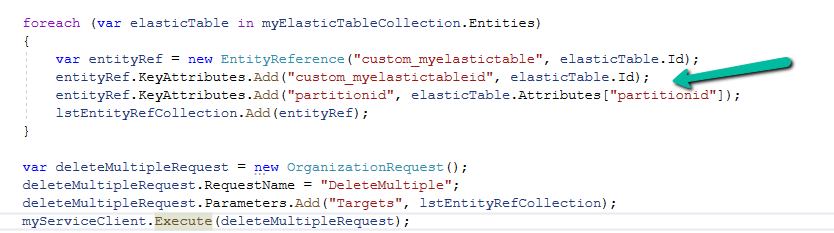
foreach (var elasticTable in myElasticTableCollection.Entities)
{
var entityRef = new EntityReference("custom_myelastictable", elasticTable.Id);
entityRef.KeyAttributes.Add("custom_myelastictableid", elasticTable.Id);
entityRef.KeyAttributes.Add("partitionid", elasticTable.Attributes["partitionid"]);
lstEntityRefCollection.Add(entityRef);
}
var deleteMultipleRequest = new OrganizationRequest();
deleteMultipleRequest.RequestName = "DeleteMultiple";
deleteMultipleRequest.Parameters.Add("Targets", lstEntityRefCollection);
myServiceClient.Execute(deleteMultipleRequest);
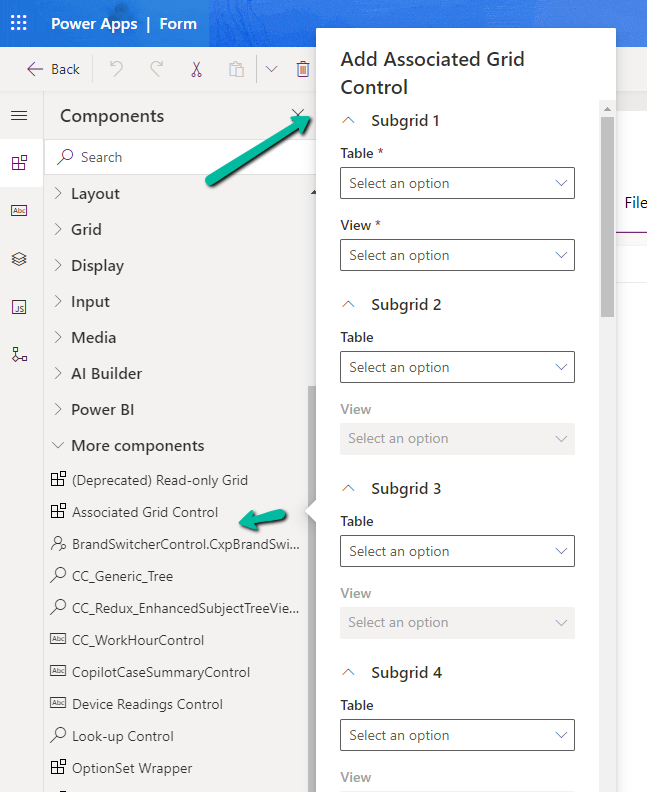
With the Associated Grid Control we can configure and show up four subgrids in the form, making it a more intuitive and cleaner form layout, with ease of navigation.
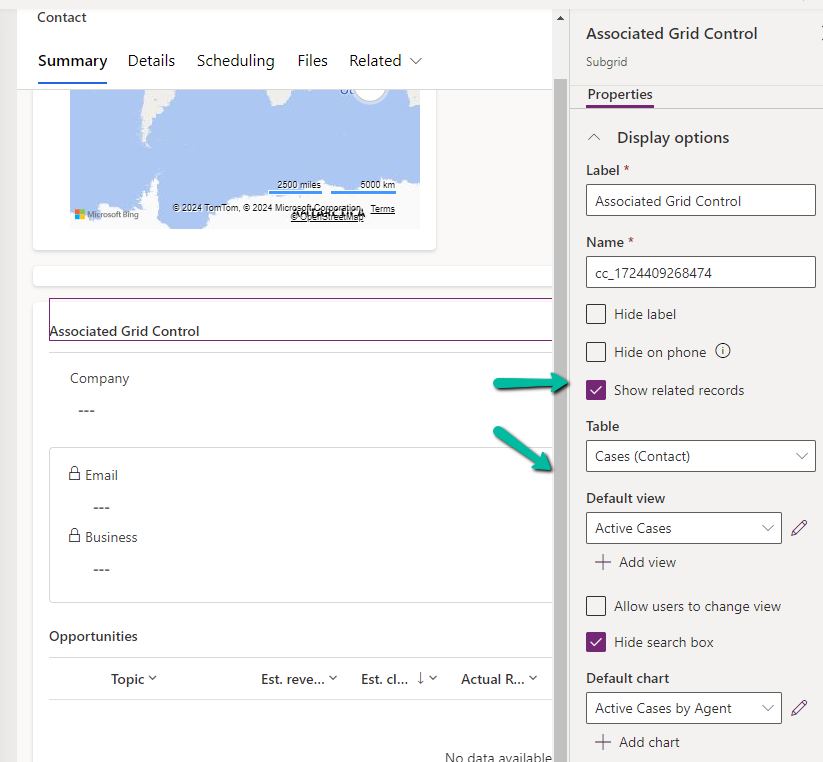
Below we are adding the Associated Grid Control component to the Contact’s form.
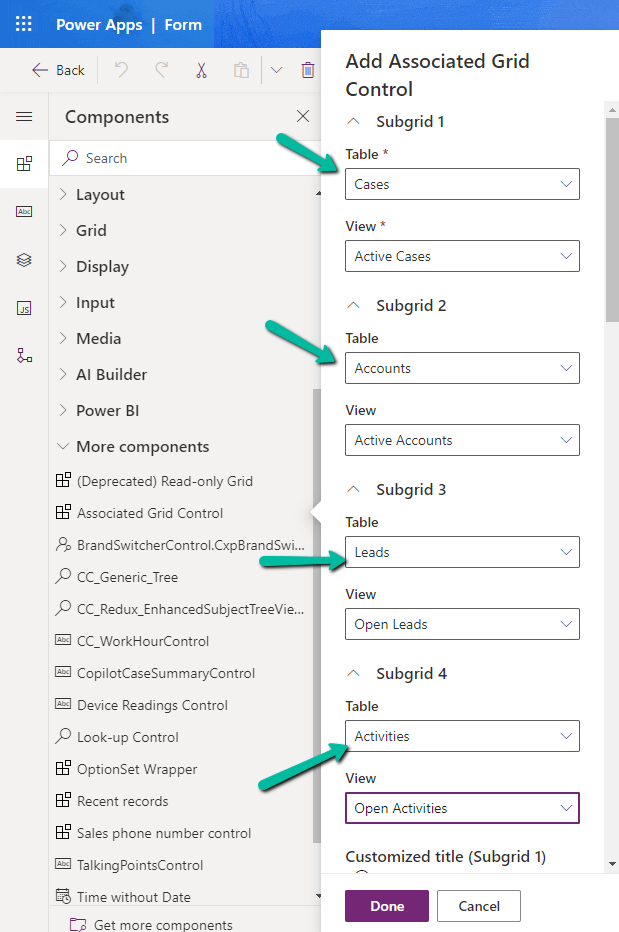
Here we have specified the Subgrid Tables and Views to begin with.
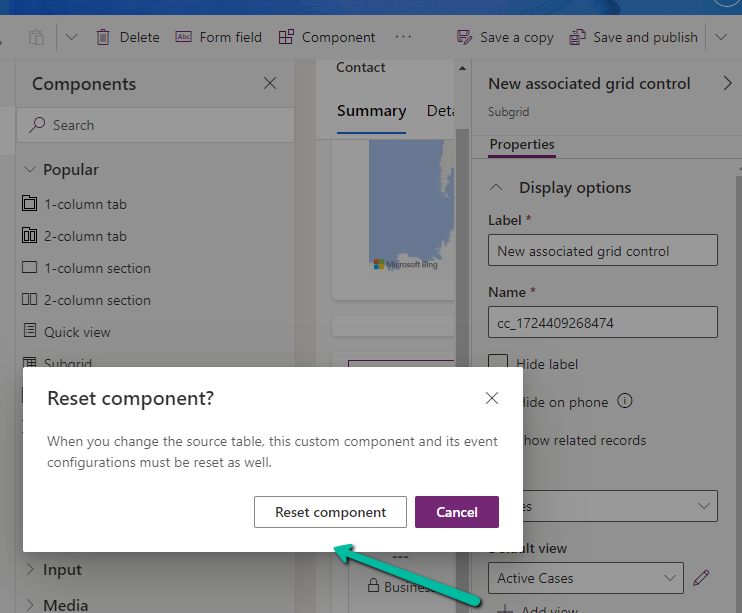
For the 1st subgrid specified we can set the specific options from the properties pane. Here let us try checking the Show related rows properties for the cases subgrid.
On doing so, we get the below message.
It basically reset the 1st subgrid’s table to Accounts from Case, the rest of the configuration remains unchanged.
Let us change it back to Cases and select the appropriate view.
Let us save and publish the change.
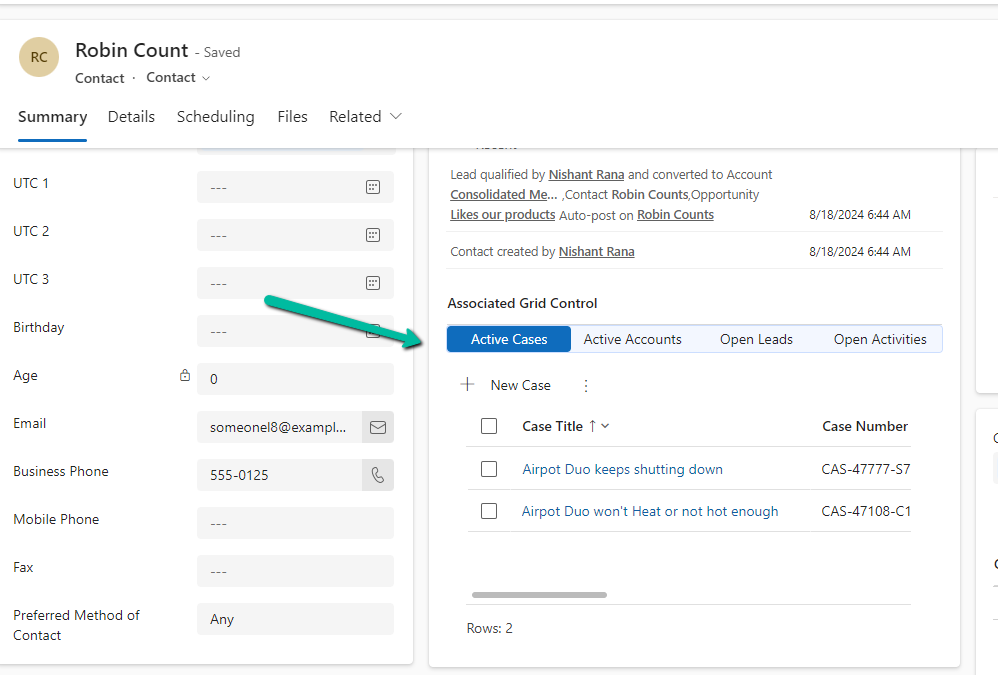
Now in the Contact form we can see the grid control with 4 different subgrids as configured.
The Active Cases shows the associated cases.
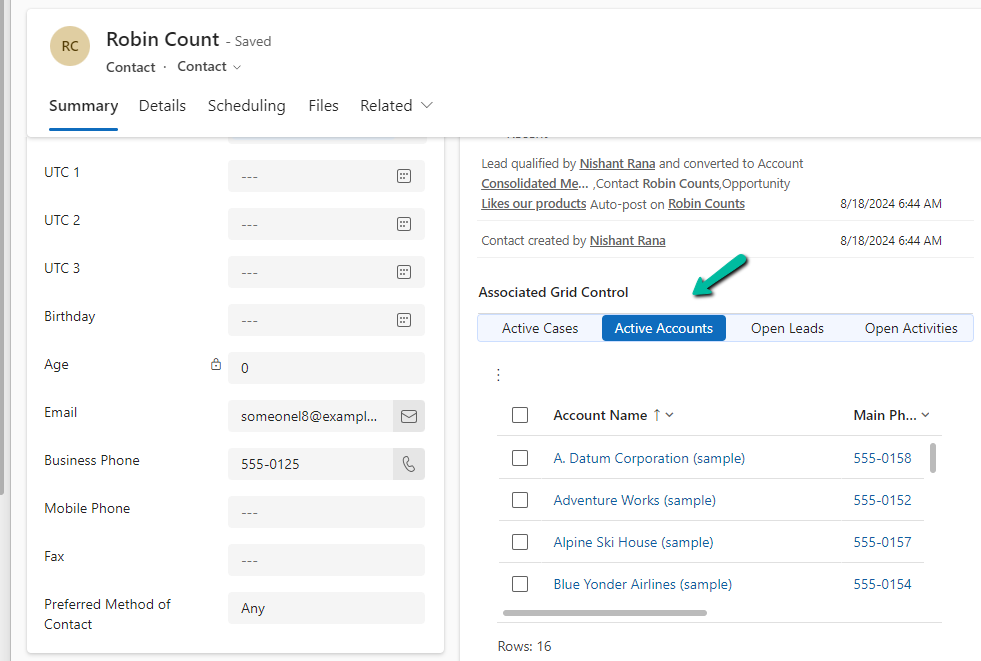
However, that is not the case with other subgrids as they show all the records.
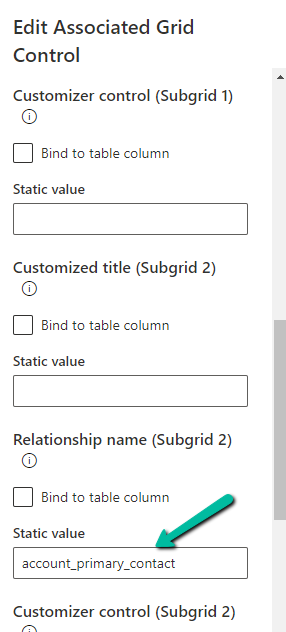
To filter it to show the associated records we need to specify the relationship name while configuring the component.
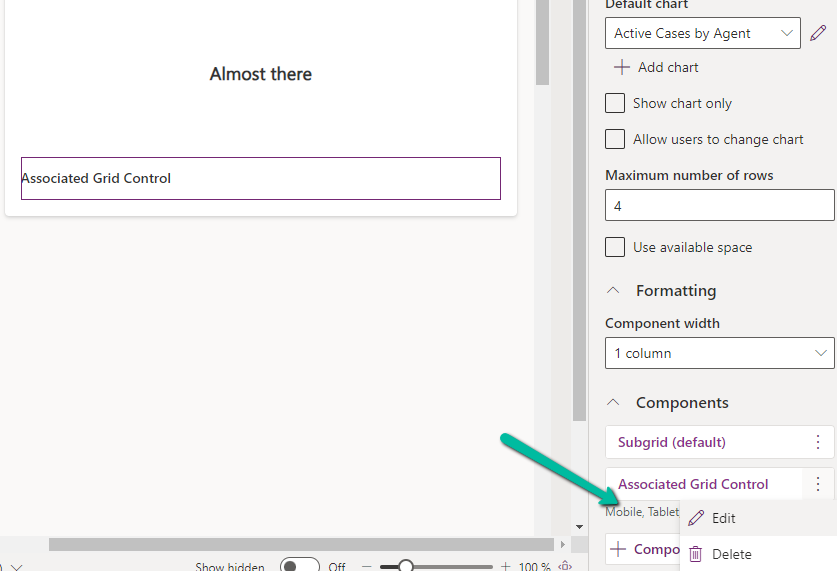
Let us edit the component.
Below we specified the relationship name for the subgrid 2 i.e Accounts.
As expected, this time we can see Active Accounts filtered to show only those account records where the contact is associated as the primary contact.
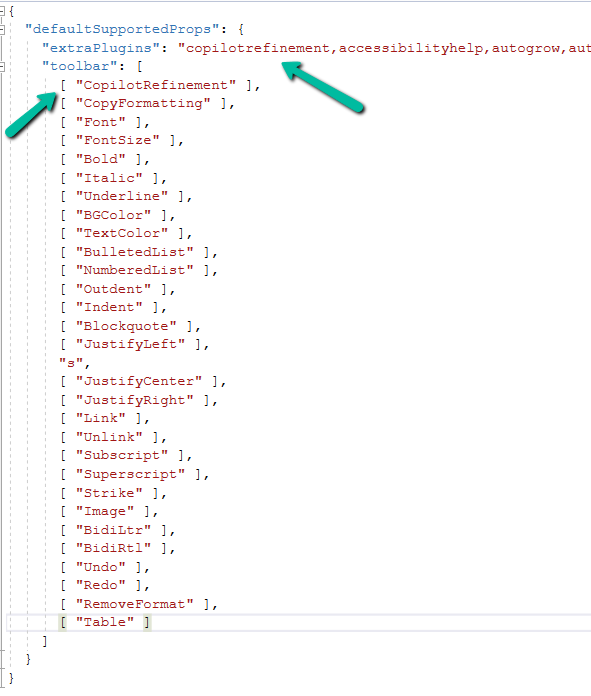
To enable Copilot for a specific instance of a Rich Text editor field, we first need to create a Web Resource where we need to specify the property we want to update/override as specified in the RTEGlobalConfiguration_Readonly.json, the base read-only configuration file for the Rich Text editor control.
We have created a JavaScript Web Resource file named rtecustom.js.
Added the copilitrefinement and CopilotRefinement values to the extraPlugins and toolbar properties existing values as shown to enable copilot.
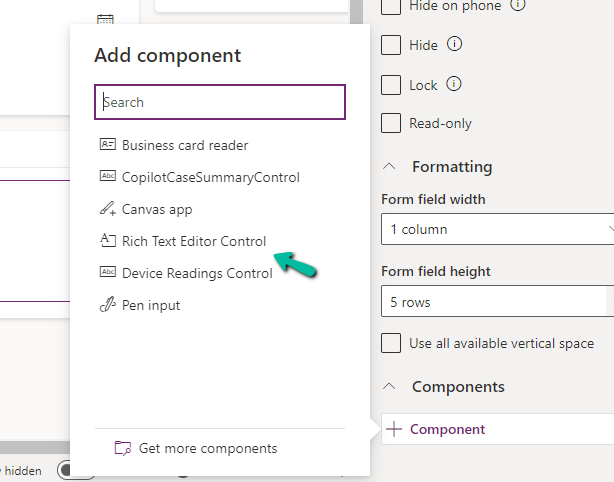
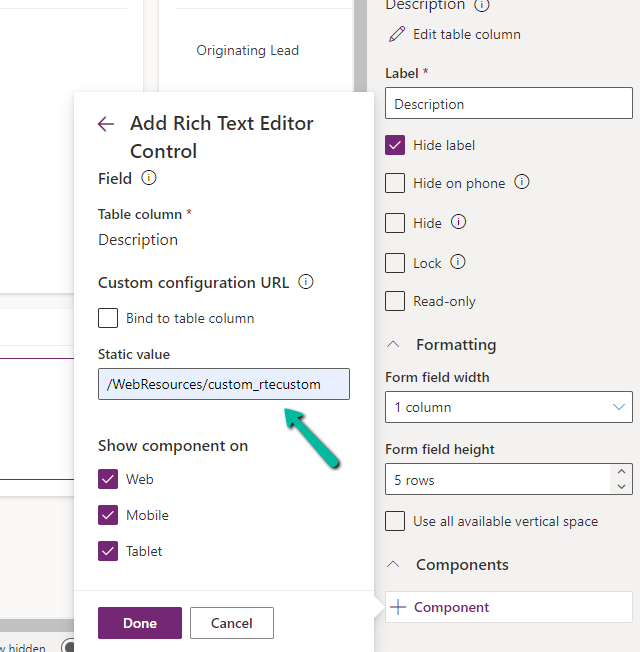
Next, we opened one of the Contact’s forms for Customization, selected the description field, and added the component – “Rich Text Editor Control” to it.
In the Static value property, we specified the relative URL of the Web Resource file. We can also specify the full path but then we would need to update it each time we move it to other environments.
Save and publish the changes.
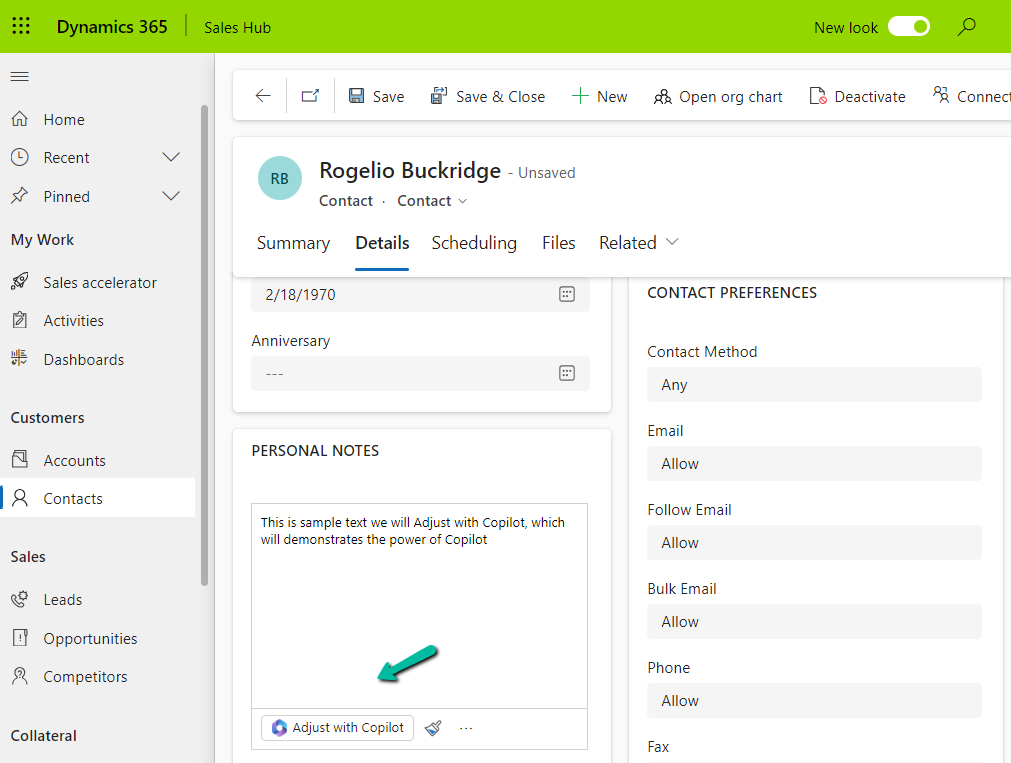
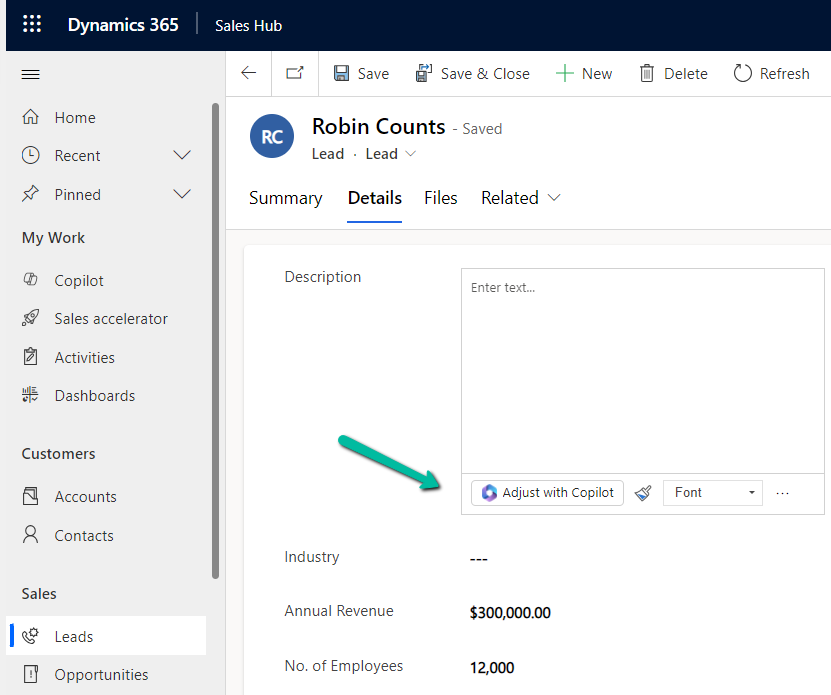
We can see the option Adjust with Copilot added to the toolbar for the control.
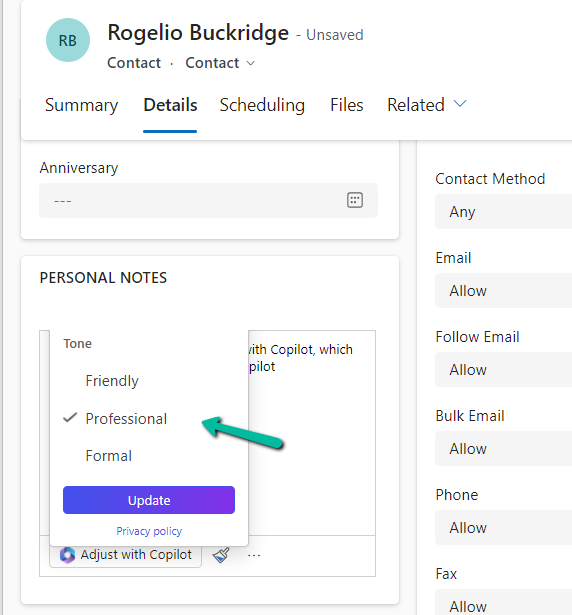
On selecting the text, and clicking on “Adjust with Copilot”, we get the option to update the Tone of the content.
On selecting a Professional tone, the text is updated in the control.
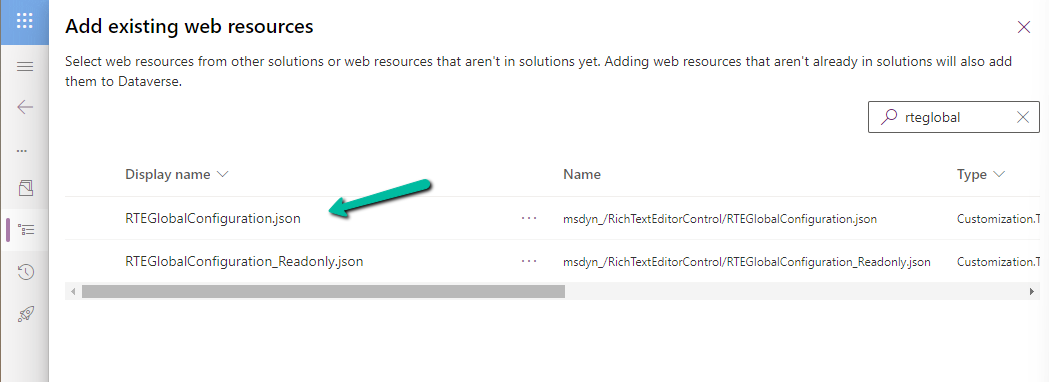
In case we want to apply to all the fields that are using Rich Text Editor Control instead of specifying it for individual fields, we need to update and add the same JSON to the existing RTEGlobalConfiguration.json file.
The file is blank by default, and we can specify properties to it that we want to override.
We updated the RTEGlobalConfiguration.json file, to use the same definition we used earlier for our custom web resource.
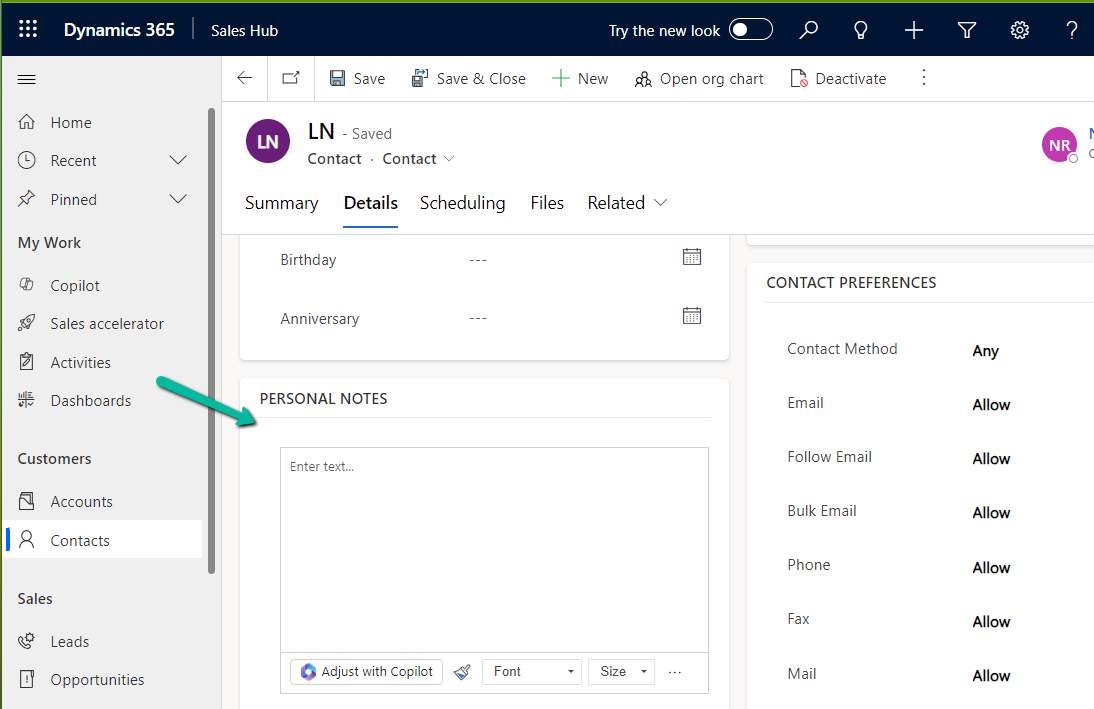
We can see the “Adjust with Copilot” added to the form even without specifying the URL in the static value while customizing the form.
On saving and publishing the changes, we can then see it rendered for all the Rich Text Editor fields.
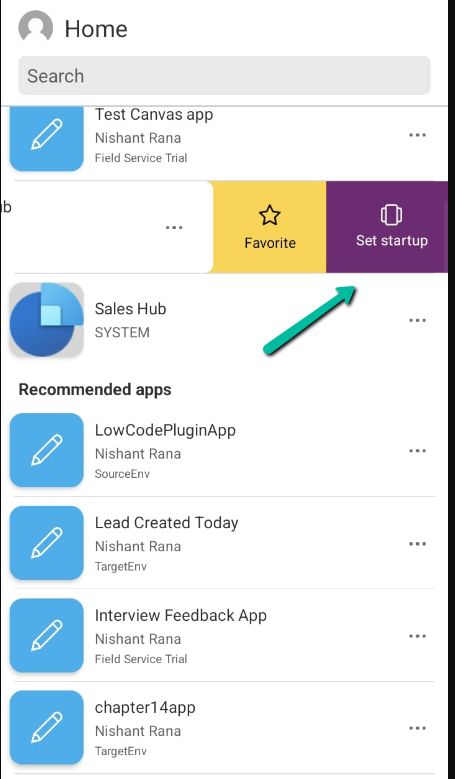
Microsoft has introduced a new feature, through which we can now specify a particular app as a start-up app, that will open up when we launch the Power Apps mobile, instead of waiting for the home page / or selecting it from favorites.
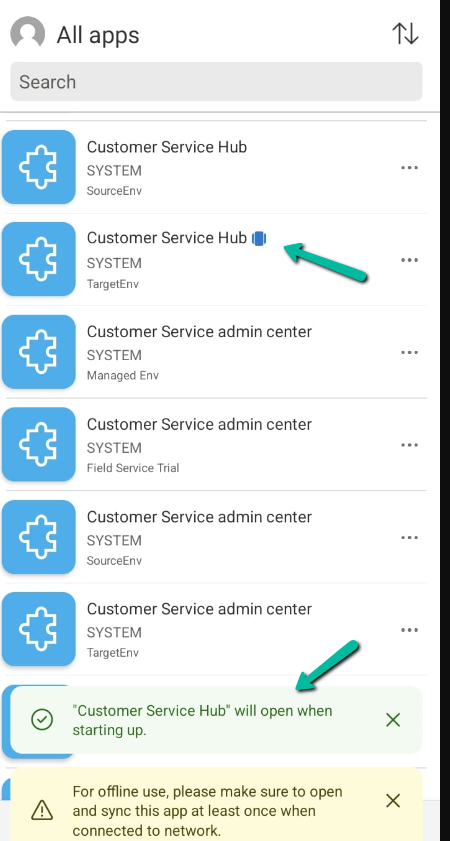
Below we can select the option Open at Startup to specify the Customer Service Hub app as the startup app as an example.
Or we can swipe left to mark an app as “Startup App”
We can see an icon next to the app.
Now launching the Power Apps mobile app will directly open the Customer Service Hub app.
Using the Remove from startup option we can remove it as the startup app
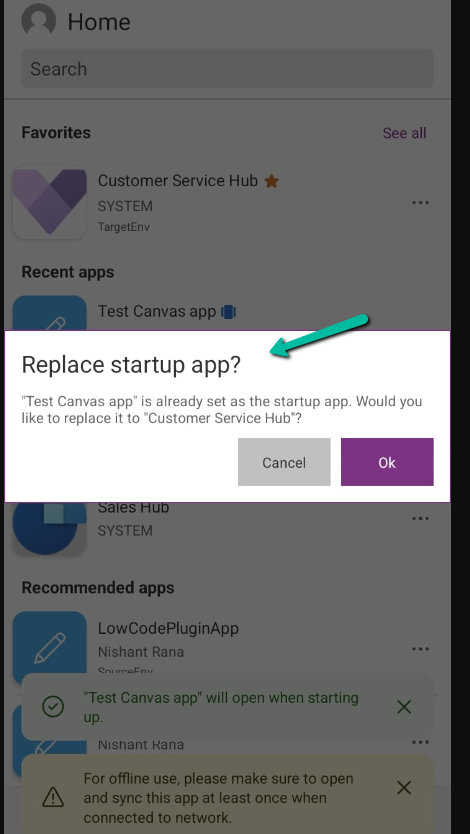
We can only have one app set as a startup app, if we try setting up another app as a startup we get the notification that it will replace the existing app.