How to – Share read-only links to records with any user in your organization – Dynamics 365 / CRM (Dataverse)


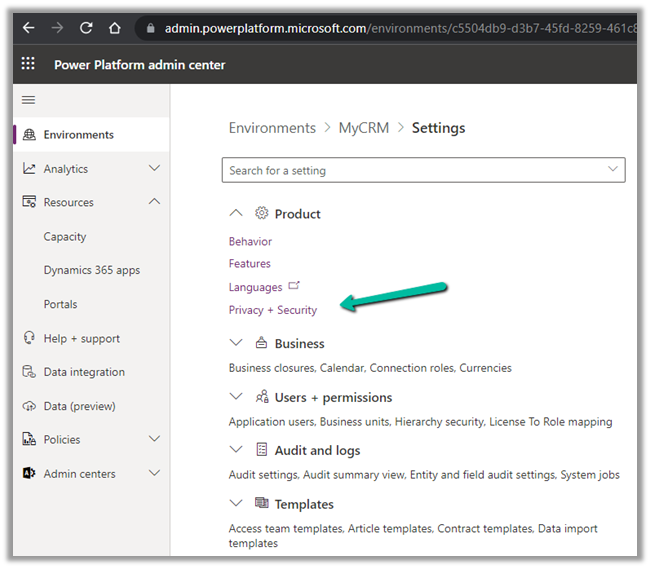
To enable quick sharing of the read-only link of the records to any users within the organization, log in to Power Platform Admin Center

Select the Environment > Settings > Privacy + Security


Switch On the Enable Sharing option


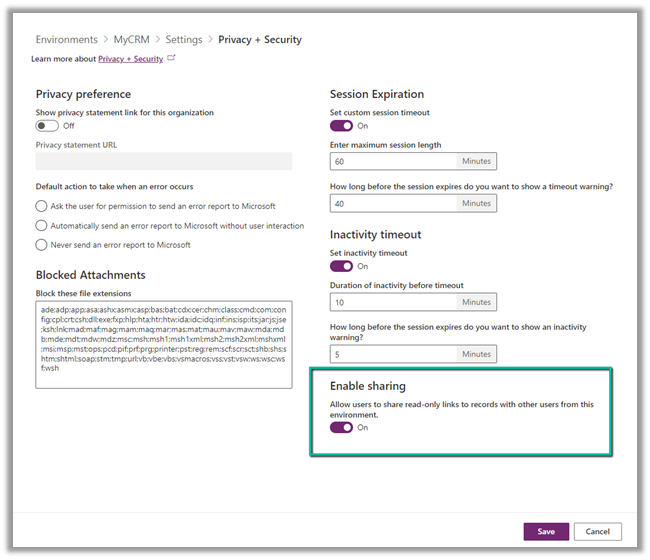
This option currently works on the Contact, Account, Opportunity, and Case table.

It enables the option of sending the link to the record with

  • People in the organization with the link
  • Specific People

apart from

  • People with existing access.

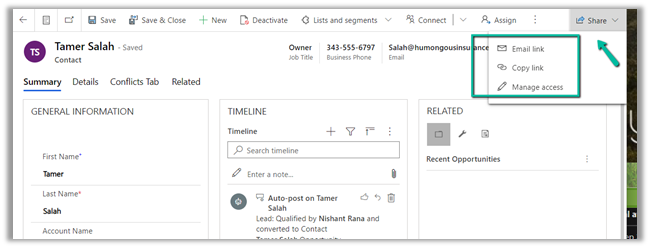
Clicking on the Copy link opens the below model dialog box –

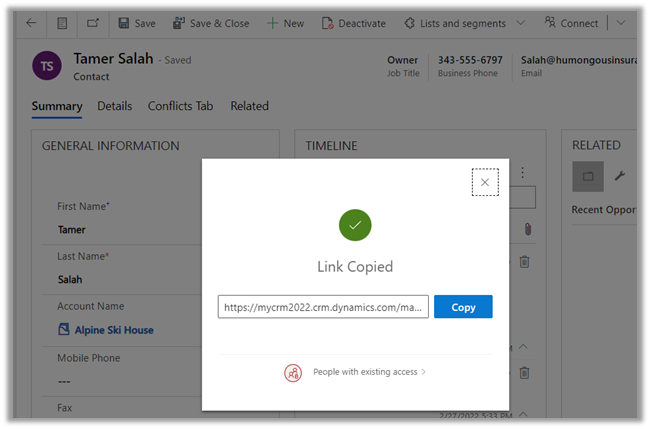
Clicking on People with existing access opens the below options –

  • People in your organization with the link
  • Specific people (disabled)

Here we have selected “People in your organization with the link

This enables any user (even if he has no CRM License or Dynamics 365/ Power Platform Role assigned) with the link to open the record as read-only.

This is how the record has opened for the user having no access to CRM but having the link to the record. (read-only)

Similarly, Email Link opens the Send Link dialog box, which allows us to select either a User(s) or Team(s) and define the content of the message as shown below

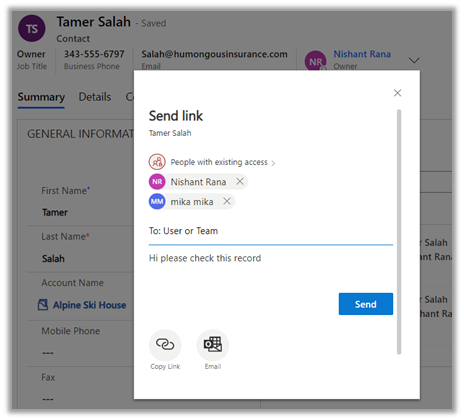
Clicking on Send opens the email in the default Mail Client associated

Here also we have the option to select either People in your organization with the link and Specific People


Get more details –

https://docs.microsoft.com/en-us/power-platform-release-plan/2022wave1/power-apps/easy-record-sharing

Hope it helps..

Advertisements

How to – Use Refresh Option to force user state synchronization in Power Platform Admin Center – Dynamics 365 / CRM


At times we would assign or update the licenses and roles assigned to the users in Microsoft 365 Admin Center, and these changes would take time to reflect inside the Dynamics 365 applications.

A background system process takes care of synchronizing the user state in Azure AD to the System User table in Dataverse.

However, here we can also use the Refresh
User option in Power Platform Admin Center to force the synchronization instead of waiting.

Inside Power Platform Admin Center – Navigate to Environment >> [Env]>> Settings >> Users and select the user and click on Refresh user option.

This will immediately start the synchronization process.

Hope it helps..

Advertisements

Sample Code to Approve Email – Mailbox programmatically C# (Dynamics 365/CRM)


Suppose we want to Approve the Email for the mailbox of the user(s) programmatically.

We’d see the below notification for the user whose mailbox is not yet approved.

Email won’t be processed for this mailbox until the email address of the mailbox is approved by an Office 365 Global Administrator or by an Exchange Administrator. For more information, contact your system administrator.

Below is the sample code –

On running the code, we can see the notification for the email address approval removed or the mailbox approved for the user.

C# Code –

            CrmServiceClient svc = new CrmServiceClient(ConnectionString);

            if (svc.IsReady)
            {

                var systemUser = new Entity("systemuser", new Guid("C48A539A-F493-EC11-B400-000D3A4F37D3"));

                // emailrouteraccessapproval - status of the primary email address
                //0	= Empty, 1 = Approved, 2 = Pending Approval, 3 = Rejected
                systemUser.Attributes["emailrouteraccessapproval"] = new OptionSetValue(1);

                svc.Update(systemUser)

The code should run under the context of the user who has either Global Admin or Exchange Admin role.

Hope it helps..

Advertisements

How to – Stop Synchronization of Task / Appointment through System View using Sync Filter Manager


In the previous post, we saw how we can create a user filter (outlook) for a particular user and apply the same to other users through Sync Filter ManagerXrmToolBox plugin.

https://nishantrana.me/2022/03/29/how-to-stop-synchronization-of-task-appointment-between-dynamics-365-and-outlook/

In this post, we’d achieve the same through System View.

Here we have created below System View on Tasks entity/table.

The Created On Doesn’t Contain Data False Condition will make sure none of the records of the task are synced.

Open the Sync Filter Manager, navigate to the System Views tab and click on Load System Views

Select the new System View- Task Filter which we created earlier and click on Create – System Synchronization Filter Template from selected view(s)

Select Outlook Template for System Rule Type

We are presented with the option to specify the user(s) to who we want to apply the new template.

If we select Yes, we get the Select users dialog box to select the user(s).

Inside the Synchronization Filters Templates tab, we can click on Load Synchronization Filter Templates to list down all the outlook templates.

We can see our custom template listed there.

From there again we apply it to the user(s) or define it as the default filter.

After applying Define as default, we can see the custom filter applied to the new users. It won’t be applied or make changes to the filters of the existing users.

So for the existing users, we have to explicitly apply this filter using Apply to users option

As the last step, we need to disable or delete any other filter on the task, to make sure that we only have the new filter applied.

On disabling the filter, we can see their status updated as inactive.

Lastly, we can only delete Custom Outlook Template, if we try deleting any default out of the box template we will get the below error.

E.g. on trying to delete the My Tasks default filter, we will get the below error

“Error while deleting selected records: SavedQuery My Tasks for otc 4212 cannot be deleted”

Check other posts on Synchronization –

Hope this helps..

Advertisements

How to – Stop synchronization of Task / Appointment between Dynamics 365 and Outlook


In the earlier posts we saw how synchronization works for different activities type and how to work with user as well as system filters.

In this post, we will how to use the wonderful Sync Filter Manager (XrmToolBox Plugin) for managing the outlook filters.

Suppose we don’t want Tasks to be synced for some of the users.

Here we already have a custom user filter (Task- Created on is null) defined for one of the users, specifying the condition which will always be false.

We have also disabled the default filter on tasks – My Tasks for that user.

For that particular user, now we do not see any tasks getting synced.

Now to apply the same setting to the others users, we can use the wonderful Sync Filter Manager – XrmToolBox plugin.

To know more about the tool –

http://mscrmtools.blogspot.com/2013/12/introducing-new-tool-sync-filter-manager.html

https://www.slideshare.net/jukkan/control-outlook-synchronization-settings-for-dynamics-crm-users

Navigate to the Users tab, search for the user whose setting we want to apply to other users, and select it.

Here we have selected the source user record

Click on Apply selected user synchronization filer to user(s) button.

For Question Dialog Box – “Are you sure want to apply the selected user synchronization filters to other users ?” – select Yes

For now, we have selected only User 2. We can select multiple users or select / unselect all the users.

It will remove the default / or existing filters from users. User 2 in our case.

And will add the filters from the selected user to it.

After some time, we can see the filters updated for User 2, with the Task – Created on is null filter added.

We can also verify it from the User Synchronization Filters tab, where we can load the synchronization filters for all the users.

As a last step we just need to deactivate/delete the default My Tasks filter for User 2 also(or all the other users for who we want to disable task sync) and we are done.

Hope it helps..

Advertisements

Business Process Flow UI Improvement in Dynamics 365 / CRM


With 2022 Release Wave 1, we have a small enhancement in the user interface inside the BPF path line’s color contrast.

With 2022 Release Wave 1 turned off

With 2022 Release Wave 1 – the path that needs to be followed is shown now in a slightly darker shade,

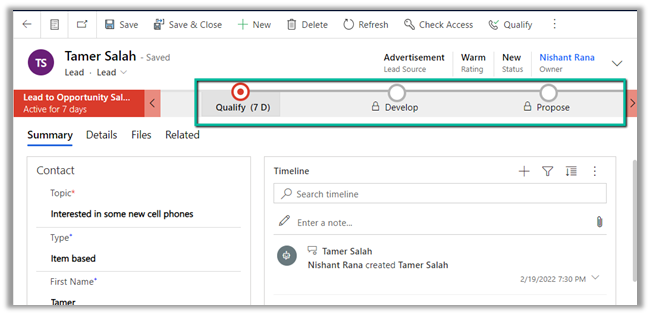
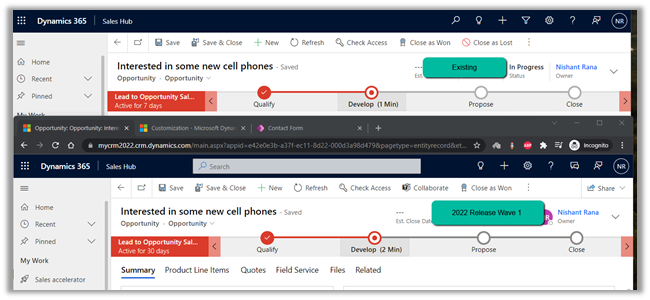
making it easy for an agent to understand the stages to be followed in the business process flow.
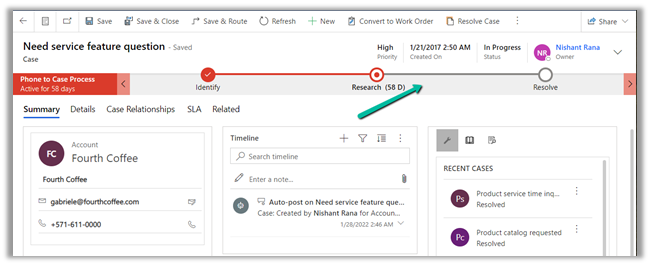
Hope it helps..

Advertisements