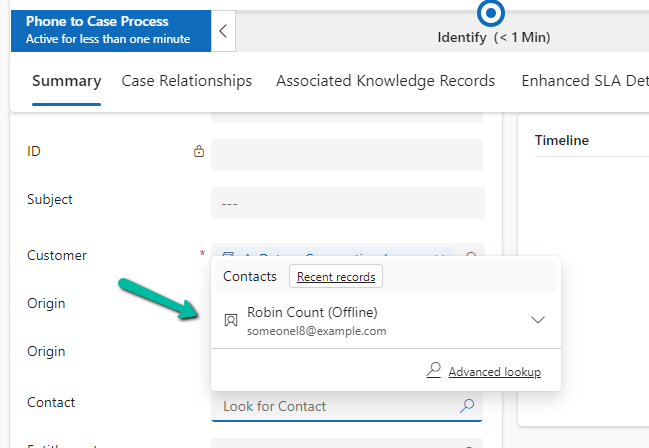
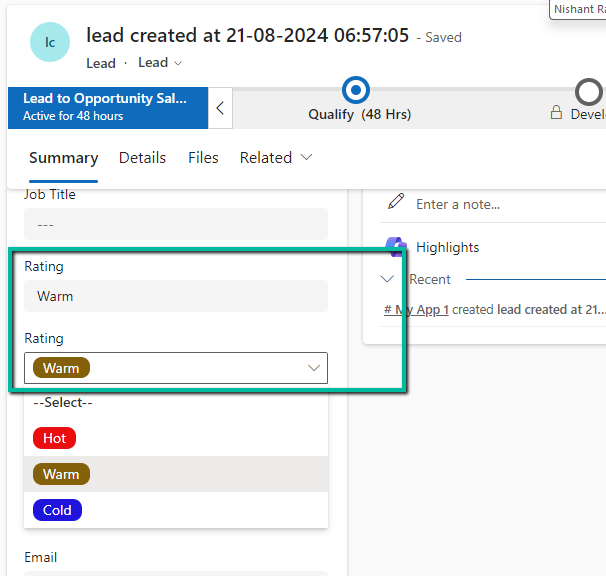
By default, we can only specify the contact associated with the customer for the case record. If we try specifying a contact record that is not associated with the Customer selected, we will get the below error message.
Invalid Contact – The specified contact doesn’t belong to the account selected as the customer. Specify a contact that belongs to the selected account, and then try again.
Also, CRM will filter the lookup to show only the associated contact record
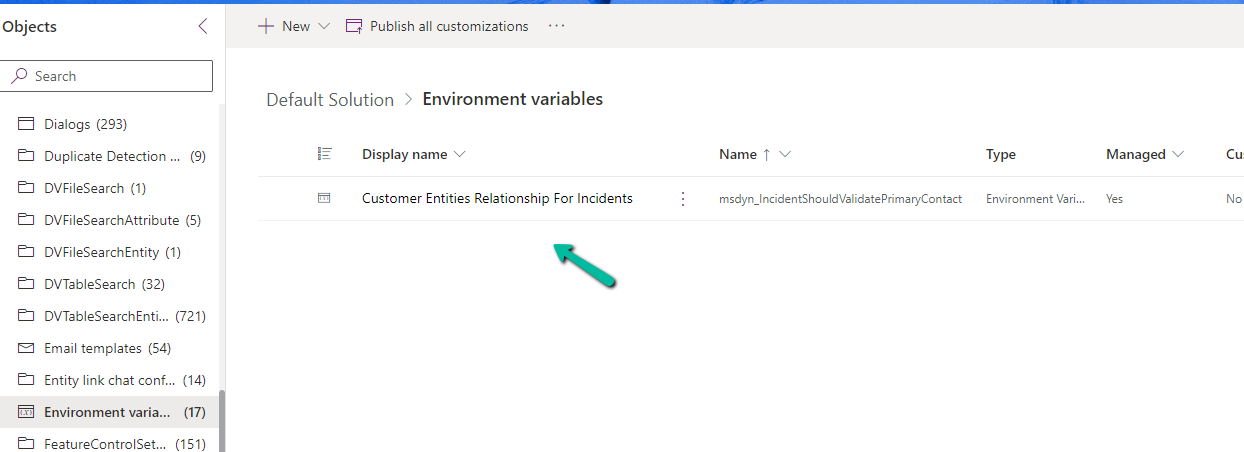
However, if we do not want this validation, we can remove it using the environment variable.
Search for Customer Entities Relationship For Incidents / msdyn_IncidentShouldValidatePrimaryContact
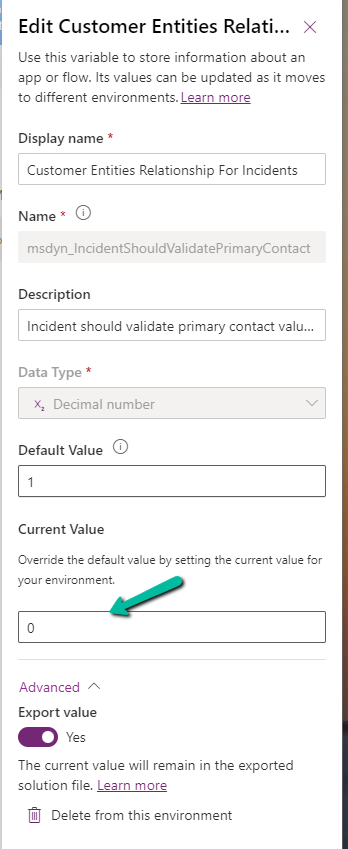
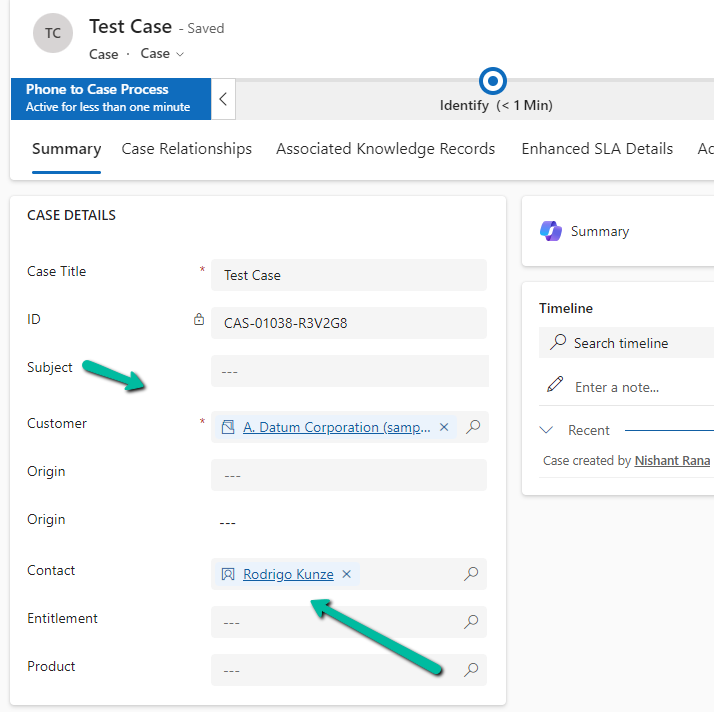
Set the new value as 0.
Now we will be able to save the record using an unassociated contact.
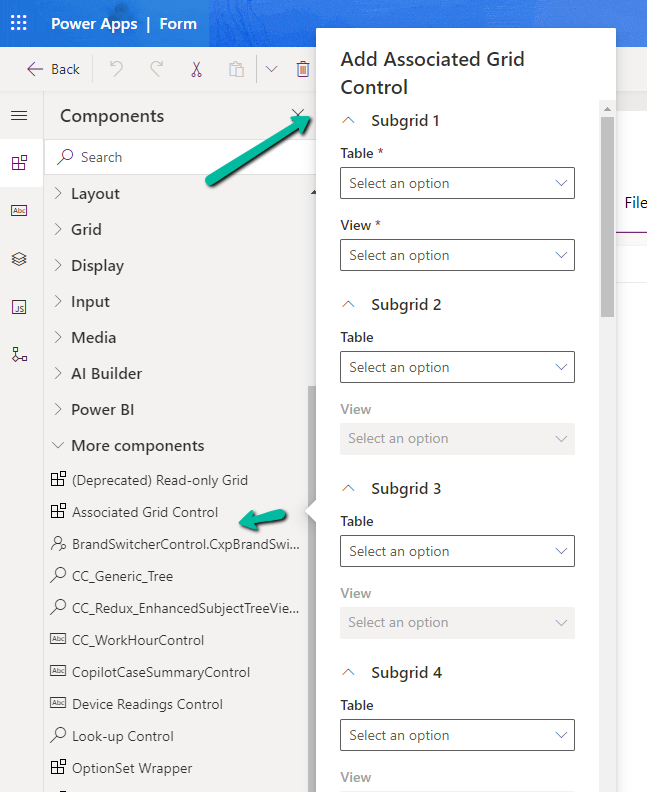
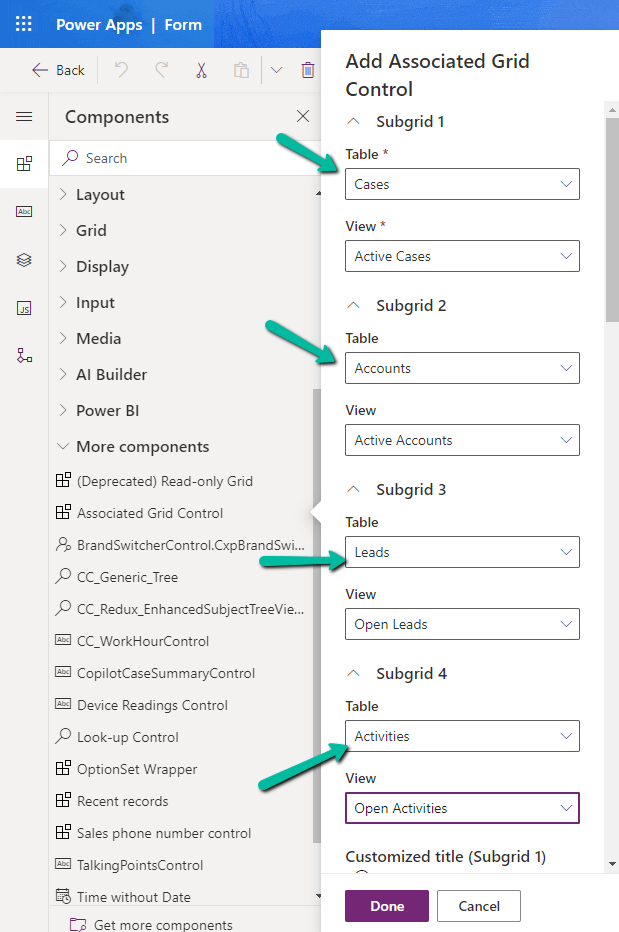
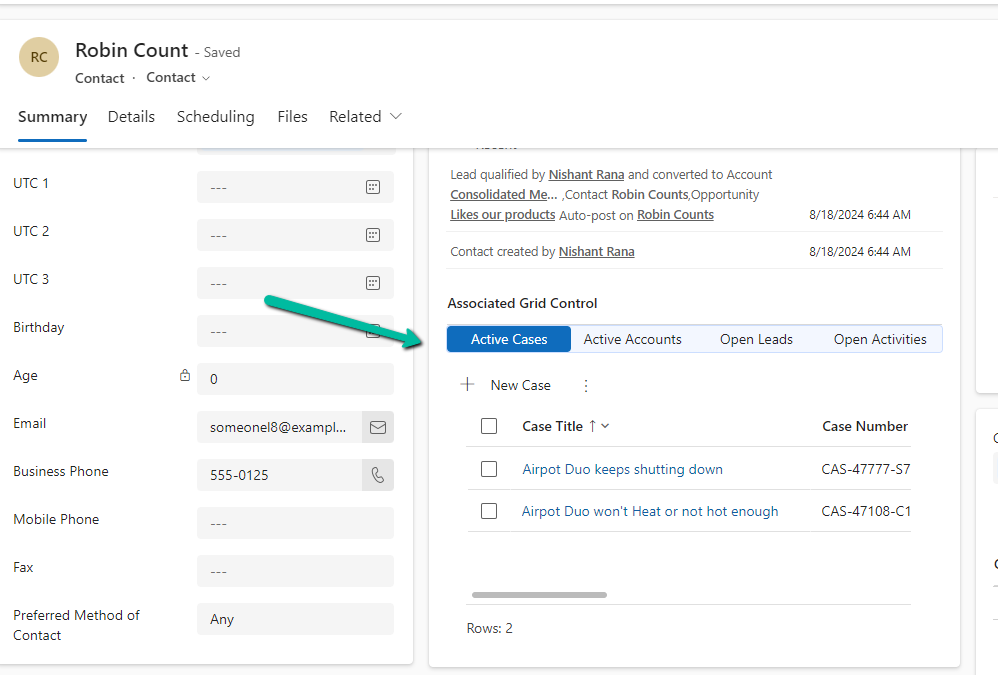
With the Associated Grid Control we can configure and show up four subgrids in the form, making it a more intuitive and cleaner form layout, with ease of navigation.
Below we are adding the Associated Grid Control component to the Contact’s form.
Here we have specified the Subgrid Tables and Views to begin with.
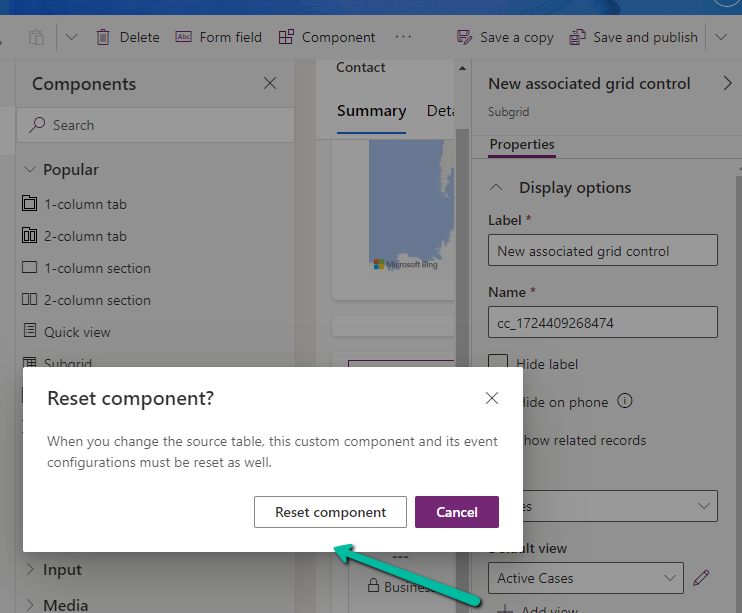
For the 1st subgrid specified we can set the specific options from the properties pane. Here let us try checking the Show related rows properties for the cases subgrid.
On doing so, we get the below message.
It basically reset the 1st subgrid’s table to Accounts from Case, the rest of the configuration remains unchanged.
Let us change it back to Cases and select the appropriate view.
Let us save and publish the change.
Now in the Contact form we can see the grid control with 4 different subgrids as configured.
The Active Cases shows the associated cases.
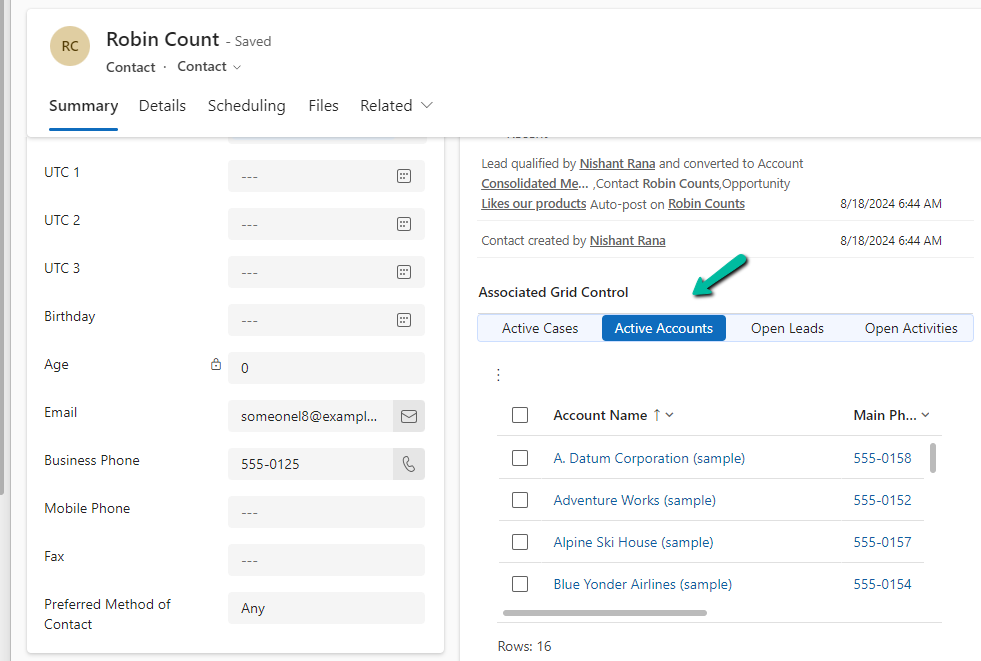
However, that is not the case with other subgrids as they show all the records.
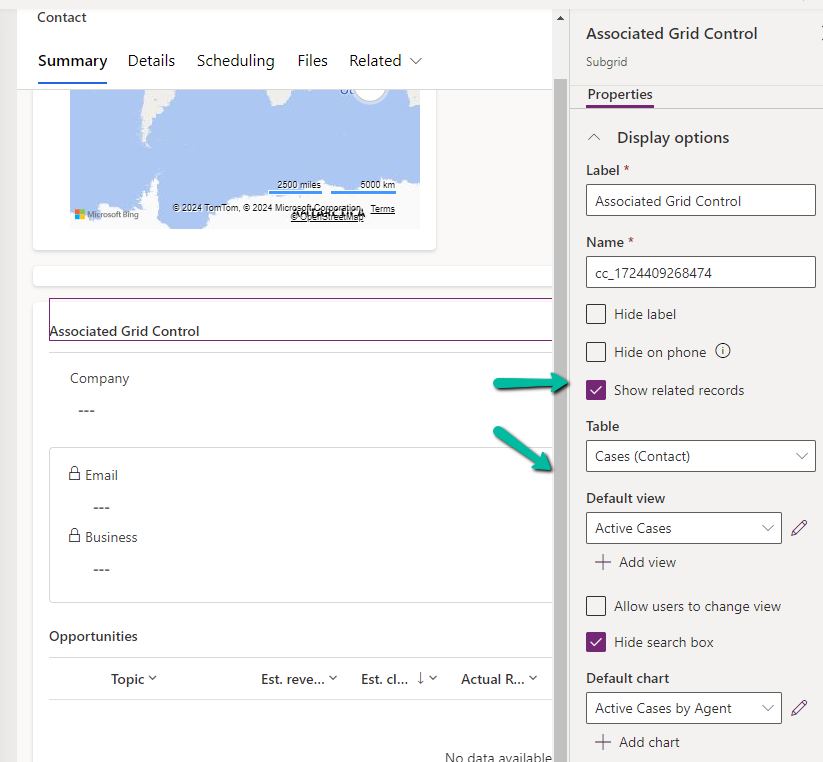
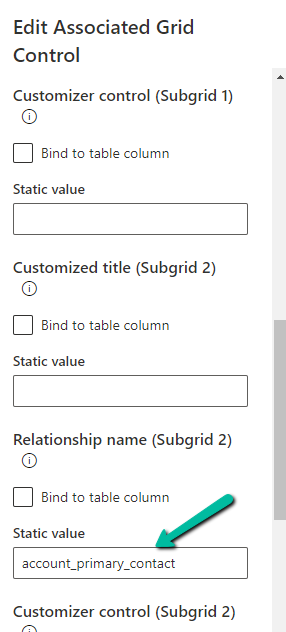
To filter it to show the associated records we need to specify the relationship name while configuring the component.
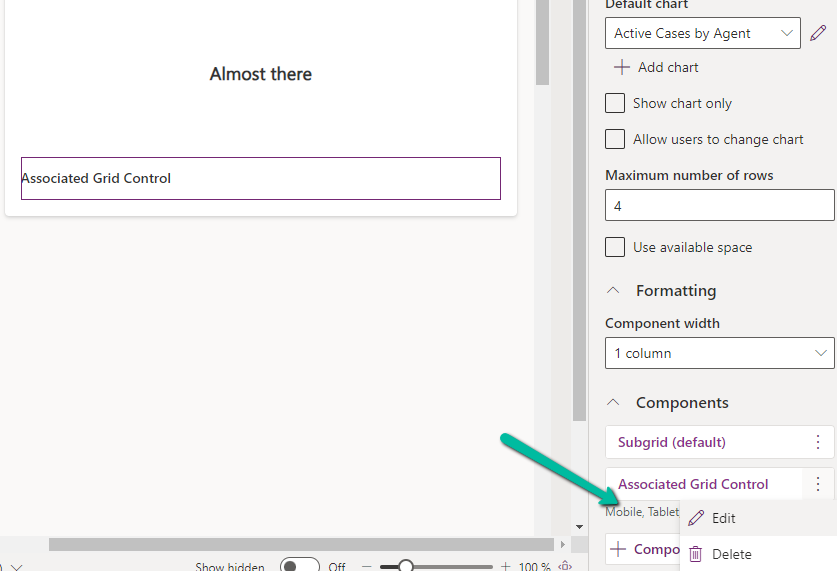
Let us edit the component.
Below we specified the relationship name for the subgrid 2 i.e Accounts.
As expected, this time we can see Active Accounts filtered to show only those account records where the contact is associated as the primary contact.
Recently in one of our test environments, the out the box flow – “Deserialization of Inspection Definition” wasn’t getting triggered even when it was in the On state.
This was because the “CallbackRegistrationExpanderFilter” operation was failing with the below error.
Unexpected failure during ValidateUserAccessCached. Ex: System.ServiceModel.FaultException`1[Microsoft.Xrm.Sdk.OrganizationServiceFault]: The specified user(Id) is disabled. Consider enabling this user. Additional Details: User IsDisabled=True, IsLicensed=True. ImpersonatingSystemUserId. (Fault Detail is equal to Exception details:
ErrorCode: 0x80040225
Message: The specified user(Id = xxxx-xxxx-xxxx-xxx-xxxxxx) is disabled. Consider enabling this user. Additional Details: User IsDisabled=True, IsLicensed=True. ImpersonatingSystemUserId=xxxx-xxxx-xxxx-xxx-xxxxxx)
This was because the flow’s corresponding Callback Registration record’s Owner was a user whose account was now disabled in CRM.
So the option to fix was to Turn off and Turn On the flow, which will delete the old callback registration record and will create a new one with the user who is turning off / on the flow. Updating the owner of the flow will not work here, as it won’t update the existing callback registration record.
Also we had another observation, if a callback registration is owned by a user who is a proper / enabled user in CRM, simply turning off and on the flow using a different user account will not delete the existing callback registration record and create a new one with that particular user as the owner. In this case we will have to explicitly delete the existing callback registration record.
While trying to enable Admin Mode for one of our Dataverse Environments,
we got the below error
“This operation cannot be performed because there is an active lifecycle operation on the environment”
This was because we had a copy operation going in the background, we were copying that particular environment to another environment.
After the copy operation was completed (around 1 hour, for the environment DB Usage – 45 GB, File Usage – 118 GB, and Log Usage – 21.63 GB), we were able to switch on the Admin mode.
We have the following 2 custom tables having a 1 – N relationship.
Project (1-n) Artefact.
The relationship behavior is Custom with Cascade All for all the actions except Delete.
User 1 is the System Administrator and Test User 1 has the Field Service Admin role but doesn’t have any roles that give him access to the project or artefact table.
We can see the tables are not showing up for Test User 1 in the app unlike User 1 with the System Admin role.
Now let us assign a custom security role – Test Sharing to test user 1 that gives him OrganizationLevel rights on the Project table.
As expected, Test user 1 now has Projects appearing in the app, and as he doesn’t have any rights on the Artefact table, he cannot see it in the form or the app.
Now user 1 shares the Project 1 record with test user 1. Remember we have set Share as Cascade All in the relationship between Project and Artefact.
But still, because the user doesn’t have any privileges on Artefact, it doesn’t appear for Test User 1 on the form as well as the app.
Now let us update the Test Sharing Role and add Read Permissions – User Level for the Artefact table.
Now Test User 1 can see the Artefacts in the related records as well as the App.
We can observe 2 things here –
Although Test User 1 only has User-level Access to the Artefact, he can still see the Artefact records created by User 1, as the parent Project record is shared with Cascade All–Share in the relationship behavior.
And as Test User 1 has only Read access he can only view the artefact records shared.
Here if we update the Test Sharing role to provide Write access at User Level, the user will be able to edit the records.
Also right now if User 1 creates the Project 2 record with the related P2 A2 artefact record, Test User 1 will only have access to the Project 2 record because of Organization Access but not to the P2 A2 artefact record as he has only has the user-level access.
Let us now update the Relationship Behaviour between Project (1-n) Artefact, and set Share to Cascade None.
Let us share the Project 2 record with Test User 1 now through the User 1 account.
As expected even after sharing the Project 2 record, Test User 1 does not have access to the P2 A2 artefact record as we had updated the relationship behavior as Cascade None for Share.
The first check that the user needs to pass is the Privilege Check, which checks if the user has the required privileges for that table before the Shared Access check