The conversation form in Omnichannel is now updated to allow agents to view and edit customer and case information more efficiently.
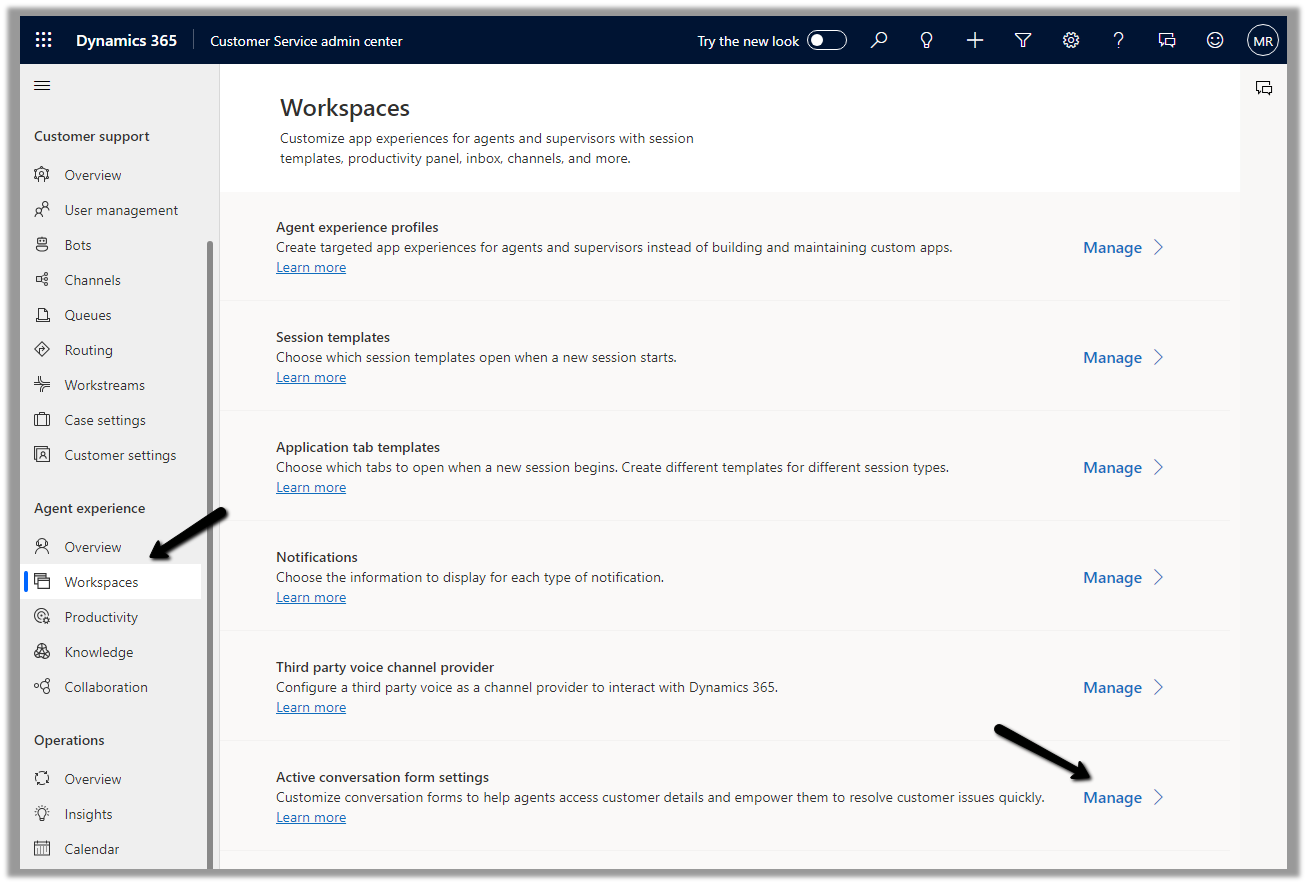
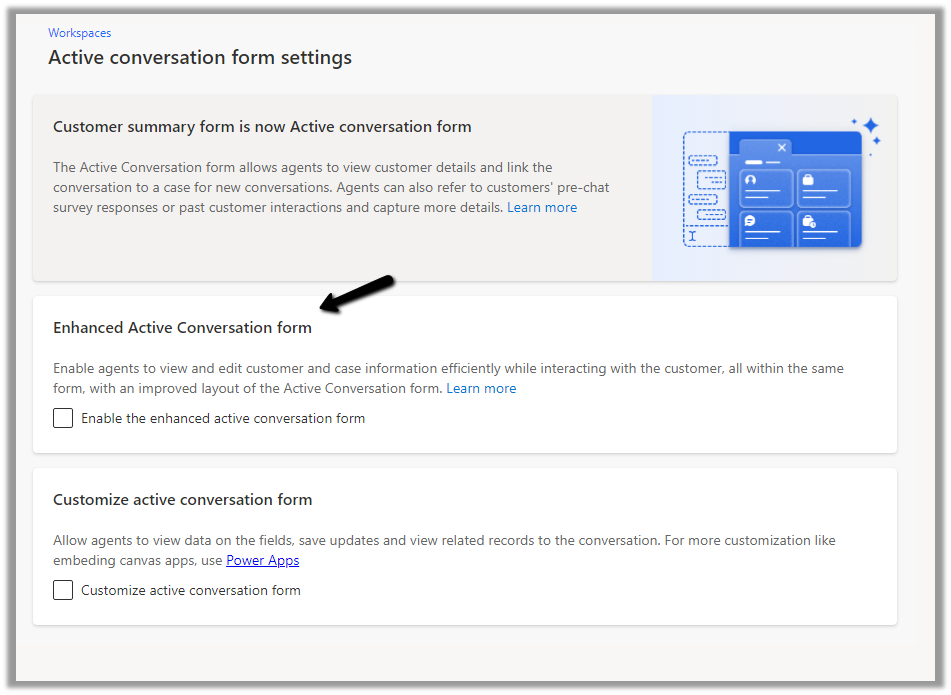
To enable it, Inside Customer Service Admin Center app – navigate to Workspaces >> Active Conversation form settings (Manage)
Before we enable it let us have a look at the exiting conversation form.
Now let us enable and compare it with the enhanced one.
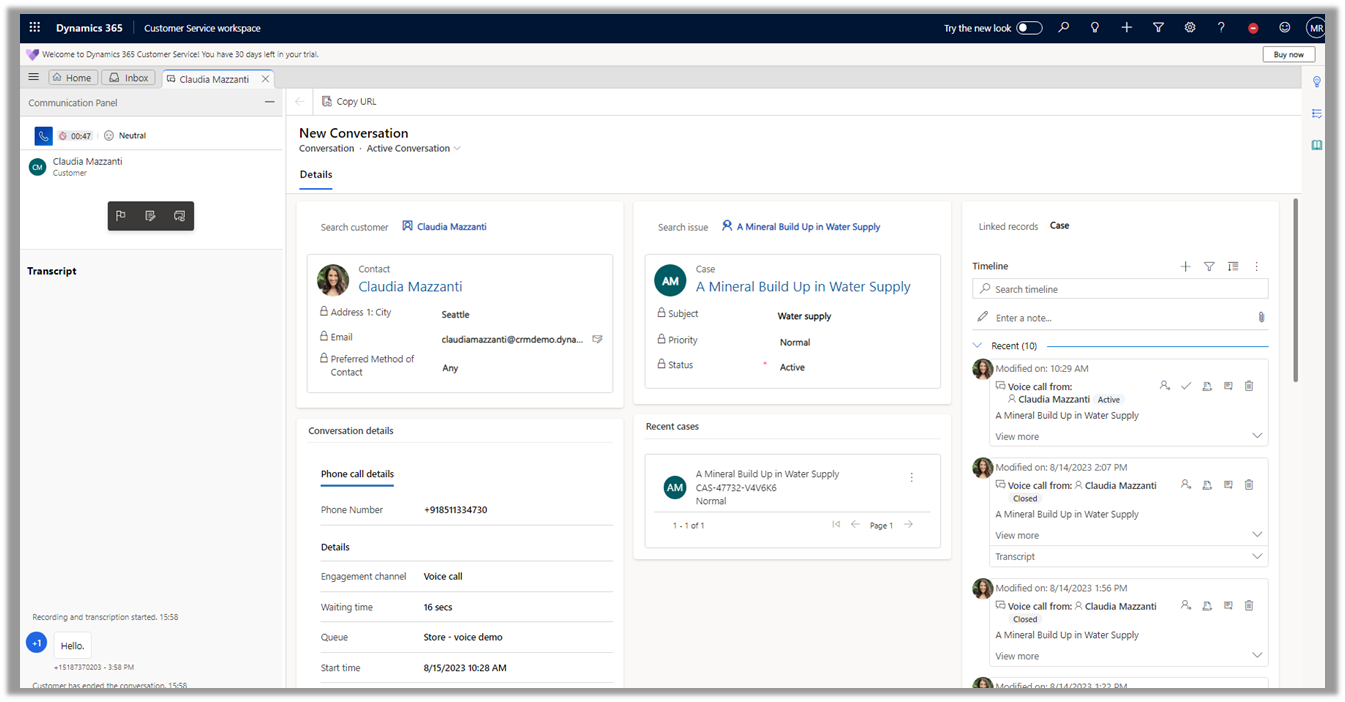
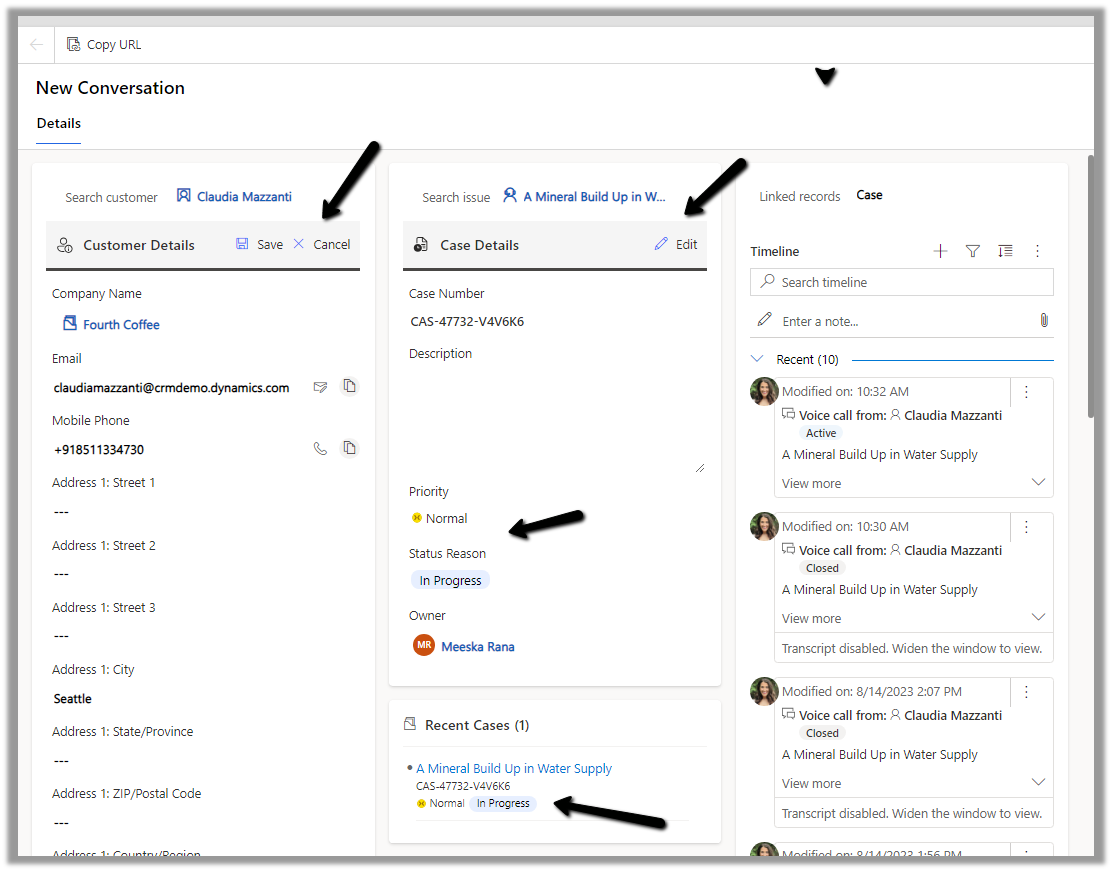
We can see the form displaying a Customer 360 Card for Customer (Contact or Account), which also allows for inline editing of details from within the Conversation form, and a similar card showing case details and allowing for inline editing. The fields that are displayed are configurable.
Another change is the color-coded priority and case status field for easy discoverability for the agents.
Sales Copilot can generate and suggest email content while composing or replying to an email in Dynamics 365 in the context of a Lead or Opportunity record.
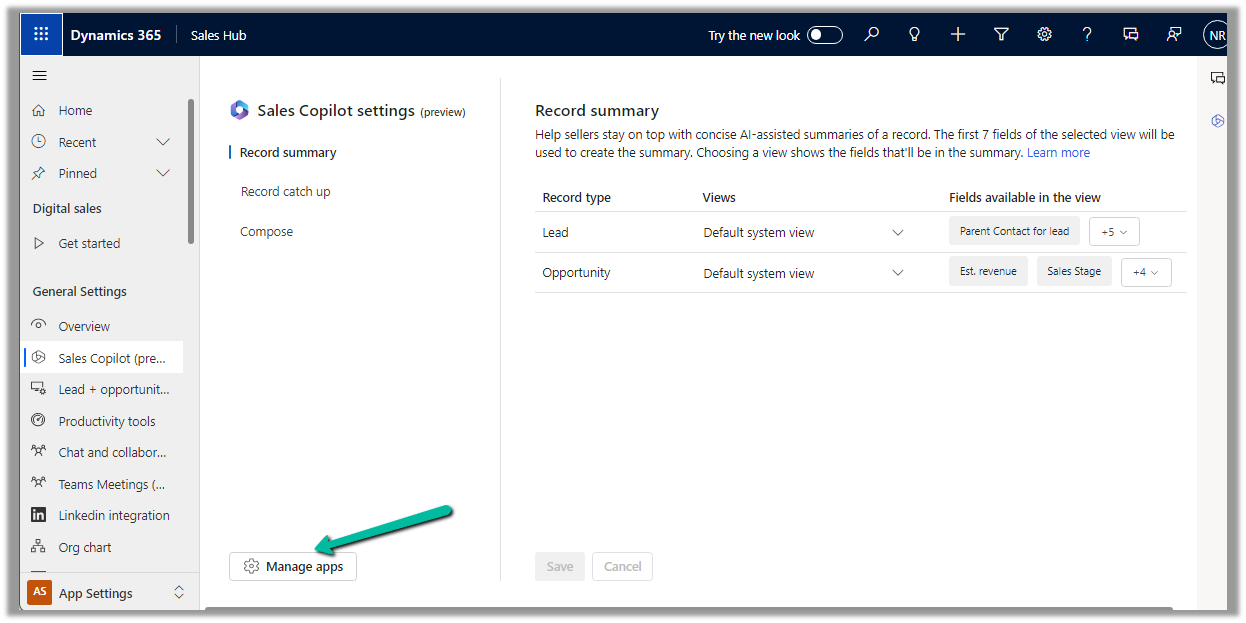
Sales Hub >> App Settings >> Sales Copilot (preview) >> Set up Sales Copilot
Or if we have already enabled it, we can manage the features provided along with the different apps we want to apply the Sales Copilot using the Manage apps option.
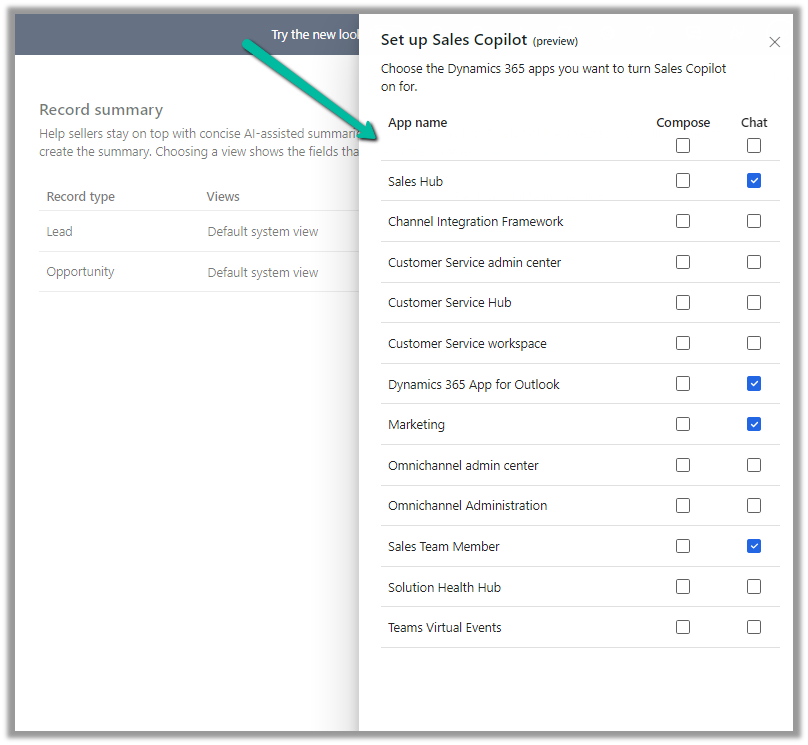
Here we can specify to which apps we want to enable the Compose and Chat feature
The Compose refers to the AI-driven email insights here.
Let us create a new Email from the timeline of the lead record.
We can see the Sales Copilot Compose in the inactive state right now. It becomes active when opening an email record or creating a new email record with either lead or opportunity in the Regarding field.
On the new email record, we can see the Compose tab enabled, and the option Describe the email you want.
We get the option to specify the statement, for which the content should be generated.
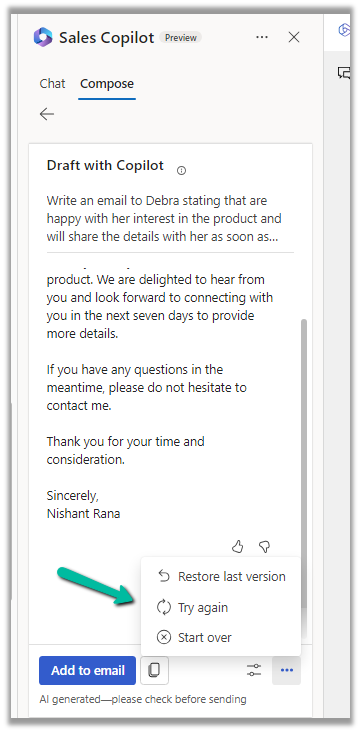
Below we can see the suggested content
We also get the option to Add content to the Email, Copy it
Adust tone and add more details
Also, Restore the last version, Try again, Start Over
Similarly, in the case of replying to an email we get the below options to start with along with an Email Conversation Summary.
Selecting the Address a Concern option generates the following content.
We recently had a requirement to create the SharePoint folder automatically on the Account records creation, instead of having the users click on the Documents tab to create it.
We could write a Power Automate flow to achieve this.
Here we have enabled the Share Point server-based integration. Also, the SharePoint Site and the main or parent folder for the Account are already created/configured.
Below is the corresponding Document location record for the parent Account folder.
So basically, we will create a new folder inside the Account folder in the SharePoint site configured in CRM.
Then create a new SharePoint Document Location record specifying the Account document location as a parent.
And then Associate / Relate the new account record created with this new document location record.
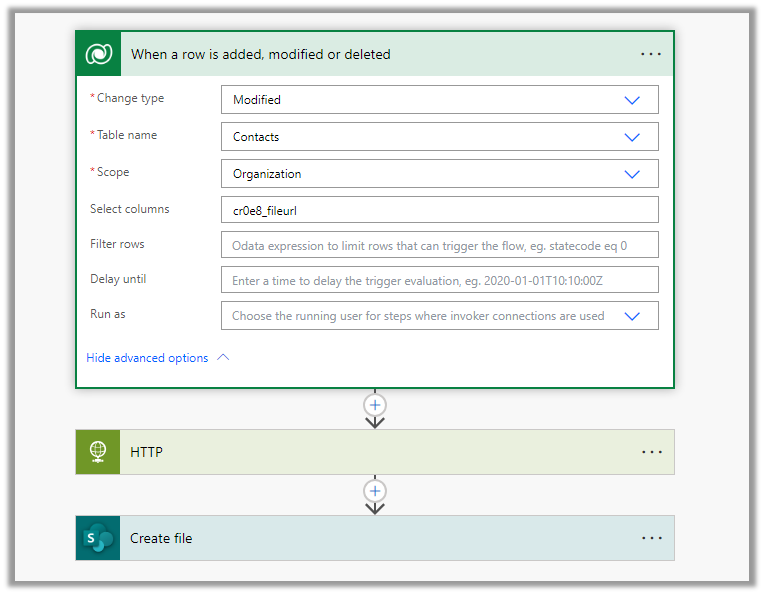
Below is how our Flow will look like –
Triggers on Account record creation.
2. Create a new folder inside Account Folder, here for the name of the folder we are using the format “AccountName_AccountNumber“
3. Create a new Document Location record, associating the Account document location with the parent location record. Here we are specifying the same folder name in the relative URL.
We can also fetch the GUID of the Account document location and/or use a variable to store the GUID.
4. Lastly, we are associating these 2 new records.
Below is our newly created account record.
Below we can see our flow ran successfully.
We can see the new folder created and associated.
Here if we click the Documents tab immediately after creating the account record, before our flow runs, we might have the OOB folder also getting created along with our custom folder (flow being asynchronous). If our custom folder is already created and associated before the user clicks on the documents tab, then CRM will not be creating a new folder.
In this blog post, we’ll cover one of its key features – IntelliSense.
As we saw in the last post the Kupp Analytics tool will download and cache the Metadata of the environment it is configured to, which it uses for IntelliSense.
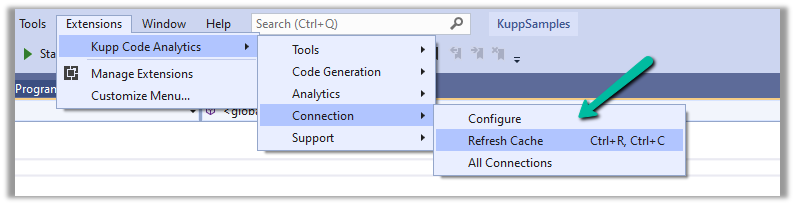
To refresh the Metadata cache, or configure and manage the connection, navigate to Extensions >> Kupp Code Analytics >> Connection
Let us look at different places where we get the IntelliSense.
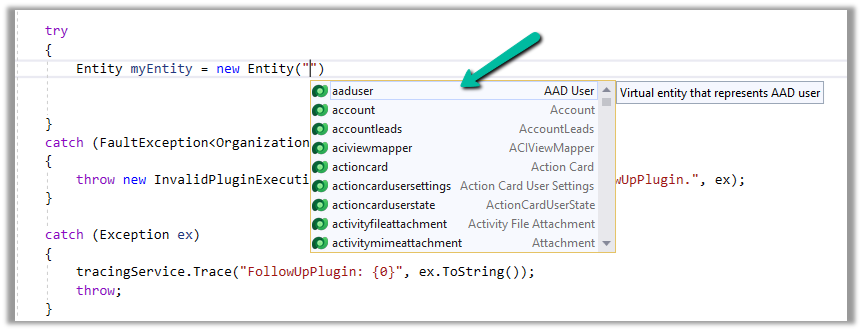
Starting with the entity or table, we can see it suggesting all the tables in that Environment.
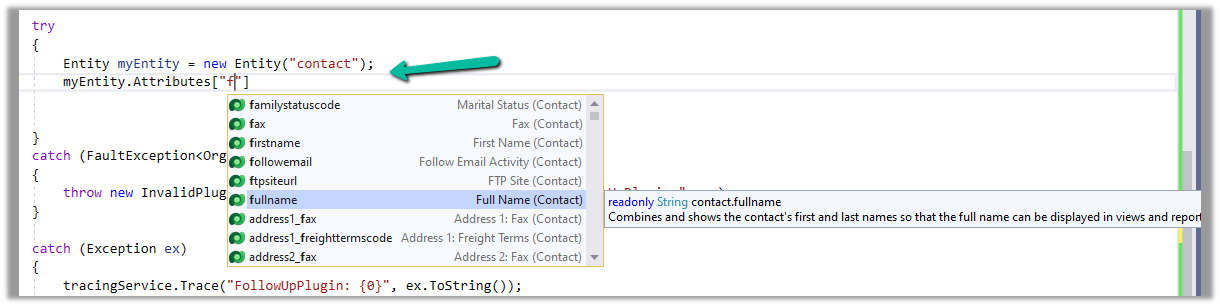
If we have specified the entity name, when it comes to attributes or columns, we can see it suggesting all the attributes specific to that table.
Getting attributes with specific type lists only attributes having the same type.
For EntityReference – we can see it suggesting all the lookup fields.
Same for Money –
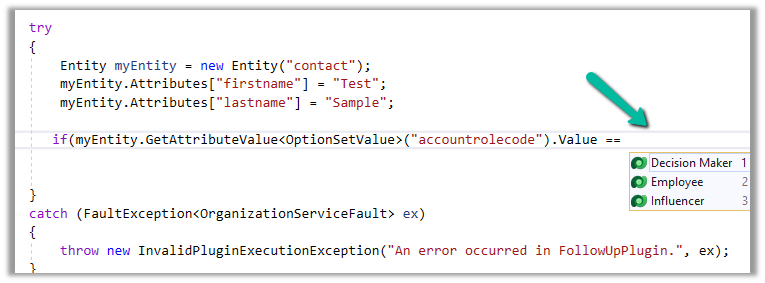
And for OptionSetValue –
It also suggests the attribute’s value in the case of Option Sets
IntelliSense also applies to Relationships, we can see it suggesting only contact-related relationships.
Apart from our Plugin and Console Applications (C#), we have the Intellisense feature available for our client-side code as well (JS/TS).
To configure we can navigate to Options >> Kupp Code Analytics >> General
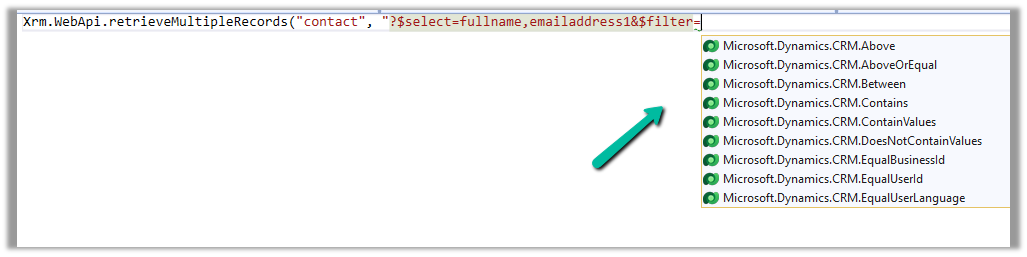
Currently, the IntelliSense support is limited to retrieve operation only.
It suggests,
the name of the entity –
different query options –
attributes specific to the entity –
Filter operators –
Query functions –
Thus using the IntelliSense feature that provides real-time suggestions, the development team can code efficiently, reduce typing errors, develop faster, and maintain code consistency.
The flow triggers when there is an update in the File URL field of the contact record.
Next, we are using HTTP action to use the GET method to get the content of the file. As it is a public URL we haven’t specified any Authentication.
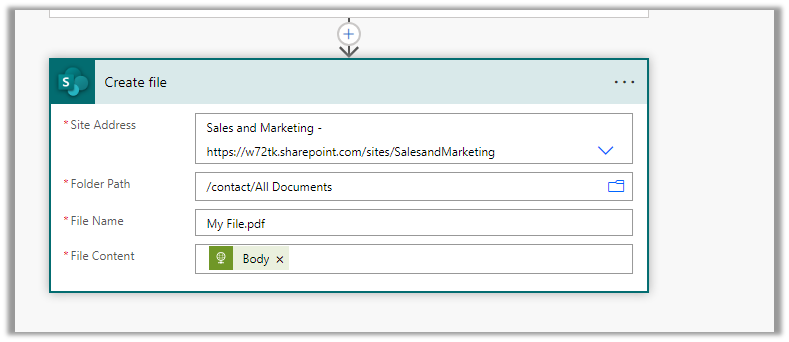
Next, we are using Create File action of SharePoint, we have specified the Site Address, Folder Path, File Name, and most importantly the Body of the HTTP action to the File Content property.
On the successful run of the flow,
we can see the document (pdf) uploaded in the SharePoint folder.
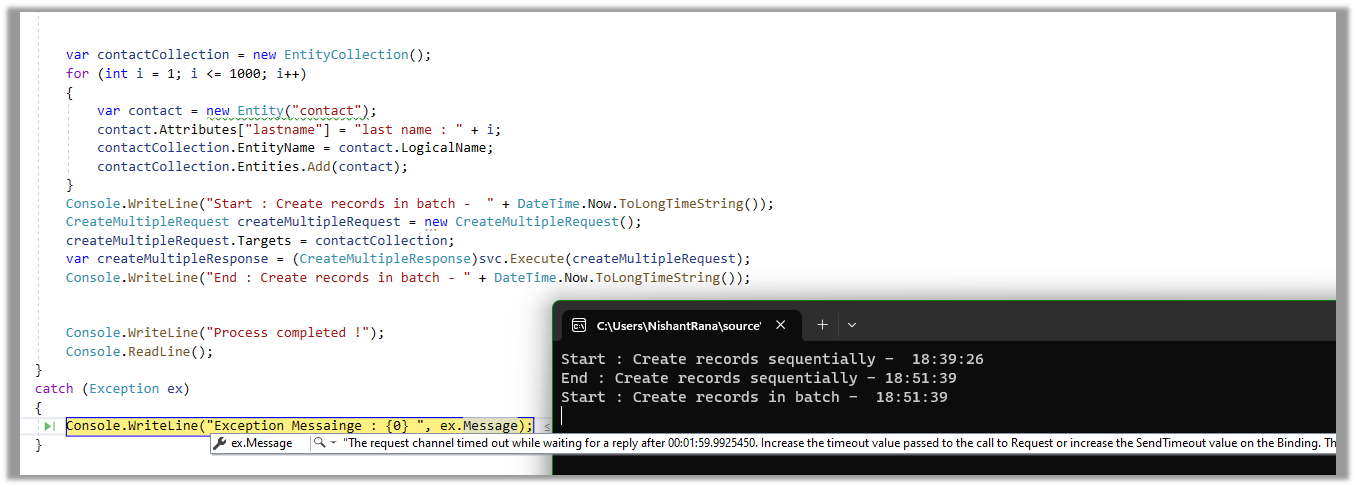
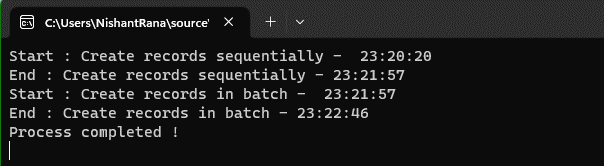
As we know now we have the bulk operation messages – CreateMultiple, UpdateMutiple, and DeleteMultiple (only for elastic tables) released with UpsertMutilple coming soon.
The messages allow us to work with records in bulk. Get more details here
And in fact, now we can also write plugins against the CreateMultiple and UpdateMultiple messages. Get more details here
These messages are available for all the custom tables, but not all the standard tables.


 3. Create a new Document Location record, associating the Account document location with the parent location record. Here we are specifying the same folder name in the relative URL.
 4. Lastly, we are associating these 2 new records.