Using Dialogs in Microsoft Bot Framework (Creating lead in CRM)


Let us continue with our previous post on Bot Framework

https://nishantrana.me/2017/04/18/getting-started-with-microsoft-bot-framework/

Here we will implement our own dialog.

Dialogs are basically a class which implements IDialog interface. Dialog sends a message to the user and is in suspended state till it waits for the response from the user. The state is saved in State Service provided by Bot Connector Service.

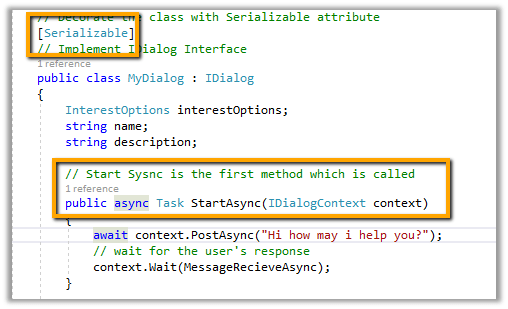
Here MyDialog is our dialog class which implements the IDialog Interface i.e. implement StartAsync method which would be the first method called. We also need to mark our class as Serializable.
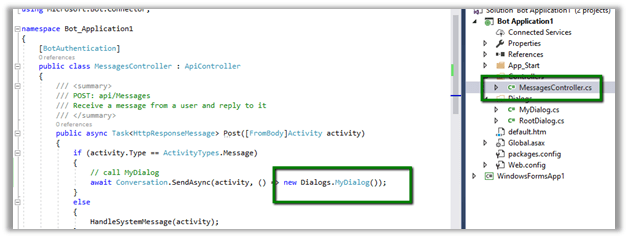
Next we need to update our controller class to point it to our new MyDialog class.
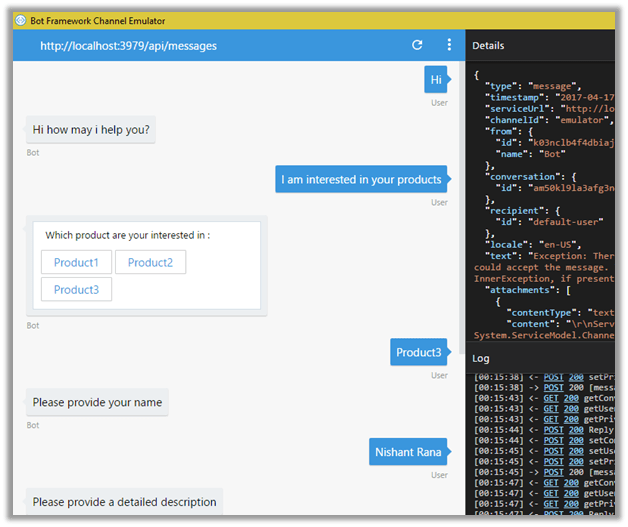
Here we will ask the user about the product in which he is interested, then get the name and description and finally using this information we will create a Lead record inside CRM.
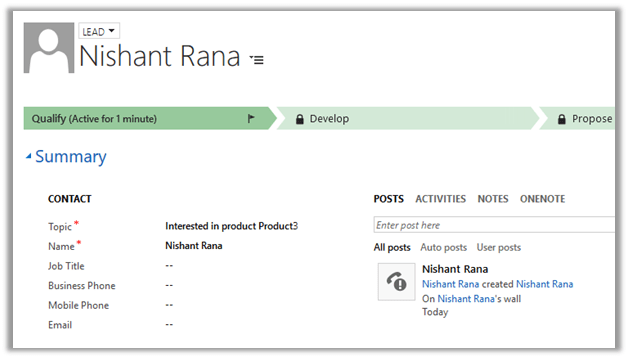
The lead record created in CRM.
Here we are making use of PromptDialog type for managing interactions with the user. Using PromptDialog we can easily prompt user for text, choice, attachment, confirmation etc.
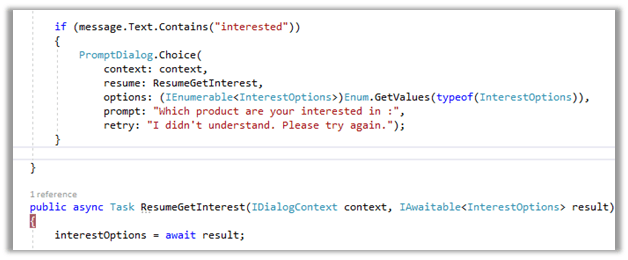
The context here is the IDialogContext. In resume parameter, we can specify which dialog methods to be called next after the user has responded. The response from the user is passed to the subsequent dialog methods.


using Microsoft.Bot.Builder.Dialogs;
using Microsoft.Bot.Connector;
using Microsoft.Xrm.Sdk;
using Microsoft.Xrm.Sdk.Client;
using System;
using System.Collections.Generic;
using System.Threading.Tasks;

namespace Bot_Application1.Dialogs
{

public enum InterestOptions
{
Product1,
Product2,
Product3
}

// Decorate the class with Serializable attribute
[Serializable]
// Implement IDialog Interface
public class MyDialog : IDialog
{
InterestOptions interestOptions;
string name;
string description;

// Start Sysnc is the first method which is called
public async Task StartAsync(IDialogContext context)
{
await context.PostAsync("Hi how may i help you?");
// wait for the user's response
context.Wait(MessageRecieveAsync);
}

public virtual async Task MessageRecieveAsync(IDialogContext context, IAwaitable argument)
{
// get the message
var message = await argument;

if (message.Text.Contains("interested"))
{
PromptDialog.Choice(
context: context,
resume: ResumeGetInterest,
options: (IEnumerable<InterestOptions>)Enum.GetValues(typeof(InterestOptions)),
prompt: "Which product are your interested in :",
retry: "I didn't understand. Please try again.");
}

}

public async Task ResumeGetInterest(IDialogContext context, IAwaitable result)
{
interestOptions = await result;

PromptDialog.Text(
context: context,
resume: ResumeGetName,
prompt: "Please provide your name",
retry: "I didn't understand. Please try again.");
}

public async Task ResumeGetName(IDialogContext context, IAwaitable result)
{
name = await result;

PromptDialog.Text(
context: context,
resume: ResumeGetDescription,
prompt: "Please provide a detailed description",
retry: "I didn't understand. Please try again.");
}

public async Task ResumeGetDescription(IDialogContext context, IAwaitable result)
{
description = await result;
PromptDialog.Confirm(
context: context,
resume: ResumeAndConfirm,
prompt: $"You entered Product :- '{interestOptions}', Your Name - '{name}', and Description - '{description}'. Is that correct?",
retry: "I didn't understand. Please try again.");
}

public async Task ResumeAndConfirm(IDialogContext context, IAwaitable result)
{
bool confirm = await result;

if (confirm)
await context.PostAsync("Thanks for showing your interest we will contact you shortly.");

// Create a lead record in CRM
CreateLeadinCRM();

}

private void CreateLeadinCRM()
{
Microsoft.Xrm.Sdk.Entity lead = new Microsoft.Xrm.Sdk.Entity("lead");
lead.Attributes["subject"] = "Interested in product " + interestOptions;
lead.Attributes["lastname"] = name;
lead.Attributes["description"] = description;
GetOrganizationService().Create(lead);
}

public static OrganizationServiceProxy GetOrganizationService()
{
IServiceManagement<IOrganizationService> orgServiceManagement =
ServiceConfigurationFactory.CreateManagement<IOrganizationService>(new Uri("https://nishantcrm365.crm.dynamics.com/XRMServices/2011/Organization.svc"));

AuthenticationCredentials authCredentials = new AuthenticationCredentials();
authCredentials.ClientCredentials.UserName.UserName = "nishant@nishantcrm365.onmicrosoft.com";
authCredentials.ClientCredentials.UserName.Password = "*****";
AuthenticationCredentials tokenCredentials = orgServiceManagement.Authenticate(authCredentials);
return new OrganizationServiceProxy(orgServiceManagement, tokenCredentials.SecurityTokenResponse);
}
}

}

The next posts in this series

Hope it helps..

Getting started with Microsoft Bot Framework


To get started with Bot Framework, download the visual studio template for Bot Application from the following location

http://aka.ms/bf-bc-vstemplate

Extract it and put the content at the following location. (Visual Studio 2017 in my case)

C:\Users\<<ComputerName>>\Documents\Visual Studio 2017\Templates\ProjectTemplates\Visual C#

Open Visual Studio and select Bot Application template to create a new project

This is how the basic structure of the bot application looks like

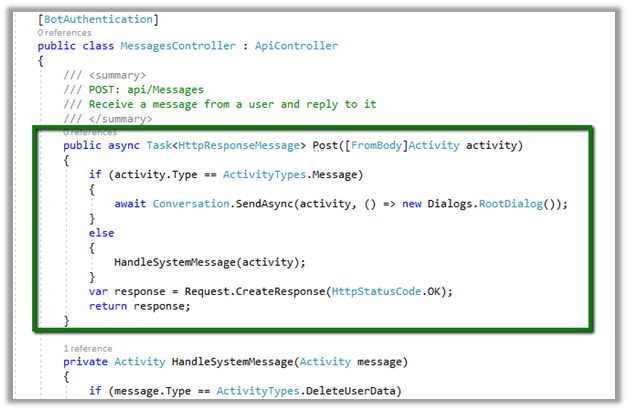
The most important part here being the MessageController class.

The class has the Post method which handles the message sent by the user/client termed as Activity. The Post method handles the Activity of type Message.

Below is the list of different type of Activities

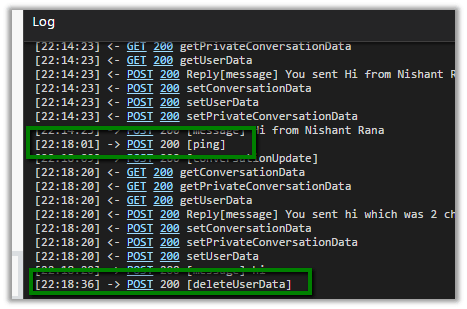
DeleteUserData is when the client\user requests for Deletion of all the user data, ConversationUpdate is when a new member is added or removed from the conversation, Typing is when user is typing the message etc.

Now to test this sample application, we need to first download the Bot Emulator.

https://emulator.botframework.com/

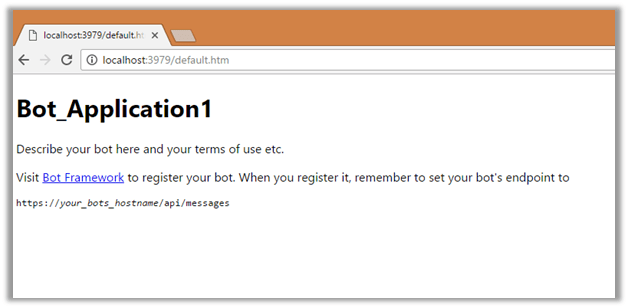
Now run the bot application.

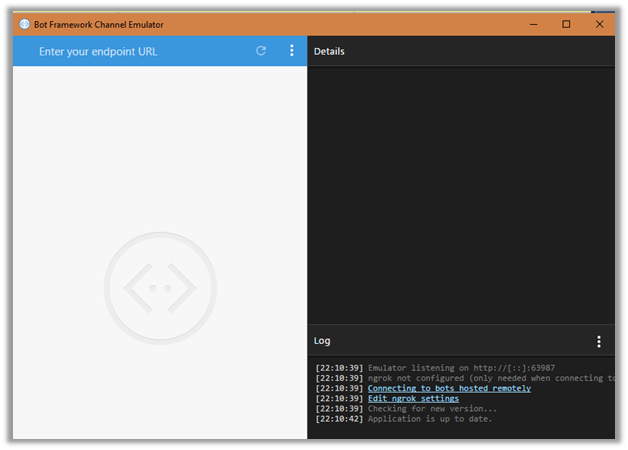
And next start the emulator

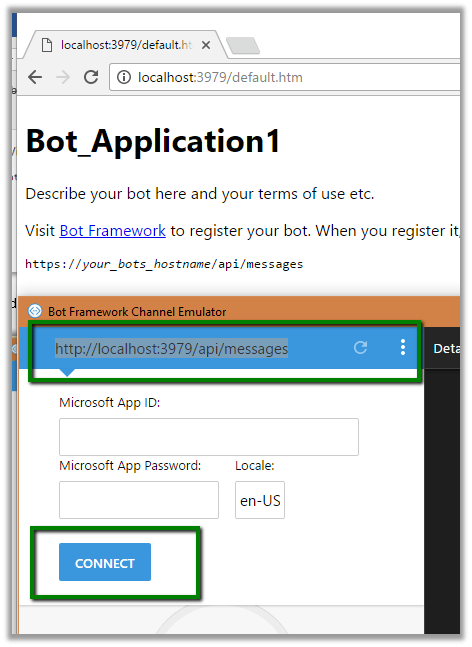
Enter the URL and click on Connect. We will leave App ID and Password as blank as we are testing it locally.

Just type in the message and we’d get the response back.

Details section shows the JSON message which could be useful for debugging and testing purpose.

Apart from sending message we can simulate other Activity Type from within the emulator

The next post in this series

Hope it helps..

Solved – You do not have permission to open this Web site in SharePoint Designer 2013


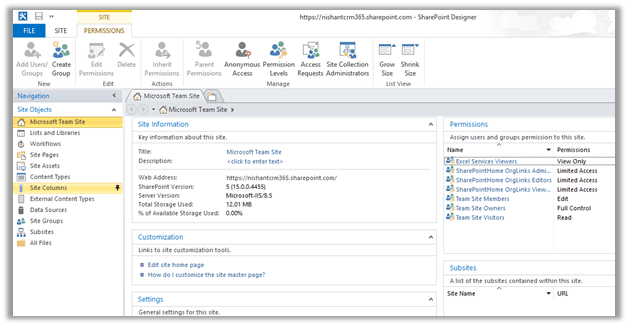
Recently we had installed SharePoint designer 2013, and while trying to open a SharePoint online web site.

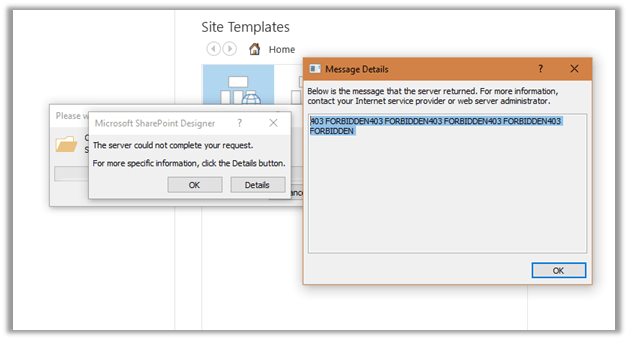
However we were getting the below error.

“403 FORBIDDEN403 FORBIDDEN403 FORBIDDEN403 FORBIDDEN403 FORBIDDEN”

Installing the SharePoint designer SP 1 (64 bit in our case) https://www.microsoft.com/en-in/download/details.aspx?id=42009 fixed the issue.

Hope it helps..

Step by step – Upload files to Azure Blob storage


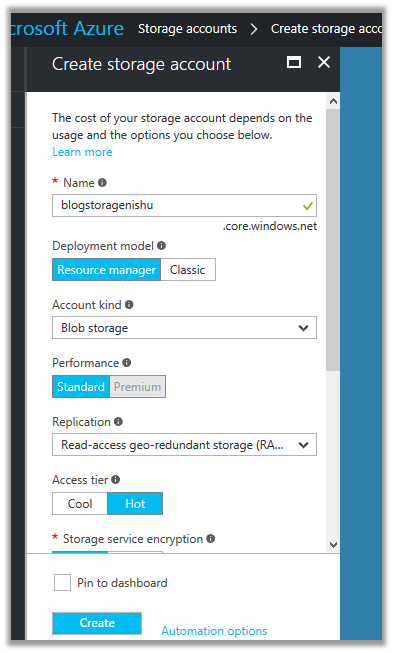
Here we will be creating a storage account of type blob storage and a container inside it. Then we will create a console application, add required nuget packages and upload a file to the container.

Log in to Azure Portal

https://portal.azure.com

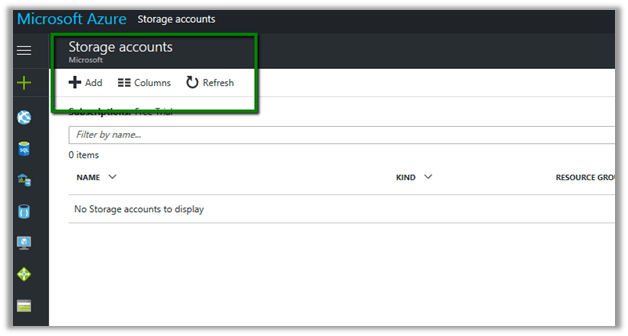
Click on Add to add a new storage account.

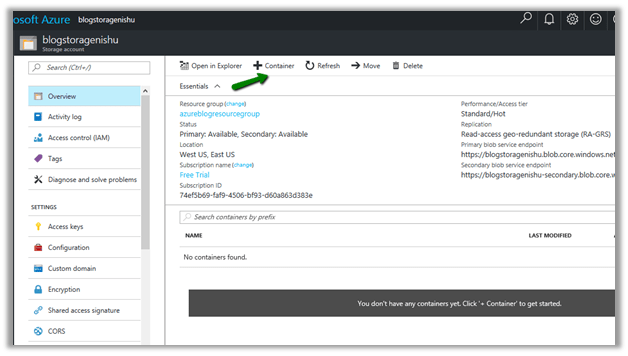
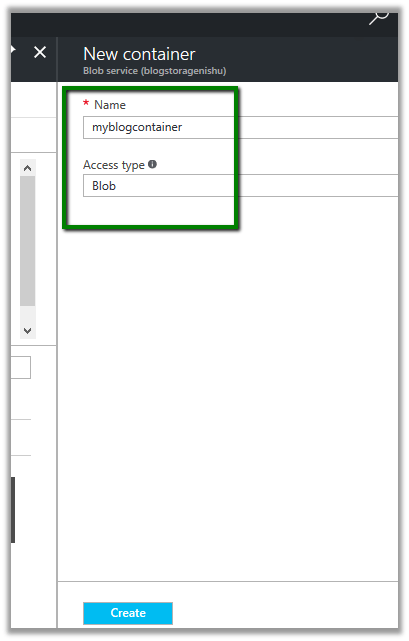
Create a new container in it to store the blob files

Now we’d write a console app to connect to this container and upload a file.

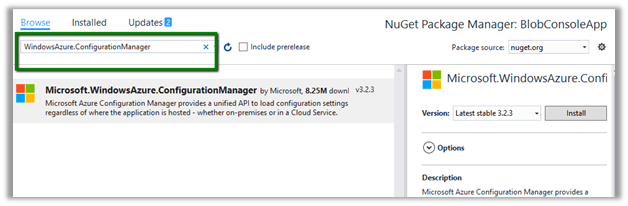
Create a new console application and add references to below Nuget Packages.

  • Windows.Azure.Storage
  • Windows.Azure.ConfigurationManager

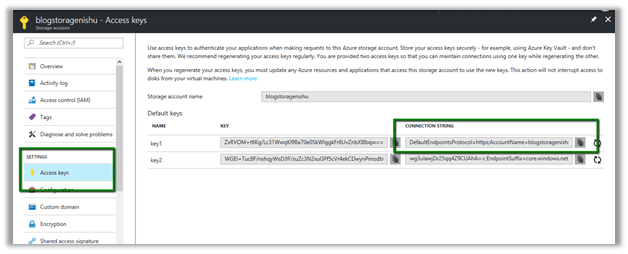
In Azure Portal – Storage Account, go to Access Keys and copy the connection strings for the storage account.

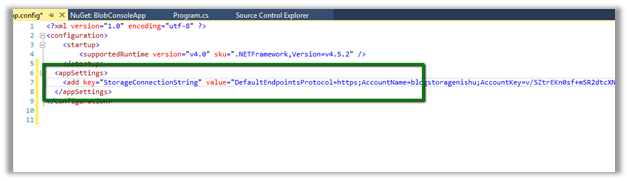
Inside console application add an appSettings section and add a key and paste the above copied connection string there.

The source code to upload the Blob file

// Retrieve storage account from connection string.
CloudStorageAccount storageAccount = CloudStorageAccount.Parse(
CloudConfigurationManager.GetSetting("StorageConnectionString"));

// Create the blob client.
CloudBlobClient blobClient = storageAccount.CreateCloudBlobClient();

// Retrieve a reference to a container.
CloudBlobContainer container = blobClient.GetContainerReference("myblogcontainer");

// Retrieve reference to a blob named "myblob".
CloudBlockBlob blockBlob = container.GetBlockBlobReference("WeekendChamps.jpg");

// Create or overwrite the "myblob" blob with contents from a local file.
using (var fileStream = System.IO.File.OpenRead(@"C:\Users\Bliss\Downloads\WeekendChamps.jpg"))
{
blockBlob.UploadFromStream(fileStream);
}

The file uploaded in the container

Hope it helps..
Plugin Registration Tool and screen resolution issue


Plugin Registration Tool Resolution Issue

nirman1983's avatarNirman Doshi and his Dynamics Lab

If you are a CRM developer or consultant, you can’t live without Plugin Registration Tool. The tool provided with CRM SDK is MUST in order to register/ uninstall any plugin to a CRM instance, be it online or on-premises.

However, there is one weird issue with the tool (atleast the one provided in SDK 2013, and SDK 2016). That is, except for a few specific screen resolutions, the tool doesn’t show buttons to allow users to complete the actions.

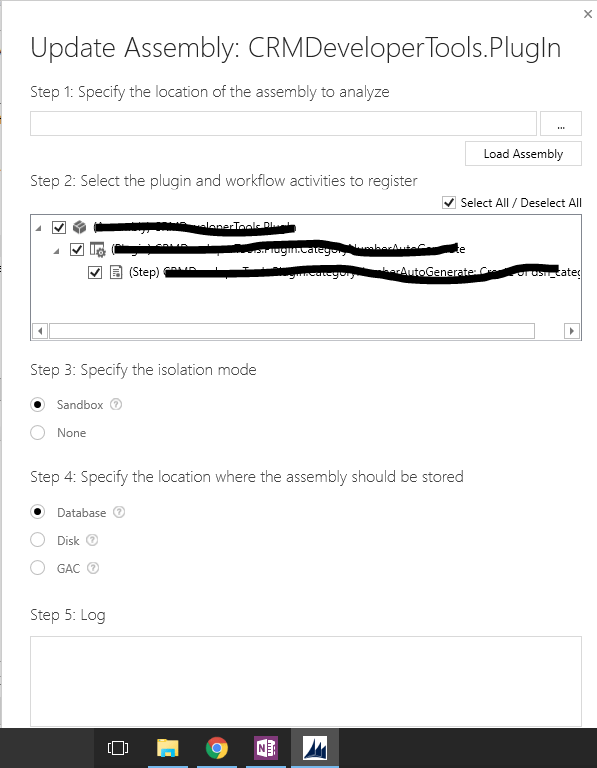
Notice the screenshot below, where are the buttons to “Update Selected Plugins”? There is no scrollbar either.

PluginRegTool-Issue

There are few workarounds to get rid of this issue. For example, hitting TAB key for 2 times from the Step 2 control. Or hitting a shortcut key. But, for me the preferred method is to rotate the screen to left or right, this is because at least you can see what button you are hitting.

How…

View original post 73 more words

How t0 – Insert a Chart in Excel Spreadsheet using EPPlus Library.


EPPlus is .NET Library that makes it very easy to manipulate Excel programmatically. It is based on Open XML.

https://epplus.codeplex.com/

Below is the sample code we can use to insert a chart in a excel spreadsheet.

</p>
<p>public void UpdateExcelUsingEPPlus(string fileName)<br />
{<br />
FileInfo fileInfo = new FileInfo(fileName);</p>
<p>ExcelPackage p = new ExcelPackage(fileInfo);</p>
<p>// access the first sheet named Sheet1<br />
ExcelWorksheet myWorksheet = p.Workbook.Worksheets["Sheet1"];</p>
<p>// specify cell values to be used for generating chart.<br />
myWorksheet.Cells["C2"].Value = 10;<br />
myWorksheet.Cells["C3"].Value = 40;<br />
myWorksheet.Cells["C4"].Value = 30;</p>
<p>myWorksheet.Cells["B2"].Value = "Yes";<br />
myWorksheet.Cells["B3"].Value = "No";<br />
myWorksheet.Cells["B4"].Value = "NA";</p>
<p>// add chart of type Pie.<br />
var myChart = myWorksheet.Drawings.AddChart("chart", eChartType.Pie);</p>
<p>// Define series for the chart<br />
var series = myChart.Series.Add("C2: C4", "B2: B4");<br />
myChart.Border.Fill.Color = System.Drawing.Color.Green;<br />
myChart.Title.Text = "My Chart";<br />
myChart.SetSize(400, 400);</p>
<p>// Add to 6th row and to the 6th column<br />
myChart.SetPosition(6, 0, 6, 0);</p>
<p>p.Save();</p>
<p>}</p>
<p>

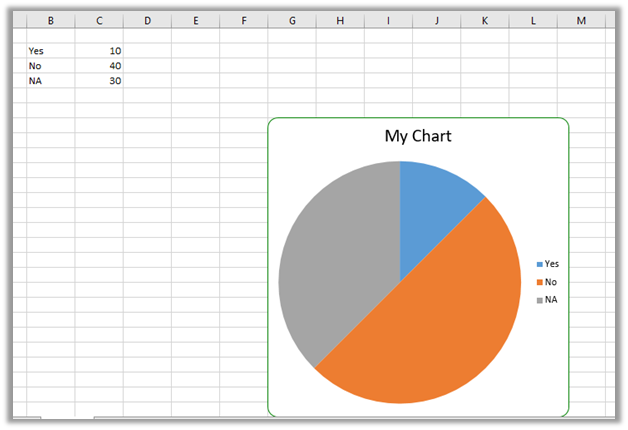
The output –

If we want to do it using Open XML SDK without using EPPlus Library we can refer to the below article.

https://msdn.microsoft.com/en-us/library/office/cc820055.aspx

Hope it helps..
Advertisements

Nishant Rana's Weblog

Everything related to Microsoft .NET Technology

Skip to content ↓