To enable this feature navigate to Power Platform Admin Center > Environment > Features > Enable smart paste (preview)
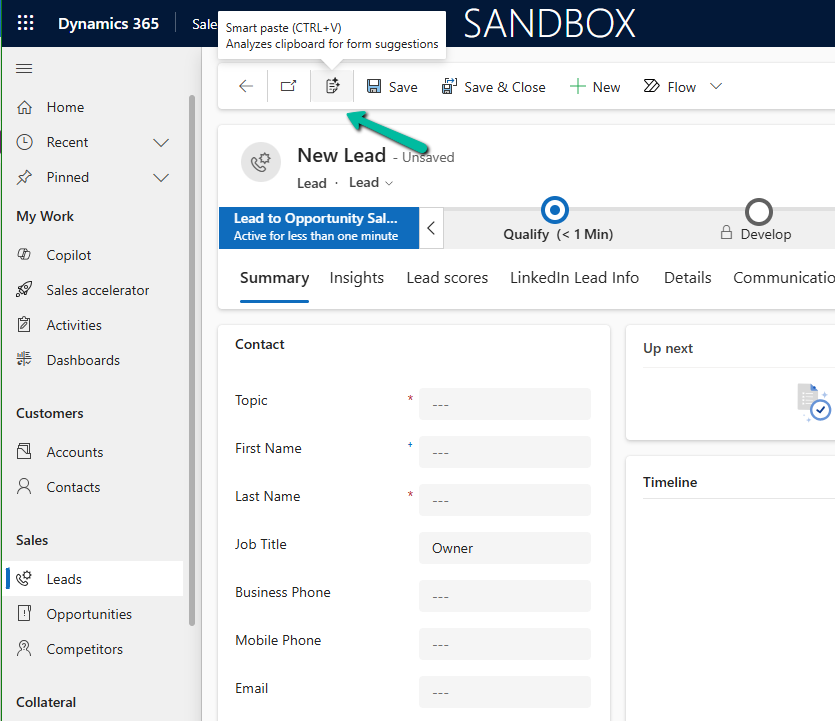
With the smart paste feature, we can copy the text to the clipboard that has the details we want to fill in for our form and click the smart paste button or use our normal CTRL + V. Copilot will analyze the pasted text and will provide suggestions for the different fields on the form.
Suppose we have copied the below text from an email received–
Below we have selected the Smart paste button.
We can see the notification that the Smart Paste is analyzing the clipboard data.
And can see it populating the suggestions for most of the fields from the text we had copied.
We can click on Accept all suggestions or select it for the individual fields.
On Accept all suggestions we can see the values auto-filled from the copied text in clipboard –
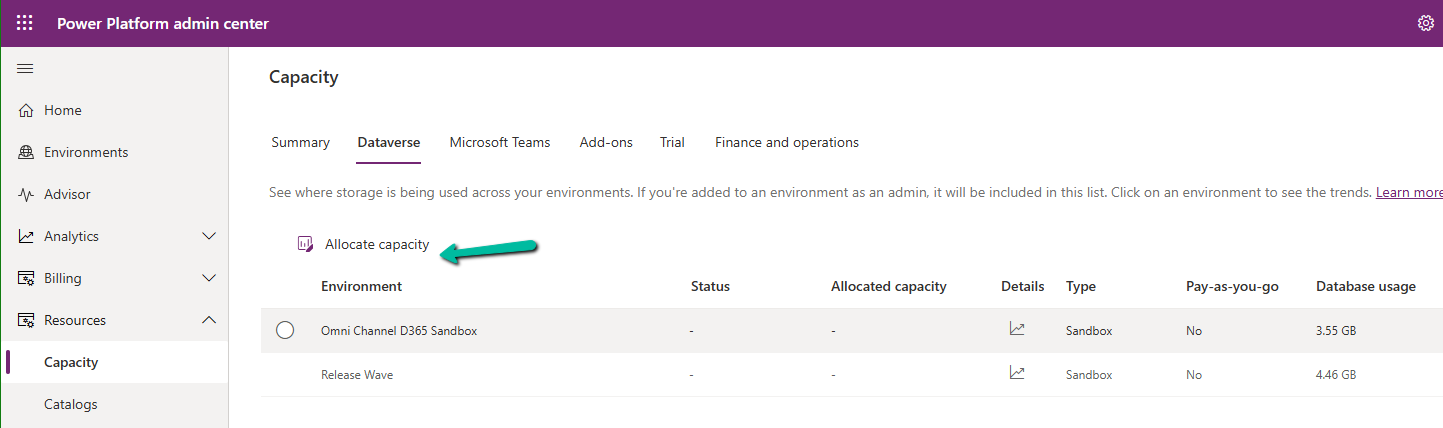
The new Allocate Capacity feature allows administrators to manage and optimize storage allocation across different environments. It allows administrators to strategically distribute available storage among the Dataverse environments based on each environment’s unique needs ensuring each has the right amount of storage to maintain performance and avoid service interruptions.
Navigate to Resources >> Capacity >> Dataverse inside the Power Platform Admin Center and select an environment to make the Allocate capacity option visible.
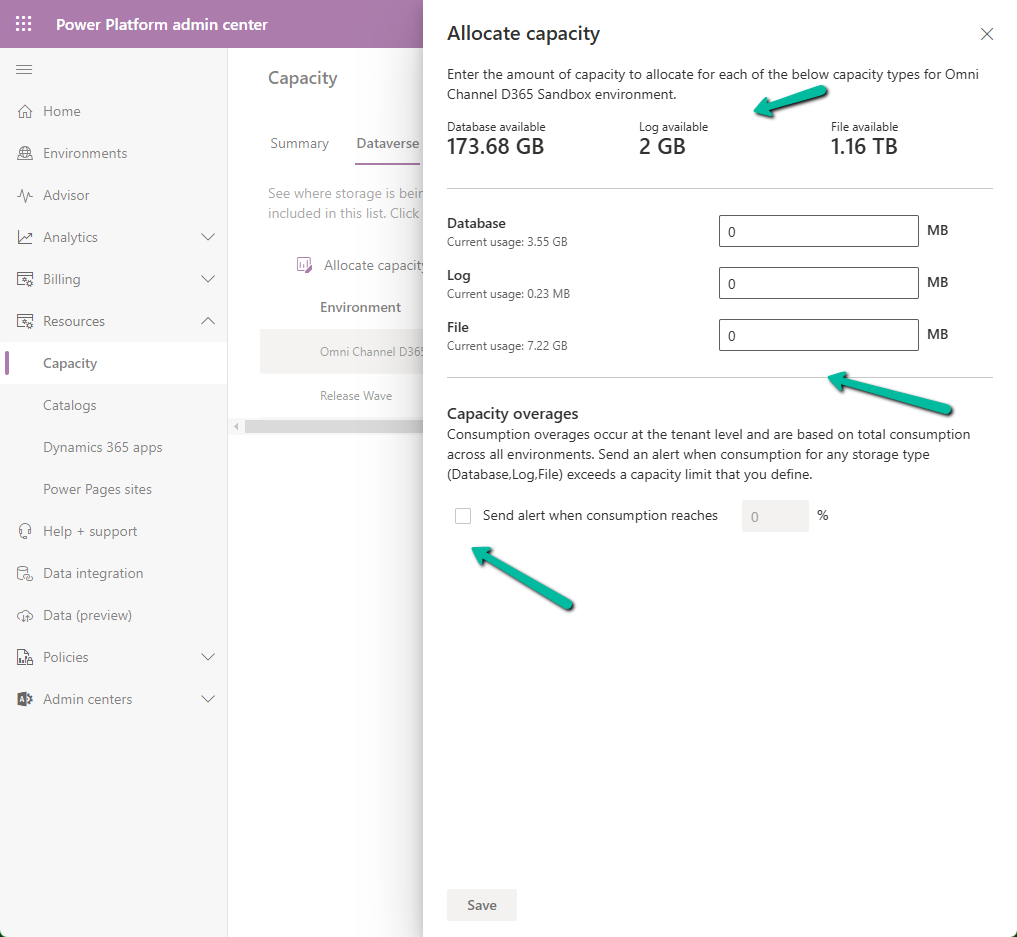
It shows the available storage, and current usage of the environment selected.
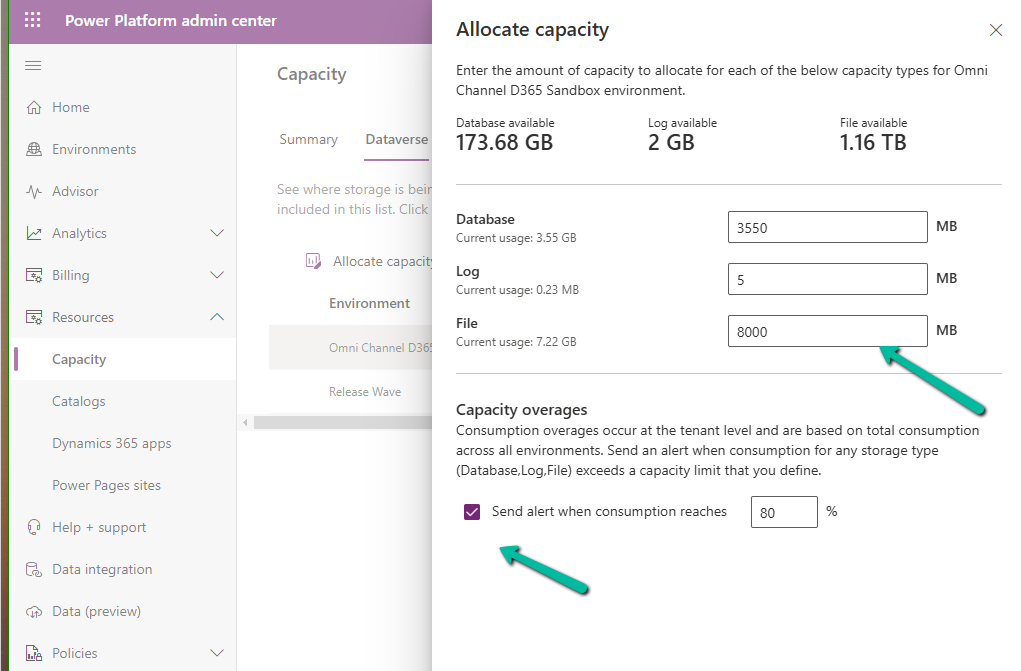
We can allocate Database, Log, and File-specific storage and also configure alerts.
If an environment exceeds, it shows up as “Overage” as shown below
Using this new feature, admins can Allocate Capacity effectively by monitoring the storage usage across environments, setting alerts when the environment nears its capacity limit, and allocating the capacity strategically e.g. production environment will get higher allocation compared to the development environment. Admins can also purchase additional storage and allocate it as required to ensure each environment runs smoothly.
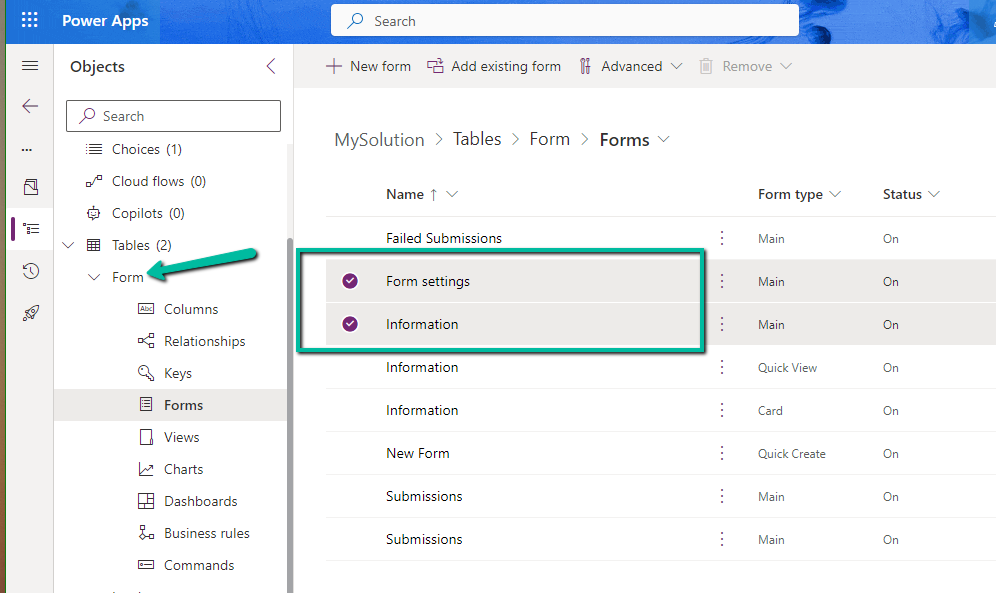
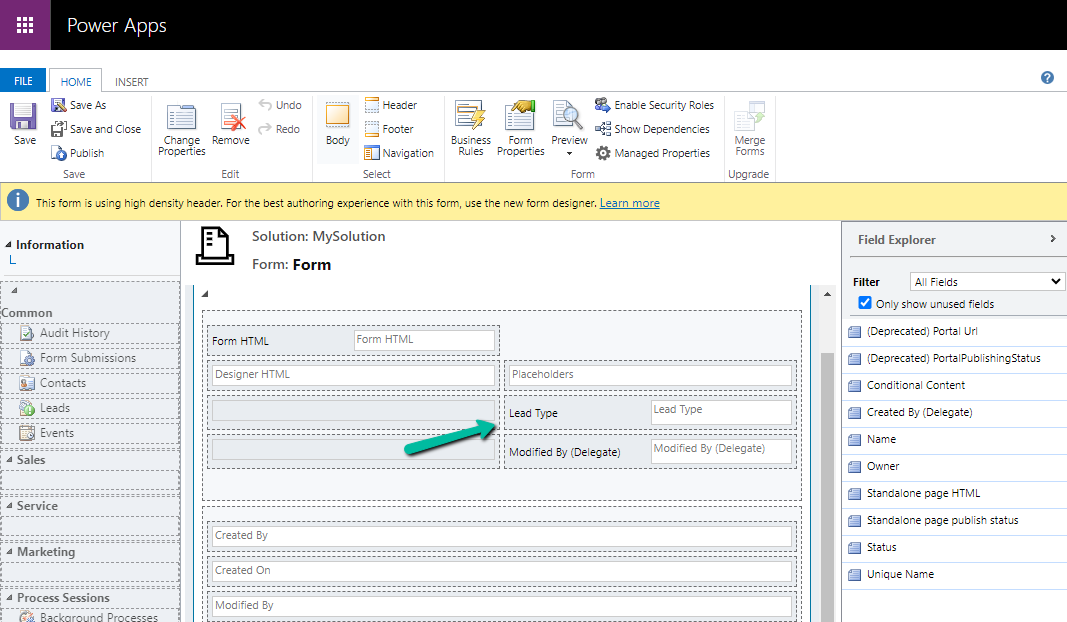
Suppose we want to add the Lead Type (a custom choice field) to the Marketing Form’s form / form settings (RTM).
Open the Form table for customization, here we need to add the field to below 2 forms.
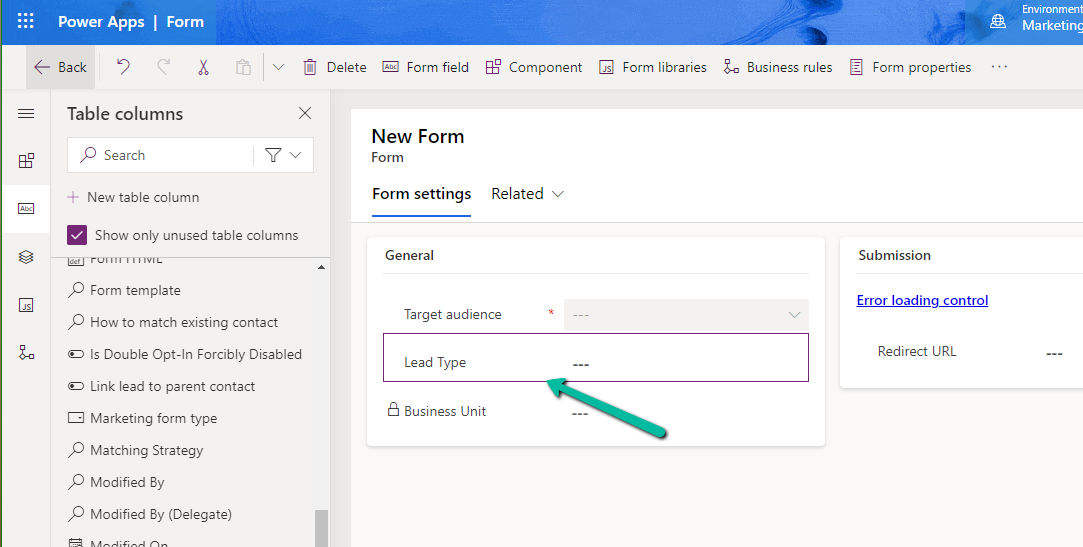
Starting with the Form Settings form, drag the field to the form.
If we check the form now, it will ask us to add it to the main form.
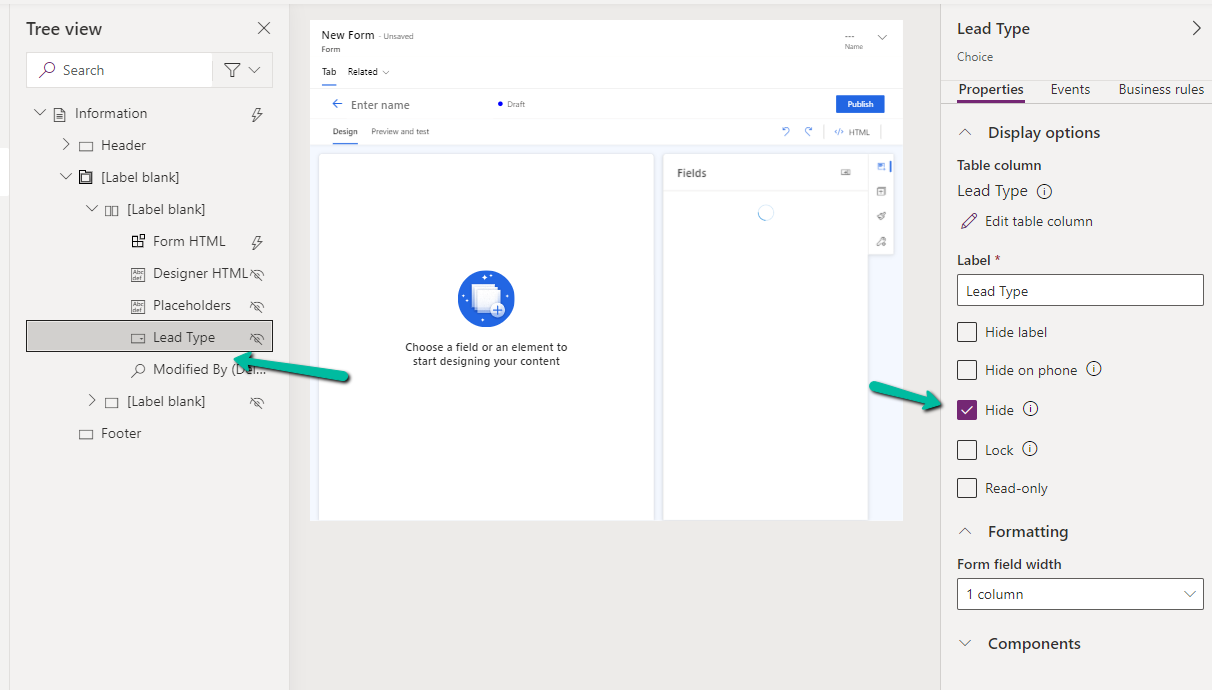
Open the Information (Main) form, double click the field to add it. As the field will not render in the form designer, select the field from the Tree View, and Hide it.
Or we can also open the form in the classic designer, there we will be able to see the field.
On saving and publishing the change, we can see our Lead Type field appearing on the Form Designer.
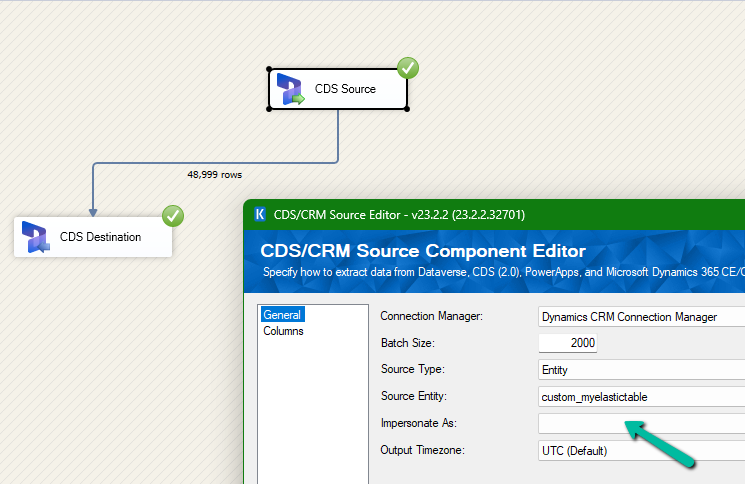
We had mapped the primary field for deletion and the package was also showing success.
However back in our CRM / Sales Hub app, we saw that none of the records were deleted (total – 48999)
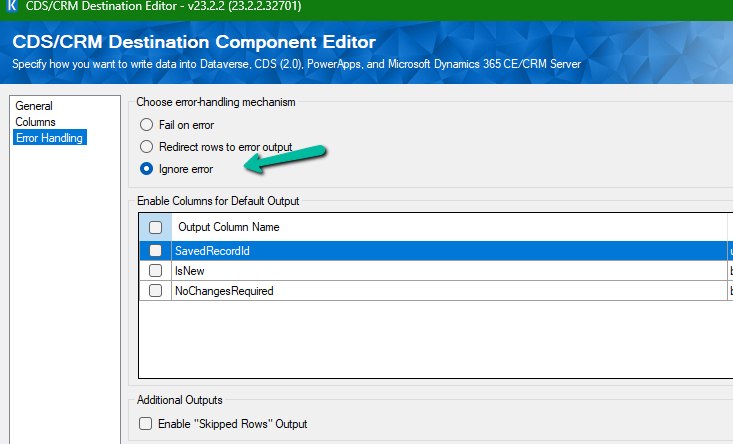
The reason it was showing success is that we had specified the Ignore Error option in our CDS Destination component.
Then we created 2 more records but didn’t specify the partition ID for them.
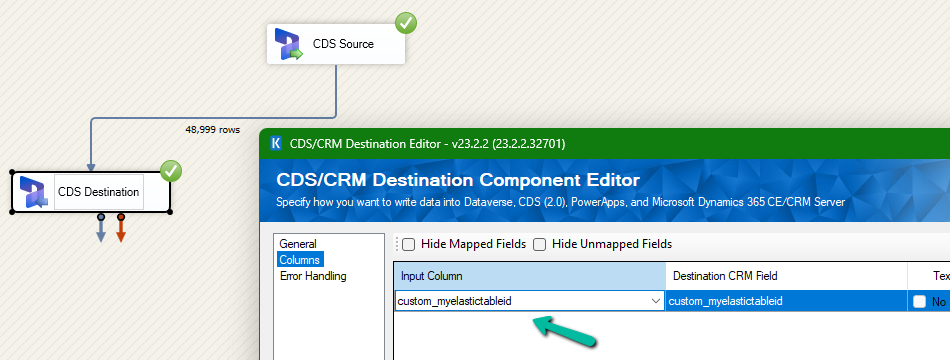
This time on the successful run of the package we can see those 2 new records getting deleted for which we didn’t specify any partition ID i.e. Test 1 and Test 2 records were deleted successfully.
If we check the Microsoft docs it mentions that we need to include the partition ID using the alternate key to delete those records using the DeleteMultiple request.
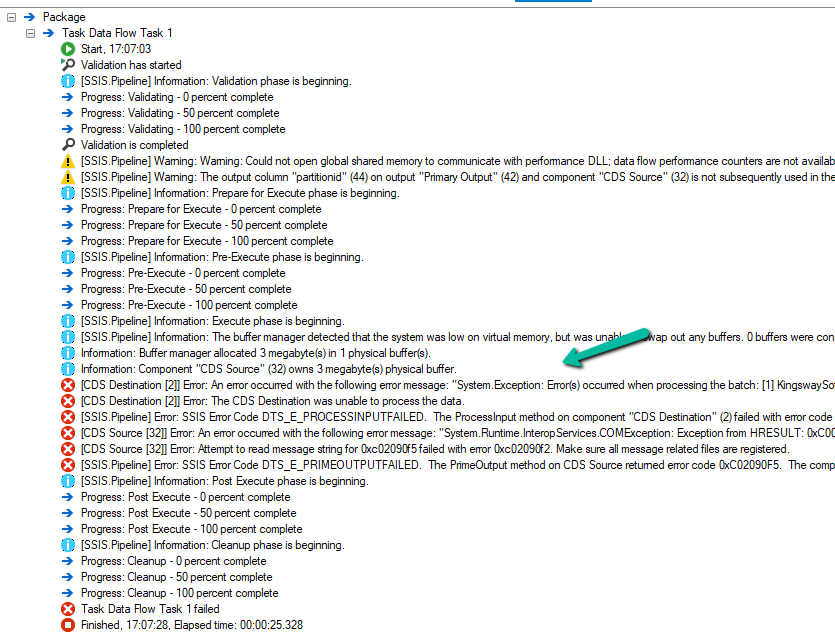
Could not find a way to specify an Alternate Key in the CDS Destination component for the Delete message and if we try deleting the records one by one instead of using the DeleteMultiple request we get the below error.
[CDS Destination [2]] Error: An error occurred with the following error message: “System.Exception: Error(s) occurred when processing the batch: [1] KingswaySoft.IntegrationToolkit.DynamicsCrm.WebAPI.WebApiServiceException: The remote server returned an error: (404) Not Found. (Error Type / Reason: NotFound, Detailed Message: {“error”:{“code”:”0x80040217″,”message”:”The HTTP status code of the response was not expected (404).\n\nStatus: 404\nResponse: \n{\”error\”:{\”message\”:\”Could not find item ‘b3a70971-9674-ef11-a671-6045bdfe58ee’.\”,\”details\”:[{\”message\”:\”\\r\\nErrors : [\\r\\n \\\”Resource Not Found. Learn more: https://aka.ms/cosmosdb-tsg-not-found\\\”\\r\\n]\\r\\n\”}]}}”}}) (SSIS Integration Toolkit for Microsoft Dynamics 365, v23.2.2.32701 – DtsDebugHost, v16.0.5270.0)System.Net.WebException
As expected, using CrmServiceClient also if we do not include partitionid we will get the below error for the records that have partition id specified.
The HTTP status code of the response was not expected (404).
Response:
{“error”:{“message”:”Could not find item ‘b3a70971-9674-ef11-a671-6045bdfe58ee’.”,”details”:[{“message”:”\r\nErrors : [\r\n \”Resource Not Found. Learn more: https://aka.ms/cosmosdb-tsg-not-found\”\r\n]\r\n”}]}}
Here we can specify the partitionId parameter to delete those records having the partitionId specified in the DeleteRequest
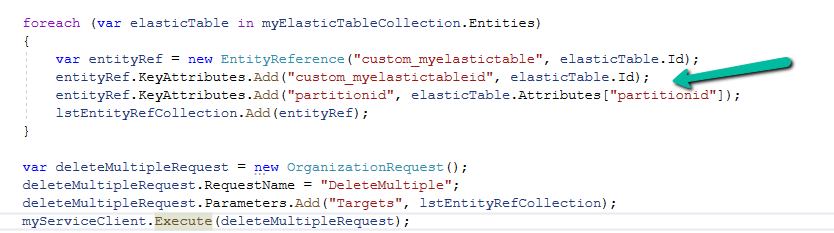
For DeleteMultiple Request we need to provide the alternate key as shown below.
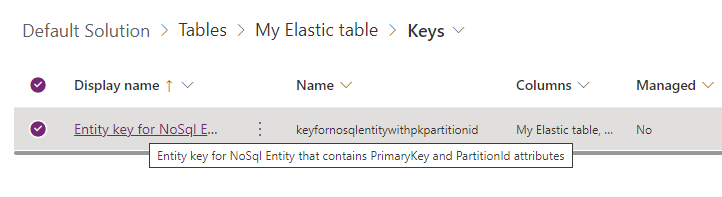
We will have the alternate key auto-created by the system when we create an elastic table.
Sample Code –
 var myServiceClient = new CrmServiceClient(connectionString);
        var query = new QueryExpression("custom_myelastictable");
        query.ColumnSet.AddColumns("custom_name", "partitionid");
        var myElasticTableCollection = myServiceClient.RetrieveMultiple(query);
        var lstEntityRefCollection = new EntityReferenceCollection();

        // Delete Request
        foreach (var elasticTable in myElasticTableCollection.Entities)
        {
            var deleteRequest = new DeleteRequest();
            deleteRequest.Target = new EntityReference("custom_myelastictable", elasticTable.Id);
            deleteRequest.Parameters["partitionId"] = elasticTable.Attributes["partitionid"];
            var response = myServiceClient.Execute(deleteRequest);
        }

        // DeleteMultiple Request

        foreach (var elasticTable in myElasticTableCollection.Entities)
        {
            var entityRef = new EntityReference("custom_myelastictable", elasticTable.Id);
            entityRef.KeyAttributes.Add("custom_myelastictableid", elasticTable.Id);
            entityRef.KeyAttributes.Add("partitionid", elasticTable.Attributes["partitionid"]);
            lstEntityRefCollection.Add(entityRef);
        }

        var deleteMultipleRequest = new OrganizationRequest();
        deleteMultipleRequest.RequestName = "DeleteMultiple";
        deleteMultipleRequest.Parameters.Add("Targets", lstEntityRefCollection);
        myServiceClient.Execute(deleteMultipleRequest);
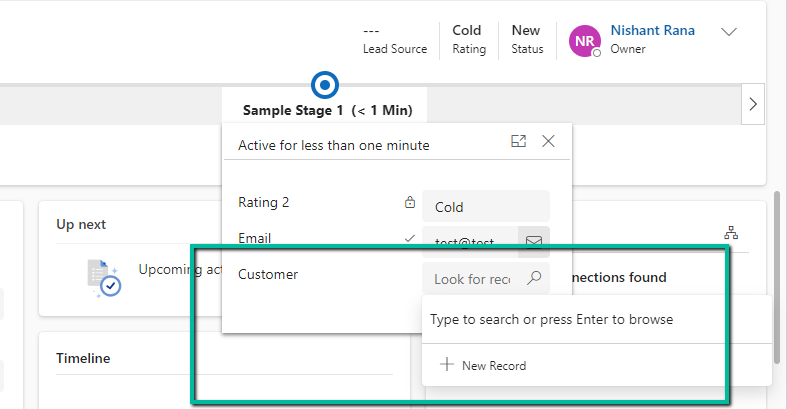
As the getControl method is used to show or hide the field it only applies to the field being referenced. That is why we only have the Rating 1 field on the BPF being hidden.
We are setting the Rating field on the form as mandatory, in the next line we are setting the Rating 2 field on the BPF as non-mandatory, the final result is Rating field is non-mandatory on the form as well because here getAttribute method is used which applies to the attribute level so gets applied to all its corresponding controls.