Recently we migrated the Real-time marketing forms from our Dev environment to UAT environment using the Configuration Migration Tool. Here what we noticed was on submitting the form using the standalone page in UAT, the submissions were going back to the Dev environment instead of UAT.
This was because the data-form-api-url and data-cached-form-url property of msdynmkt_standalonehtml field of msdynmkt_marketingform record was still referencing the organization id of the Dev environment instead of UAT.
<div data-form-id='167fce01-b674-ef11-a671-002248e36298'
data-form-api-url='https://public-oce.mkt.dynamics.com/api/v1.0/orgs/f69f1cea-23d9-446f-9130-ed45ce666b28/landingpageforms'
data-cached-form-url='https://assets-oce.mkt.dynamics.com/f69f1cea-23d9-446f-9130-ed45ce666b28/digitalassets/forms/xxxfce01-b674-ef11-a671-002248e36298' ></div>
The f69f1cea-23d9-446f-9130-ed45ce666b28 is the development environment’s organization ID.
This information is stored in the msdynmkt_standalonehtml field of msdynmkt_marketingform record.
select msdynmkt_marketingformid,msdynmkt_standalonehtml,* from msdynmkt_marketingform where msdynmkt_marketingformid = ‘formGUID’


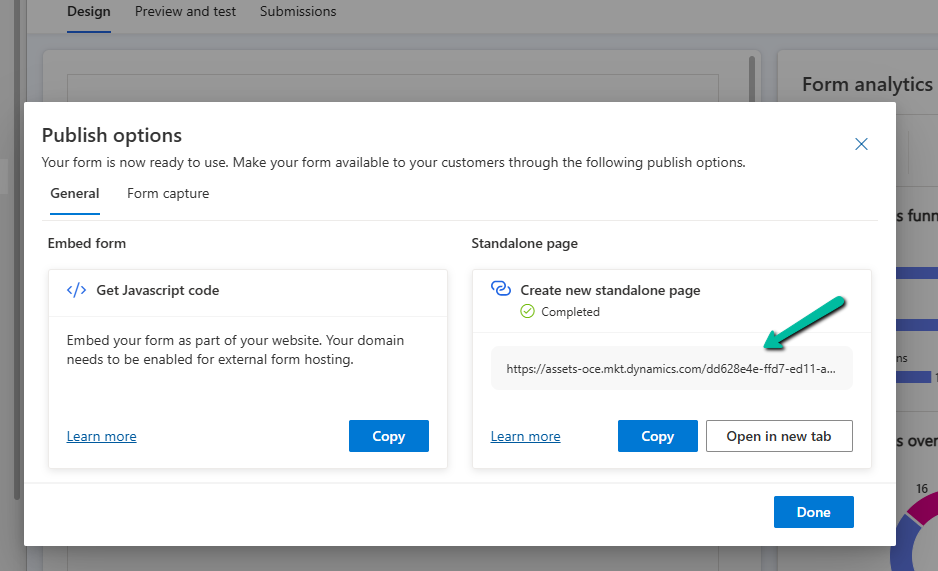
To fix we replaced the Dev’s Organization ID = f69f1cea-23d9-446f-9130-ed45ce666b28 with UAT’s Organization ID = dd628e4e-ffd7-ed11-aecf-002248932ace
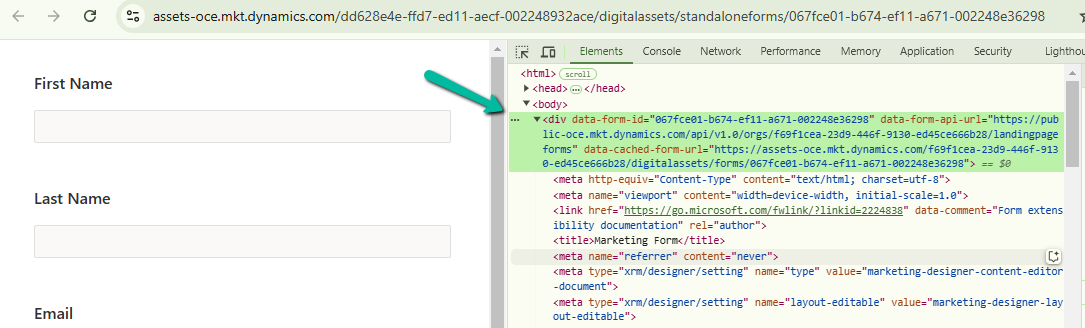
<div data-form-id='167fce01-b674-ef11-a671-002248e36298'
data-form-api-url='https://public-oce.mkt.dynamics.com/api/v1.0/orgs/dd628e4e-ffd7-ed11-aecf-002248932ace/landingpageforms'
data-cached-form-url='https://assets-oce.mkt.dynamics.com/dd628e4e-ffd7-ed11-aecf-002248932ace/digitalassets/forms/xxxfce01-b674-ef11-a671-002248e36298' >
And updated the marketing form record.

update msdynmkt_marketingform
set msdynmkt_standalonehtml = '<div data-form-id=''067fce01-b674-ef11-a671-002248e36298''
 data-form-api-url=''https://public-oce.mkt.dynamics.com/api/v1.0/orgs/dd628e4e-ffd7-ed11-aecf-002248932ace/landingpageforms''
 data-cached-form-url=''https://assets-oce.mkt.dynamics.com/dd628e4e-ffd7-ed11-aecf-002248932ace/digitalassets/forms/067fce01-b674-ef11-a671-002248e36298'' >
 </div><script src = ''https://cxppusa1formui01cdnsa01-endpoint.azureedge.net/oce/FormLoader/FormLoader.bundle.js''></script>'
where msdynmkt_marketingformid = '067fce01-b674-ef11-a671-002248e36298'
After the update we can see submission reflecting back to the correct UAT environment.

The query we used to update all the forms with UAT’s Id
-- replace Dev Org ID with UAT Org ID in all the marketing forms
UPDATE msdynmkt_marketingform
SET msdynmkt_standalonehtml = REPLACE(msdynmkt_standalonehtml, 'dd628e4e-ffd7-ed11-aecf-002248932ace', '2deea9c2-77e5-ed11-a809-0022489424c2')
where msdynmkt_standalonehtml LIKE '%dd628e4e-ffd7-ed11-aecf-002248932ace%'
Hope it helps..