Microsoft has introduced a new feature, through which we can now specify a particular app as a start-up app, that will open up when we launch the Power Apps mobile, instead of waiting for the home page / or selecting it from favorites.
Below we can select the option Open at Startup to specify the Customer Service Hub app as the startup app as an example.

Or we can swipe left to mark an app as “Startup App”
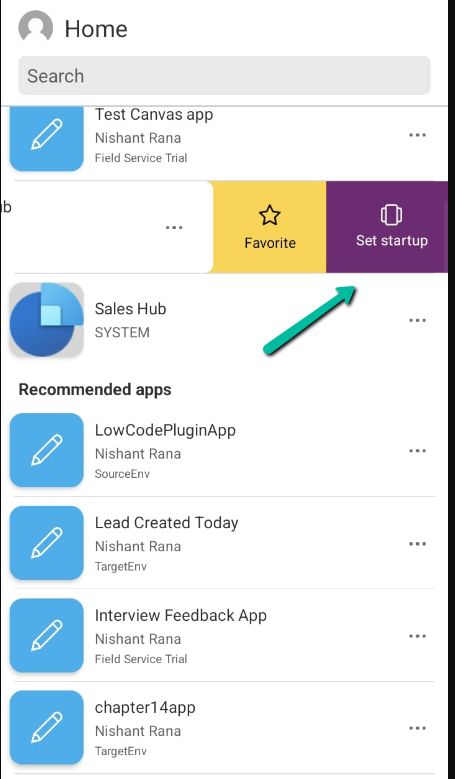
We can see an icon next to the app.
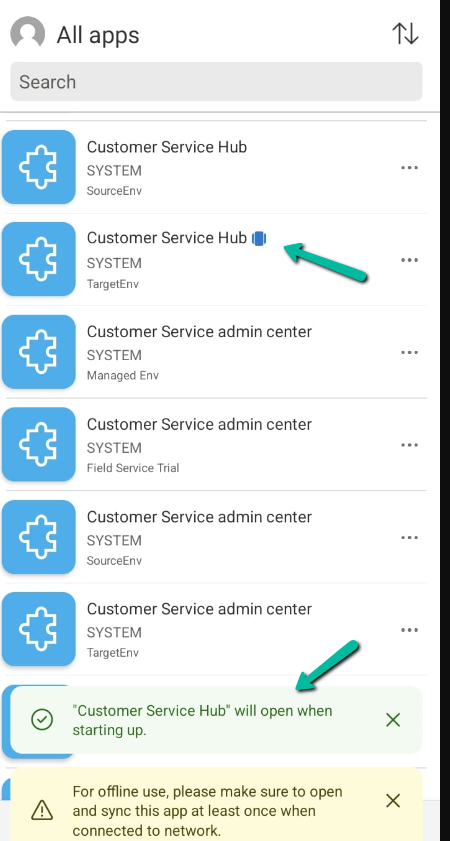
Now launching the Power Apps mobile app will directly open the Customer Service Hub app.

Using the Remove from startup option we can remove it as the startup app

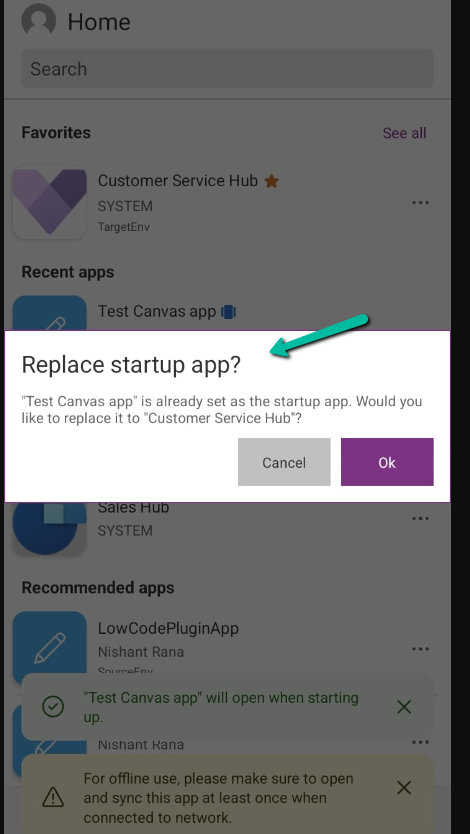
We can only have one app set as a startup app, if we try setting up another app as a startup we get the notification that it will replace the existing app.
Get all the details here
Hope it helps..