Recently we had to delete records for one of our entities, and we tried out different combinations of batch sizes and the number of threads with 25000 records as a sample to find the optimum setting.
Below is our sample SSIS Package (uses KingswaySoft Dynamics 365 Tool Kit), it retrieves 25000 record’s GUID (Contact table / entity) and then distributes it equally among 3 different CRM Destination Component running under different users (CRM Connection Managers).
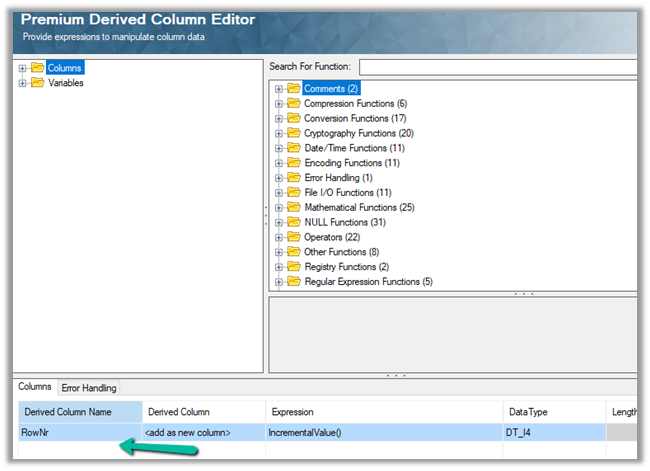
Below is our Premium Derived Column where we have added a new column with expression IncrementValue()
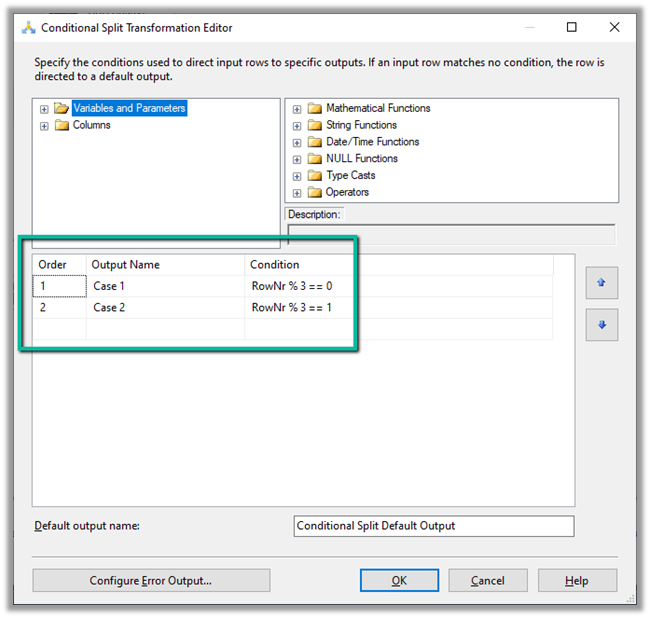
In Conditional Split component, we are then using this new column added to distrubute the output across three CRM Destination Component, each using a different CRM Connection Managers running under different application users.
We first started with 10 batch size and 20 thread followed by different combinations after that à
Below were our findings ->
Records Count
Batch Size
Thread
Parallel Users
Elapsed Time
25000
10
20
3
00:15:58.578
25000
10
15
3
00:14:43.734
25000
10
10
3
00:16:06.438
25000
10
5
3
00:23:52.094
25000
10
15
2
00:18.55.012
25000
10
15
1
00:39:15.828
25000
20
30
1
00:39:12.781
As we can see the Batch size 10 and thread around 15 gave us the best performance. However, evert environment / conditions will would be different so we should try out different combinations before finalizing.
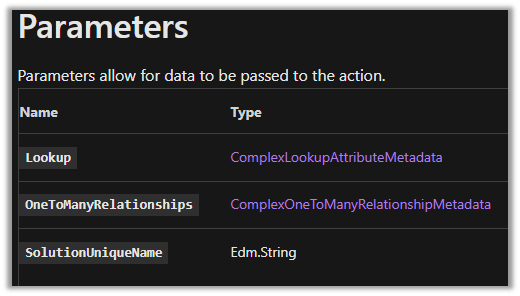
For creating multi-table lookup we already have an XrmToolBox plugin Polymorphic Lookup Creator which we should be using ideally, but in case somebody wants to try it out, the below shared sample code can be referred.
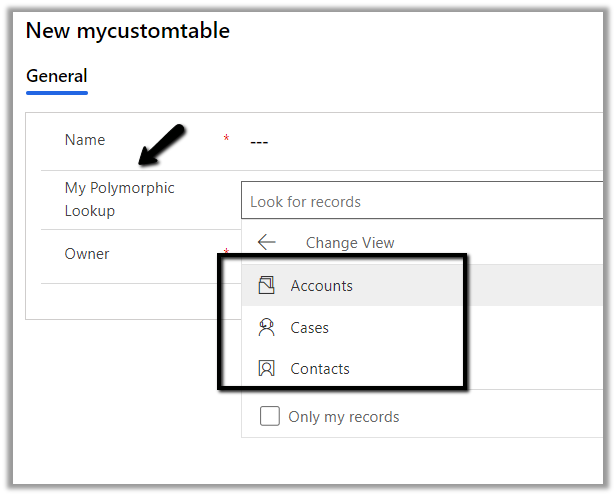
Below is our custom table named mycustomtable to which we’d add a multi-table lookup which references case, contact and account entity.
Below is the sample code to create the polymorphic lookup.
string ConnectionString = "AuthType = OAuth; " +
                  "AppId=51f81489-12ee-4a9e-aaae-a2591f45987d; " +
                  "Username=user@domain.onmicrosoft.com; " +
                  "Password=pwd; " +
                  "RedirectUri=app://58145B91-0C36-4500-8554-080854F2AC97;" +
                  "Url = https://orgname.crm4.dynamics.com/;";


 CrmServiceClient svc = new CrmServiceClient(ConnectionString);

            if (svc.IsReady)
            {
                // Create PolymorphicLookupAttribute
                // with mycustomtable custom entity / table
                // referencing case, contact and account entity
                var varOrgRequest = new OrganizationRequest();

                // specify the request name
                varOrgRequest.RequestName = "CreatePolymorphicLookupAttribute";

                // specify lookup attribute details
                varOrgRequest.Parameters["Lookup"] = new LookupAttributeMetadata()
                {
                    SchemaName = "crf82_mypolymorphiclookup",
                    DisplayName = new Label("My Polymorphic Lookup", 1033)
                };

                // referencing entity is our custom entity named my custom table
                // referenced entity is incident
                var oneToManyRelation1 = new OneToManyRelationshipMetadata();
                oneToManyRelation1.ReferencingEntity = "crf82_mycustomtable";
                oneToManyRelation1.ReferencedEntity = "incident";
                oneToManyRelation1.SchemaName = "crf82_mycustomtable_crf82_incident";

                // referencing entity is our custom entity named my custom table
                // referenced entity is contact
                var oneToManyRelation2 = new OneToManyRelationshipMetadata();
                oneToManyRelation2.ReferencingEntity = "crf82_mycustomtable";
                oneToManyRelation2.ReferencedEntity = "contact";
                oneToManyRelation2.SchemaName = "crf82_mycustomtable_crf82_contact";


                // referencing entity is our custom entity named my custom table
                // referenced entity is account
                var oneToManyRelation3 = new OneToManyRelationshipMetadata();
                oneToManyRelation3.ReferencingEntity = "crf82_mycustomtable";
                oneToManyRelation3.ReferencedEntity = "account";
                oneToManyRelation3.SchemaName = "crf82_mycustomtable_crf82_account";

                // populate OneToManyRelationships parameter of CreatePolymorphicLookupAttribute request
                varOrgRequest.Parameters["OneToManyRelationships"] = new OneToManyRelationshipMetadata[]
                {
                    oneToManyRelation1, oneToManyRelation2, oneToManyRelation3
                };

                // specify the existing solution name
                varOrgRequest.Parameters["SolutionUniqueName"] = "MySolution";

                var response = svc.Execute(varOrgRequest);
            }
The lookup à
Sample code to add a new relationship to an existing lookup.
                var createOneToManyRelationshipRequest = new CreateOneToManyRequest();

                // referencing entity is our custom entity named mycustomtable
                // referenced entity is contact - add the entity to be added
                var oneToManyRelationAdd = new OneToManyRelationshipMetadata();
                oneToManyRelationAdd.ReferencingEntity = "crf82_mycustomtable";
                oneToManyRelationAdd.ReferencedEntity = "contact";
                oneToManyRelationAdd.SchemaName = "crf82_mycustomtable_crf82_contact";

                createOneToManyRelationshipRequest.OneToManyRelationship = oneToManyRelationAdd;


                // specify lookup attribute details to which new relationship is to be added
                createOneToManyRelationshipRequest.Parameters["Lookup"] = new LookupAttributeMetadata()
                {
                    SchemaName = "crf82_mypolymorphiclookup",
                    DisplayName = new Label("My Polymorphic Lookup", 1033)
                };


                var createOneToManyRelationshipResponse = svc.Execute(createOneToManyRelationshipRequest);
Sample code to remove relationship from an existing lookup.
 var deleteRelationShip = new DeleteRelationshipRequest();
                // specify schema name of the relationship
                deleteRelationShip.Name = "crf82_mycustomtable_crf82_contact1";
                svc.Execute(deleteRelationShip);
Sample code to delete the lookup
  // User delete attribute request
                DeleteAttributeRequest varDelRequest = new DeleteAttributeRequest();

                // specify the entity name
                varDelRequest.EntityLogicalName = "crf82_mycustomtable";

                // specify the schema name of the entity
                varDelRequest.LogicalName = "crf82_mymultitablelookup";
                svc.Execute(varDelRequest);
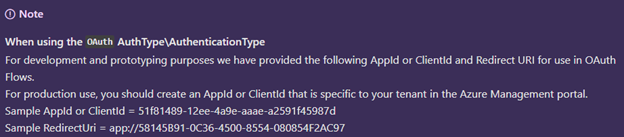
At times we want to quickly try out few things (PoC) by writing a console application or running an SSIS package etc., there we can use the sample ClientId and RedirectUri provided by Microsoft, instead of registering the application in Azure AD / creating Application User
Sample AppId or ClientId = 51f81489-12ee-4a9e-aaae-a2591f45987d
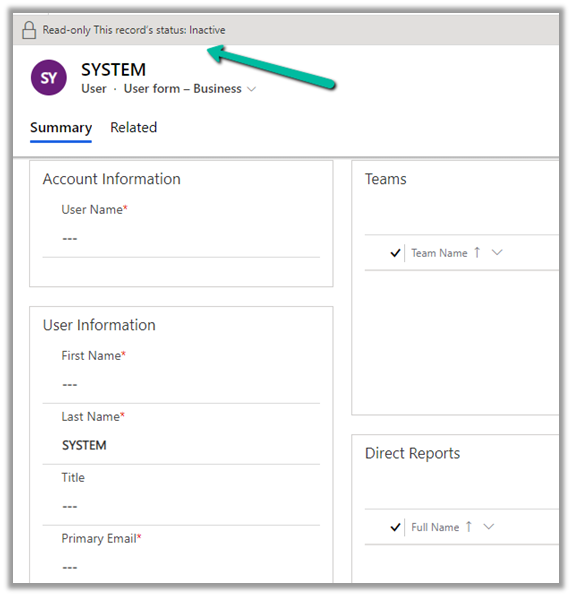
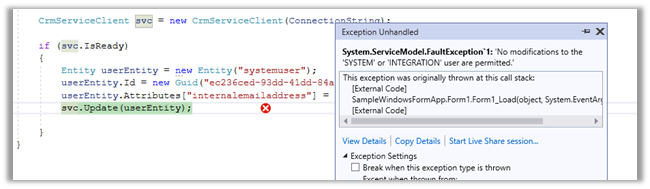
Usually, we use SYSTEM user to specify the plugin’s execution context for business requirements that needs elevation of privileges.
And also we can neither update it from the user interface nor it is recommended to update the SYSTEM user.
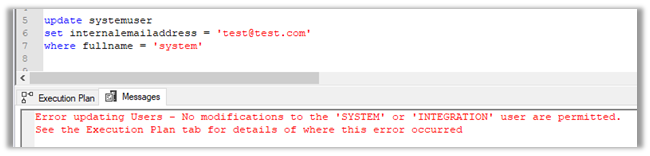
If we try to update the user through code, we’d get the below error message
Error updating Users – No modifications to the ‘SYSTEM’ or ‘INTEGRATION’ user are permitted. [See the Execution Plan tab for details of where this error occurred]
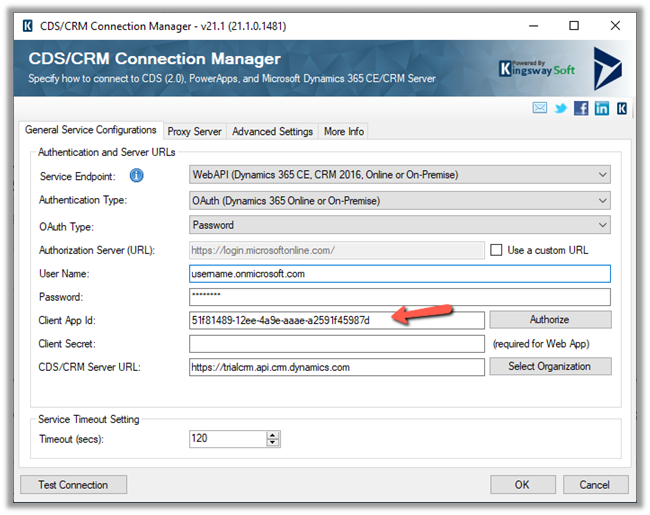
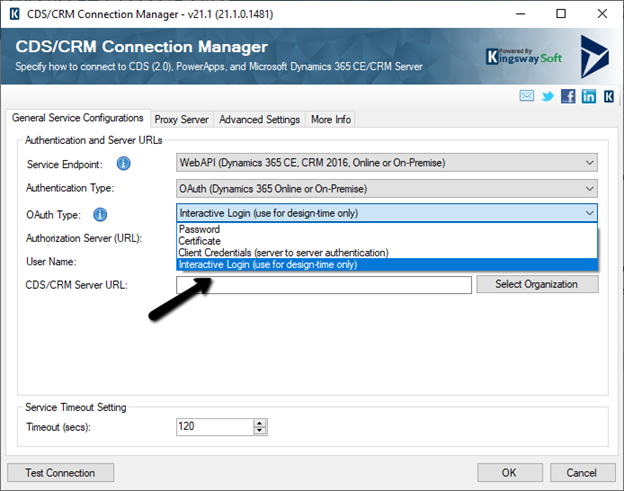
With the new release, the CDS/CRM connection manager adds a new Interactive Login option in the CDS/CRM Connection Manager for Authentication Type as OAuth.
Interactive login allows the user to log in using his account details (to establish the connection with CRM) without the need for registering the application in the Azure Active Directory.
This is supposed to be used only during design time.
Enter User Name and the CDS/CRM URL and click on Test Connection.
The login screen pops up, where we can enter the credentials and sign in.
We’d receive the Test connection succeeded message.
Now we are ready to use the CRM Connection.
Now when we will run the package from within the Visual Studio (SSDT), it will again ask for entering the credentials.
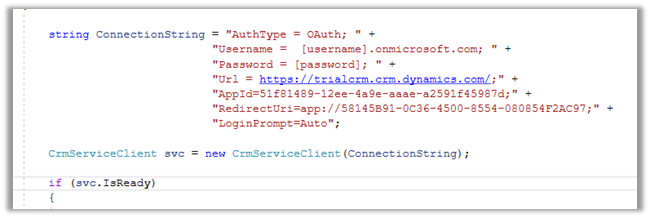
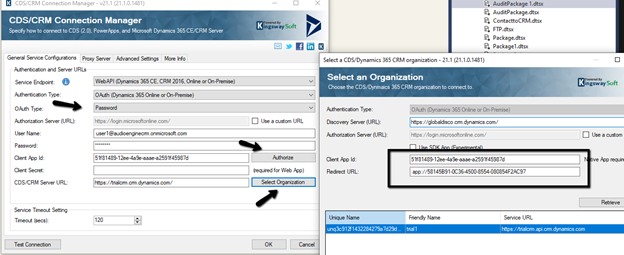
The other option is to use the OAuth Type Password along with default Client App ID and Redirect URL
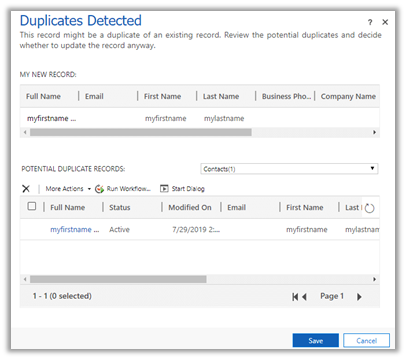
and now uses the new interface replacing the legacy web client.
The legacy experience –
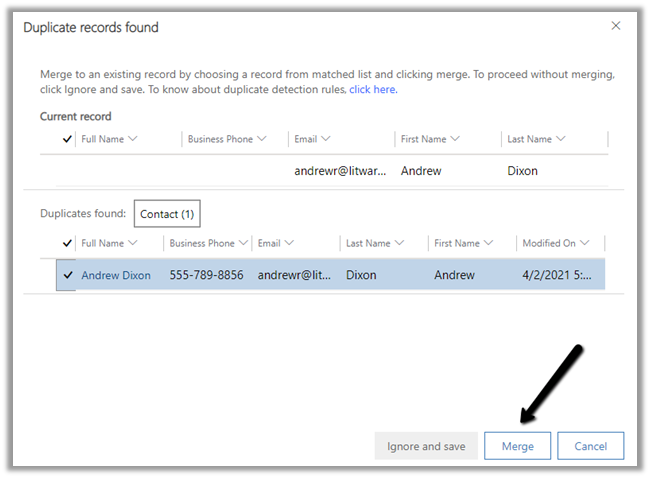
The enhanced experience – now with merge option.
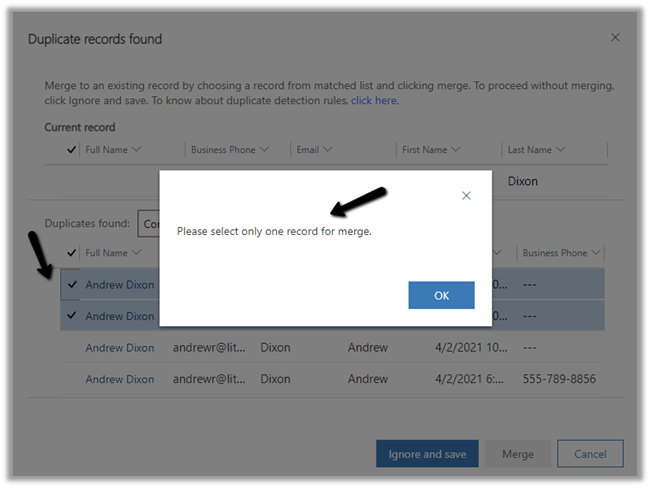
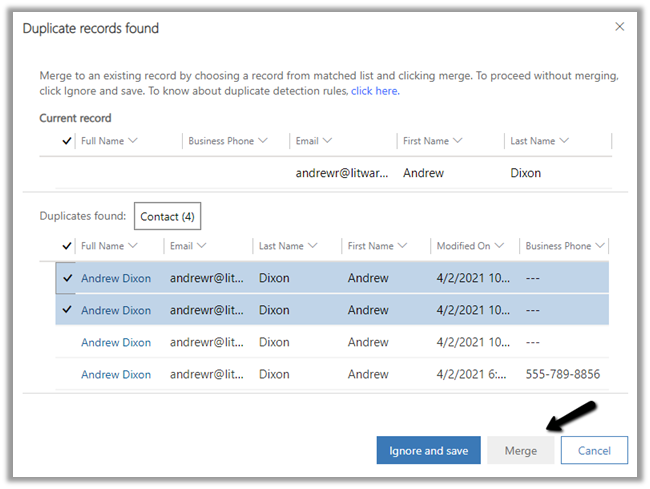
Merge allows to select up to 2 records to merge. Selecting more than 2 records to merge gives the below error.
And Merge button will also get disabled.
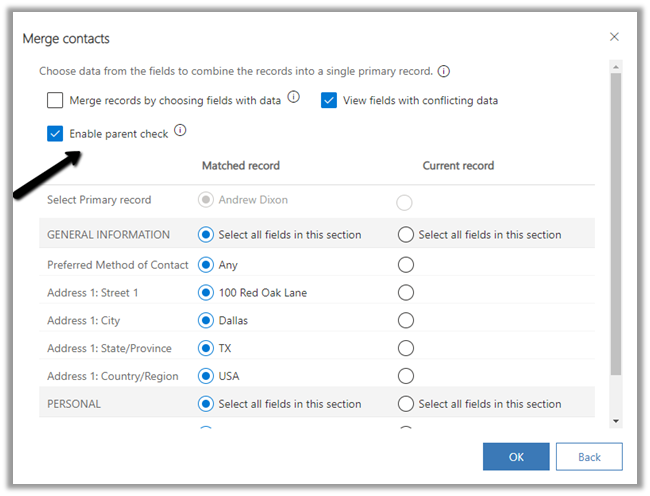
Below are the different options available while performing Merge.
Merge records by choosing fields with data.
View fields with conflicting data.
Enable Parent check
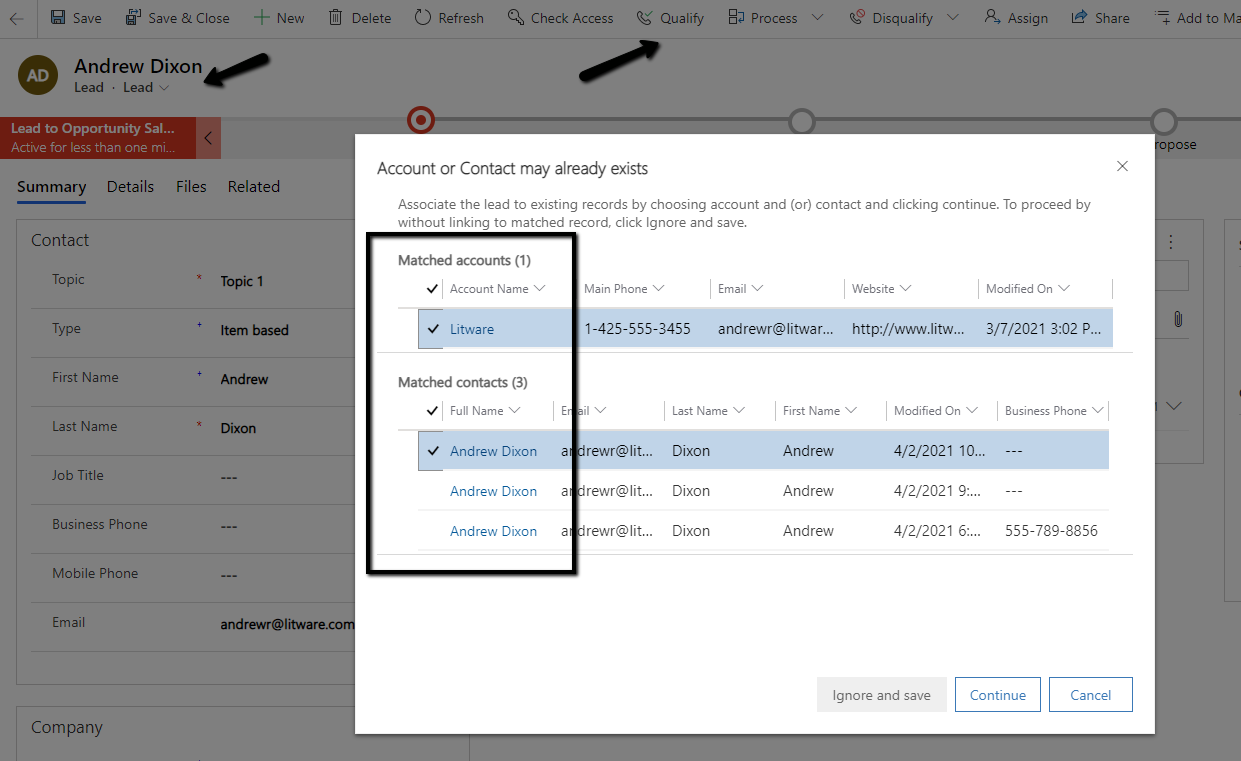
In case of qualify we are able to select 2 matching records for merge
The merge process is always asynchronous. The merge also merges any child records.
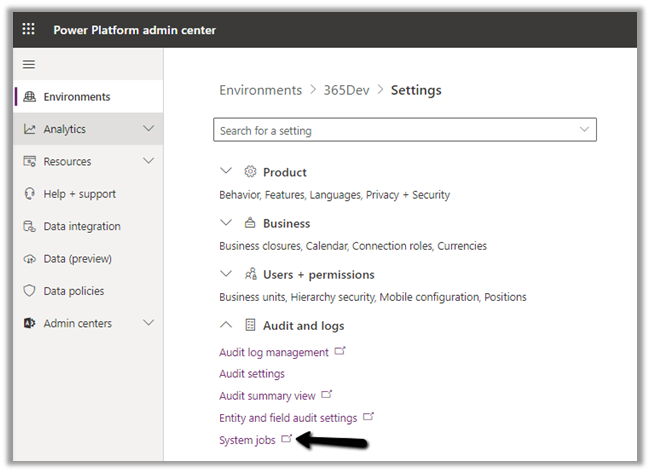
As per Microsoft Docs, to find the progress of the cascading operation triggered as part of the merge, navigate to System Jobs in Audit and Logs settings within the Admin portal.
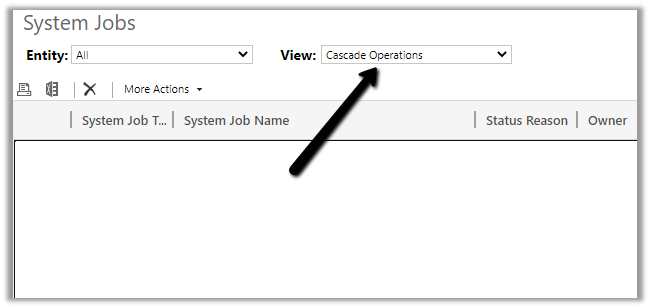
Filter by Cascade Operations
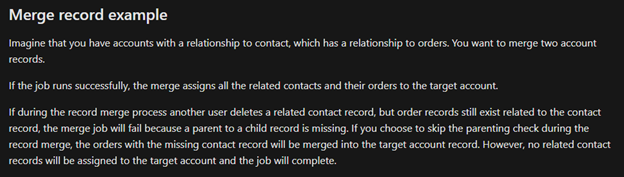
The Enable parent check option, if checked, will result in failure during merge operations if records are deleted while the system job is running. We need to uncheck this option if we want merge to continue even if a record is deleted while the Merge job is running.
There could be other reasons because of which merge operations could fail.