Below are a few key points and links for quick reference –
Core Marketing License –
Dynamics 365 Marketing – For organizations without any other Dynamics 365 Application.
Dynamics 365 Marketing Attach – For organizations with qualifying Dynamics 365 Applications (minimum 10 users of the following apps – Dynamics 365 Sales, Customer Service, Field Service, Supply Chain Management, Finance or Commerce)
Additional Marketing Licenses – that can be purchased apart from the core license –
Production License – Used for the production environment. Fully functional and includes both solutions and services. It is licensed per tenant and includes a default capacity allotment of 10K Marketing contacts (contact, lead, account, customer insights B2C profile, etc) and 100K marketing interactions (email, SMS, push notifications) per month.
Non-Production License – Used for the test environment to try out new features or customizations. Fully functional and includes both solutions and services but has strict quotas and cannot be used to run production campaigns.
Solution Only License – Used for development or test environment for customizations, importing or exporting solutions, non-functional testing, other development, etc. Only includes solutions and entities and doesn’t include any services. Included with Paid Licenses. To convert a solution-only environment to production or non-production, we will need to purchase either production or non-production license and do the configuration using the marketing setup wizard.
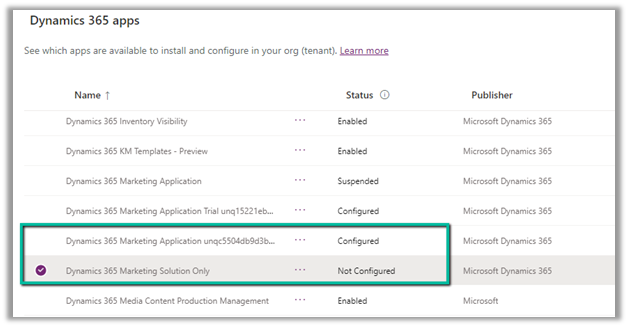
Another Tenant example –

A configured Marketing Application app will have the unique id of the organization / env. appended to it, on which it has been configured as shown above.
Dynamics 365 Marketing Application App: This is a fully functional Dynamics 365 Marketing application, including both solutions and services. Mainly for production but can be used for another environment for testing the functionalities.
Dynamics 365 Marketing Solution Only App: This application includes all the marketing solutions/entities but doesn’t include any services. It can be installed on as many test or development environments as needed for no additional charge.
Other points –
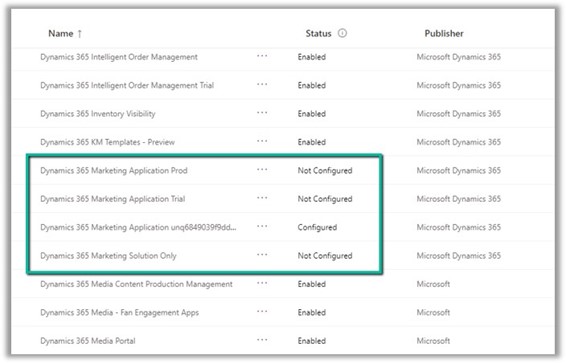
We can only have one Dynamics 365 marketing app per environment i.e. each Dynamics 365 Marketing App can be tied to only one environment.
To add more marketing apps to the tenant, we need to purchase an additional license. On purchase of the license, we can see an unconfigured Dynamics 365 Marketing app added in the tenant.
We can have n number of marketing apps available in the tenant, which can be assigned to any of the Dynamics 365 environments not being used for marketing earlier.
We can also set up a marketing trial – https://learn.microsoft.com/en-us/dynamics365/marketing/trial-signup which can be later purchased – https://learn.microsoft.com/en-us/dynamics365/marketing/direct-purchase#purchase-a-license-within-a-trial
Adding Marketing capacities – We can buy additional marketing contacts and interactions as below

Dynamics 365 Marketing Pricing – https://dynamics.microsoft.com/en-us/marketing/pricing/
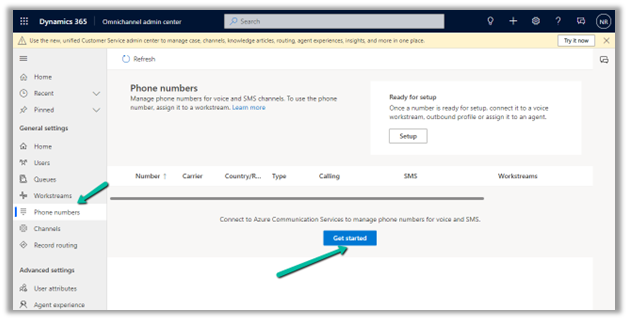
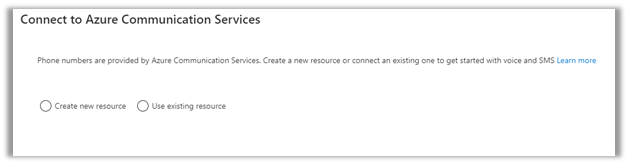
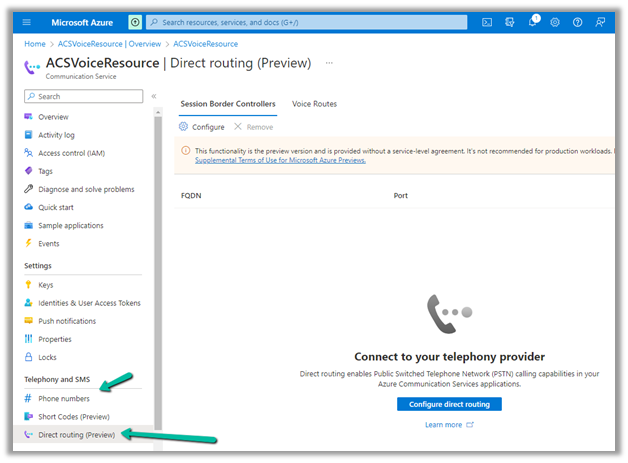
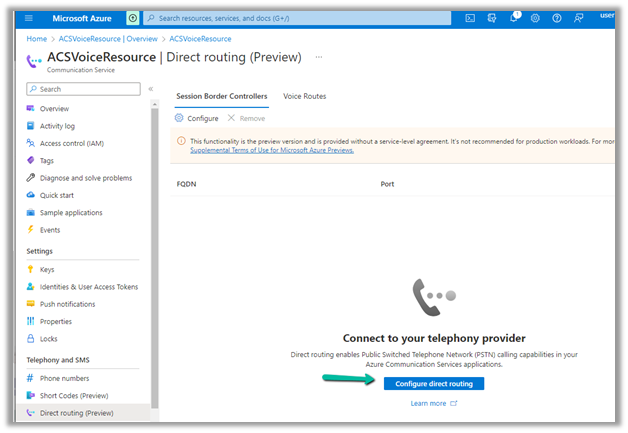
Step by step – Configure Dynamics 365 Marketing in a Dataverse Environment
Hope it helps..