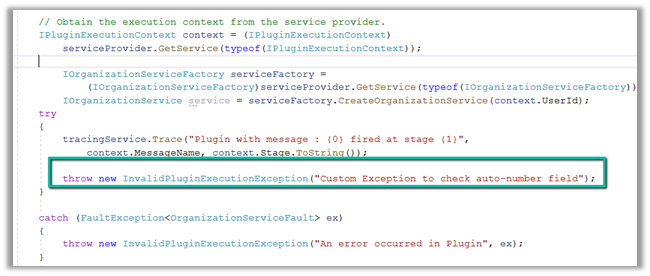
Let us see Run As option of When a row is added, modified or deleted trigger in action, to understand its behavior.
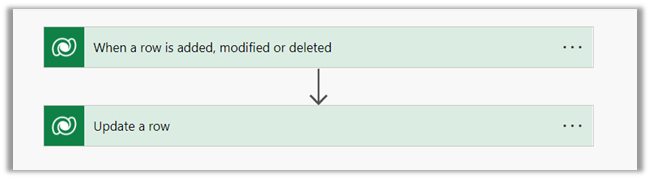
Below is our example flow – it triggers when a field on the case is updated and then it updates the lead record.
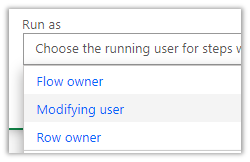
Here we have not specified any value for Run as for When a row is added, modified or deleted trigger step.

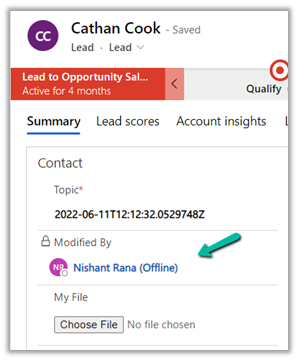
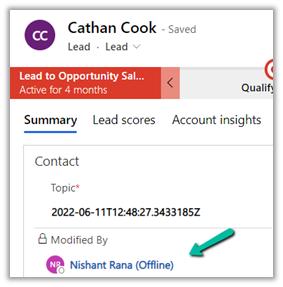
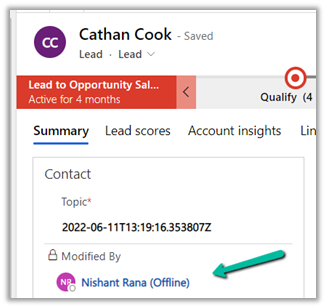
On updating a case record using the User 1 account who is also the Flow Owner, we can see the modified user as User 1 for the lead record.
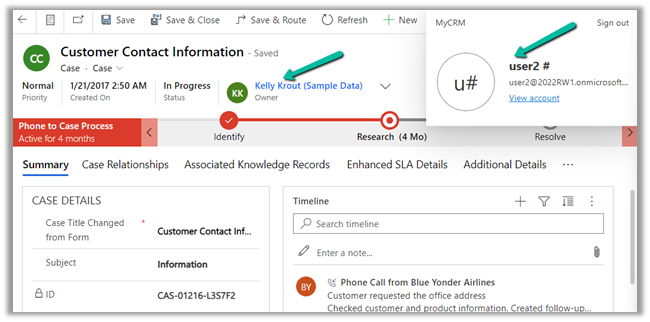
Let us trigger the flow this time through User 2.
This time also modified by for the lead record is User 1, even though the Modifying User and Row Owner were different.
So if Runs as is not specified, the Microsoft Dataverse actions are performed using the context of the Flow Owner.
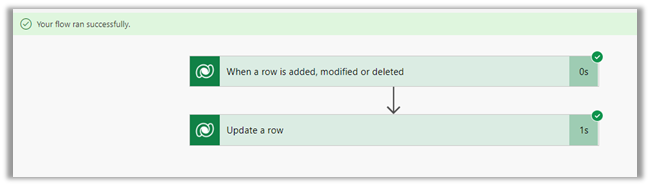
To test it further let us remove the update rights of User 1, who is the flow owner, and trigger the flow again using User 2.
As expected the flow run fails this time.
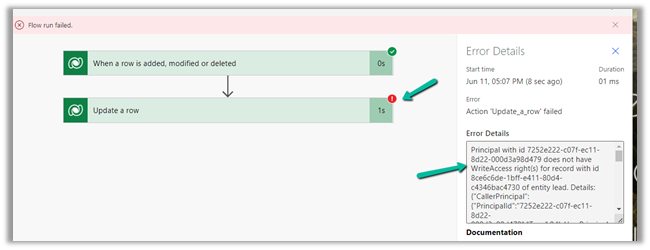
“Principal with id 7252e222-c07f-ec11-8d22-000d3a98d479 does not have WriteAccess right(s) for record with id 8ce6c6de-1bff-e411-80d4-c4346bac4730 of entity lead“
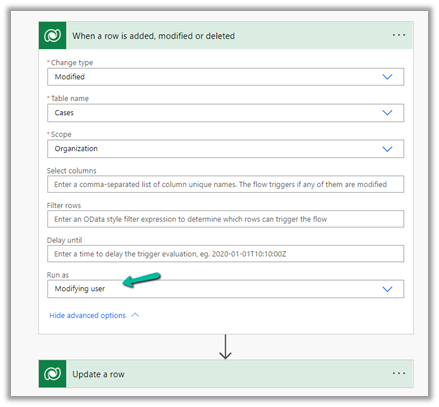
Not let us specify Run as = Modifying User this time, and trigger the flow using User 2 again. (we have restored the rights of User 1)
This time also we can see the modified by the user as User 1 (Nishant Rana) the flow owner.
For it to run under the context of the user set as “Run As” in When a row is added, modified or deleted trigger, we need to select the Use invoker’s connection setting for the Update a row step.

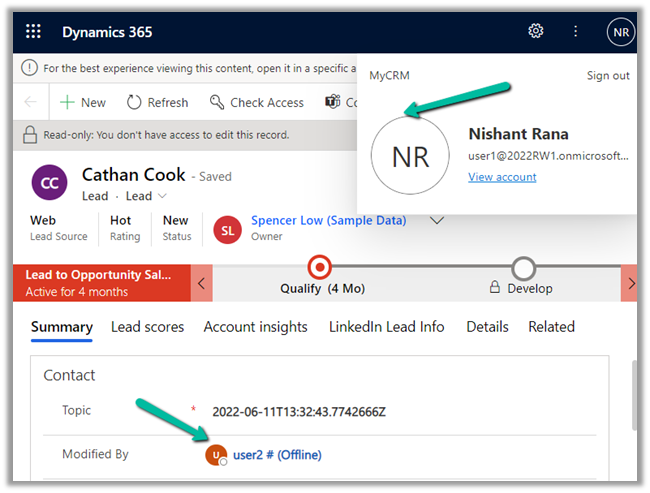
Let us trigger the flow again through User 2, remember we have Run As set as modifying user.
Interestingly it still shows User 1 as the Modified By user.

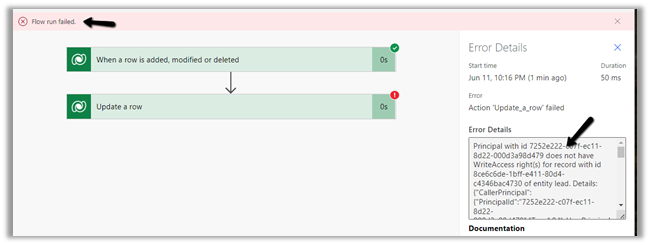
Let us again remove the write rights of User 1 and trigger the flow using User 2.
This time flow is successful. If you remember it failed last time when we removed the User 1 rights and the Run as was default Flow Owner.
And this time, it shows modified by as User 2. (as we can see for user 1, the record is read-only as we have the rights removed)
This time it worked because had set Run As as Modifying User and specified Use invoker’s connection for the subsequent step i.e. update a row in this case, so it used User 2’s context which modified the case record to trigger the flow, which in turn updated the lead record using user 2’s context.

Now it will fail if User 1 updates the case record and triggers the flow because it will try to update the lead record using its context i.e. Run as = modified by
We will observe a similar behavior with Run As = Row Owner.
In case the owner of the record is a team, instead of a user, then it falls back to the flow owner option.

Get all the details here – https://docs.microsoft.com/en-us/power-automate/dataverse/create-update-delete-trigger#user-impersonation-using-run-as
Also check – https://d365demystified.com/2020/10/30/run-as-context-in-cds-current-environment-flow-trigger-power-automate/
Hope it helps..