Queue Item details change in Dynamics 365 – 2020 Release Wave 2


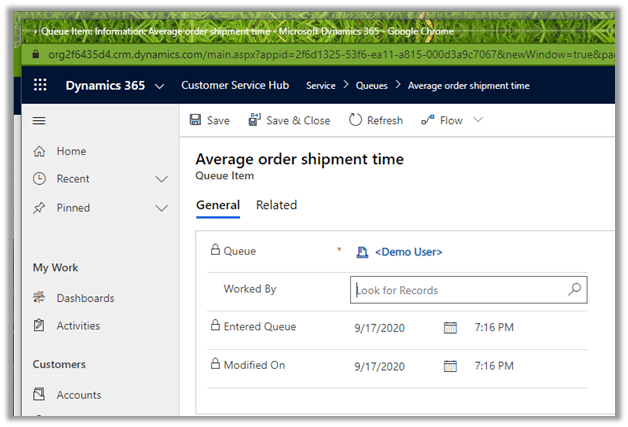
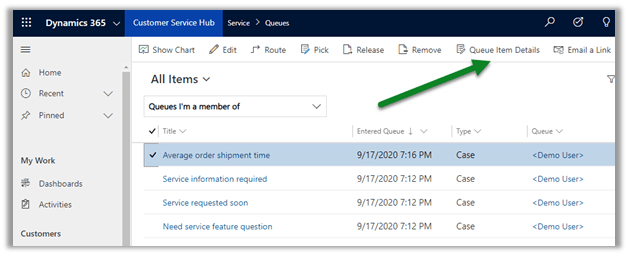
Queue Item details for a Queue Item earlier used to open in a new window.

Thus losing the context

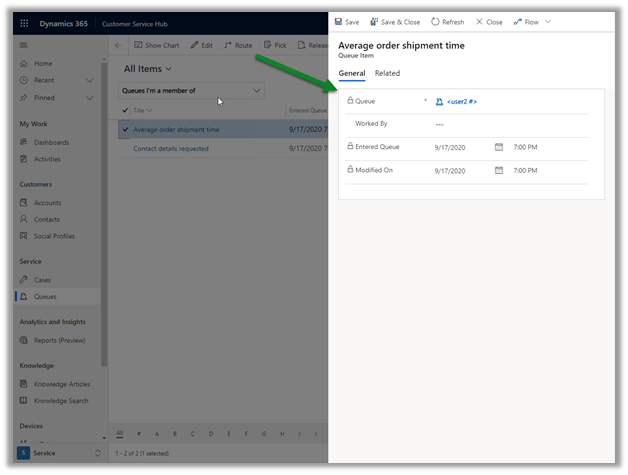
2020 Release Wave 2 provides an immersive experience for the agents, as the queue item details open in the context of the parent window.

Small but nice update for the agents.

Check other blog posts on Release 2020 Wave 2

Refer to below articles to understand more on Queues

MB2-714 (Microsoft Dynamics CRM 2016 Customer Service) : Queue Management

https://www.itaintboring.com/dynamics-crm/working-with-queues-in-dynamics/

https://carldesouza.com/releasing-queue-item-behavior-in-dynamics-365/

Hope it helps..

Using SQL Server Management Studio to deploy and run SSIS package in Azure Data Factory


In our previous post, we created the SSIS Catalog (SSISDB) in Azure and deployed the SSIS package using SSDT.

Supported version for SSDT – SQL Server Data Tools to deploy SSIS package to Azure.

  • For Visual Studio 2017, version 15.3 or later.
  • For Visual Studio 2015, version 17.2 or later.

In this post, we’d use SSMS to deploy the packages in Azure.

Connect to the Azure SQL Server

Expand the Integration Services Catalog, right-click the Projects folder, and select the Deploy Project option.

Enter the source details in the deployment wizard

Select the option SSIS in Azure Data Factory

Select the existing or create a new folder for the project

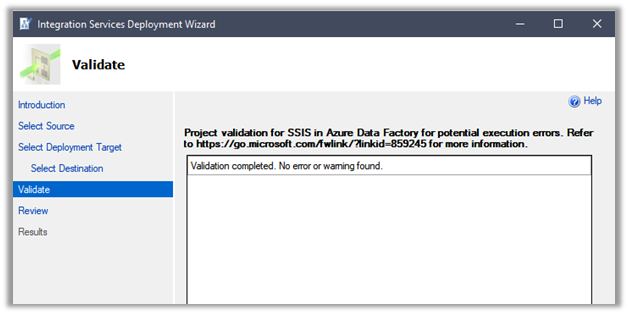
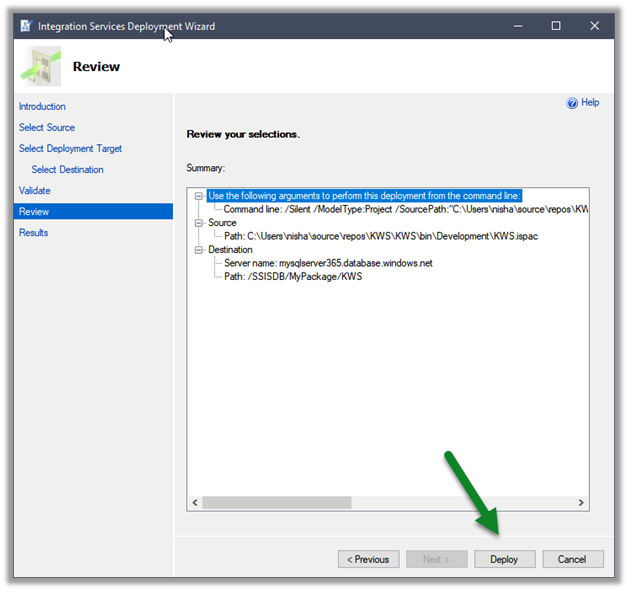
Click on Deploy after successful validation and review.

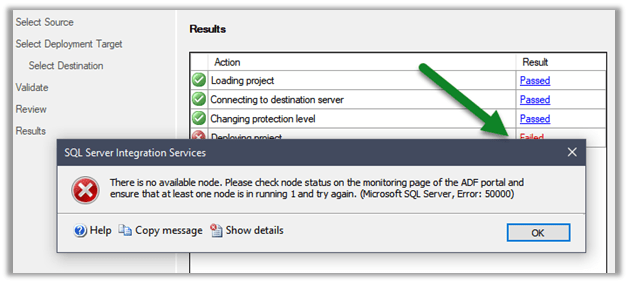
Here in our case, it failed with the below message

There is no available node. Please check node status on the monitoring page of the ADF portal and ensure that at least one node is in running 1 and try again. (Microsoft SQL Server, Error: 50000)

The error is because the Azure-SSIS Integration runtime is in the status Stopped.

navigate to your Azure Data Factory instance, and start the runtime.

After around 10 minutes or so the service would be up and running.

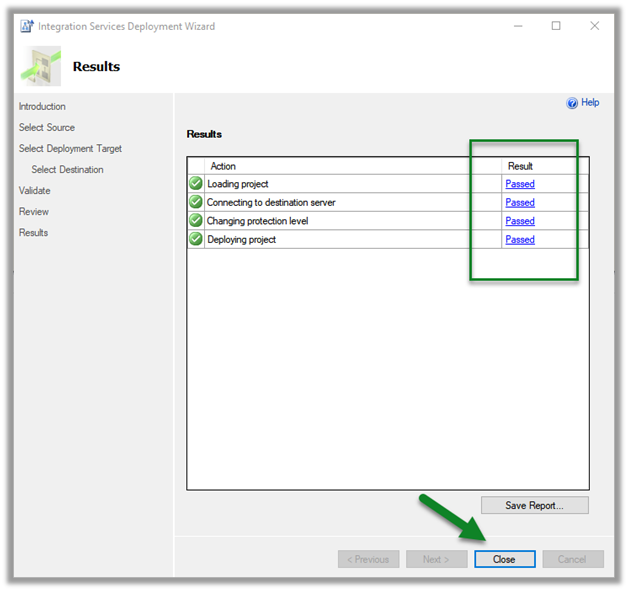
This time deployment is successful.

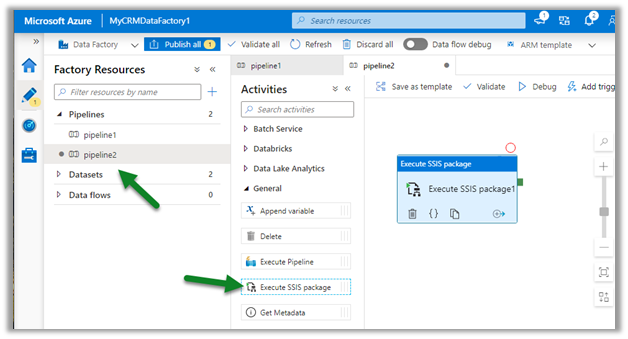
We can see the packages available within the pipeline.

Hope it helps..

How to – Deploy and run SSIS package in Azure Data Factory


Before the SSIS package can be deployed to Azure Data Factory we need to provision Azure-SQL Server Integration Service (SSIS) runtime (IR) in Azure Data Factory.

In the previous posts, we had created an Azure data factory instance had used Azure SQL Database as the source.

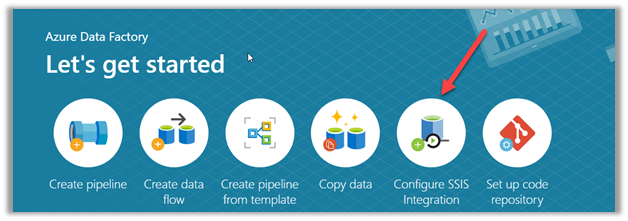
Within Azure Data Factory in the Let’s get started page, select Configure SSIS Integration.

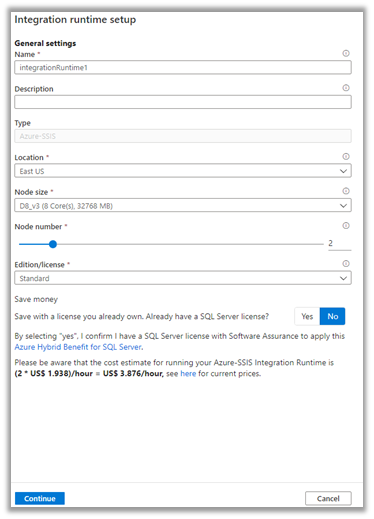
Specify the appropriate values to integration runtime.

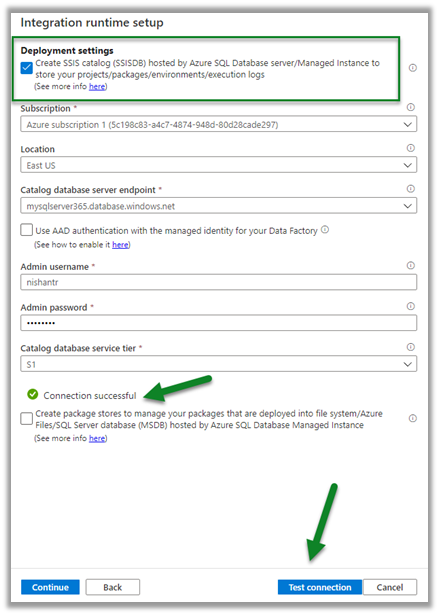
Select Create SSIS Catalog option to deploy packages in SSISDB, provide Azure SQL Database server endpoint, and the admin credentials to connect.

Test the connection.

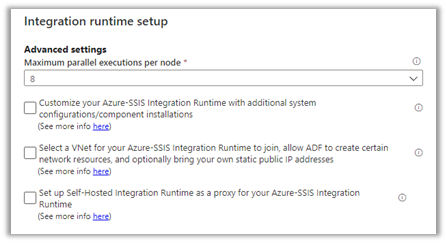
Specify advanced settings as appropriate.

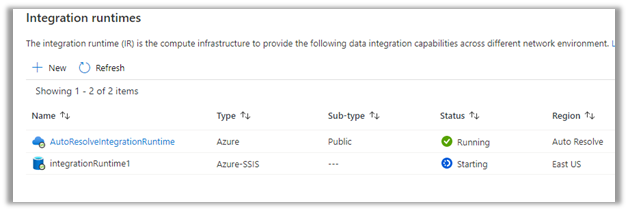
This starts the creation of Azure-SSIS Integration Runtime.

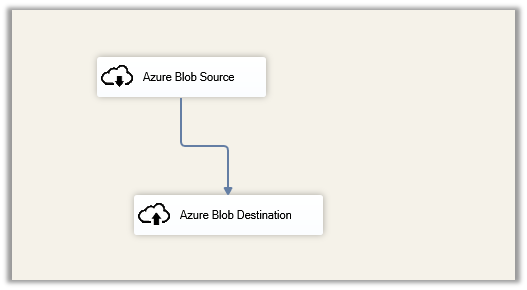
Meanwhile below is our SSIS package that we would be deploying to Azure Data Factory.

It extracts a text file named contacts.txt from the blob source and loads it into destination blog storage.

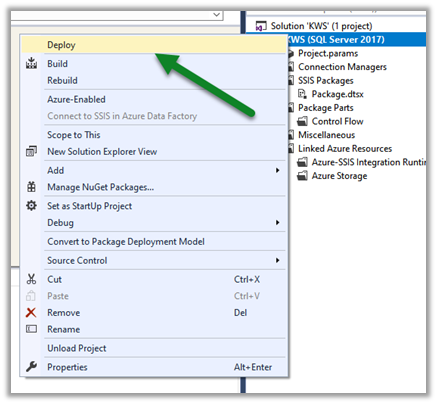
Right-click the project  and select Deploy.

(Deploying individual package is not supported right now)

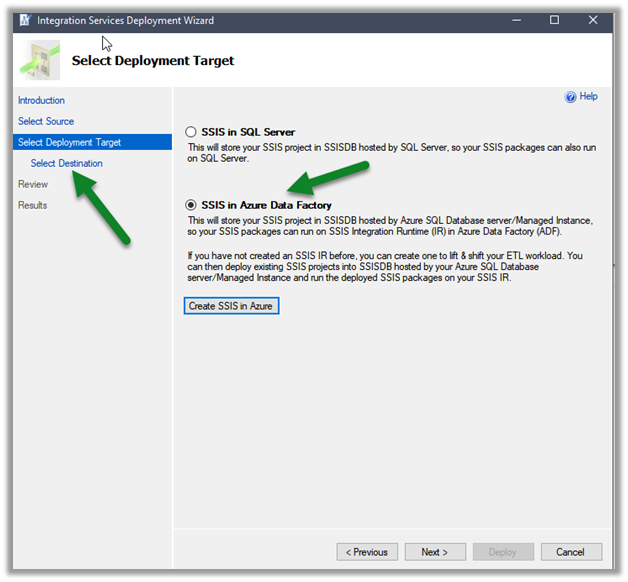
Select SSIS in Azure Data Factory.

Specify Server name and credentials and connect.

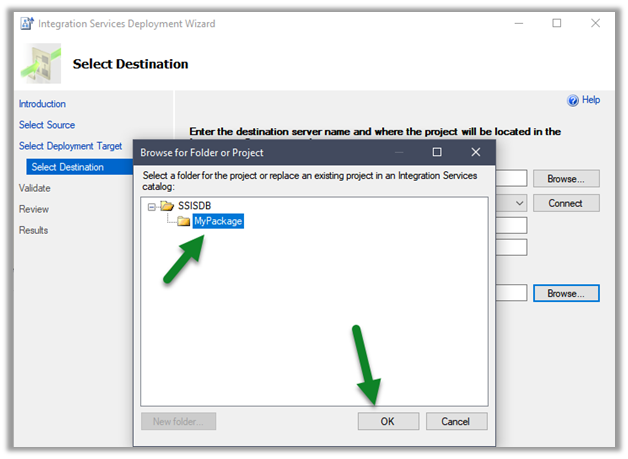
Click on Browse.

Create a new folder or select an existing folder and click on Ok

Once the validation is successful, click on Deploy and start the deployment.

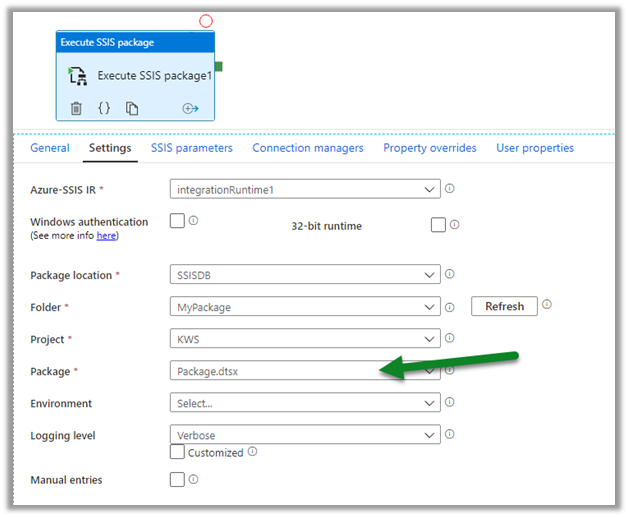
After successful deployment, create a new pipeline in the Azure Data Factory, and drag the Execute SSIS Package activity

Connect to the package deployed.

Click on debug to trigger and test the pipeline.

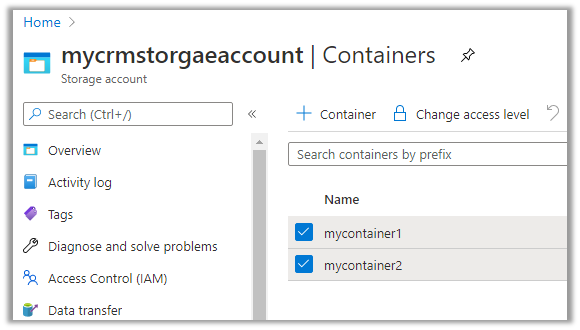
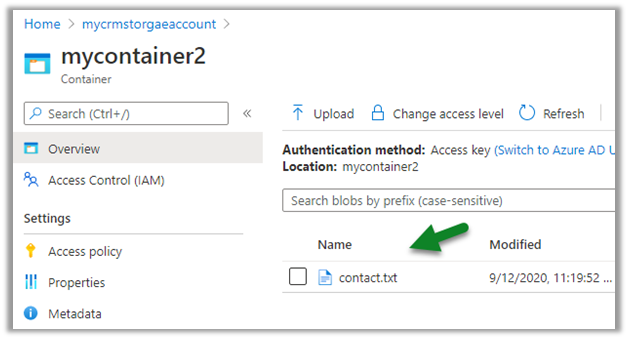
On the successful run, we can see the contact.txt file extracted from mycontainer1 and loaded to mycontainer2.

Hope it helps..

Advertisements

How to – Use Azure Data Factory V2 to load data into Dynamics 365


Let us take a simple example where we will set up an Azure Data Factory instance and use Copy data activity to move data from the Azure SQL database to Dynamics 365.

Login to Azure Portal.

https://portal.azure.com

Search for Data factories

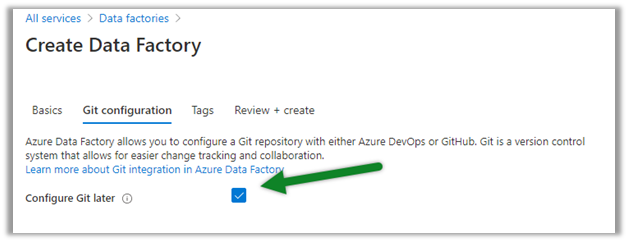
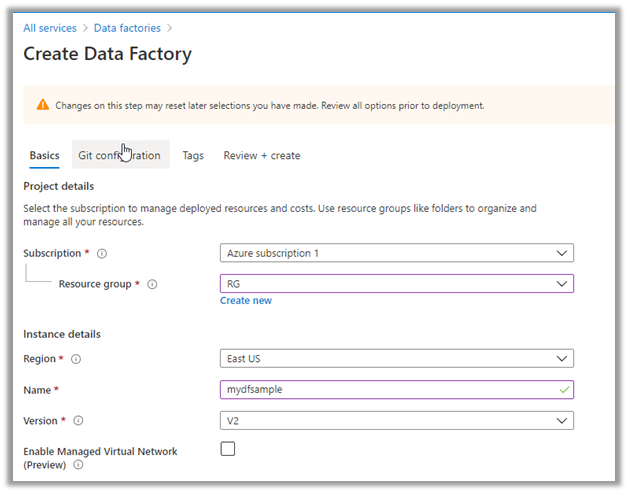
Create a new data factory instance
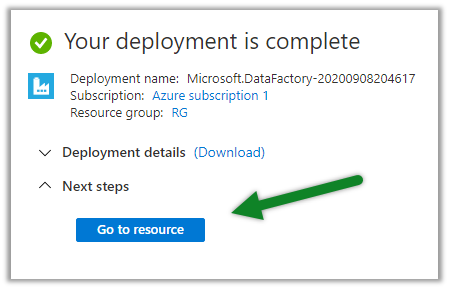
Once the deployment is successful, click on Go to resource
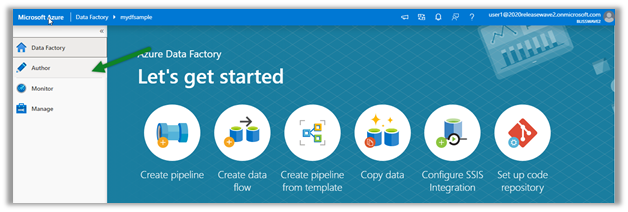
Inside the data factory click on Author & Monitor

Click on Author in the left navigation
Create a new Pipeline

And drag the Copy data activity to it

Go to the Source tab, and create a new dataset.

Below is our Azure SQL database with contacts table which will be our source here.


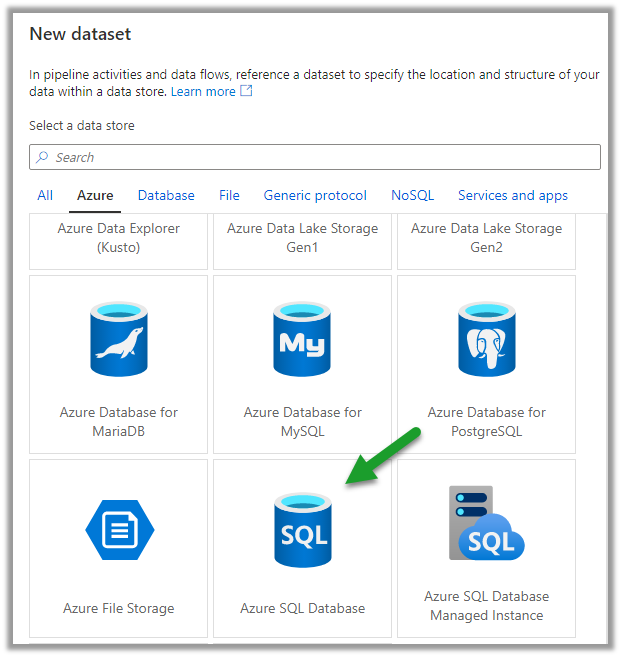
Select Azure SQL Database as the source dataset.

Create a new linked service to specify the connection properties.


Specify the details to connect to the Azure SQL Database.


We have selected the contacts table here.


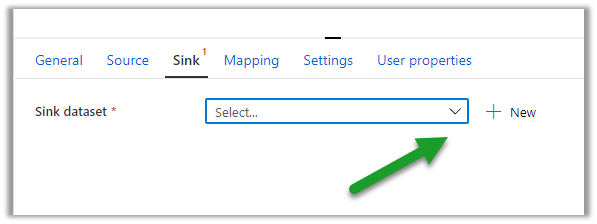
Similarly, let us define a new dataset for Sink which will connect to our Dynamics 365 Instance.
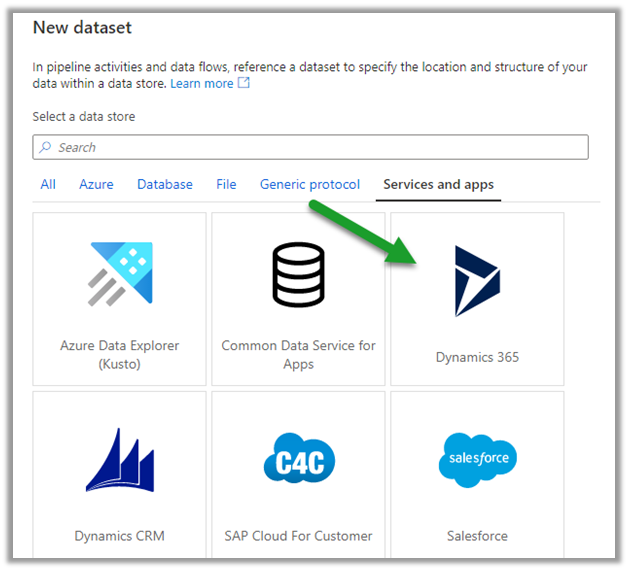

Select the Dynamics data set and specify the linked service.

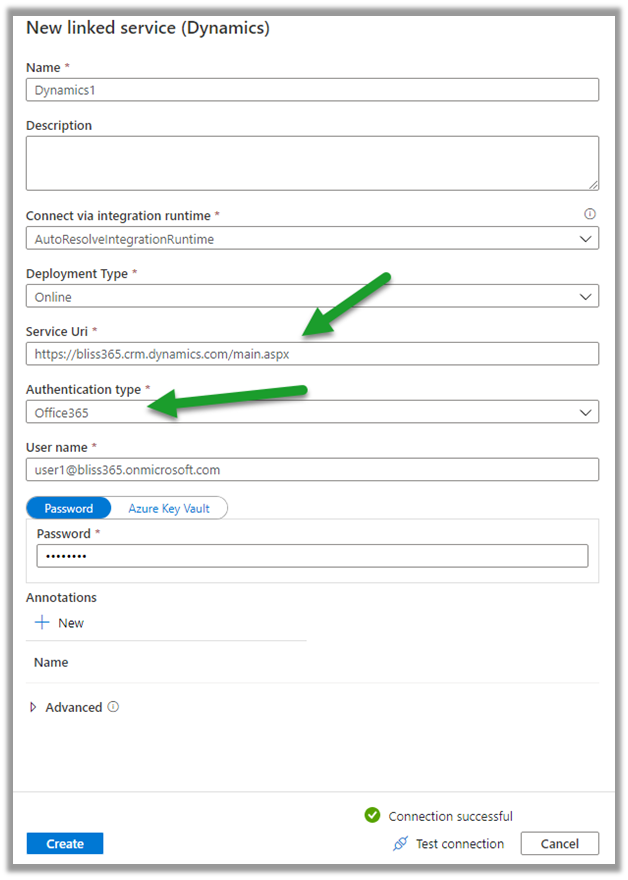
Specify the details of the Dynamics 365 instance to connect to.
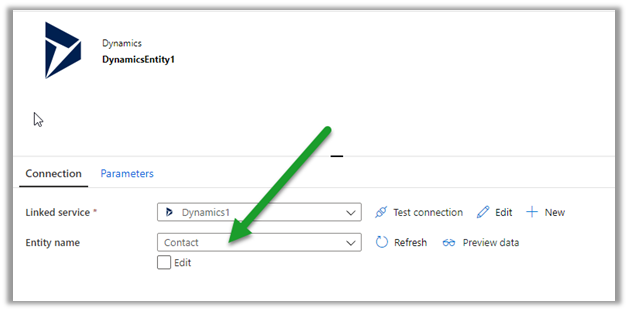
We have selected contact entity as the destination.
Within the Mapping tab, we can specify the fields to be mapped.
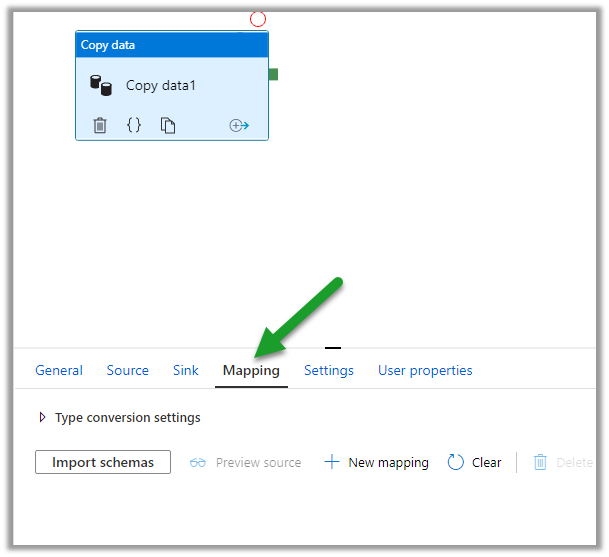
Below is how we have specified the mapping.

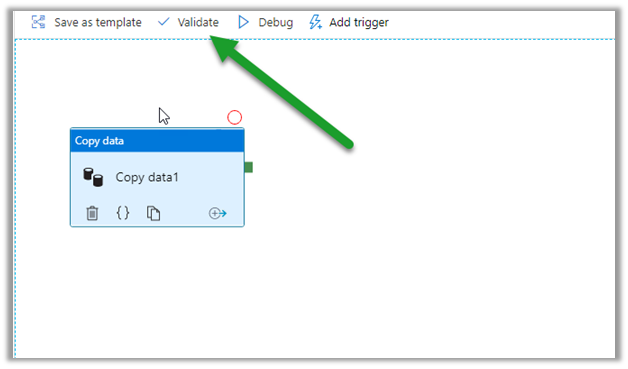
Click on Validate and after successful validation, click on Debug to run the pipeline.
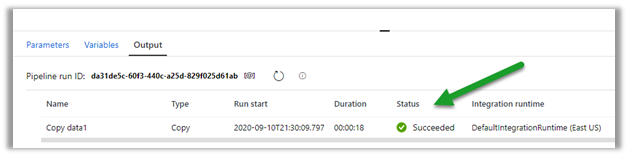
Within the Output window, we can see the status.

After the successful run, we can see the contact records created inside Dynamics 365.

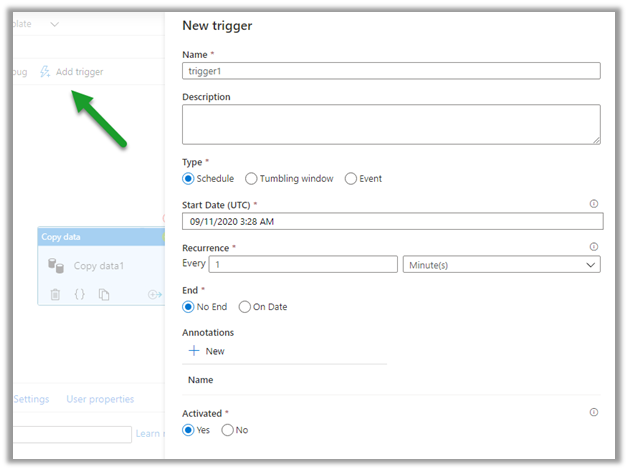
We can specify a trigger for the pipeline as shown below.
Publish All will publish the changes to the data factory.

Hope it helps..

Advertisements

Use Power BI to analyze the CDS data in Azure Data Lake Storage Gen2


In the previous post, we saw how to export CDS data to Azure Data Lake Storage Gen2.

Here we’d see how to write Power BI reports using that data.

Open the Power BI Desktop, and click on Get data

Select Azure > Azure Data Lake Gen 2 and click on connect.

To get the container URL,

Log in to the Azure portal and navigate to the container and click on Properties and copy the URL.

Replace the blob part in the copied URL with dfs

Below is the format of the URL.

https://accountname.dfs.core.windows.net/containername/

replace the account name and the container name.

In case you get the below error

Refer –

https://nishantrana.me/2020/09/08/error-we-dont-support-the-option-hierarchicalnavigation-parameter-name-hierarchicalnavigation-when-trying-to-load-table-in-power-bi-desktop-using-azure-data-lake-storage-gen-2-cdm-fo/

Select the CDM Folder View (beta)

Expand the CDM folder and select the entity.

In case if you get the below error

Refer

https://nishantrana.me/2020/09/08/error-we-dont-support-the-option-hierarchicalnavigation-parameter-name-hierarchicalnavigation-when-trying-to-load-table-in-power-bi-desktop-using-azure-data-lake-storage-gen-2-cdm-fo/

Once connected we can then create our Power BI report as shown below.

Check the below posts for creating a Power BI report with Dynamics 365 data as the source

https://nishantrana.me/2018/11/24/power-bi-and-microsoft-dynamics-365/

Posts on Azure Data Lake

Hope it helps..

Advertisements

How to – Use Approval/Reject Type – Everyone must approve – Power Automate and Dynamics 365


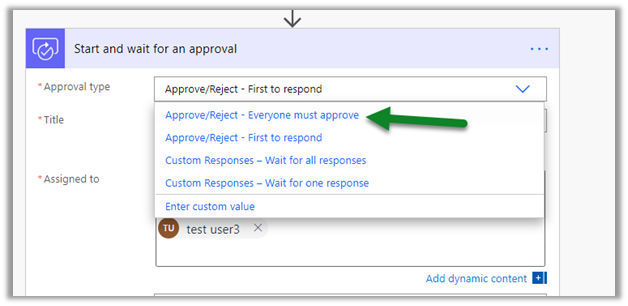
Let us update our previous flow from approval/reject type – First to respond to Everyone must approve type.

Check other posts on Approvals – https://nishantrana.me/2020/08/31/approvals-power-automate-dynamics-365/

For First to respond, either Approval or rejection by any of the approver completes the request.

In case of Everyone must approve, if any of the approvers rejects the request is considered rejected, for the request to be considered approved all the approver needs to approve it.

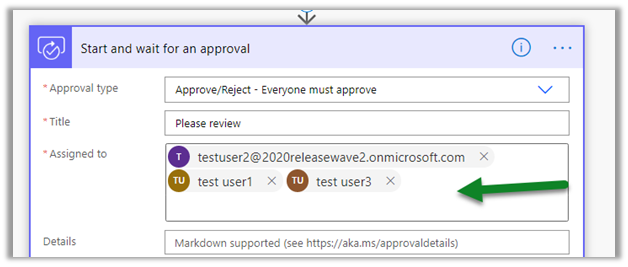
We have updated the approval type from first to respond to

everyone must approve.

In the case of Approve / Reject – Everyone must approve –

  • All the assigned users must approve, for the request to be approved.
  • Any of the assigned users if rejects, the request will be considered rejected.

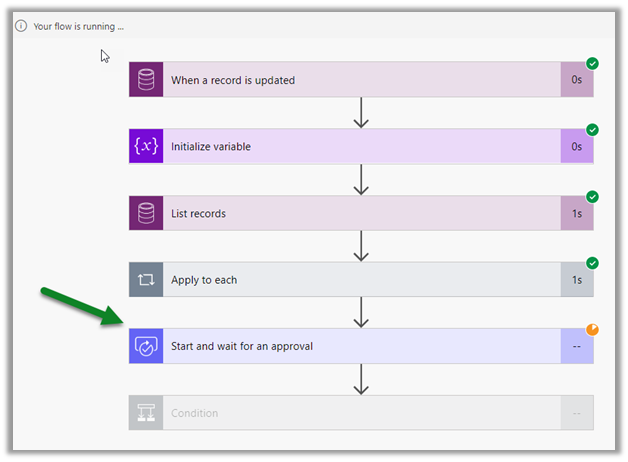
Let us run the flow and test it.

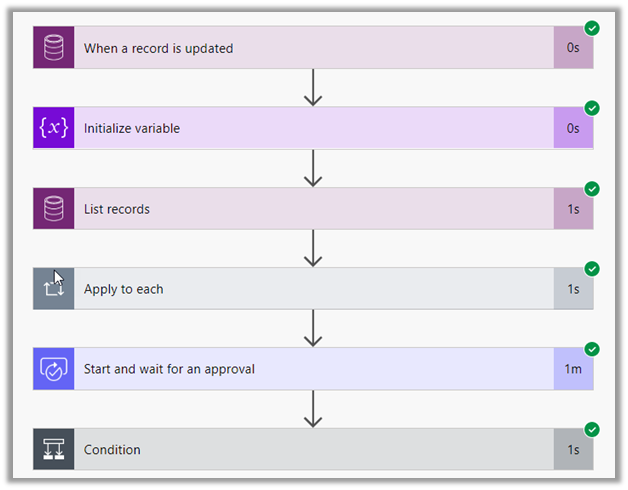
We can see our flow waiting for approvals

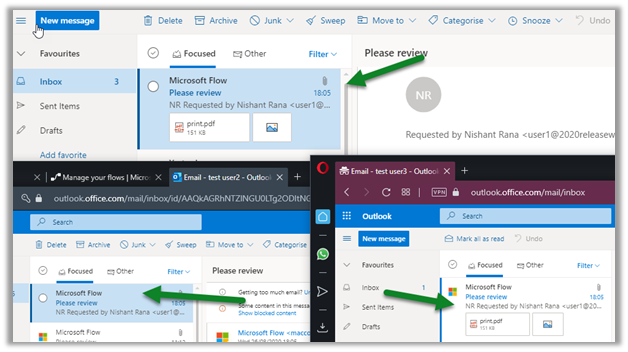
We can see all the 3 approvers getting the approval request

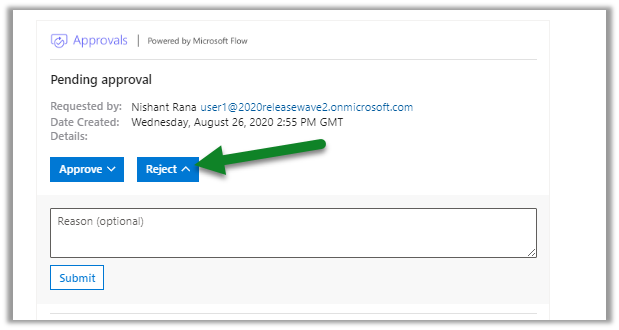
Let us Reject it for one of the approvers.

It completes the flow without waiting for responses from other approvers.

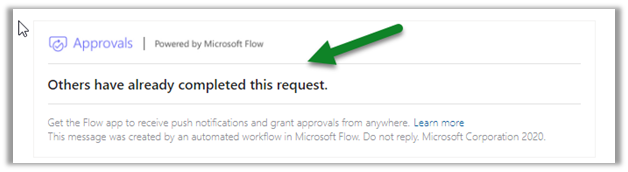
The other approvers will see the below message.

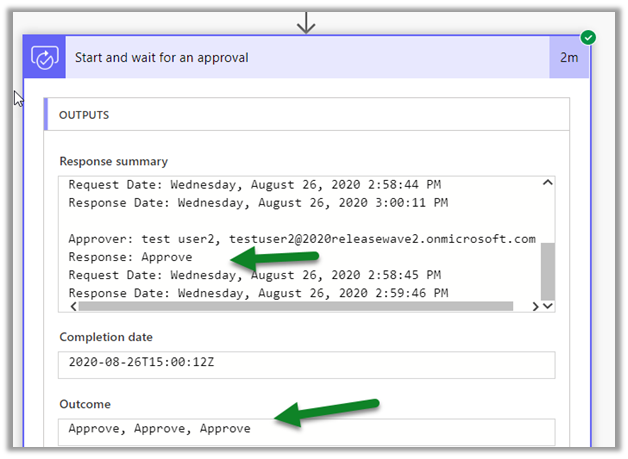
Similarly, as expected, it will wait for all the approvers to approve before moving to the next action.

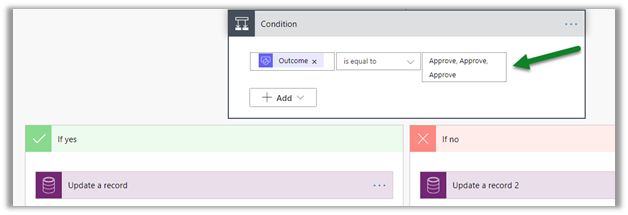
We need to make sure we specify the same value as shown in the Outputs above in the condition action.

Hope it helps..
Advertisements