Manager approval – Power Automate and Dynamics 365


Continuing our previous basic  approval flow, here we’d update it to send an approval request to the manager of the user.

Check other posts on Approvals – https://nishantrana.me/2020/08/31/approvals-power-automate-dynamics-365/

First, we’d use the Get manager V2 action to get the user’s manager.

Let us first update the profiles of the users to add their manager.

Sign in to the Azure portal as an administrator and select Users inside Azure Active Directory.

Here we have specified test user 2 as manager of user 1.

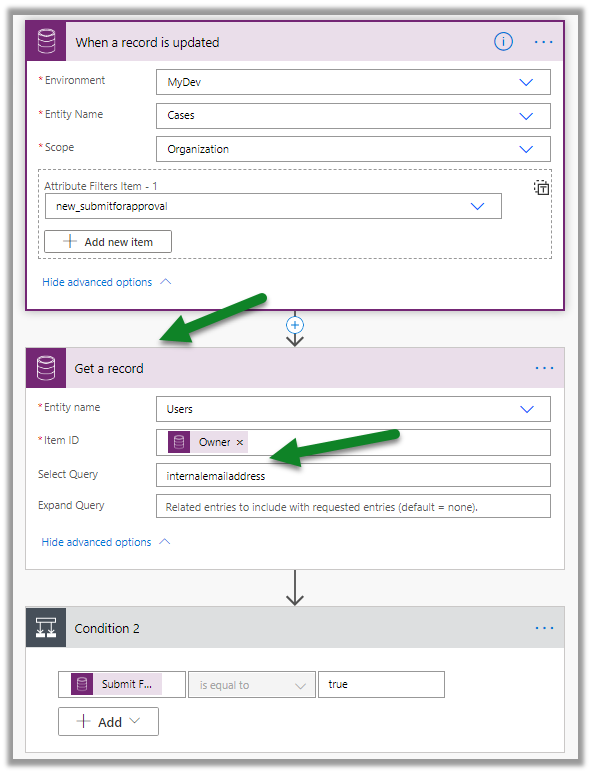
Let us now update our flow, add a Get a record action to get the email of the owner of the case record which will be used later to get the user’s manager.

Here in Item Id, we are passing Owner, it could well be created by or modified by as well.

In the select query, we are specifying the internal email address i.e. primary email address of the user.
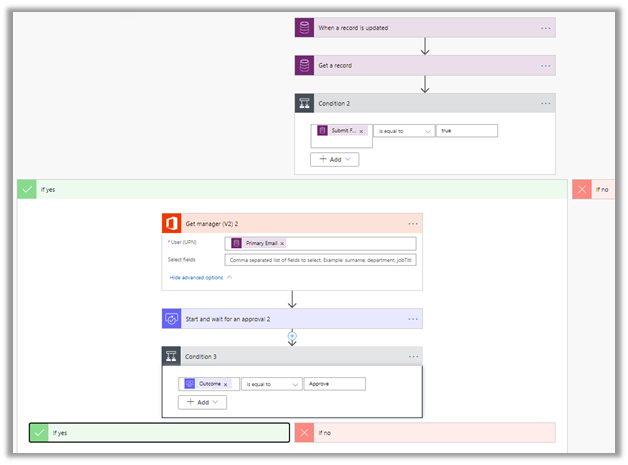
Now for the If Yes step, we have used the Get manager action, and have specified the primary email address fetched earlier.
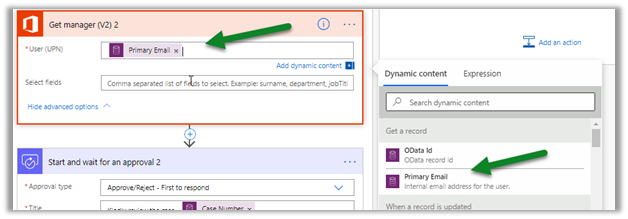
The Mail returned by the Get manager action is used for Assigned to field inside Start and wait for an approval action.

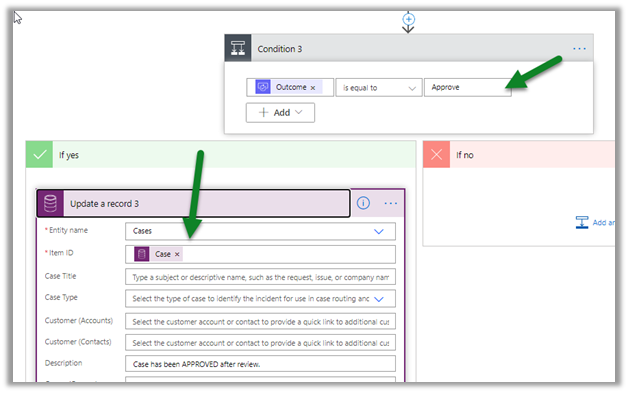
Based on the outcome of approval we are then updating the case record.
This is how the flow looks like
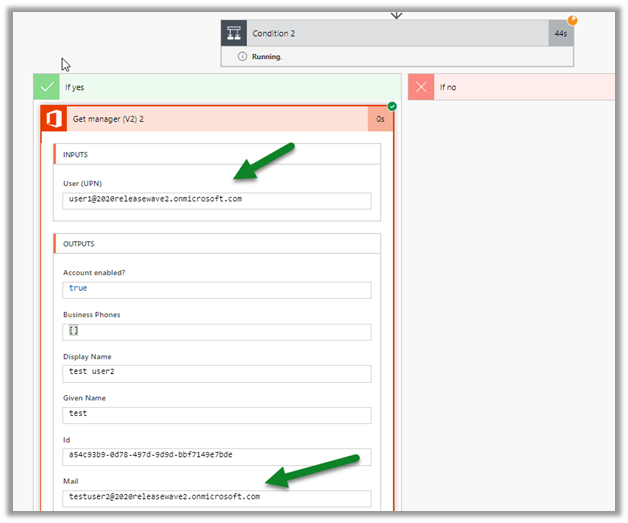
On running the flow, we can see the user’s manager email address in the output for the Get manager V2 action.
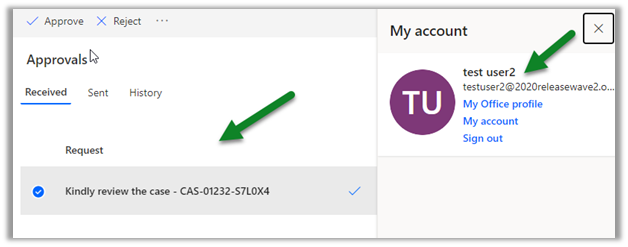
We can see the manager of the user 1 getting the approval request.
Now instead of the manager specified in User’s profile in Office 365 (Azure AD), let us update the flow to send an approval request to the User’s manager (system user) inside Dynamics 365.
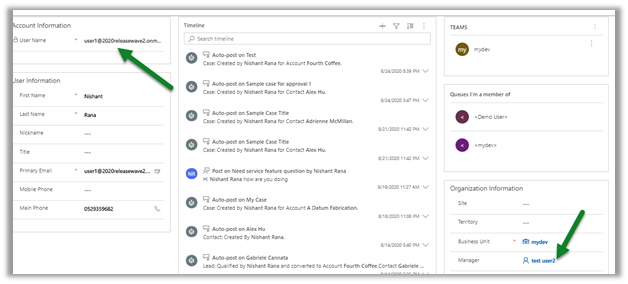
Let us update the flow,

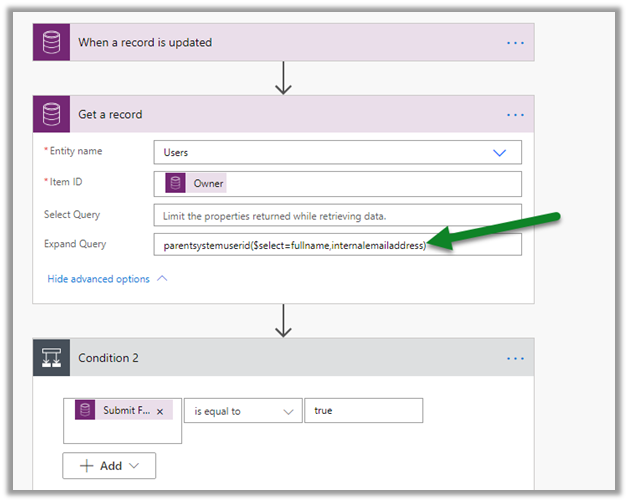
in the Get a record action instead of fetching the primary email address (internal email address) of the owner, we’d use Expand Query to fetch the primary email address of the Manager specified in the Owner (system user) record.

Create the query with link entity in our favorite FetchXML Builder and click on Power Automate Parameters
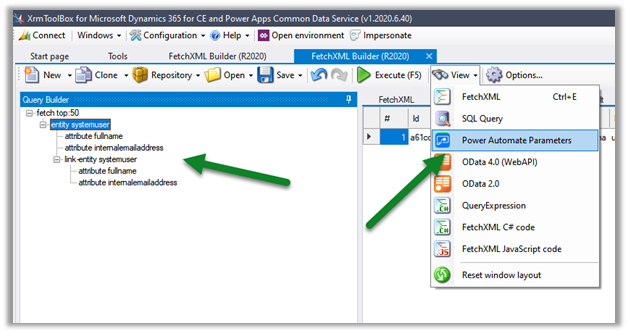
Copy the Expand query.
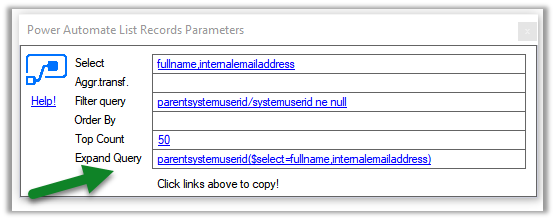
Paste it in the Expand Query of the Get a record action.
Remove Get manager (V2) 2 action from If Yes step, as we already have the email address of the manager now and specify the same in the Start and wait for an approval action’s Assigned to field.
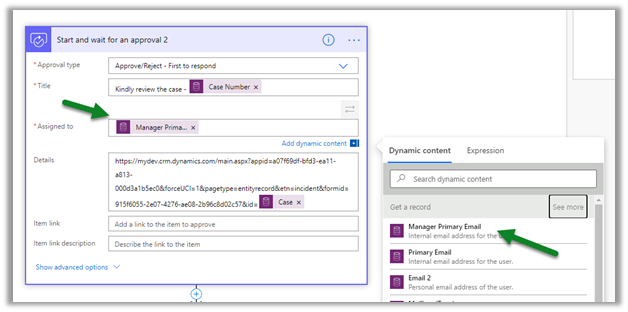
Save and Test the flow.
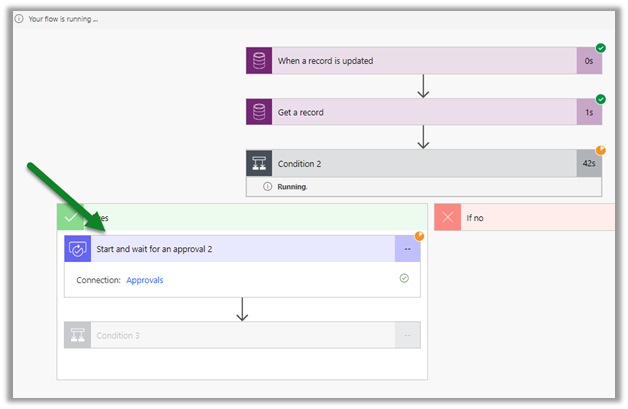
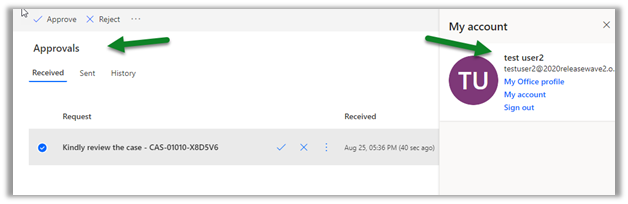
Here we can see the test user 2 who is the manager of user 1 receiving the approval request.
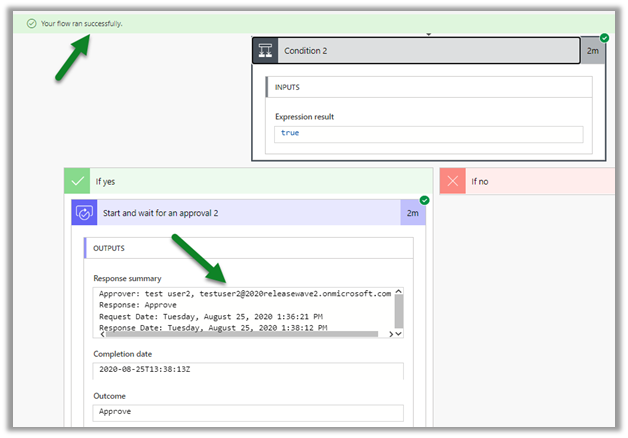
We can the manager’s email in the output for Start and wait for an
approval action.
Thus, we see a couple of ways to implement Manger’s approval, we’d look at a few more scenarios in the next posts.

Do check out the wonderful training on Approvals in Power Automate

https://www.linkedin.com/learning/microsoft-flow-approval-flows/

Hope it helps..

Advertisements

Approvals in Power Automate and Dynamics 365


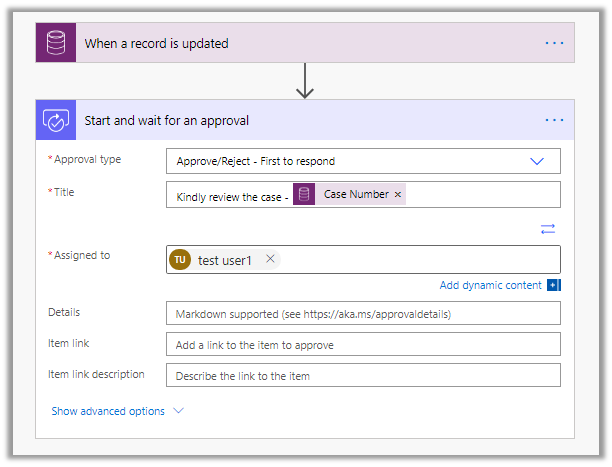
Let us try implementing a basic scenario, where an agent can send a case for approval and the record is updated based on the approver’s response.

Check other posts on Approvals – https://nishantrana.me/2020/08/31/approvals-power-automate-dynamics-365/

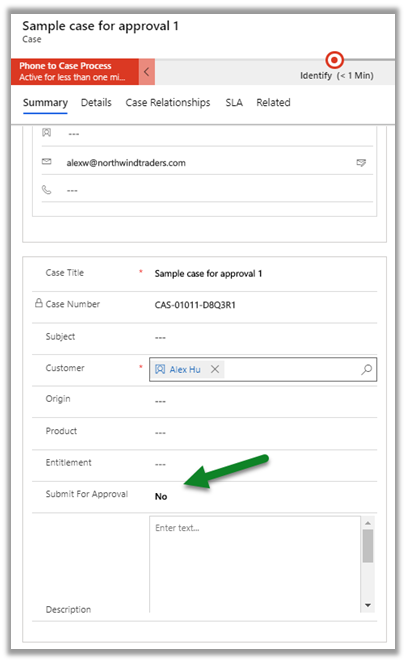
The agent here sets the Submit for Approval – custom field as Yes and saves the record for submitting it for approval.

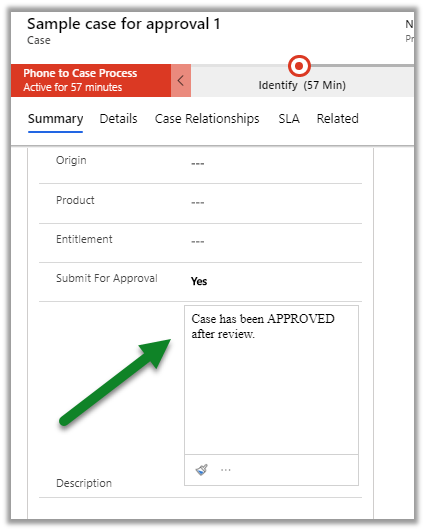
The description field will be updated to reflect approval or rejection.

Login to Power Automate

https://flow.microsoft.com/

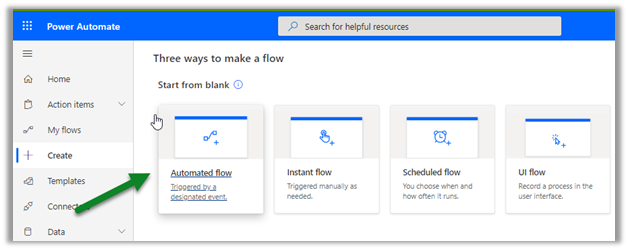
Start with Automated Flow (blank template)

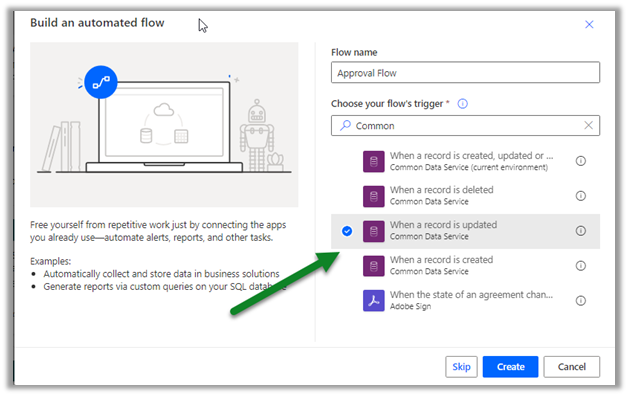
Choose trigger as When a record is updated. (Common Data Service)

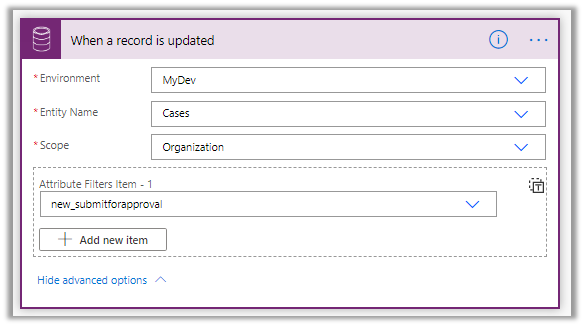
Select the appropriate environment, cases as entity name, and scope, for attribute filter, we have selected the custom field ‘submit for approval’

Add a new step and search for Approvals action.

Select approval type as Start and wait for an approval and specify the appropriate values.

To Item link with the URL of the case record

https://nishantrana.me/2020/08/25/add-url-of-record-in-item-link-in-approval-power-automate-dynamics-365/

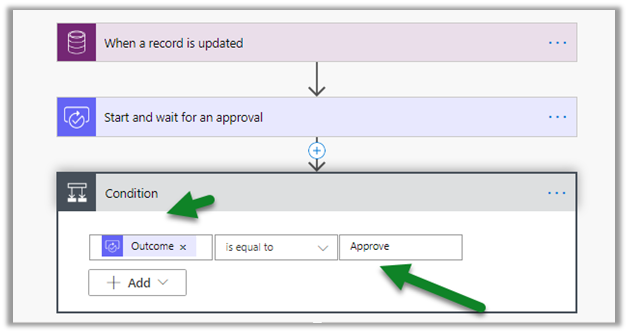
Save the flow and add a Condition step with the condition ‘Outcome’ equal to ‘Approve’.

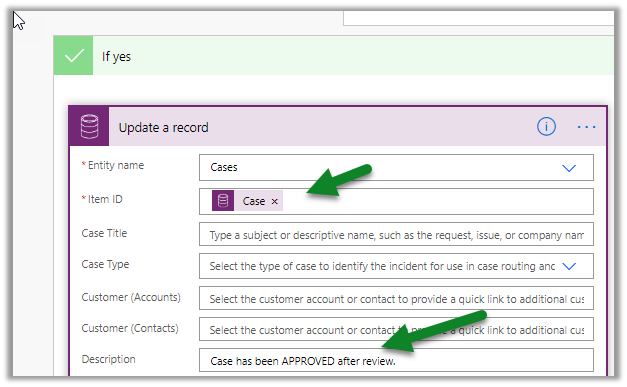
For If Yes step, select Update a record (Common data service) action, specify values for Entity name, Item ID, and Description field.

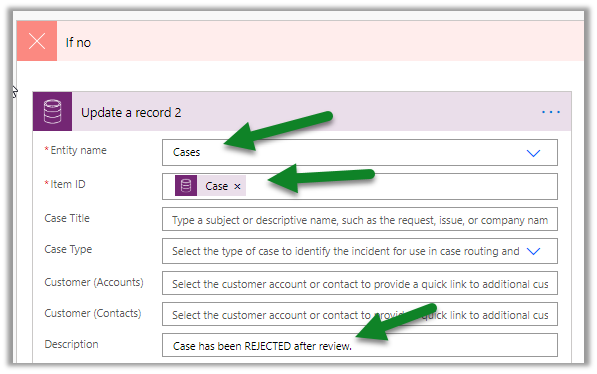
Repeat the same for the If no step.

Update – add the condition to check the value of submit for approval field

IfCondition

As we will request for approval only if value is true.

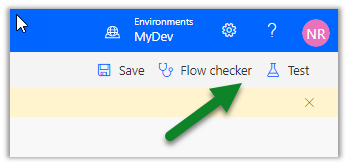
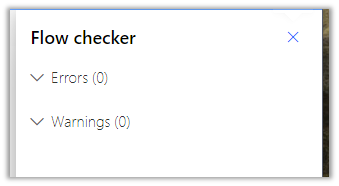
Let us select the Flow checker to check the flow first before we can test it.

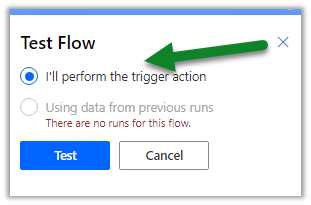
As there are no errors or warnings, click on the Test button and select the I’ll perform the trigger action option.

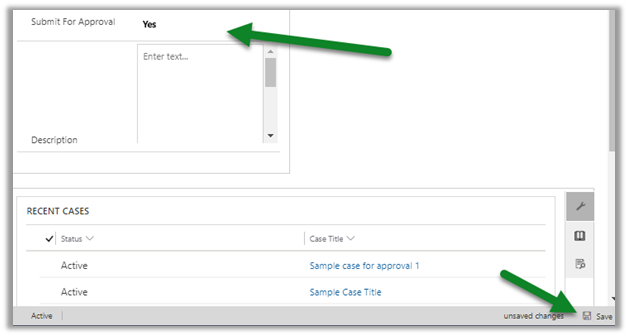
To trigger it, open a case record, set Submit for approval field as Yes, and save it.

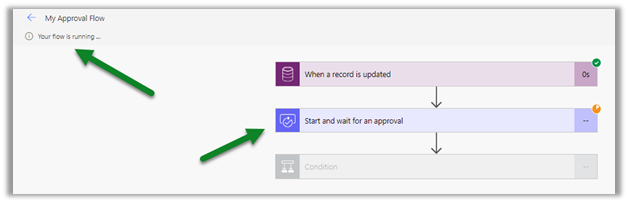
We’d see our flow running and waiting for the approval.

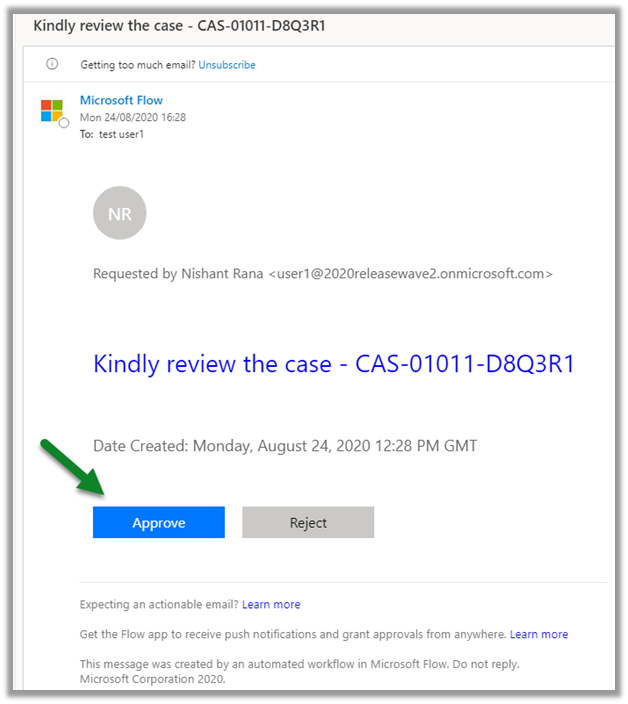
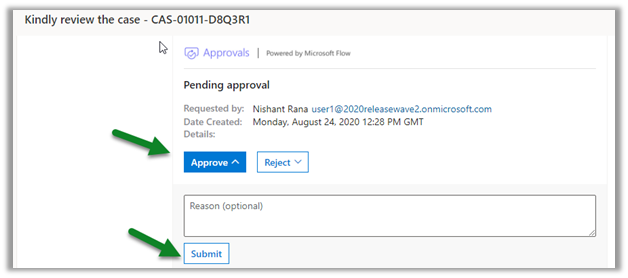
The approver can either approve it through email.

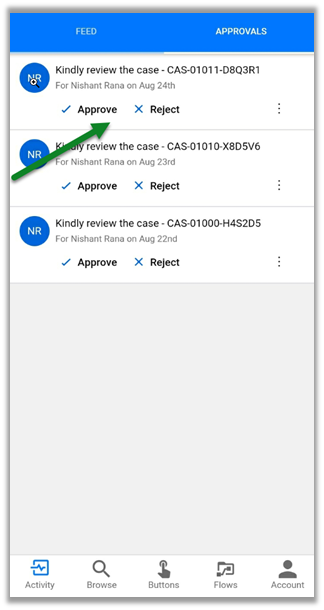
Or within the mobile app.

https://aka.ms/flowmobilediscoverabilitybanner

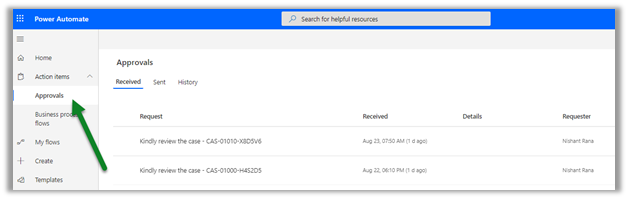
As well as the approval center.

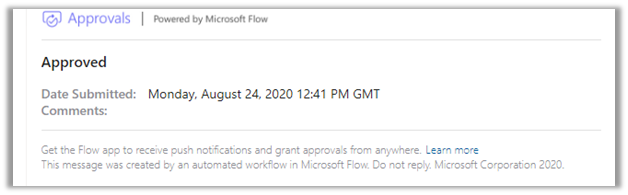
Let us approve the request.

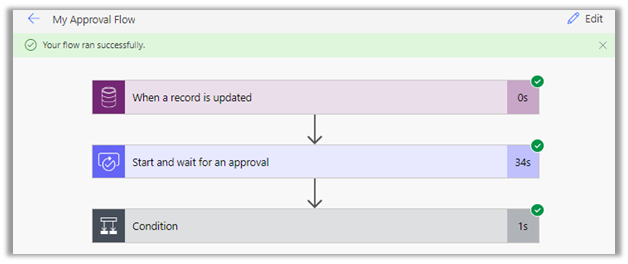
We’d see our flow completed successfully.

And the case record updated.

This was the very basic example to begin with, in the next few posts we’d try covering other scenarios.

Hope it helps..

Advertisements

How to – Add URL of record in Item link in Approval – Power Automate / Dynamics 365


To add the record’s URL in the Item link in the approval step within Power Automate, we can follow the below steps

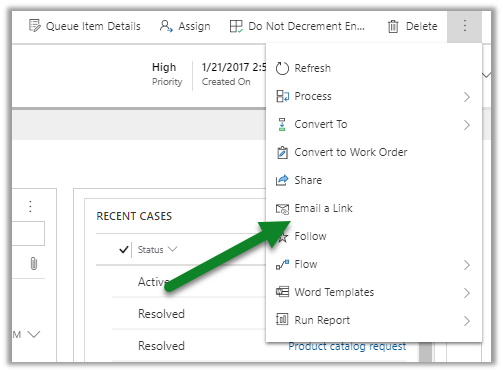
First, to get the URL, open the record, click on Email a link

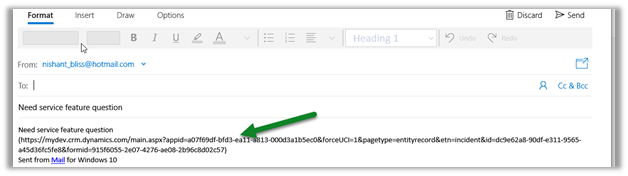
Copy the URL from the mail editor

Or get the Record URL using our favorite tool for Dynamics 365 / CRM

https://github.com/rajyraman/Levelup-for-Dynamics-CRM

Paste the URL and specify the id (guid)  part as shown below.

Link within Email

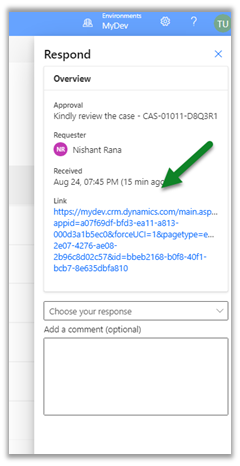
Inside Approval Center

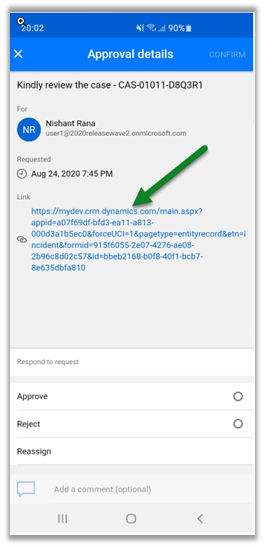
Within the app

Another option could be to create a custom field in the entity to hold the URL and use the same for the Item link.

Check our the below posts for more details à

https://diyd365.com/2019/11/27/populating-item-link-in-approvals-power-automate-ms-flow/

https://www.d365geek.co.uk/single-post/2018/11/05/Microsoft-Flow-Vs-Dynamics-365-Workflows—Part-1

https://learningrefresh.home.blog/2019/04/08/create-first-microsoft-flow/

https://powerusers.microsoft.com/t5/Building-Flows/Dynamics-365-Get-URL-dynamically-in-flow/td-p/153813

http://linnzawwin.blogspot.com/2020/01/power-automate-find-out-how-to-include.html

Hope it helps..

Advertisements

Configure Customer Service Analytics and Insights in Dynamics 365 Customer Service Hub (Preview)


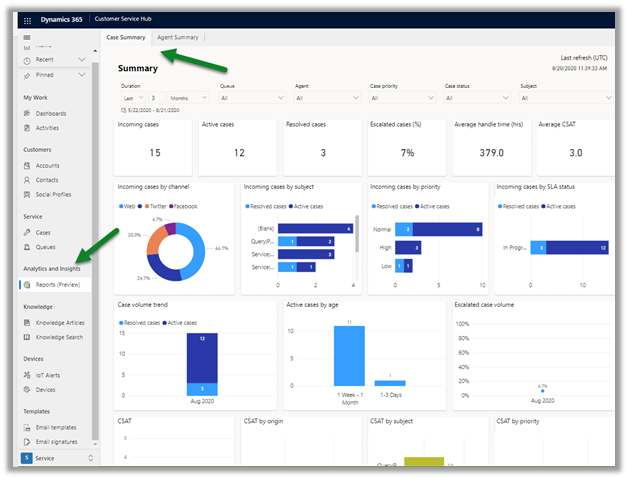
With the recent updates, the Analytics and Insights that were earlier only available inside Customer Service Insights and Customer Service Analytics for Dynamics 365 in Power BI are now accessible from within the Customer Service Hub.

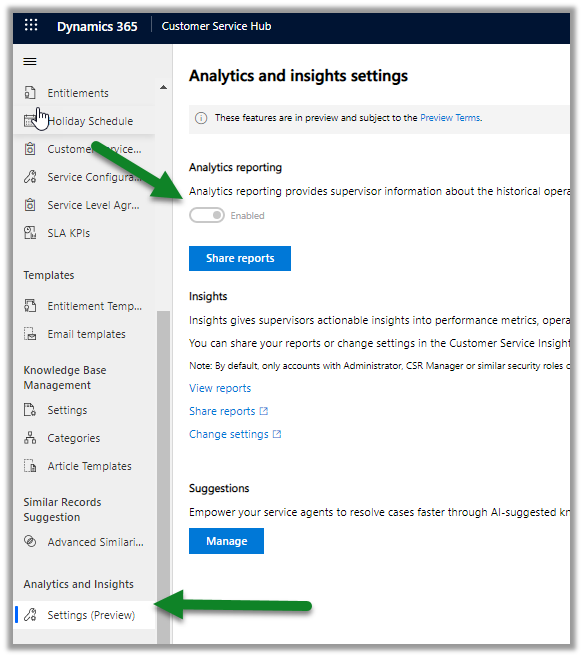
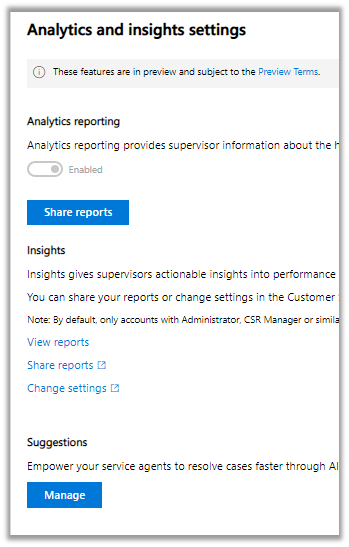
Navigate to the Service Management – Analytics and Insights – Settings (preview) section inside Customer Service Hub to enable it.

Toggle the Enabled option to enable Analytics reporting.

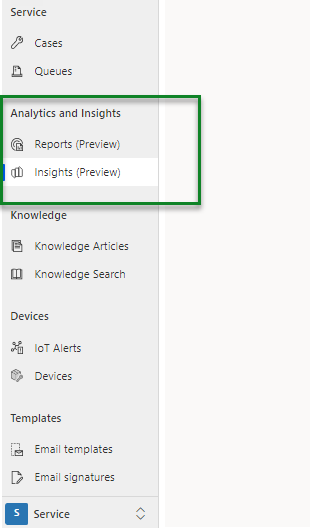
The reports can be viewed from Reports (preview) – Service Area

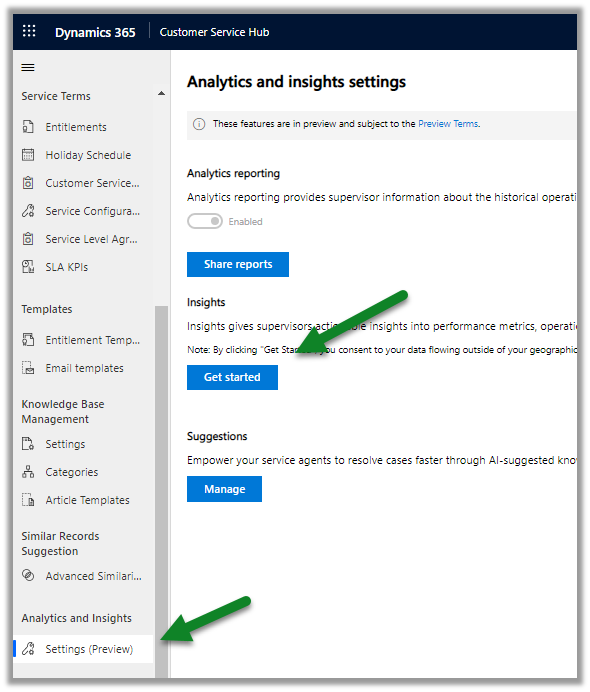
To enable Insights, click on Get Started.

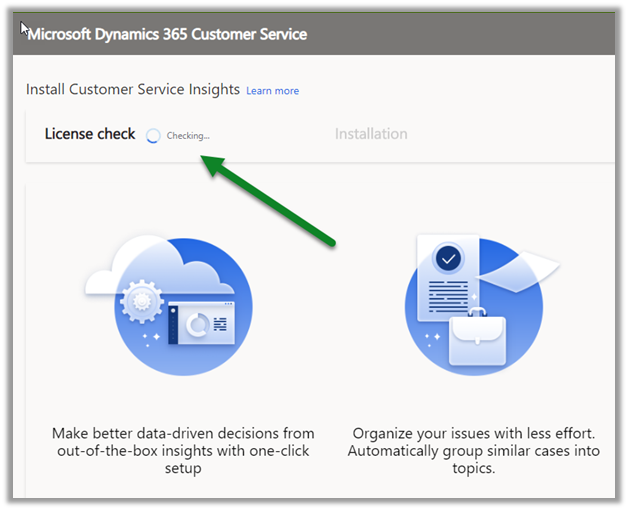
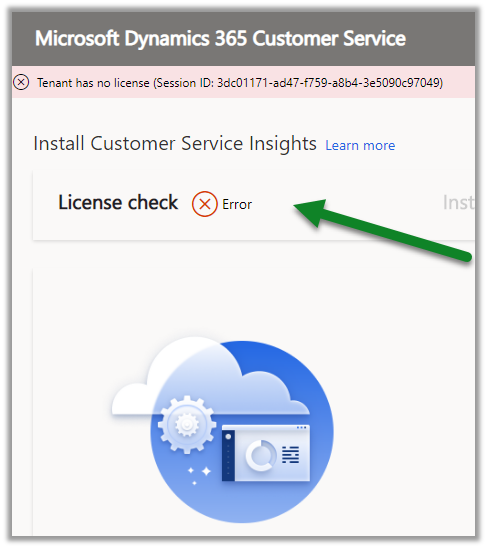
It will perform a check for the license before setting things up.

We’d get the below error if the license is missing.

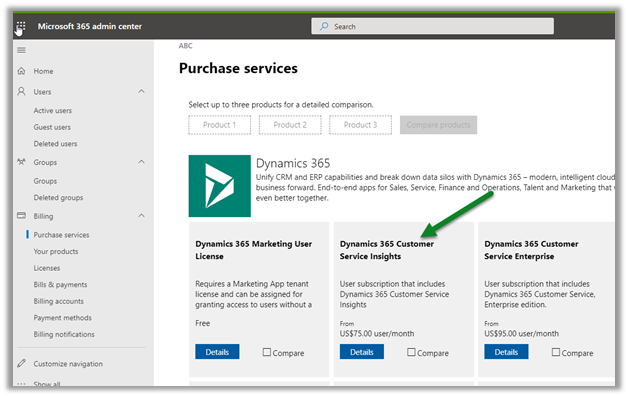
To get the license, log in to the admin portal.

https://admin.microsoft.com/

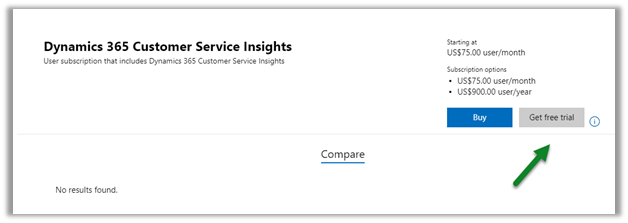
For Purchase Services, select Dynamics 365 Customer Service Insights.

Enable the trial.

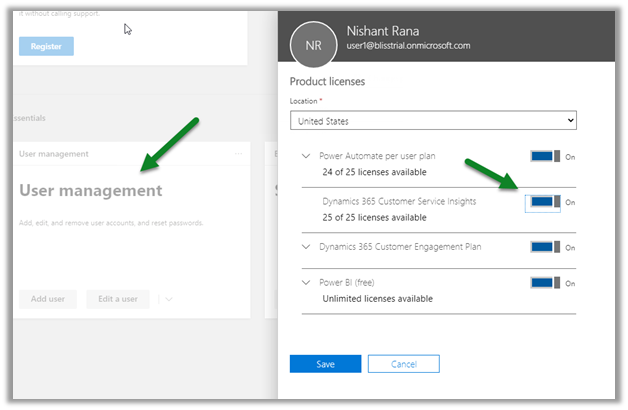
Assign the license to the user.

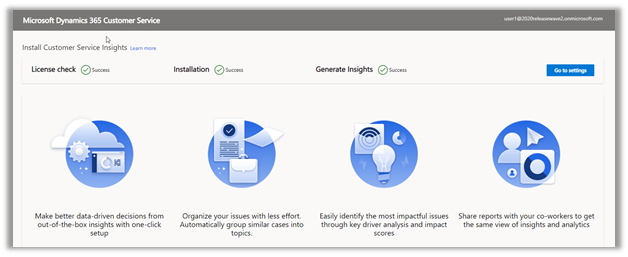
This time the configuration will be successful.

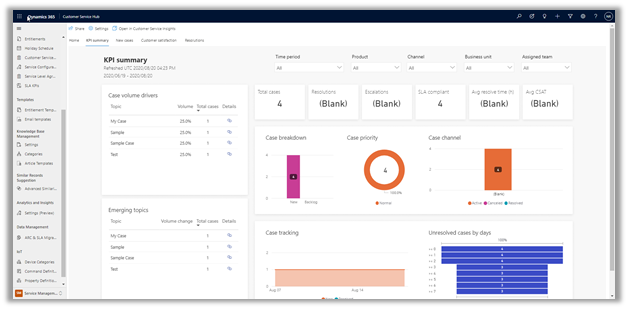
Clicking on View reports will open the reports.

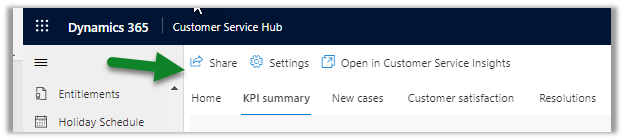
We have the option to share, configure it, and to open it inside the Customer Service Insights app.

  • Both the reports and insights are accessible from Service Area the Customer Service Hub

AS

Get all the details here

https://docs.microsoft.com/en-gb/dynamics365/customer-service/introduction-customer-service-analytics

Hope it helps..

Modern email template experience in Dynamics 365 – 2020 Release Wave 2


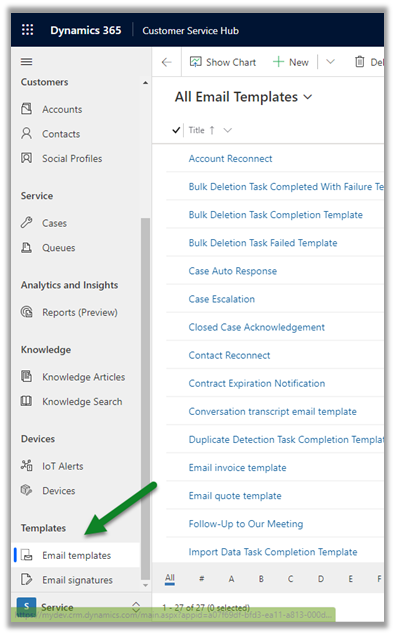
With 2020 Release Wave 2, we can now author the email template from within the Customer Service Hub app. (along with the classic Settings – Templates – Email Templates section)

Other blog posts on 2020 Release Wave 2

Navigate to Service Area – Templates

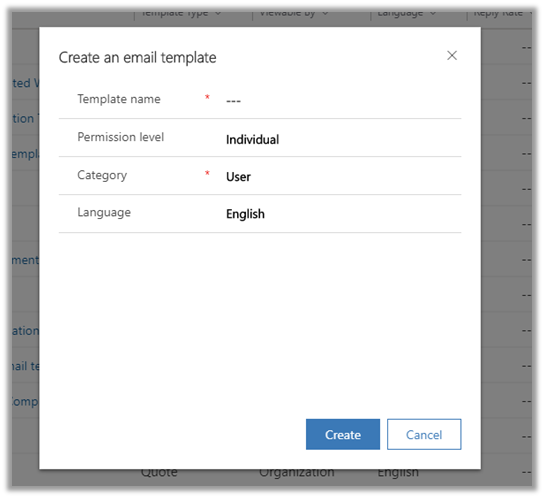
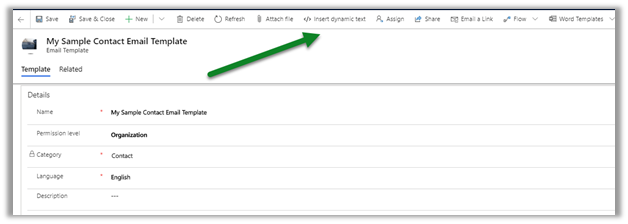
Clicking on New brings the below window, where we can specify Template Name, Permission Level, Category (entity), and Language.

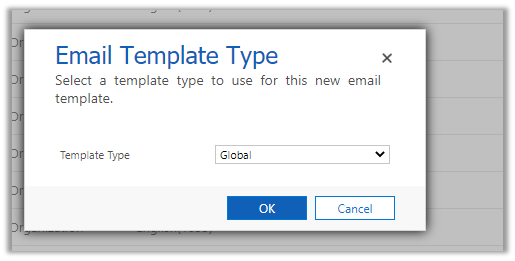
The classic experience – (it had only template type field – which included value Global and entities)

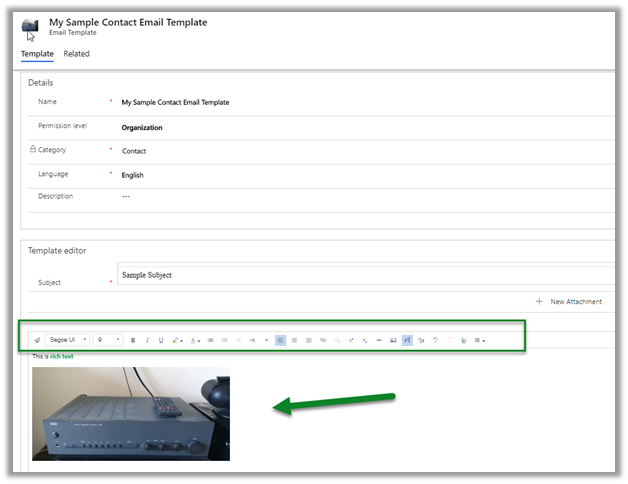
  • The new Email Template editor brings a rich text experience. ( with the option of working with image inline)

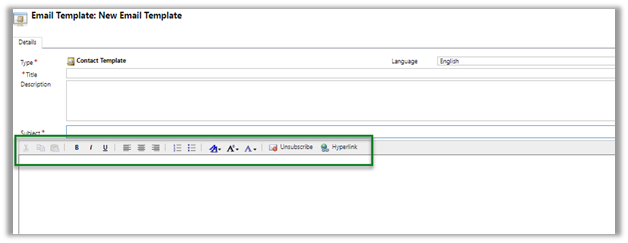
The classic experience –

  • The new Email Template also brings the new modern and familiar toolbar.

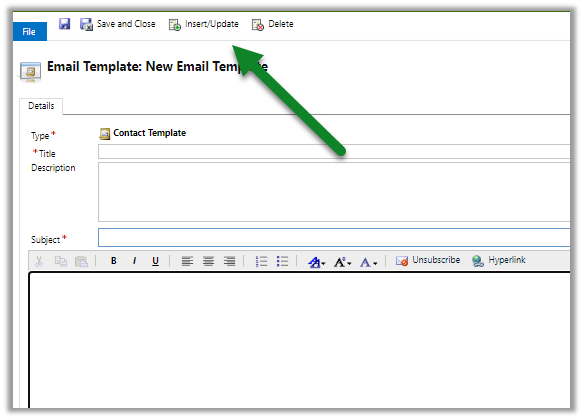
legacy experience –

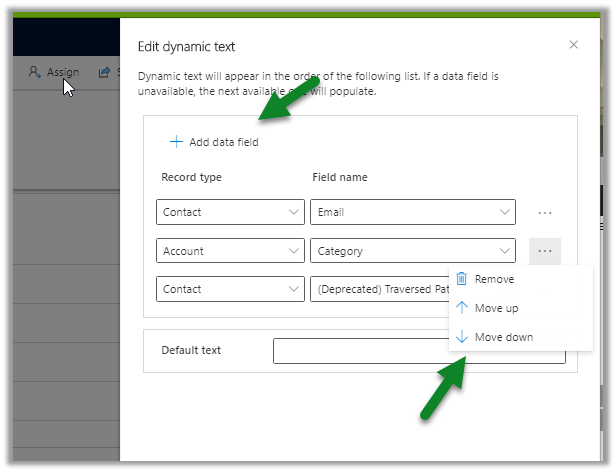
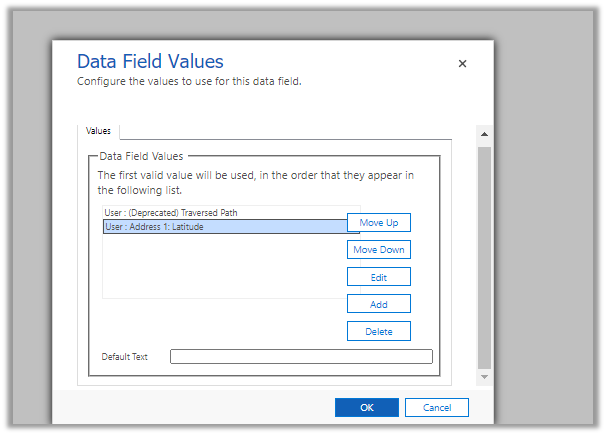
  • The new Insert / Edit dynamics text screen

Classic one –

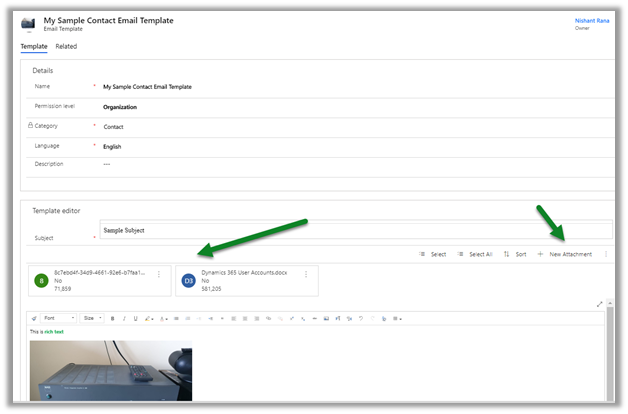
  • We can also add attachments to the email template.

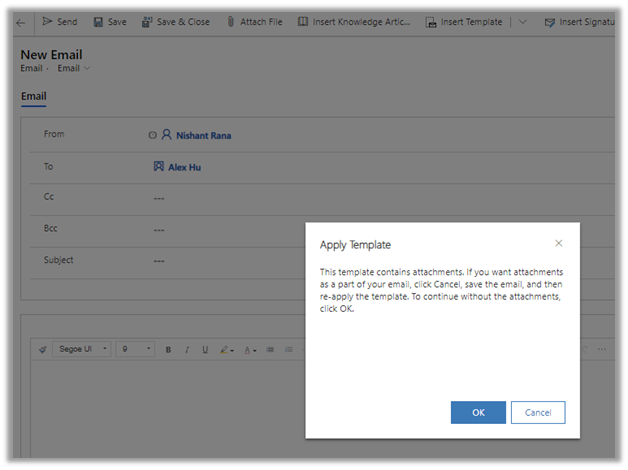
Now if we create a new email and try to apply the above template, we will be presented with the below message, which asks us to save the record first and then inserts the template, if we want the attachments to be part of it.

After saving the record, we can now insert the email template which also adds the attachments.

Dynamics 365 2020 release wave 2 –https://docs.microsoft.com/en-us/dynamics365-release-plan/2020wave2/

Hope it helps..

Advertisements

Custom entity support for PDF document generation in Dynamics 365 – 2020 Release Wave 2


With 2020 Release wave 1 we had PDF generation capability added to Lead, Contact, Opportunity, Quote, Order and Invoice entity.
https://nishantrana.me/2020/02/13/save-and-email-pdf-options-added-to-dynamics-365-sales-2020-release-wave-1-plan/

This has been extended to the custom entities with new capabilities added in 2020 Release Wave 2

Other blog posts on 2020 Release Wave 2

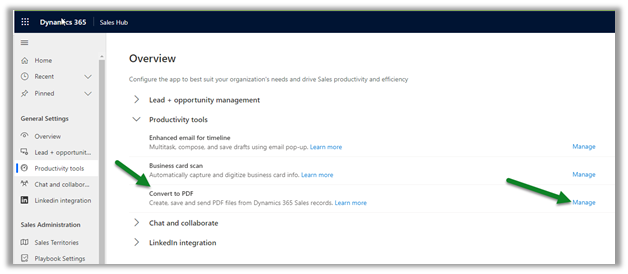
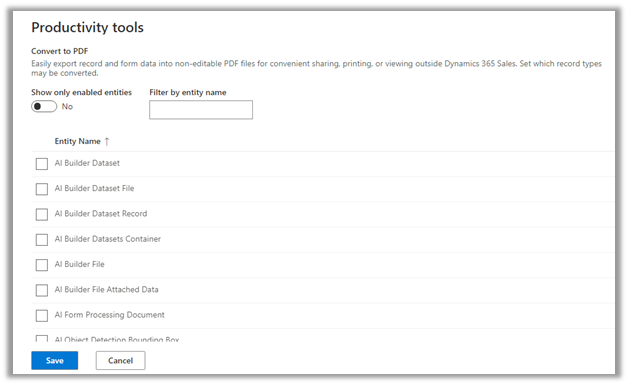
In Sales Hub, navigate to App Settings – Productivity Tools – Convert to PDF and select Manage


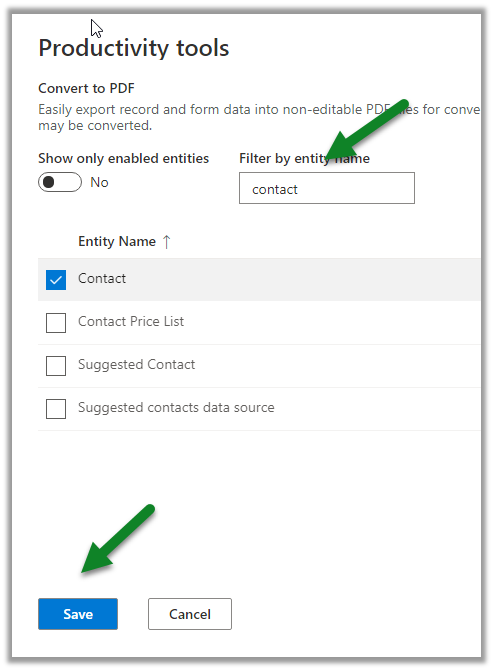
We can Search / Select the entities to enable it.


Let us enable it for the Contact entity

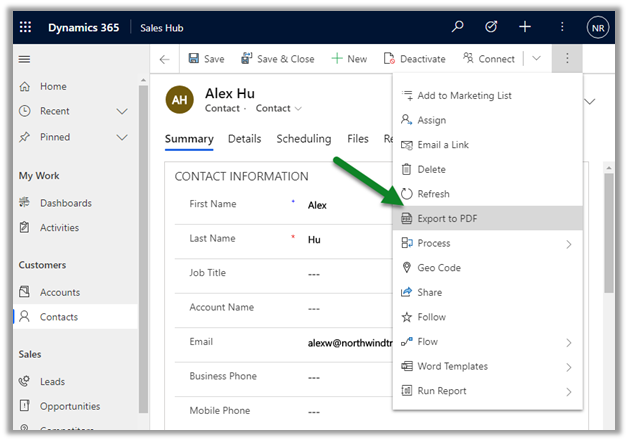
We can see the “Export to PDF” command added after enabling the Convert to PDF option in the contact entity.

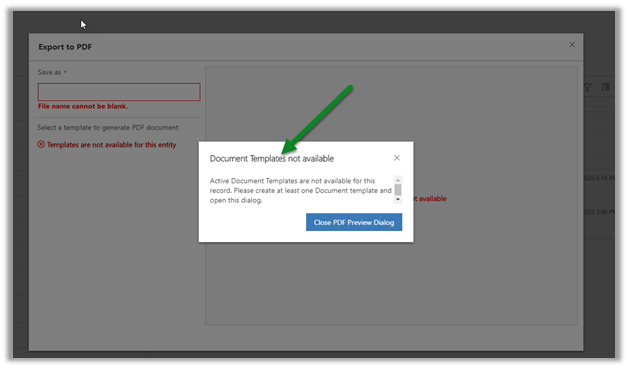
Clicking on it we are presented with below options if we do not have any active document template available for that entity.

Let us enable PDF generation on the Account entity (as it has the document template available out of the box) and try the same.

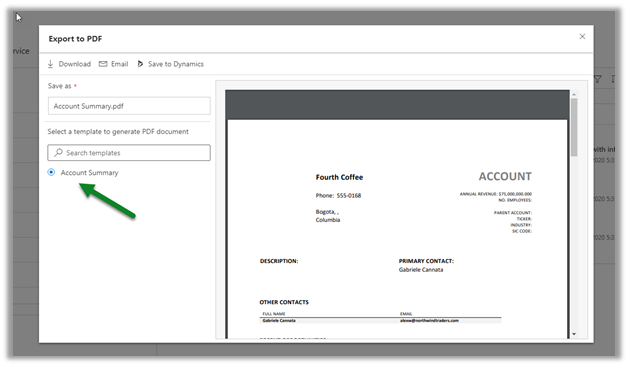
After enabling it for Account entity, clicking on Export to PDF, gives us option to  preview the PDF document based on the template selected

Download option  will download a copy of the pdf.

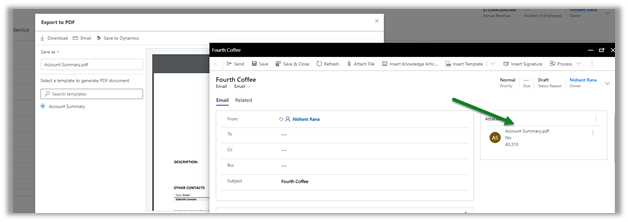
The Email option will open the compose email window with the PDF attached.

Save to Dynamics will save it in the timelines as note’s attachment for that record.

This definitely was one of the most requested feature and thanks to Microsoft for adding it in the new release.

Dynamics 365 2020 release wave 2 –https://docs.microsoft.com/en-us/dynamics365-release-plan/2020wave2/

Hope it helps..