How to – Configure Note for Entity Form in Portal in Dynamics 365


Suppose we have below form for Contact to be displayed as Entity Form in Portal having notes control in it.

The Entity Form configured for the above form à

The portal page that displays the Entity Form à

Few points we need to remember here is that

  • The Portal User (contact record) needs to have Entity Permission assigned on Notes (Annotation) through one of the web roles assigned. For simplicity I have given the Global scope permission.

  • The Notes body should start with *WEB* prefix for Notes to be published on the Portal. For e.g. we have 3 notes attached for the contact record but only one shows up in the Portal.

Only 1 note being displayed in the portal.

The Portal displays the Notes as read only OOB.

We can use Entity Form Metadata of type Notes associated to Entity Form to further customize it.

Below are the different options that we have.

Refreshing the Portal page adds the

Add Note button

Edit and Delete Option

https://community.adxstudio.com/products/adxstudio-portals/documentation/configuration-guide/customization-tools/managed-forms/notes-for-managed-forms/

Hope it helps..

Advertisements
Advertisement

Using Entity Form Metadata for Sub Grid configuration in Entity Form in Portal in Dynamics 365


Suppose we have following Entity Form configured for Lead Entity in Edit Mode which is having Contact Sub Grid in it.

Contact Us Lead Form with Contact Sub Grid:

Entity Form Configuration:

The Sub Grid renders as read only

We can further customize Sub Grid creating related Entity Form Metadata of type Sub Grid.

Suppose we have added all the below View and Item Actions to our Sub Grid type metadata.

On refreshing the page, we can see all the actions available as buttons in the page.

For Create to work we need to define the Insert Entity Form for Lead.

Download lets the records to be downloaded in Excel

Associate lets the current lead record to be associated to the contact record selected.

Similarly

View Details opens up the Entity Form defined in the Read Only mode. Edit opens the Entity Form to edit the record. The Entity Form must be configured and defined in the Item Actions for it to work.

Run workflow can be used to run On Demand Workflow(s) configured.

Delete, Disassociate and Deactivate does what it means and doesn’t need any specific configuration.

Hope it helps..

Adding Actions (Qualify, Workflow, Delete etc.) for Entity Form in Portal in Dynamics 365


Hi,

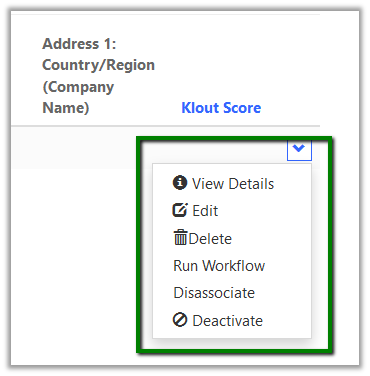
Apart from the Submit button we can additional Actions to the Entity Form like Delete, Workflow, Qualify (in case of lead) etc.

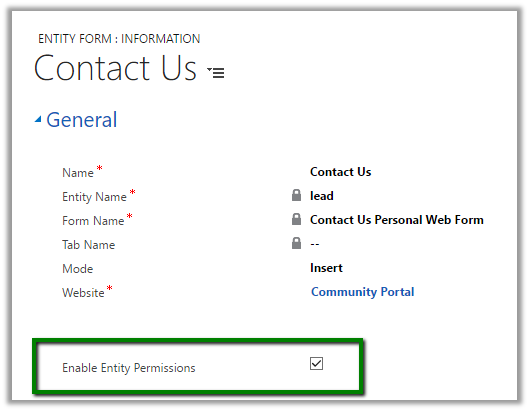
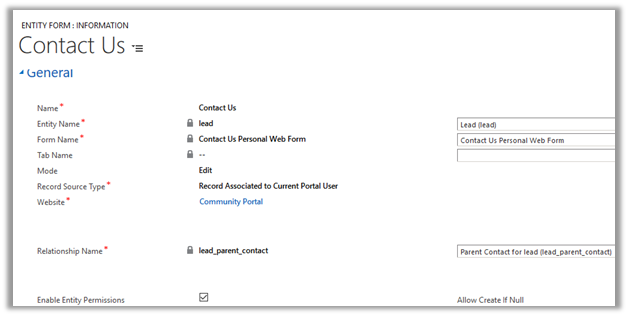
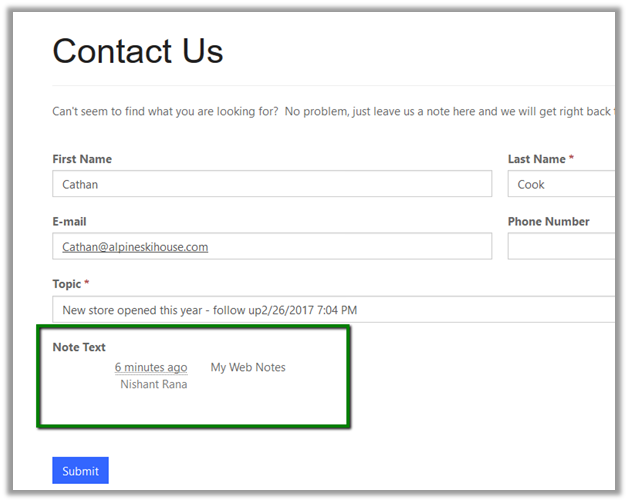
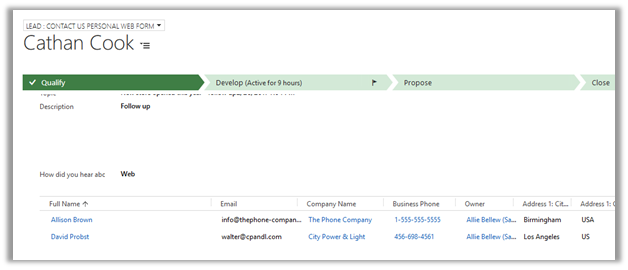
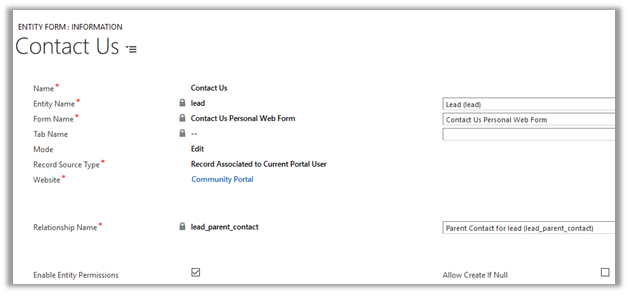
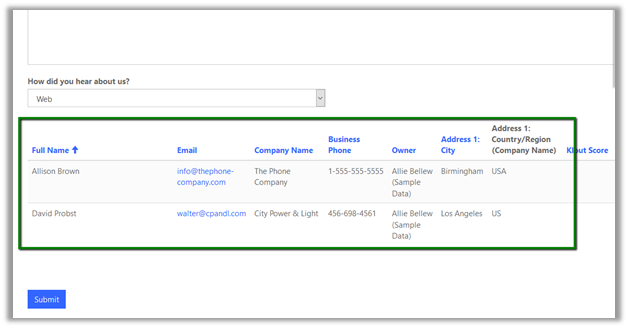
To understand this, we will use the Contact Us Entity Form that comes with Community Portal.

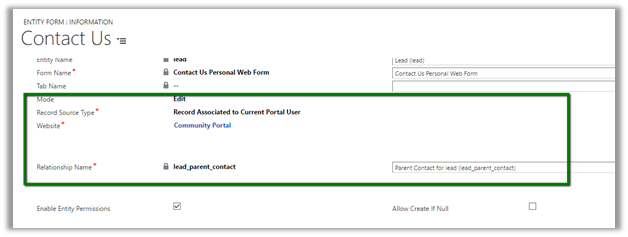
Let us add Delete, Workflow and Qualify action to it. However before doing that we first need to check Enable Entity Permissions on the Entity Form for actions to work.

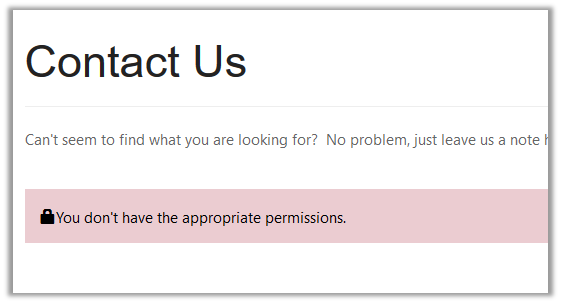
And as we have enabled the Entity Permission we need to make sure that the portal user has the appropriate permissions through the web role assigned to him.

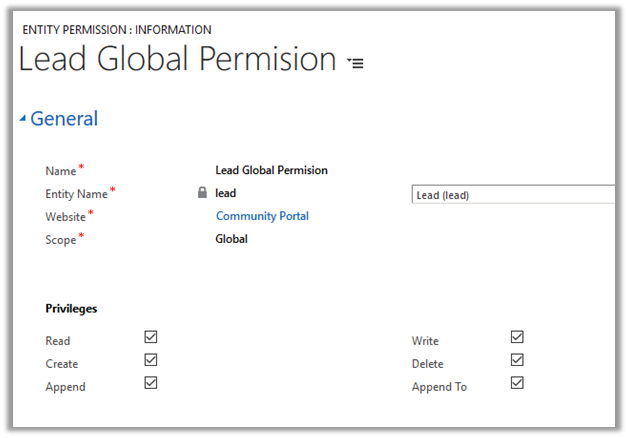
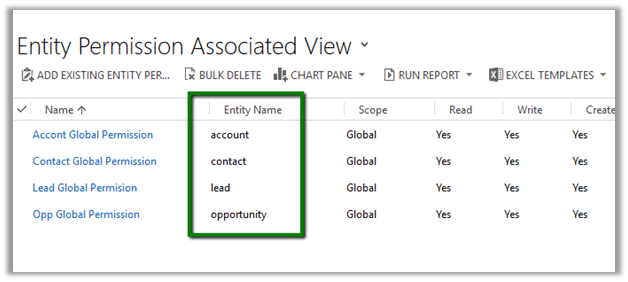
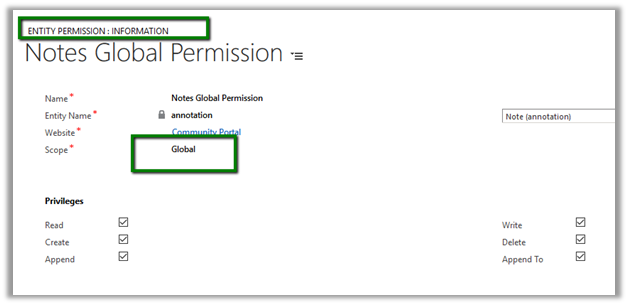
Below we have created a global entity permission for Lead record and added it to the Web Role which is assigned to the portal user.

Else we would get the below error

One more thing we need to do here is to change the Mode of the Entity Form to Edit as the delete and workflow action will only work for an existing record.

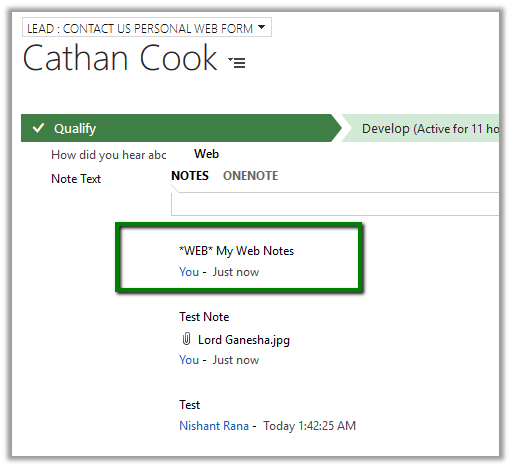
So here basically we are showing the lead record to which current Portal User (i.e. contact) is associated as Parent Contact.

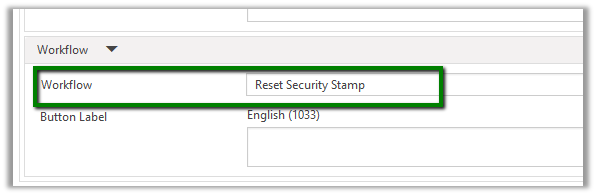
For the workflow, we need to remember that only On Demand Workflow(s) would be available for the actions inside the Entity Form, which does make sense, as it would be something which the user is triggering instead of conditions on which it is running automatically.

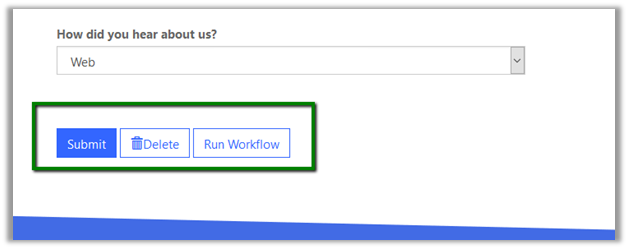
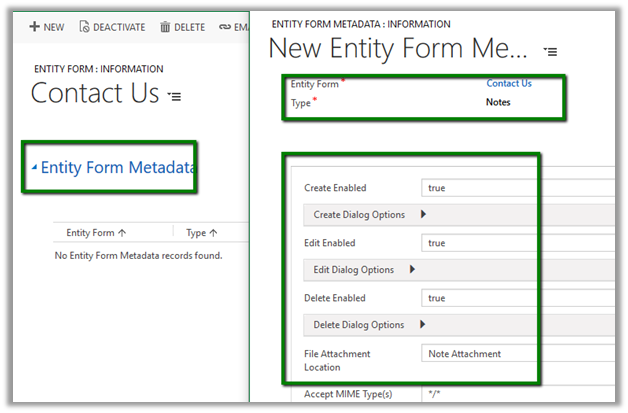
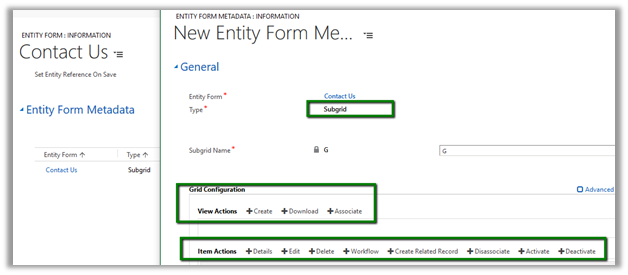
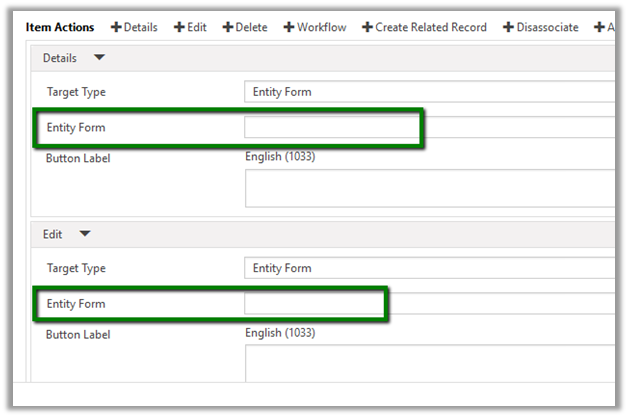
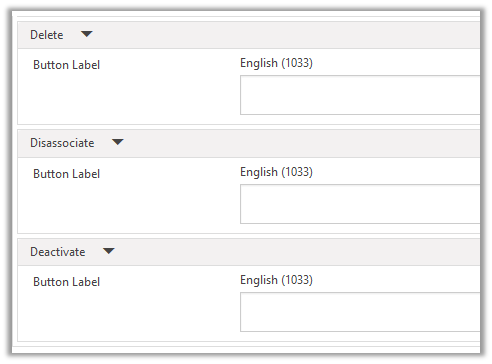
Now open the Entity Form, go to Additional Settings tab and add the actions to it.

Below we have added Delete, Workflow and Qualify action. The Qualify action is specific to Lead only.

Refresh the web page in the portal, we will see the buttons added for the Actions.

For Qualify button to appear, we need to make sure the portal user has appropriate rights on Account, Opportunity and Contact entity along with Lead. For simplicity, we have added Global Entity Permission for those entities to the web role assigned to the portal user.

Entity Permission Associated View for the Web Role record: –

On refreshing the page again, we can see the Qualify Button.

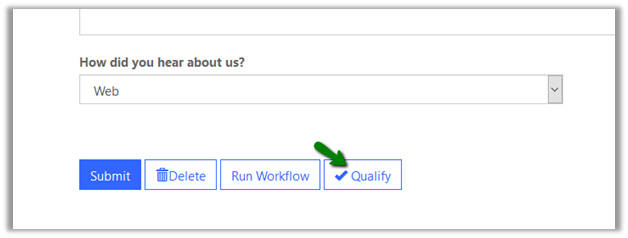
On clicking Qualify button à

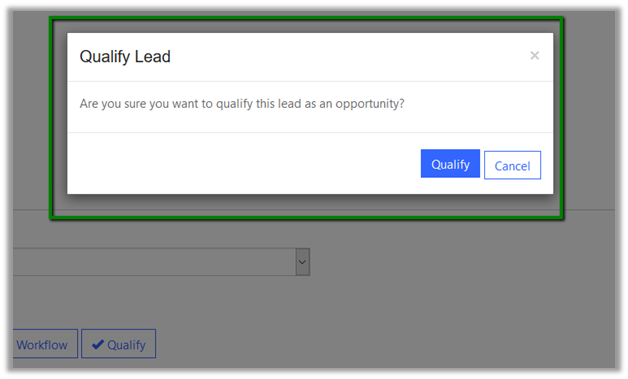
The confirmation message à

Hope it helps..

Using Entity Form Metadata to configure the Entity Form in Portal in Dynamics 365


Sharing a simple example wherein we are configuring the First Name field of the Contact Us Entity Form for the lead entity using Entity Form Metadata.

Suppose we have the below Entity Form configured for Lead entity.

Now go to Entity Form Metadata tab and create a new record.

The record allows us to configure Attribute, Notes, Section etc.

Let us configure the First Name field.

Change the label to “Please Enter First Name”.

First select Type as attribute and specify “firstname” as the attribute to be configured. And then provide the Label.

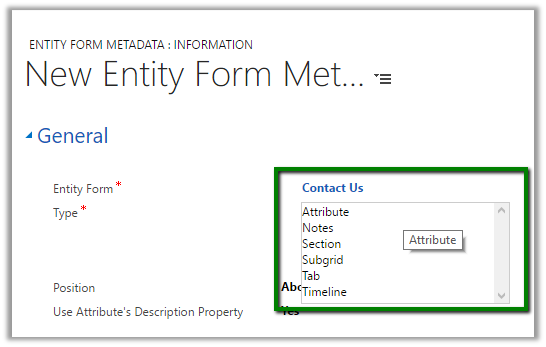
Prepopulate the field from the First Name of the Current Portal User.

Make the field required

Add instructions to the field

Refreshing the page in the portal updates the first name field in the portal accordingly –

Hope it helps..

Advertisements

Configuring OData feed for Entity List in Portal in Dynamics 365


Suppose we have Entity List configured for a custom entity name Locations.

To configure OData feed go to OData feed tab and check the Enabled checkbox.

Specify the Entity Type Name and Set Name, if none is specified the entity’s schema name is used.

Select the View to be exposed for feed.

URL for the feed

<a href="http://<>/_odata”>http://<<domain>>/_odata

Get the data for the LocationSet à

Filter option à

OrderBy option à

Supported options: –

Hope it helps..

Advertisements

Configuring Map View for Entity List in Portal in Dynamics 365


Let us create a custom entity having latitude and longitude fields (floating point data type) in it. These fields are required for configuring Map View for the entity list.

For e.g. Location is our custom entity.

We have 2 record created and have the entity list configured for the Active Location view.

Entity List for the Location custom entity on the portal :-

Open the Entity List record, go to Map View tab and check Map Enabled check box.

Configure Latitude, Longitude field.

The InfoBox title and description field will be used for the info box that pops up when hovered over the pushpin.

For Credentials, get the Bing Map key

https://www.bingmapsportal.com/

Default Center Latitude and Longitude would define the center point for the map.On refreshing the portal page, it shows the Map with the 2 records as push pin along with the records detail and Get Directions button

Info Box

Hope it helps..

%d bloggers like this: