A validation error occurred. The value of ‘membercount’ on record of type ‘list’ is outside the valid range exception in Dynamics 365 (CRM)


We were getting the below error while trying to delete one of the marketing list members from a static marketing list.

This occurs if the Members Count field has value 0 in it, even if there are members associated to it. (due to some exception)

Updating that field to correct value fixes this issue (customize the form to add the field on form). and we can then delete the members from it.

Hope it helps..

Using tpc.identity to get the logged in user details in JavaScript in The Portal Connector (TPC)


Recently while working in TPC, we had a requirement to get the details of the logged in user (which is basically a contact record in CRM).

To do so we can make use tpc.identity object in Client Side.

For e.g. contactId

Hope it helps..

Create a simple logic app with Dynamics 365 connector


Let us create a simple logic app that on create of a contact record in CRM creates the same contact in Gmail.

Log in to the azure portal.

https://portal.azure.com/#create/hub

Select New Logic App

Specify Name, Resource Group and Location for the logic app.

Select Blank Logic App

Select “When a record is created” as Trigger.

Sign in to Dynamics 365 Instance.

Select the Organization name and Entity as Contact.

Select Add an action and the New Step

Choose Google Contacts as the Service

Sign in to your Gmail account to be connected

Allow permission to Logic App to access Gmail

Configure Full Name and Primary Email (Dynamic content) as the values for the contact record to be created in Gmail.

Save and Run the app.

Create the new contact record in CRM that triggers the logic app.

On Successful run à

We can see the contact record created in Gmail.

Find all the details here

https://docs.microsoft.com/en-us/azure/connectors/connectors-create-api-crmonline

Hope it helps..

Using Multiple Choice Matrix and Likert Scape Option Sets in Web Form in Dynamics 365.


Let us continue with our previous example wherein we have already setup a sample Survey Web Form and added a Multi choice Field

https://nishantrana.me/2017/03/06/configuring-multiple-choice-field-for-web-form-in-portal-dynamics-365/

Here we would be making use of Multiple Choice Matrix.

For this first let us create 2 option sets in our Survey Entity. We’d put those field in Step 3 Tab.

  • Here we will use the existing global option set for Likert Scale which is added by the Portal in CRM.

Our first field – FacilityLikert Scale Satisfaction.

Our second field

Below are the different Likert Scale Global Option Set available within CRM added by Portal.

Now in the Survey form we have added a section named “Please Rate” and with the newly created fields inside it.

In the Web Form Step corresponding to the Step 3 tab and we added Web Form Metadata records one for each of the fields.

Style Multiple Choice Matrix
Group Name MCM

Refreshing the page in the Portal shows the option sets as Multi Choice Matrix

Hope it helps..

Configuring Multiple Choice field for Web Form in Portal (Dynamics 365)


Let us continue with our previous example and add a Multiple-Choice field for Step 3 Web Form Step as shown below.

https://nishantrana.me/2017/03/06/using-conditional-branching-in-web-form-in-portal-dynamics-365/

To configure this, add a section named “Please select all that applies” to Step 3 Tab and 3 two options (Boolean) fields in the Survey Form.

Now go to Step 3 Web Form Step and add Web Form Metadata for each of these bool fields.

For the poor management field,

  • Style – Multiple Choice
  • Group Name – MyGroup

For the poor salary field, specify the same value for style and group name field

  • Style – Multiple Choice
  • Group Name – MyGroup

Do same for the third two options field.

The main point to remember here is that the Group Name should be same.

Now open the portal page and go to the web form step.

The page shows the newly added Boolean Fields in the Web Form Step as checkboxes.

Hope it helps..

Advertisements

Using Conditional Branching in Web Form in Portal (Dynamics 365)


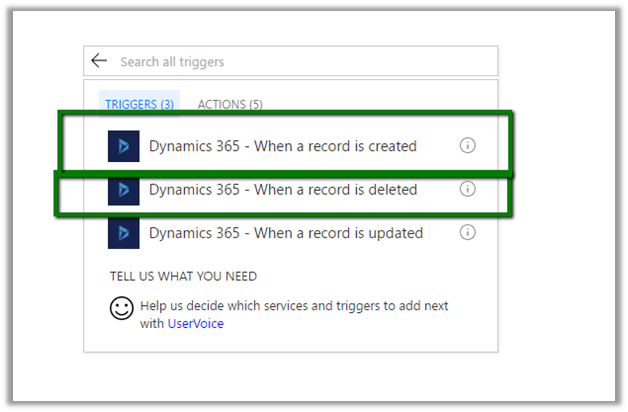
Let us continue with our previous example of Employee Exit Survey and add conditional branching step to it.

https://nishantrana.me/2017/03/05/using-web-form-to-create-a-simple-survey-in-portal-dynamics-365/

Here we’d add a conditional web form step which will check the response of the user for Work Life Balance question and in case if it false, it shows one more step to the user and asks for the comments.

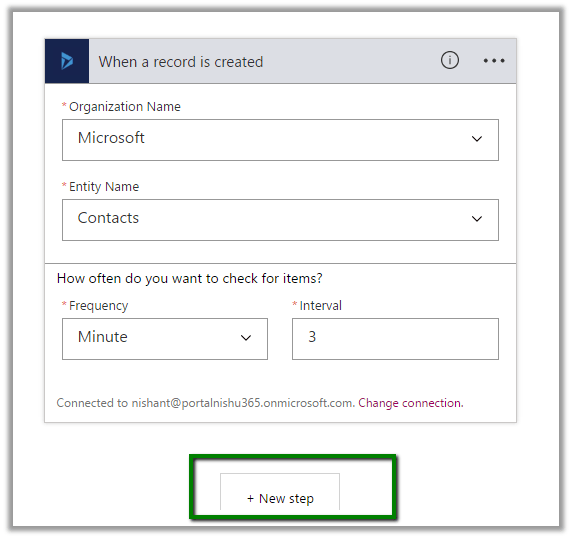
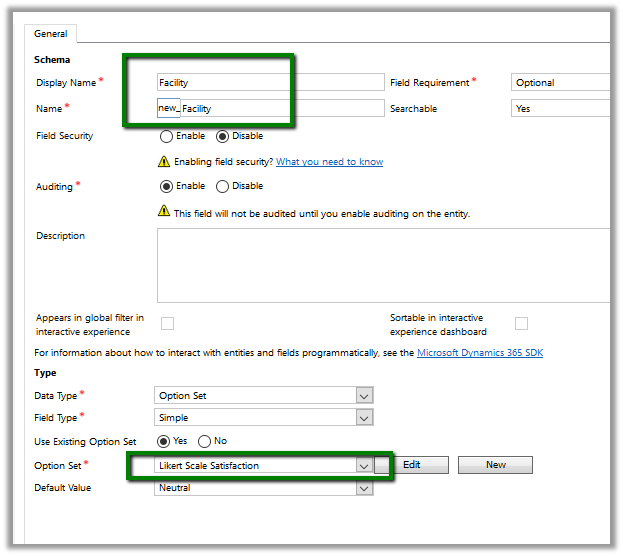
So, let us first create a web form of type Condition with below details

Type Condition
Target Entity Logical Name Our custom survey entity
Next Step Web Form Step when condition is true
Condition If new_thirdquestion is true

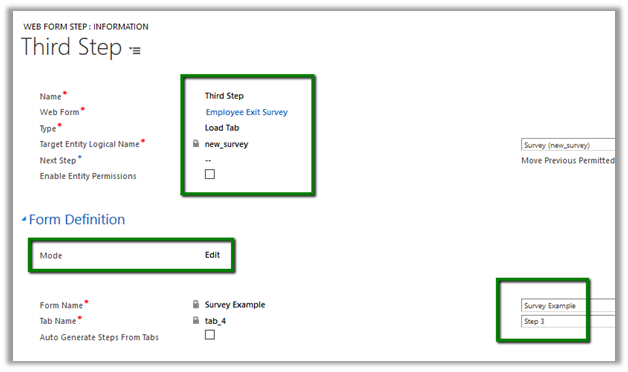
Now let us see the details of web form step – third step which we have defined as Next Step for the condition Web Step above.

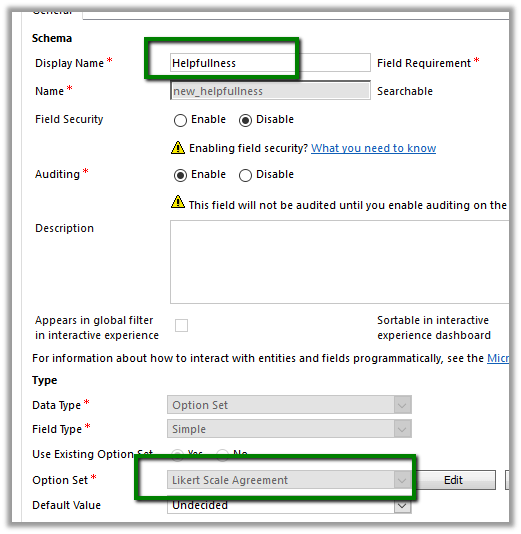
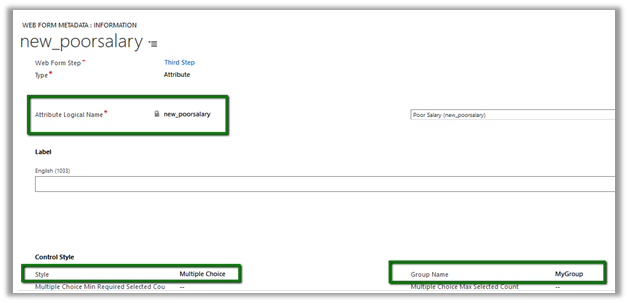
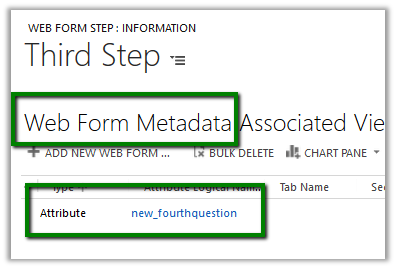
We have also created associated Web Form Metadata record of the type attribute for defining the label and other properties for the new field named fourth question in our survey form.

Adding label –

Adding Description –

Making field required –

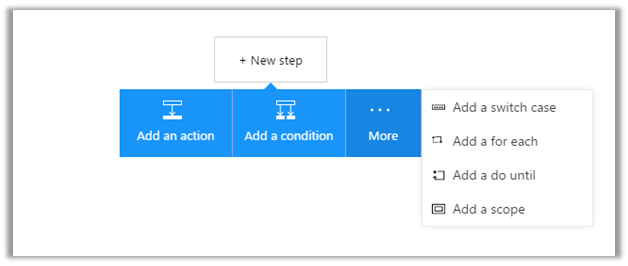
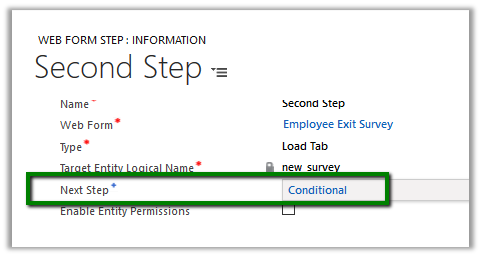
Finally update the Second Web Form Step to point to the Condition Step

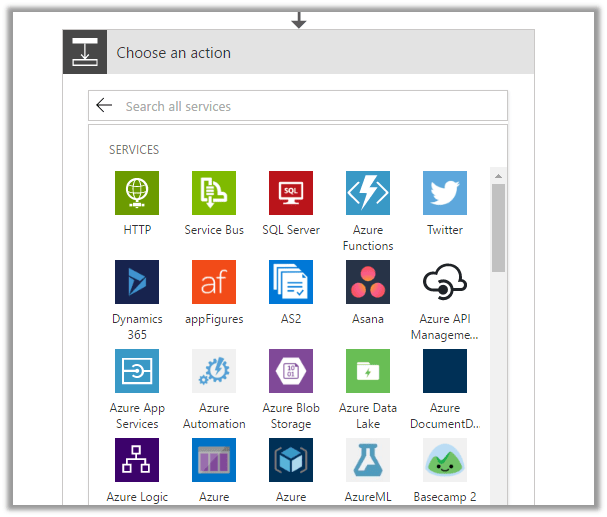
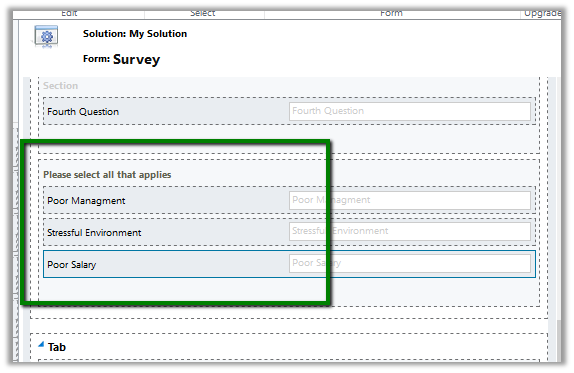
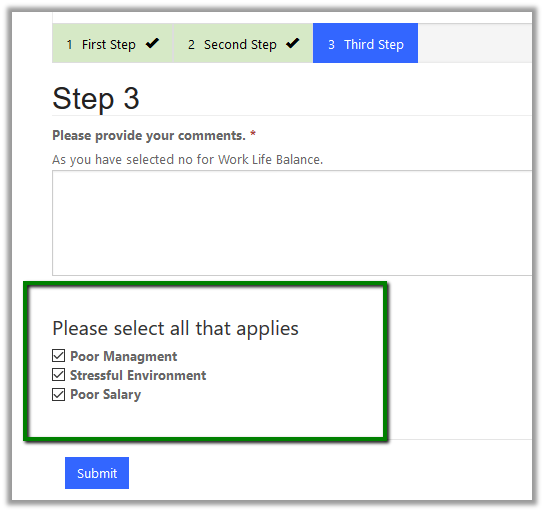
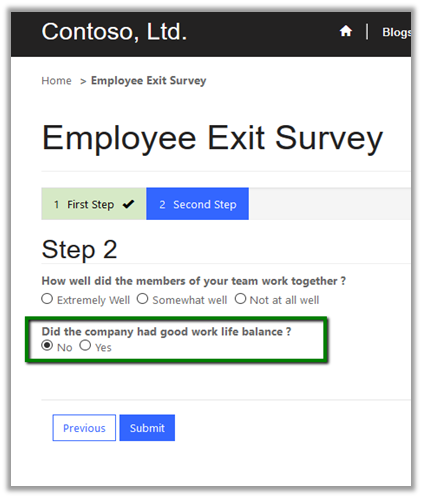
We are done with our configuration, now going back to our web page shows the Web Form with all the 3 steps.

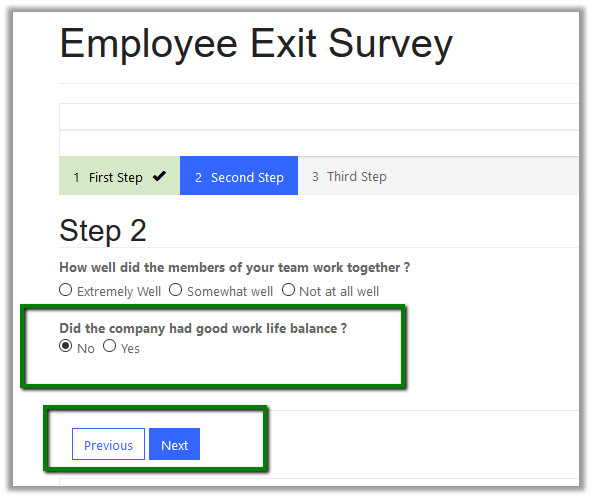
Clicking on next with No as the answer for the Work Life balance Question shows the third web form step. Note here we can see the label defined, description defined and also the field is mandatory which we did using Webform Metadata.

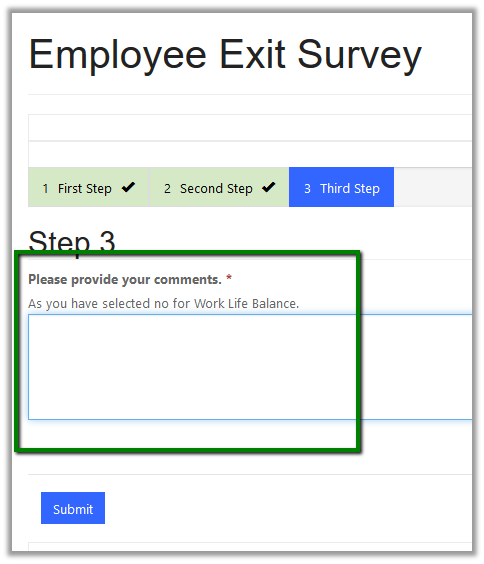
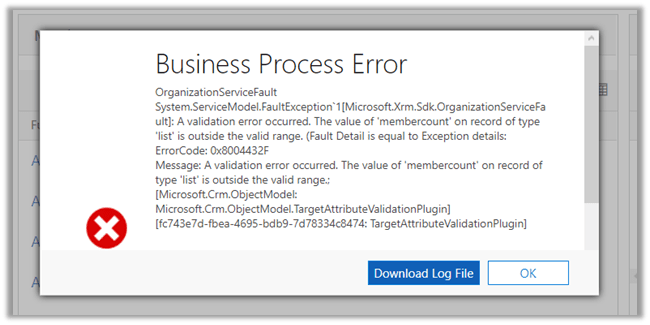
Clicking on submit without specifying comments shows the required field message

All the details here

https://community.adxstudio.com/products/adxstudio-portals/documentation/configuration-guide/web-forms/web-form-steps/conditional-step/

Hope it helps..

Advertisements