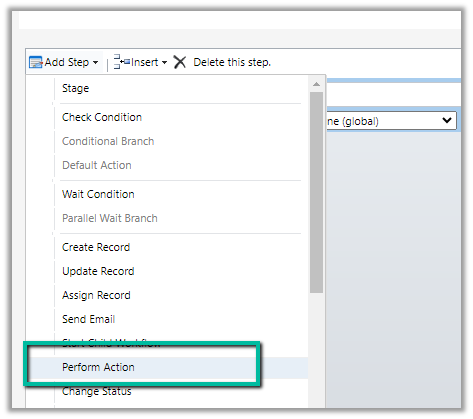
We might see some of the custom actions not appearing in the Actions list inside the Perform Action step of the workflow.
This is because the Custom Action would be using one of the following parameter types, which is not supported for Perform Action like
Picklist (Optionset)
Entity
Entity Collection
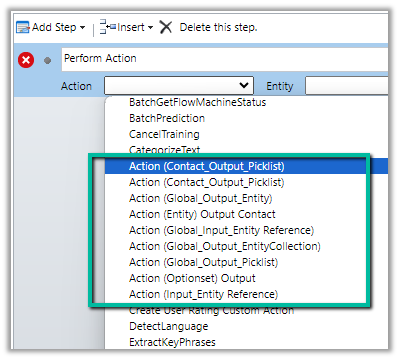
E.g. we have the following actions defined few are bound to the Contact table, some are Global, and have different types specified as either Input or output parameter.
Out of the above actions defined, we can see only the following actions listed inside the perform actions step of the workflow.
The action which has input as Entity Reference are the ones listed, as it is one of the supported types. For the unsupported types, if used as an output parameter, the actions are listed.
Microsoft has always recommended managed solution(s), apart from the some of benefits that managed solutions offer over unmanaged, Microsoft is also adding features to the managed solution, making it easy for teams to adopt and transition to Managed solutions, like focusing on making the solution import faster and adding ALM-specific features to it.
Let us take a simple example to see it working –
Suppose we have 2 environments, a Test and a Managed environment.
The test environment has 2 unmanaged solutions from different publisher that is already deployed to the target environment as unmanaged.
Source –
Target –
Ideally, we should be creating 2 copies of production environments, one for creating the new unmanaged solution (s) containing the components to be converted to managed and the other environment where the unmanaged solution (s) will be converted to managed and will be used for testing and validation.
Select source solutions and the target solution (combined) in our case, and click on Copy Components.
Here we have selected all the component types.
Back in our TestEnv, we can see the components of the solution added from Pub 1 and Pub 2 solutions to the combined solution.
Let us export the combined solution as managed.
The other way to create the combined solution would be to “Include all objects” for unmanaged components like custom tables. For managed components, like out-of-the-box tables lead, contact, case, etc, we’d only select the components customized.
Run the below command, to connect to the destination (managedenv) environment.
We can see the managed solution imported successfully to our target environment.
For quick reference –
Unmanaged
Managed
Unmanaged solutions are intended to be used in the development environment.
Managed solutions are intended to be distributed and installed.
Unmanaged solutions can be exported either as managed or unmanaged.
Managed solutions cannot be exported
Components can be directly edited within an unmanaged solution.
Components inside the managed solutions cannot be edited directly. Editing can only be done in the corresponding unmanaged solution or an additional unmanaged solution in dev and then exported and imported as managed in the target environment.
The unmanaged solution can be seen as the source code
A managed solution can be seen as a compiled code.
Deleting an unmanaged solution only deletes the solution container, all unmanaged customizations remain in effect and are applied to the default solution of the environment
Deleting a managed solution removes the customizations from the environment.
Benefits
Benefits
Unmanaged solutions allow for real-time customization directly within the environment.
The managed solution secures the solution components in the environment, by restricting the user from making changes or removing components from it.
Developers can make changes on the fly without the need for importing/exporting solutions
Ability to uninstall/roll back. In case of issues or undesired changes, managed solutions make it easier to roll back to a previous version. This can be crucial for maintaining system stability and ensuring minimal disruption to ongoing operations
The managed solution supports layering allowing multiple solutions to be installed simultaneously without conflicts.
Clearly defined component ownership in the case of multiple publishers/solutions.
Improved solution import performance with reduced performance impact on the environment.
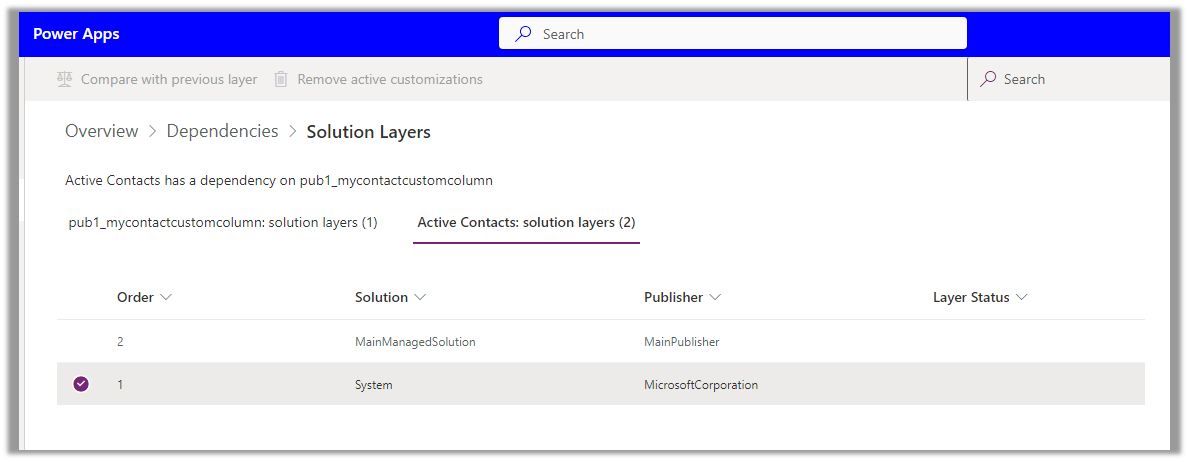
We can see Active Contacts has a dependency on the custom column, and it is part of an unmanaged layer (default solution) in this case.
Click on Remove active customizations
This will delete the unmanaged customization done in the Active Contact view in the environment. (removes the custom column from the Active Contact view)
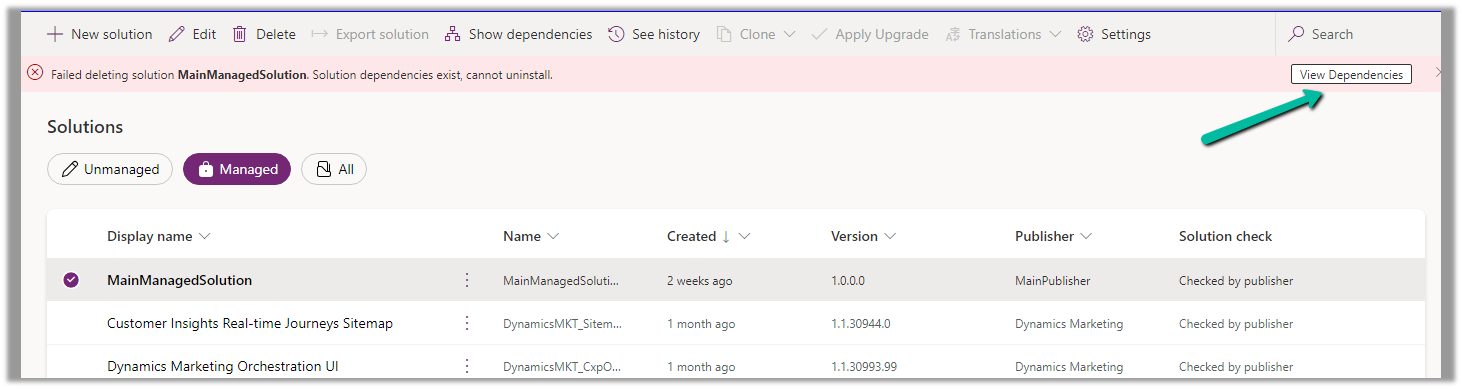
Trying again, this time we can delete the Managed solution.
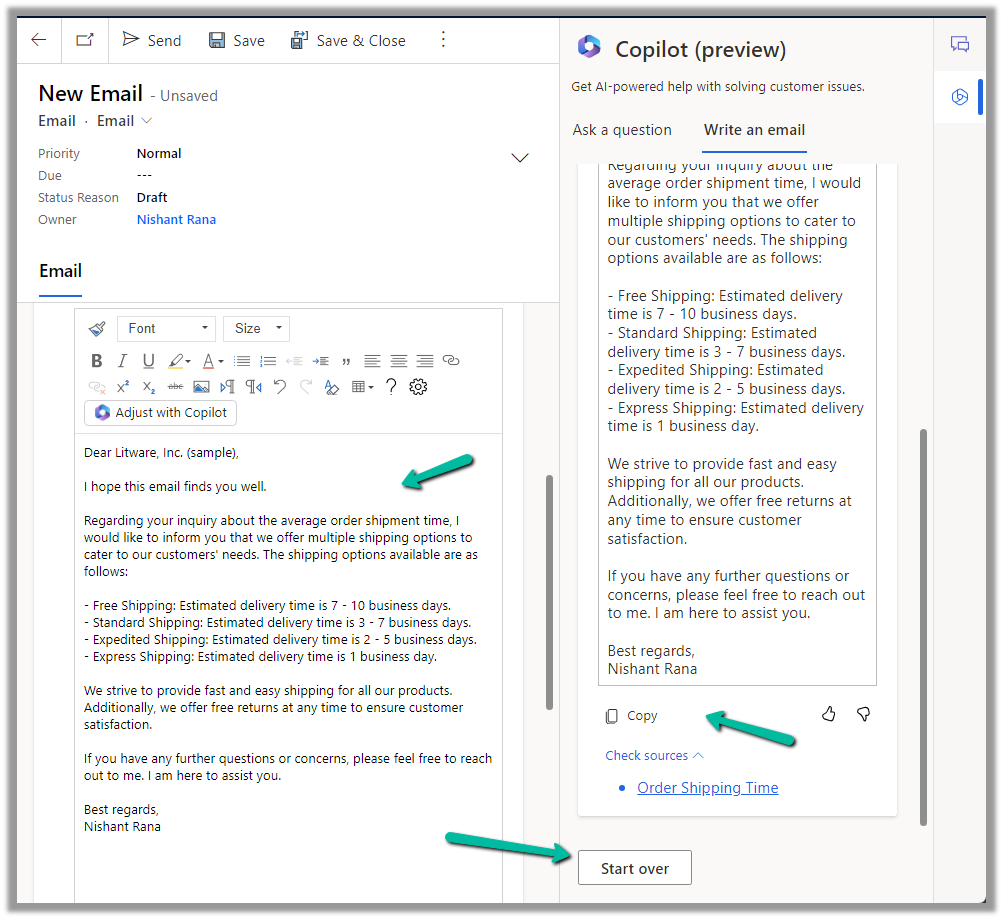
Using the Write an email functionality of Copilot in Dynamics 365 Customer Service, the agents can quickly create responses, which they can use for their email.
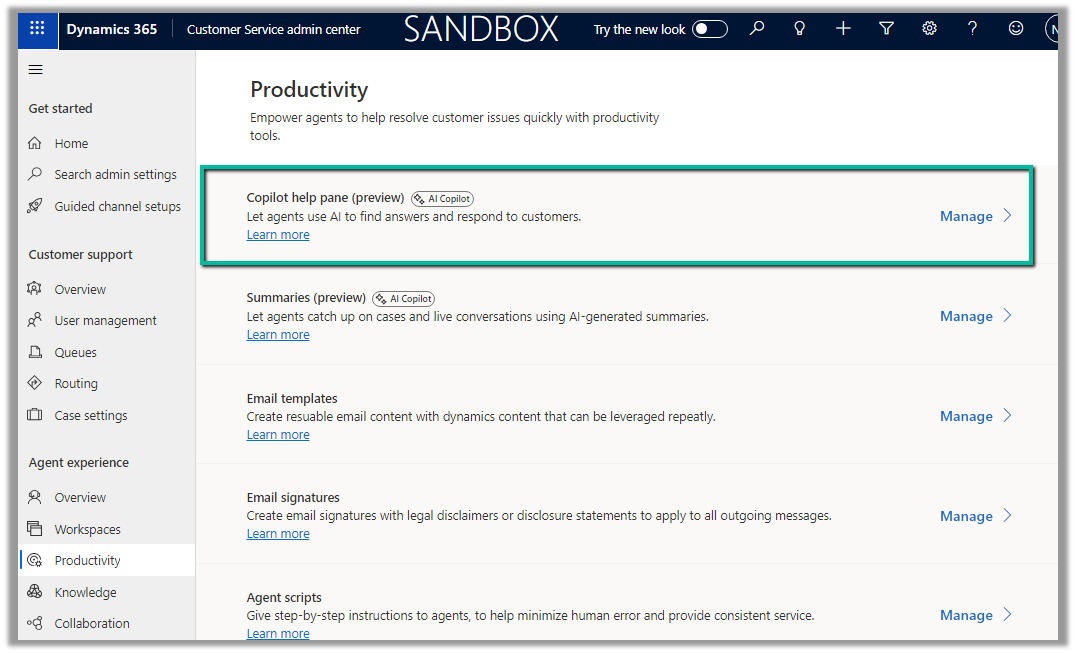
To enable it navigate to Customer Service admin center >> Agent experience >> Productivity >> Copilot help pane (Manage)
Check the For email option and save.
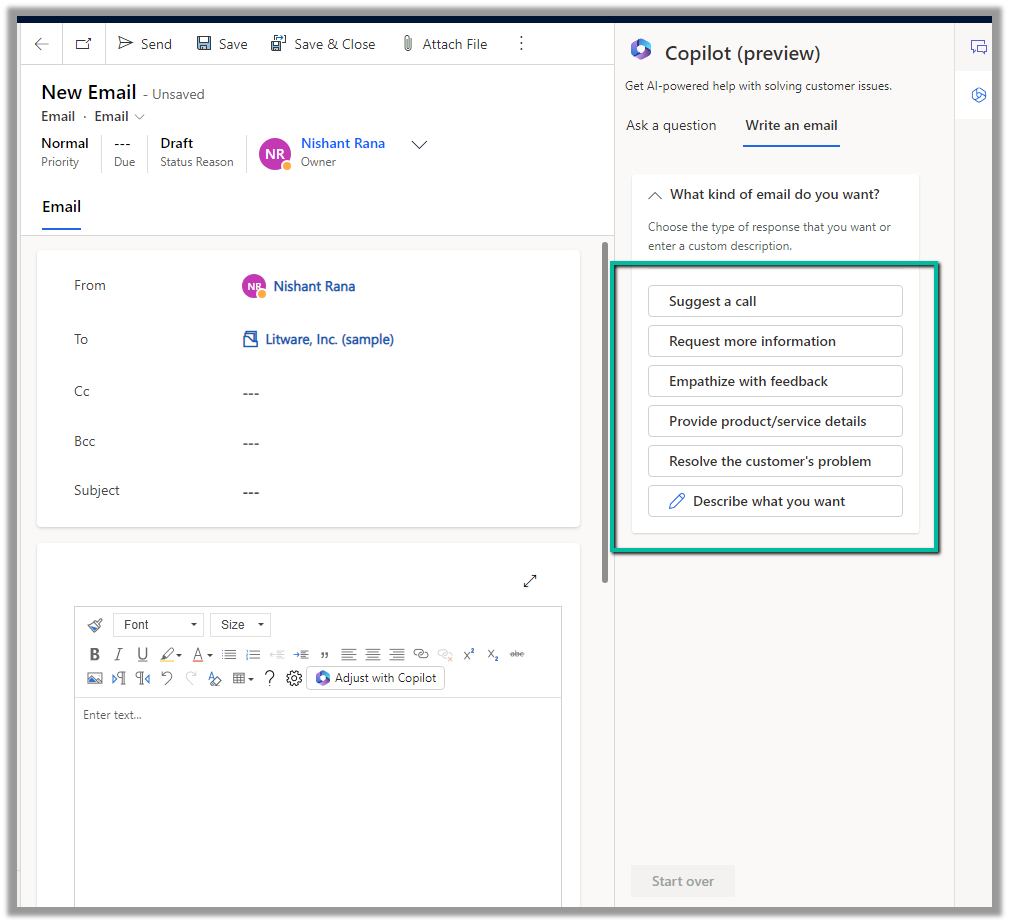
We can see the Write an email tab added to the Copilot help pane. It gets enabled in the context of an email record.
As soon as we open an email, we get predefined prompts like Suggest a call, Request more information along with the option to describe what exactly we are looking for.
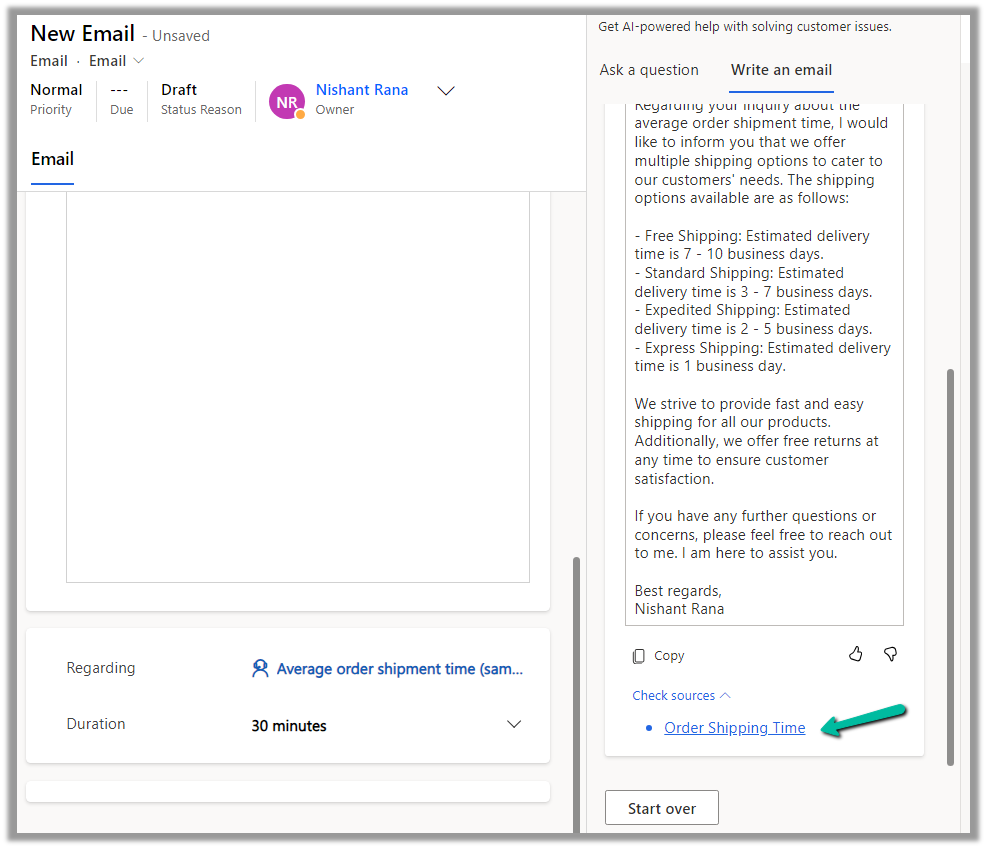
Here we have selected Resolve the customer’s problem prompt.
As we have an Average order shipment time case record associated with the email, the copilot refers to the existing published Knowledge base articles specific to shipment to generate the appropriate response.
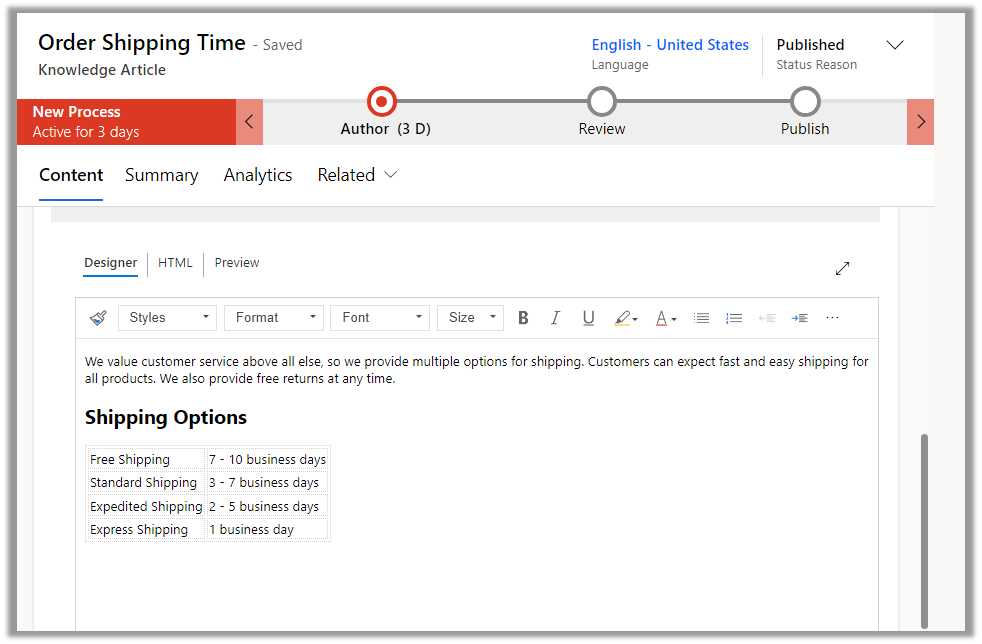
The corresponding knowledge article.
The agent can click on Copy to copy the response to an email, can review and edit it further (if required), or can start over and can select a different prompt to generate a different response.
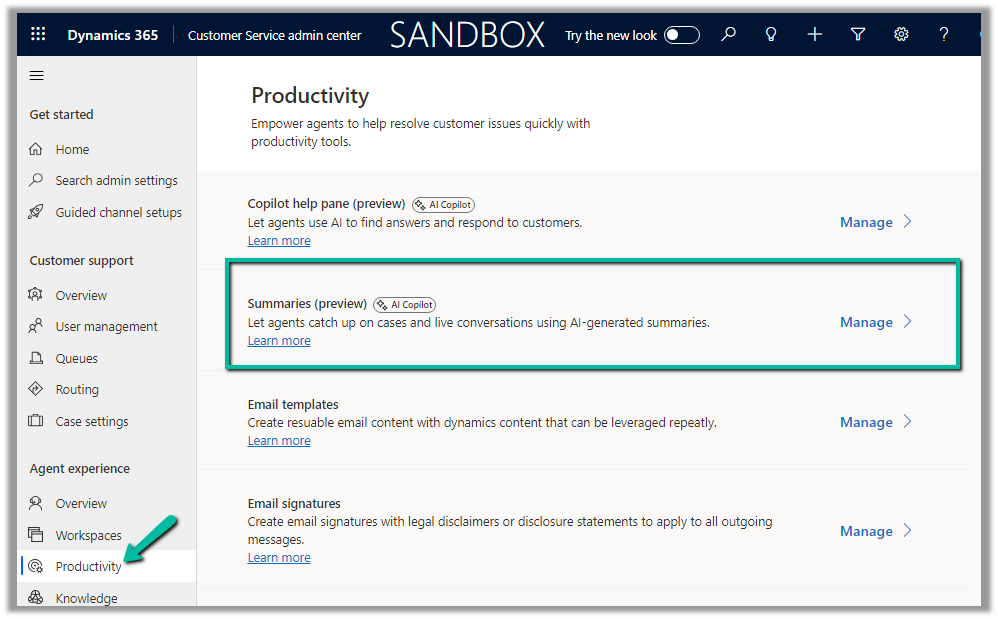
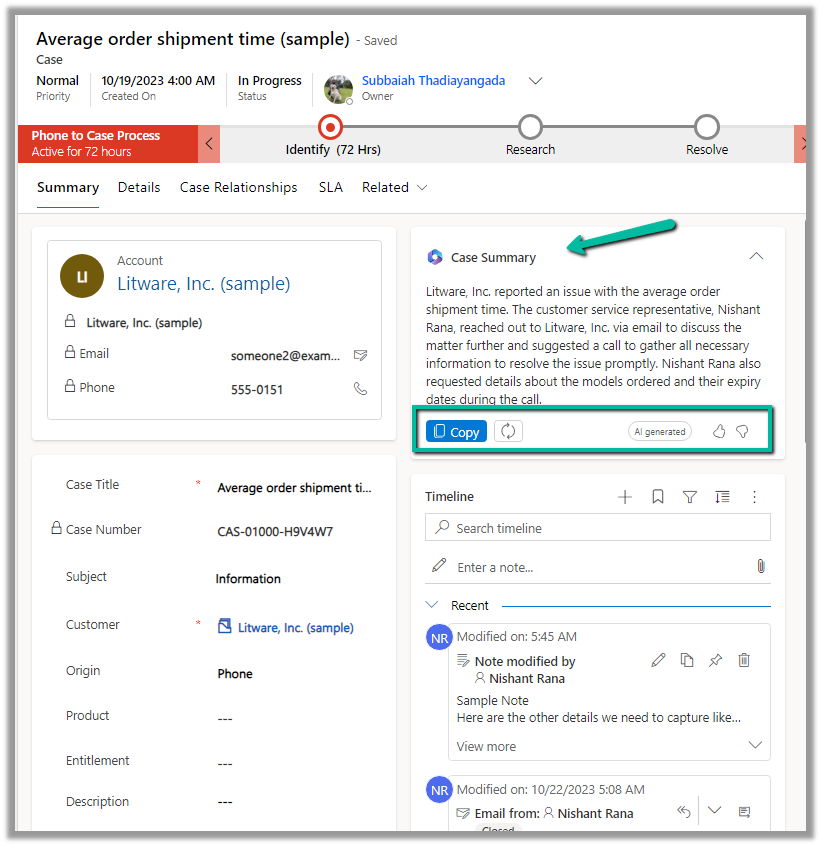
We can make use of copilot to summarize the cases. It applies to cases that are canceled and resolved also.
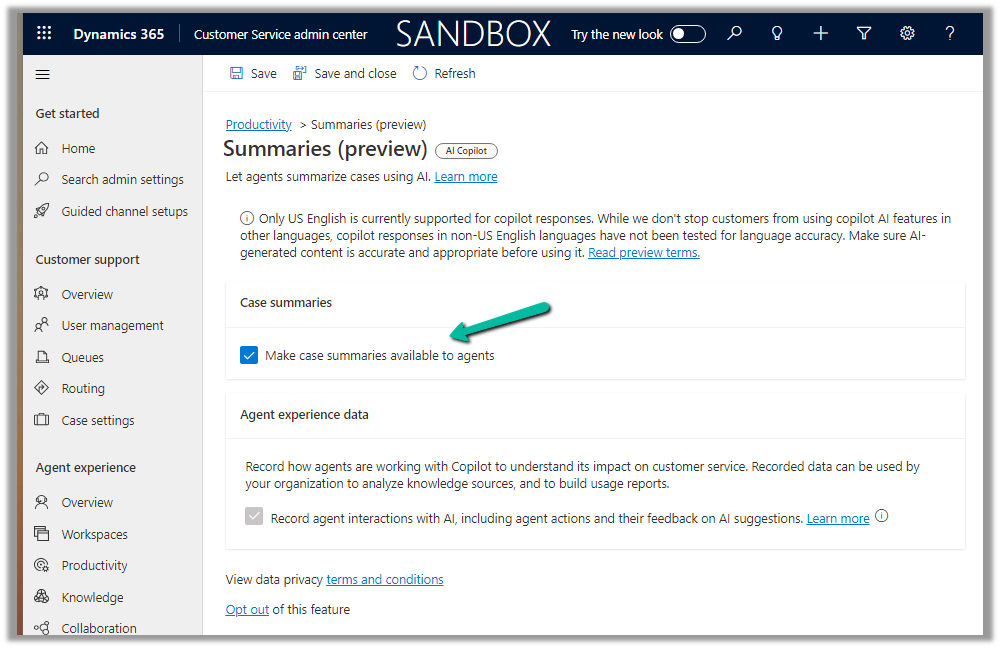
To enable it Navigate to the Customer Service admin center >> Agent Experience >> Productivity >> Summaries (Manage)
Check the Make case summaries available to agents option and save the setting.
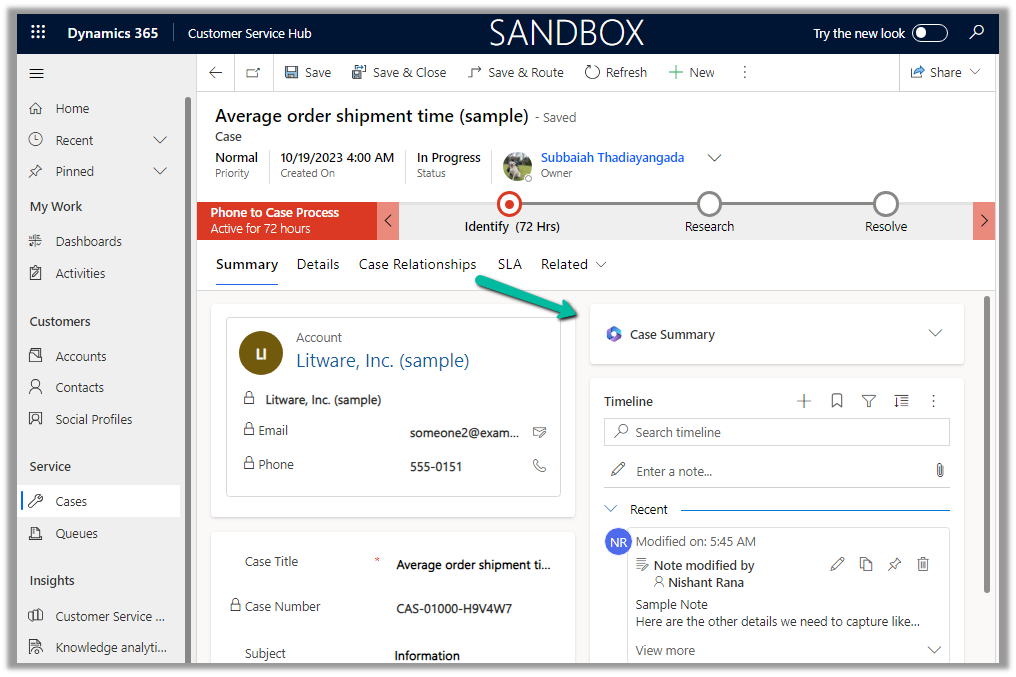
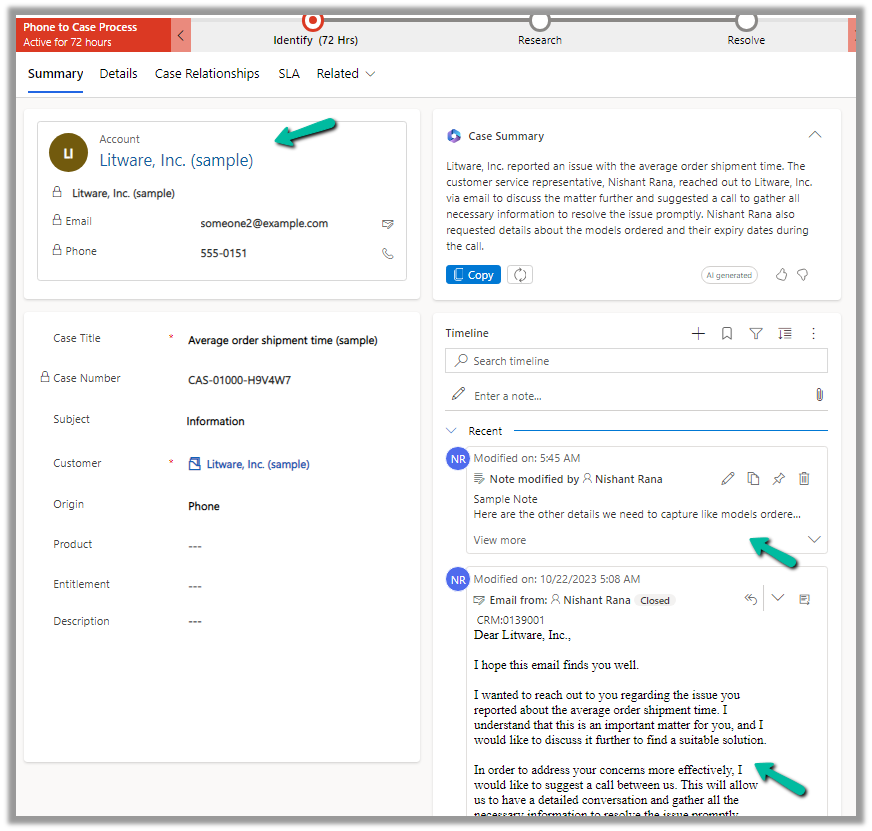
Now when we open a Case record, we can see the Case Summary card added, collapsed by default.
We can expand it to see the summary generated.
We can copy it, regenerate it, provide feedback etc.
The case summary considers key Case details like Case Title, Subject, Priority, Case Type, Description, Product, Emails, and Linked Notes as shown below.
The agents can quickly get the required details from the case summary instead of going through all the key fields, emails, and notes associated, thus allowing them to resolve the case quickly.
Enabling Microsoft Team chats inside Dynamics 365 allows the agents/sellers to start a new chat from a record or connect an existing chat to a record from within the application itself.
We can enable it from the Power Platform Admin Center or the corresponding Sales, Customer Service, Marketing, and Field Service applications.
Inside Power Platform Admin Center – Navigate to Environment >> Setting >> Team Integration Settings
We can either enable it for all the Dynamics 365 Apps or specify the apps.
Here we have specified the Customer Service Hub and Sales Hub.
We also have the option to specify the record types for Teams chats.
Let us open a contact record inside Sales Hub to see it in action.
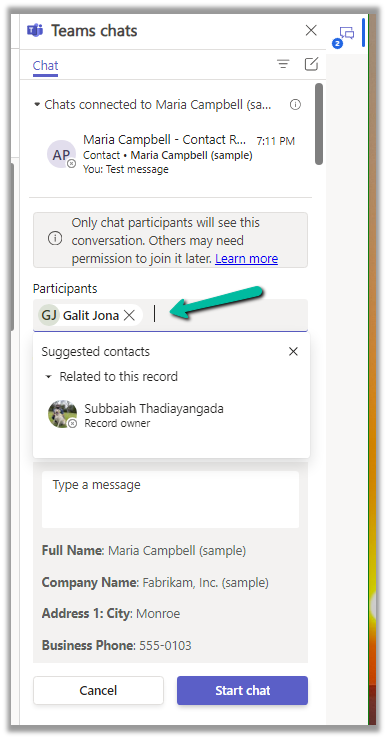
We can see 2 sections on the Team chats pane, Chats connected to the record and Other chats.
As we have not connected chat currently, we see the option New connected chat to connect the record to the team chat.
The Other chats section lists the top 200 chat conversations on the Team, from where we can select any conversation to connect it to the record.
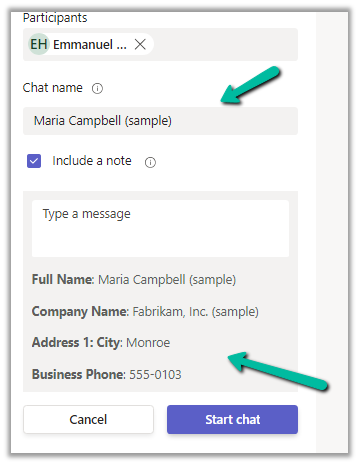
Clicking on the New connected chat allows us to search the Participants whom we want to chat with, update the chat name (suggested), and include a note as well.
It also suggests the participant (as the record is owned by a user, it will suggest the name of the record’s owner)
We can also select a user from the Other chat section, and select the Start a connected chat option, which populates the participant.
We can also have multiple participants added.
Add the required details and click on the Start chat
We can see the chat window opening with the participant selected and details / message added.
We can also connect other chats to that record using the Connect to this record option.
We can also disconnect the chat using the Disconnect form this record option.
Similarly, we can also start a regular chat (not associated with any record) using the compose icon in the Teams Chat panel.
This opens the New chat window as shown below.
As we saw earlier, we can use the + Add record types option to add more record types to connect to Teams Chats. (including custom table)
For each record type added, we get the following settings.
Here we can specify who can join and disconnect the chat.
We can also specify if the record’s title can be used for the Chat name, should the note be included or not, and which view fields to be considered for the Message.