Install Voice Channel in Omnichannel – Dynamics 365 Customer Service


Make sure all the prerequisites are in place –

https://learn.microsoft.com/en-us/dynamics365/customer-service/omnichannel-provision-license#prerequisites

Login to Power Platform Admin Center >> Environments

https://admin.powerplatform.microsoft.com/environments

Select Resources >> Dynamics 365 apps

Select Manage for Omnichannel for Customer Service – Telephony


It will open Dynamics 365 Administration Center | Omnichannel page

Click on Add environment

Select the required environment and click on Next.

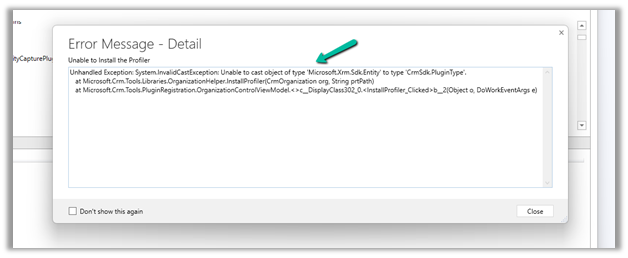
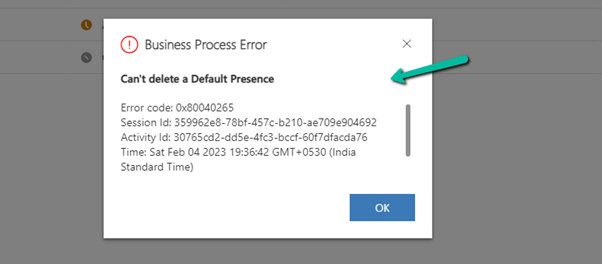
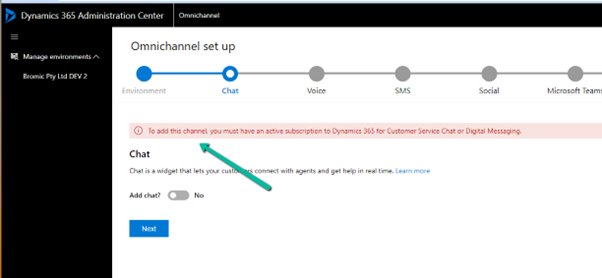
If we do not have the required subscription for a particular channel we will get the below error

Next for Voice, select Add Voice along with Voice and Messaging preview terms.

Keep clicking on Next till confirmation (add other channels if required)

The confirmation page will show all the selections and details.

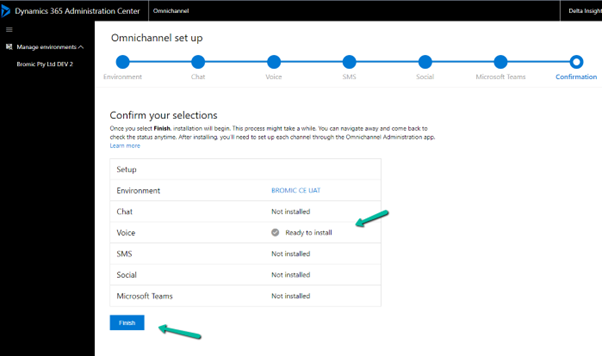
Clicking on Finish starts the installation process.

After around 1.5 -2 hours or so we could see the installation being successful.

If we want to add another channel e.g. SMS, select the SMS tab and save to start the process.

This starts the update

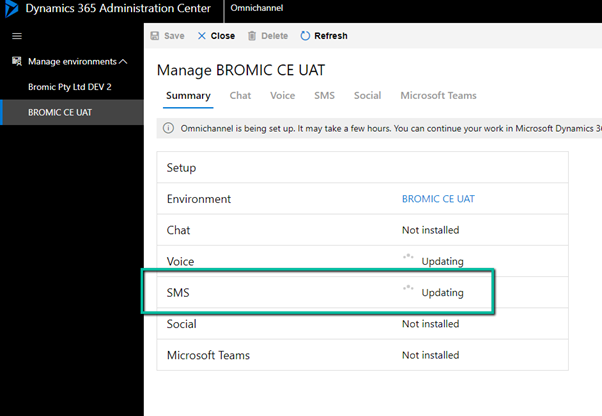
After an hour or so we see the status as installed for both Voice and SMS.

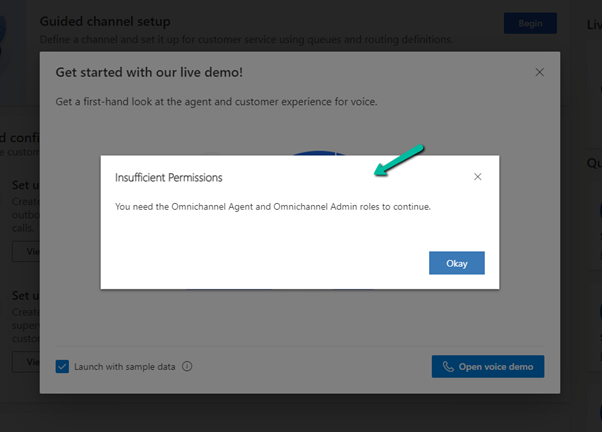
On opening the Customer Service Admin Center app, we can see the option of getting started with a voice demo.

Assign the account you are using the Omnichannel Agent and Omnichannel Admin role (even if you are a system administrator you need this role to start with the voice demo, admin to configure and agent to test)

It will create the workstreams, acquire a phone number, create a voice channel, power virtual agent, etc. for the demo

After around 2 minutes or so, we will have our voice demo setup done.

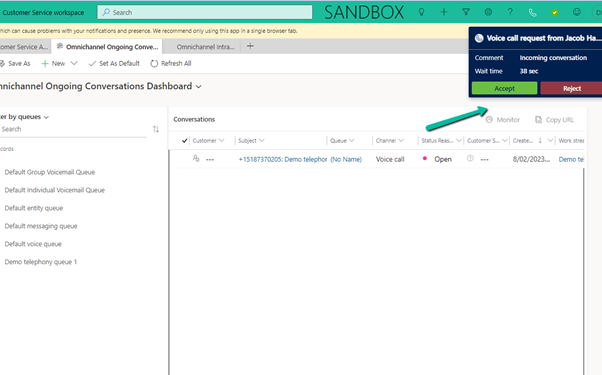
We can open the agent app which is either Omnichannel for Customer Service or Customer Service Workspace App and can call the phone number configured to test the application.

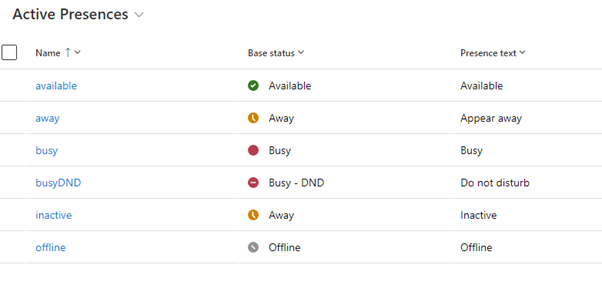
We can see the following workstreams created for Voice and Voicemail channels.

The demo telephony workstream 1 

The agent receiving the notification

*At times we have faced an issue when there is a bot configured, so in case you are facing any issues, try removing the bot from the workstream

Hope it helps..

Advertisements

Use the Marketing only field to identify automatically generated marketing contact records – Dynamics 365 Marketing


The form-matching strategy defines what field(s) will be used to find the matching record.

Can be found at – Dynamics 365 Marketing >> Settings >> Lead Management >> Form Matching (Outbound)

We then associate the form-matching record with a marketing form.

So if a contact with the same email address is found, the record will be updated, if not then a new contact record will be created, on form submission.

Now to identify these auto-created contact records, we can make use of the out-of-the-box Marketing Only Boolean field. The system populates this field for the contact records created as part of marketing form submission.

We can find the field in the Contact form – Details tab >> Marketing Section.

Read more on marketing only flag

Hope it helps..

Advertisements

Omnichannel Real-time analytics reports (Preview) – Dynamics 365 Customer Service


The Real-time dashboard consists Summary, Ongoing conversation, Agent, and Voice report.

To enable it – Login into Customer Service Admin Center >> Operations >> Insights >> Report Settings >> Real-time Analytics (preview)


Enable it –


After a couple of minutes, we can see the Dashboard added to the Customer Service Workspace app.

Within the Summary, we can get the details of any ongoing conversation, KPIs, etc.

The ongoing conversation report shows the details of all the ongoing conversations

The agent shows all the real-time details about the agents

We can select an agent from Agent List and click on Details to show additional details about the agent.

Finally, the Voice report shows details specific to Voice Channel / Queues.

Get all the details here – Real-time analytics dashboards (preview)

Hope it helps..

Advertisements

Moving Marketing Email, Journey, Events, etc. between environments – Dynamics 365 Marketing


To move Marketing configurations/data from one environment to another we can make use of the Configuration Migration Tool.

Open the tool, and create the schema file. Connect to the source environment.

Select and add the real-time marketing email table – msdynmkt_email Soure email.

Next, we are going to select the real-time marketing Journey table – msdynmkt_journey

Source Journey.

Lastly events – msevtmgt_event

Source events.

Click on Save and Export

Save the schema file and click on yes.

Click on Export data to generate the data to be exported.

Next with the schema and data exported, select Import Data to start the import and select destination organization.

Select the data file exported earlier and start the import process.

The import process gets completed with a warning for the table Event for one of the records.

Let us now check the destination environment.

We can see 4 Email records created and 1 updated, all in Draft Status.

We can see all 4 journey records created.

And 2 event records were created.

In case we want to filter the records or want to make sure records are not updated in the destination, we can select Tools >> Configure Import Settings

And use Do not update existing records for all entities and specify Fetch XML for it for filtering.

Also, checkPrerequisites for the export/import process

Hope it helps..

Advertisements

Marketing Form and required (mandatory) fields in Lead and Contact – Dynamics 365 Marketing


Let us take one of the out-of-the-box marketing forms available in Dynamics 365 Marketing.

It has only an Email field marked as required and creates / updates both contacts and leads.

If we click on Check for errors we will get the below notifications.

  • To create a Contact, the Last Name (lastname) field should be included in your form and marked as required.
  • To create a Lead, the Last Name (lastname) field should be included in your form and marked as required.

Now let us host this form and try submitting it.

Click on Go Live, and create a new related marketing form page for it. Make sure you have the domain already authenticated.

Authenticate Domainhttps://nishantrana.me/2022/11/09/how-to-authenticate-domain-in-dynamics-365-marketing/

Embed Marketing Form on the external pagehttps://nishantrana.me/2022/11/10/how-to-embed-marketing-form-on-an-external-page/

Open the Form page and copy the script to host the form.

On the host page, let us submit the details.

Back in our Marketing form, we can see the submission.

And also, both the lead and contact records created.

Now let us try one more submission without specifying a value for the lastname field (which it was showing in the notification, as a required field to be added on the form, for both the lead and contact table).

We can see the submissions in the Marketing Form.

And both the lead and contact records were created.

So although it shows the notification for all the mandatory fields which are not added in the form and marked as required, it still allows the record to be created.

Hope it helps..

Advertisements

How to – configure Facebook Webhook Validation with Power Automate Flow (Dataverse / Dynamics 365)


Recently we were working on Facebook Leads integration with Dynamics 365. Webhook for Leads can be configured to send real-time notifications of the Leads ads changes.

The first step of setting up Webhook requires creating an HTTPS endpoint that can process 2 types of HTTP Requests – Verification and Event notifications.

Here we will see how to configure the Power Automate flow for verification.

Login to Meta for Developers – Facebook and create an app.

https://developers.facebook.com/

Select Business for the app type.

After the App is created, select Webhooks to be added to the app. Click on Set up.

Next click Subscribe to this object. Here we have User selected.

For getting leads notification we need to select Page 

FBPagePreview in new tab

And subscribe to leadgen object

leadgen

It asks us to specify the Callback URL and Verify token.

Back in Power Automate create a Flow with Request type Trigger, followed by Parse JSON and Response actions.

For HTTP Request, select GET as the method, as FB will send a GET request to the endpoint URL, with the verification requests included in the endpoint of the URL.

Next, Parse the JSON and specify the Content and Schema

Content – 

 triggerOutputs()['queries']

Schemajson


Lastly in Response, set Status Code as 200 and Body as hub.challenge.

Here FB expects the Endpoint to verify the hub.verify_token (which we haven’t set up yet) and respond with hub.challenge value after verification.

Save the Flow, and copy the URL generated for the HTTP Request trigger.

Back in Meta for Developers, in edit user subscription paste the Callback URL and for now in place of token specify any value and click on Verify and Save.

We should now have a Webhook endpoint (Flow) successfully configured

We can also see our Flow ran successfully.

Here in the example we configured the webhook validation for User events, for Facebook Lead we need to configure it for Page, the other options available are Permissions, Application, Instagram etc.

Please check – 

https://powerautomate.microsoft.com/nl-nl/blog/connect-facebook-workplace-to-sharepoint/


Hope it helps..

{
    "type": "object",
    "properties": {
        "hub.mode": {
            "type": "string"
        },
        "hub.challenge": {
            "type": "string"
        },
        "hub.verify_token": {
            "type": "string"
        }
    }
}
Advertisements