Recently we got the below exception for one of our plugins.
Message: The plug-in execution failed because the Sandbox Worker process crashed. This is typically due to an error in the plug-in code. Please refer to this document: https://go.microsoft.com/fwlink/?linkid=2189390 Microsoft.Xrm.RemotePlugin.Grpc.ExceptionHandlers.SandboxFabricWorkerCommunicationException: Error communicating with SandboxFabric Worker —> Grpc.Core.RpcException: Status(StatusCode=”DeadlineExceeded”, Detail=”Deadline Exceeded”
If we refer to Microsoft Documentation below seems to be the cause of the issue in our case.
In our scenario, we had a Plugin that was Asynchronous and it was triggered on the Post Update of Work Order Service task. The plugin will fetch all the attachments (to notes associated with inspection attachments > inspection response > work order service task). There were many Service Tasks having more than 20 attachments exceeding 100 mb size total.
We were doing bulk updates which triggered the plugin creating too many requests eventually leading to that error.
Microsoft has always recommended managed solution(s), apart from the some of benefits that managed solutions offer over unmanaged, Microsoft is also adding features to the managed solution, making it easy for teams to adopt and transition to Managed solutions, like focusing on making the solution import faster and adding ALM-specific features to it.
Let us take a simple example to see it working –
Suppose we have 2 environments, a Test and a Managed environment.
The test environment has 2 unmanaged solutions from different publisher that is already deployed to the target environment as unmanaged.
Source –
Target –
Ideally, we should be creating 2 copies of production environments, one for creating the new unmanaged solution (s) containing the components to be converted to managed and the other environment where the unmanaged solution (s) will be converted to managed and will be used for testing and validation.
Select source solutions and the target solution (combined) in our case, and click on Copy Components.
Here we have selected all the component types.
Back in our TestEnv, we can see the components of the solution added from Pub 1 and Pub 2 solutions to the combined solution.
Let us export the combined solution as managed.
The other way to create the combined solution would be to “Include all objects” for unmanaged components like custom tables. For managed components, like out-of-the-box tables lead, contact, case, etc, we’d only select the components customized.
Run the below command, to connect to the destination (managedenv) environment.
We can see the managed solution imported successfully to our target environment.
For quick reference –
Unmanaged
Managed
Unmanaged solutions are intended to be used in the development environment.
Managed solutions are intended to be distributed and installed.
Unmanaged solutions can be exported either as managed or unmanaged.
Managed solutions cannot be exported
Components can be directly edited within an unmanaged solution.
Components inside the managed solutions cannot be edited directly. Editing can only be done in the corresponding unmanaged solution or an additional unmanaged solution in dev and then exported and imported as managed in the target environment.
The unmanaged solution can be seen as the source code
A managed solution can be seen as a compiled code.
Deleting an unmanaged solution only deletes the solution container, all unmanaged customizations remain in effect and are applied to the default solution of the environment
Deleting a managed solution removes the customizations from the environment.
Benefits
Benefits
Unmanaged solutions allow for real-time customization directly within the environment.
The managed solution secures the solution components in the environment, by restricting the user from making changes or removing components from it.
Developers can make changes on the fly without the need for importing/exporting solutions
Ability to uninstall/roll back. In case of issues or undesired changes, managed solutions make it easier to roll back to a previous version. This can be crucial for maintaining system stability and ensuring minimal disruption to ongoing operations
The managed solution supports layering allowing multiple solutions to be installed simultaneously without conflicts.
Clearly defined component ownership in the case of multiple publishers/solutions.
Improved solution import performance with reduced performance impact on the environment.
With the preferred solution (preview), now we can specify a solution to which all our changes, that are made outside of the context of the unmanaged solution, should get automatically added.
To enable it, navigate to Settings >> Features >> Preferred solution (Preview)
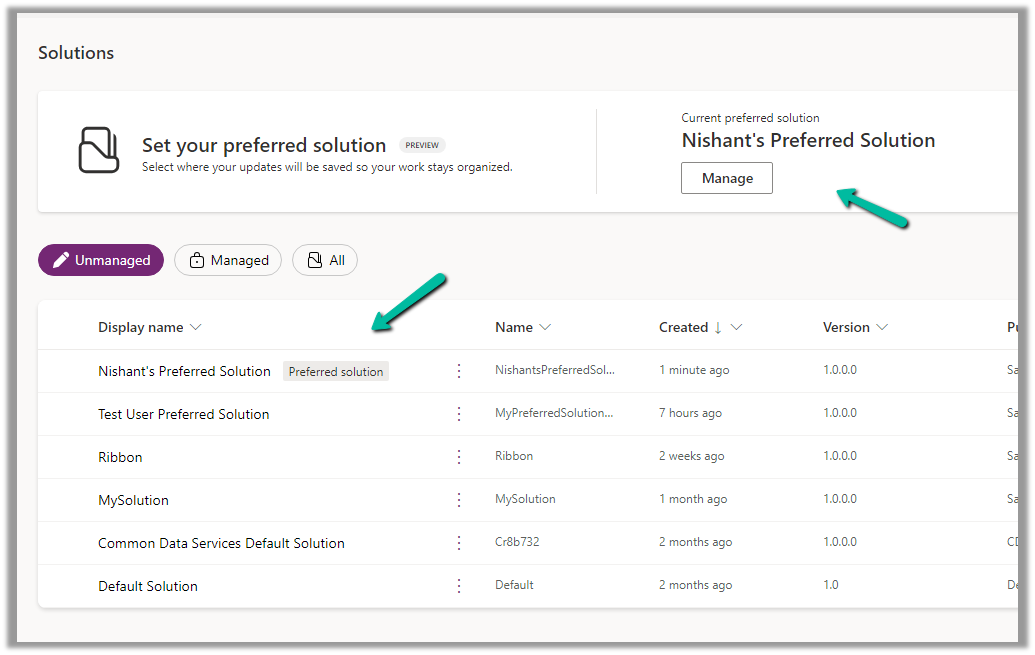
Inside the Maker Portal, now we can see a new section added, asking us to specify the preferred solution, and we can see Common Data Services Default solution set as the preferred solution as default.
We can click on Manage to specify any of the existing unmanaged solutions as the preferred solution or to create a new solution.
Here we have set one of the solutions as the preferred solution.
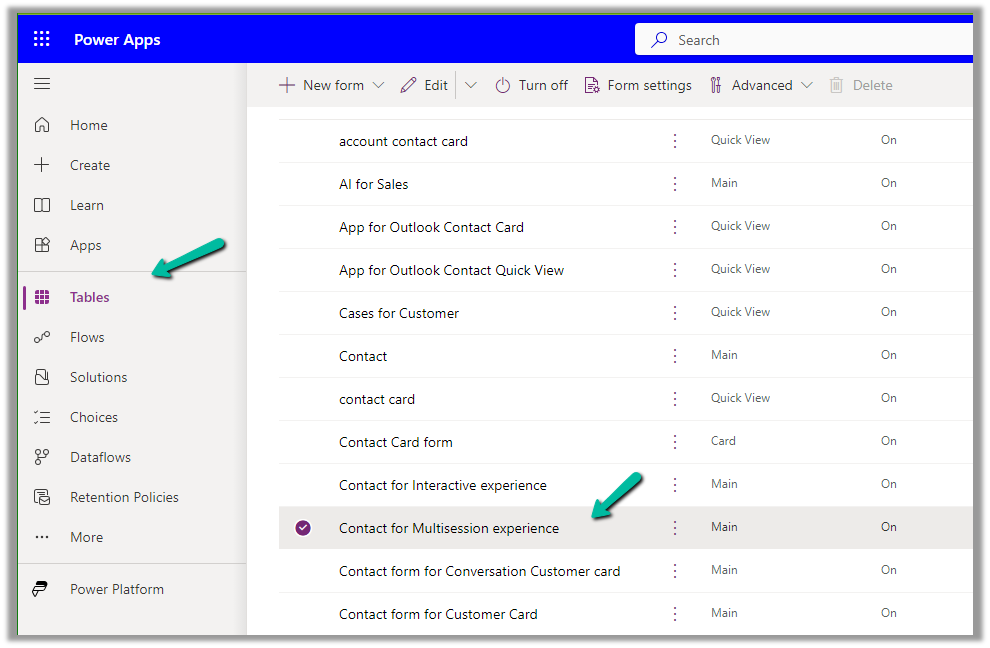
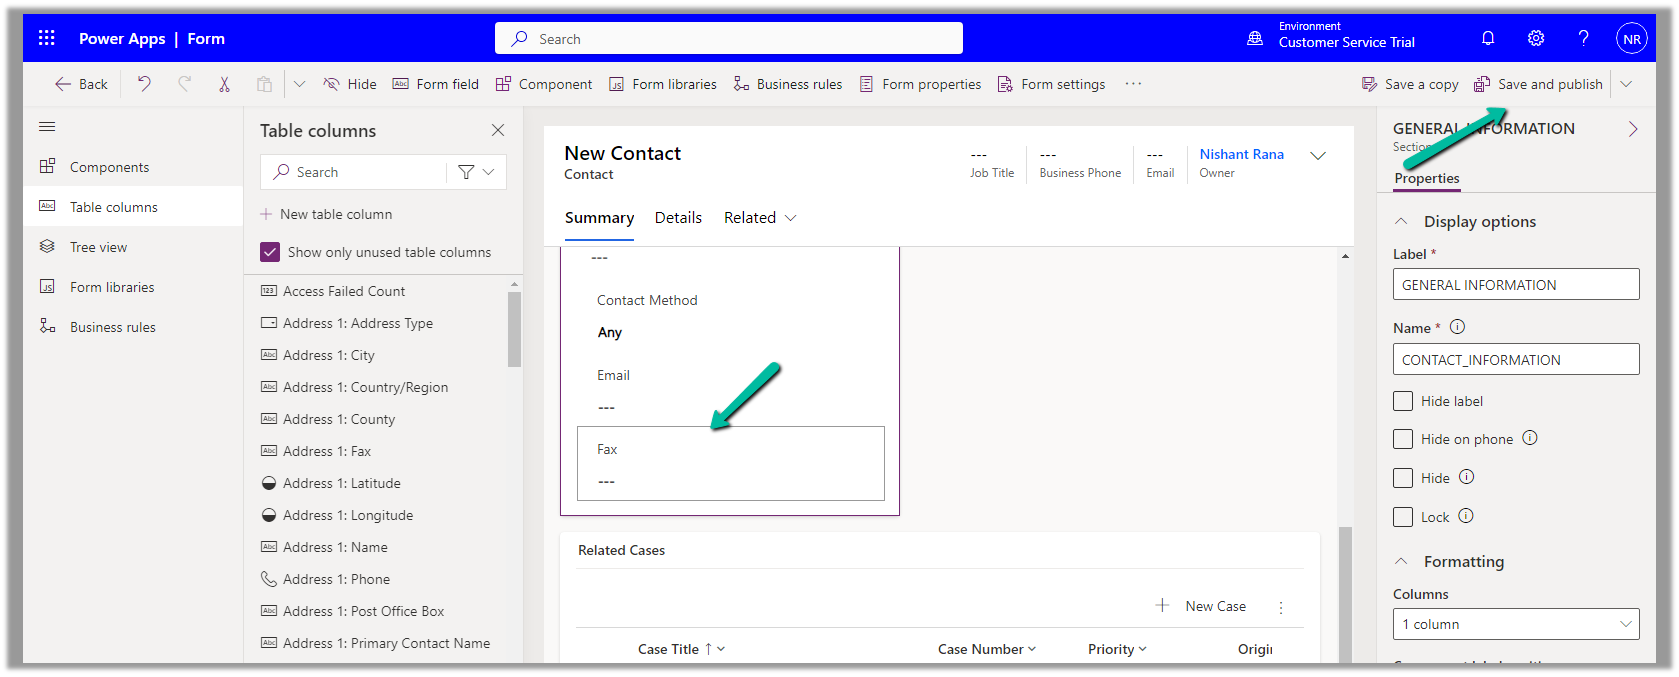
Now let us add an update existing table outside the context of the solution. Here we are updating its form by rearranging some of the fields in it.
We have moved the Fax field to be the last field in that General Information section and have published the changes.
Back in our preferred solution, we can see the form we updated, automatically added.
Similarly, any other changes, i.e. any solution components added or updated, outside the context of the unmanaged solution, will be added to the preferred solution. (apart from changing the Default Solution where all the solution components reside).
Also, other users/makers can specify their preferred solution.
To add the cloud flows or canvas apps, created outside the context of the solution, in the preferred solution, we can enable the below features.
Here we have created this sample flow from outside the solution and also a canvas app.
From the notes in the timeline, now we can link an existing note to an existing case, contact, or account record (this will unlink it from the current record) and also create either a new case, contact, or account record.
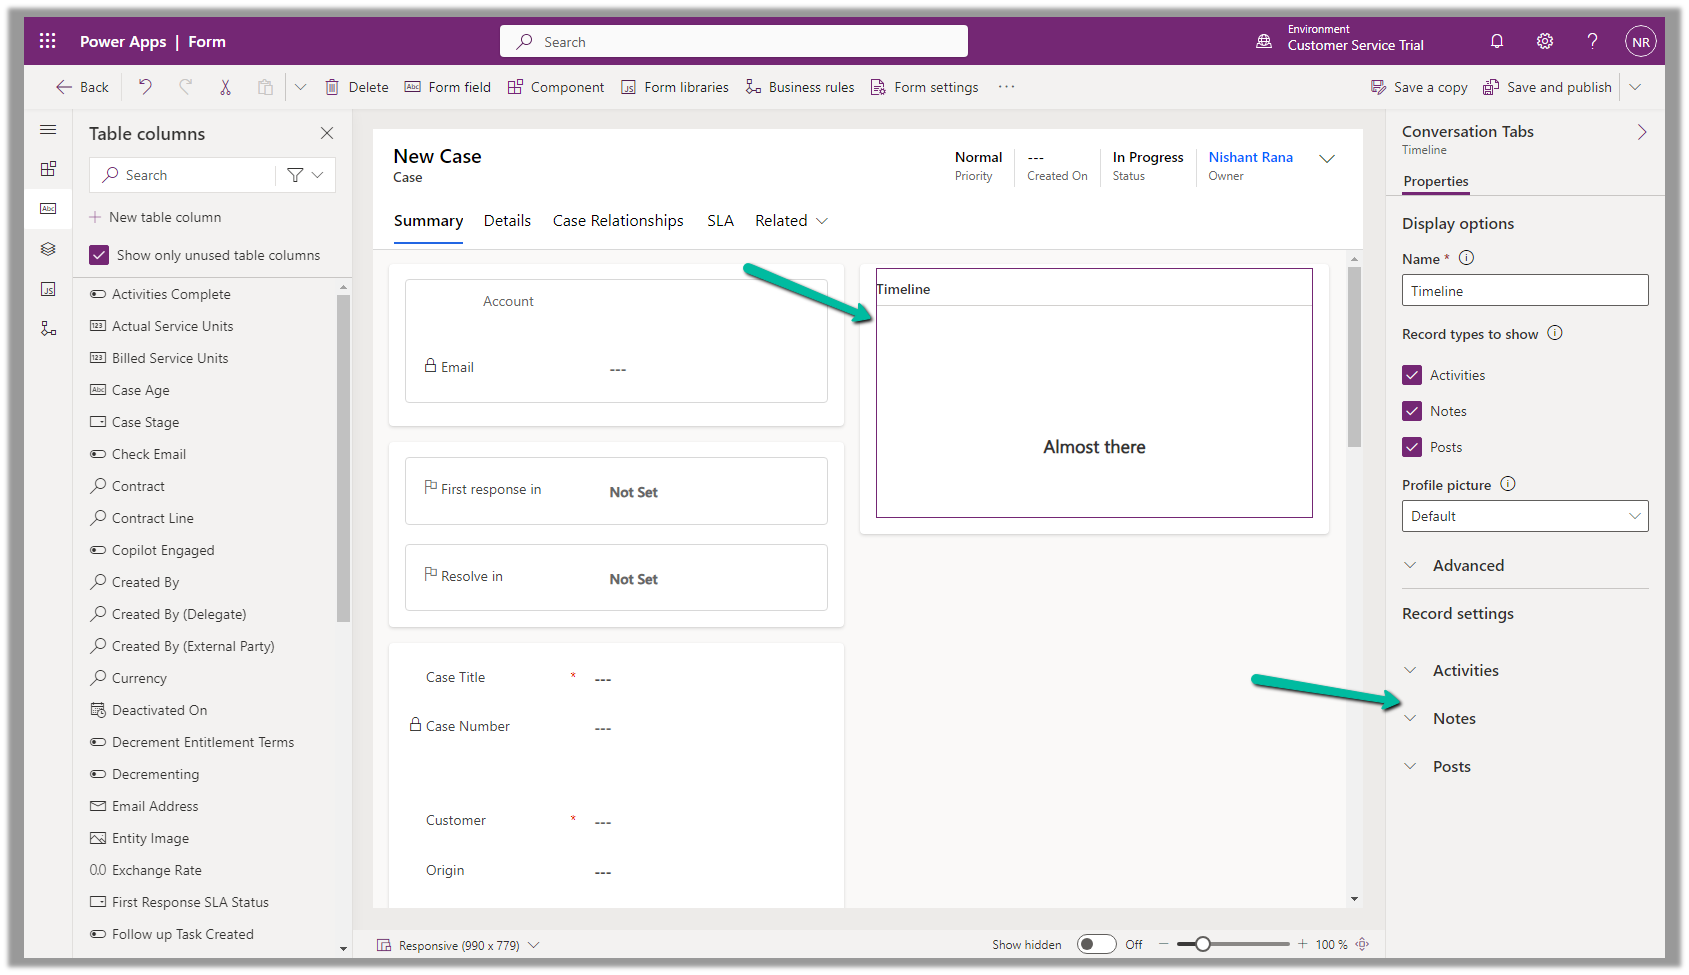
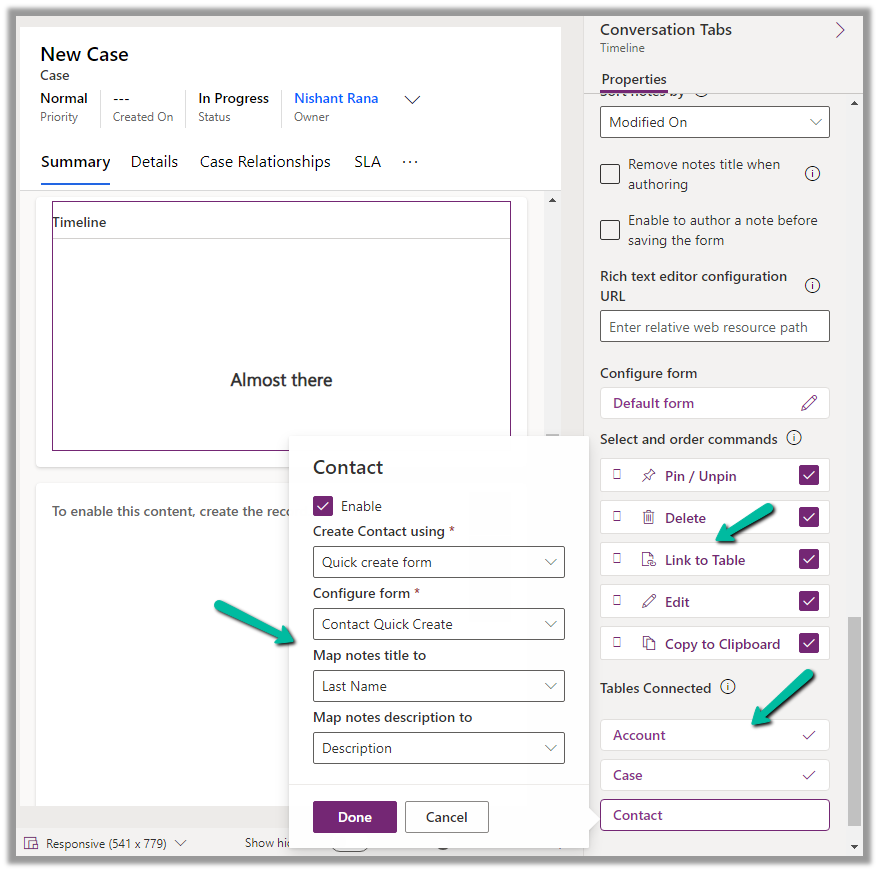
To configure it, open the Notes property of the Timeline section in the form.
Below we can see the different properties we can configure.
Enable the Link to Table Command
Enable the Tables to be connected.
Here we are enabling the Contact table, and then specfiying the Quick Create Form to be used while creating the new contact record, and also the mapping of the title and description field of the Notes. We have the same configuration for Case and Account.
Save and publish the changes.
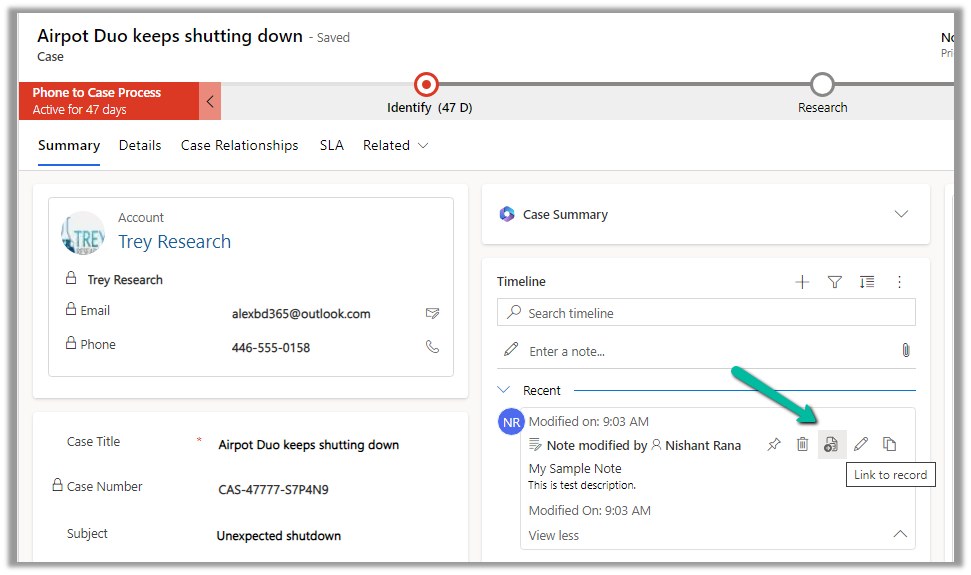
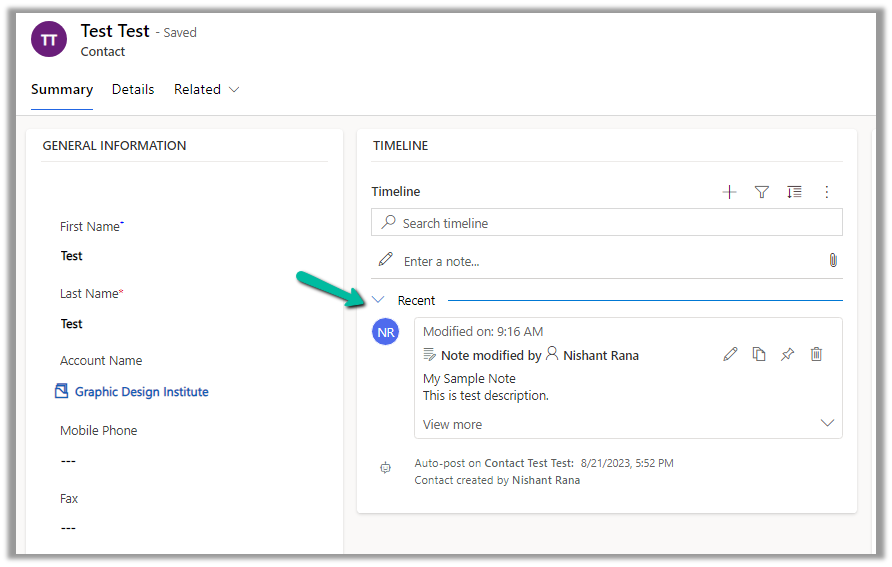
We can now see the option to Link to record for the notes.
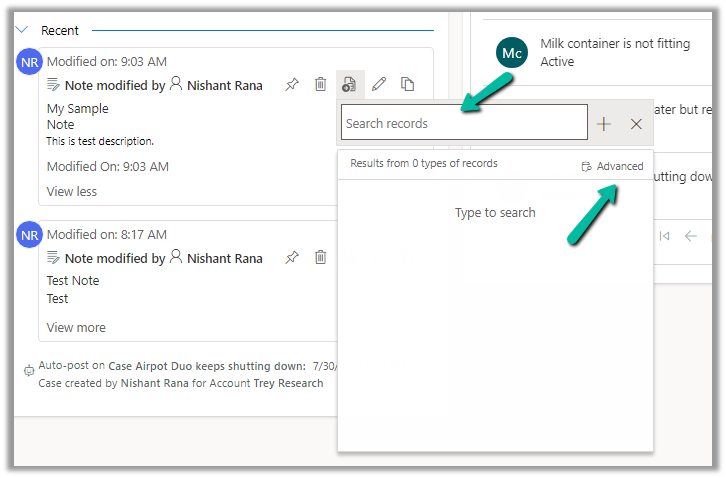
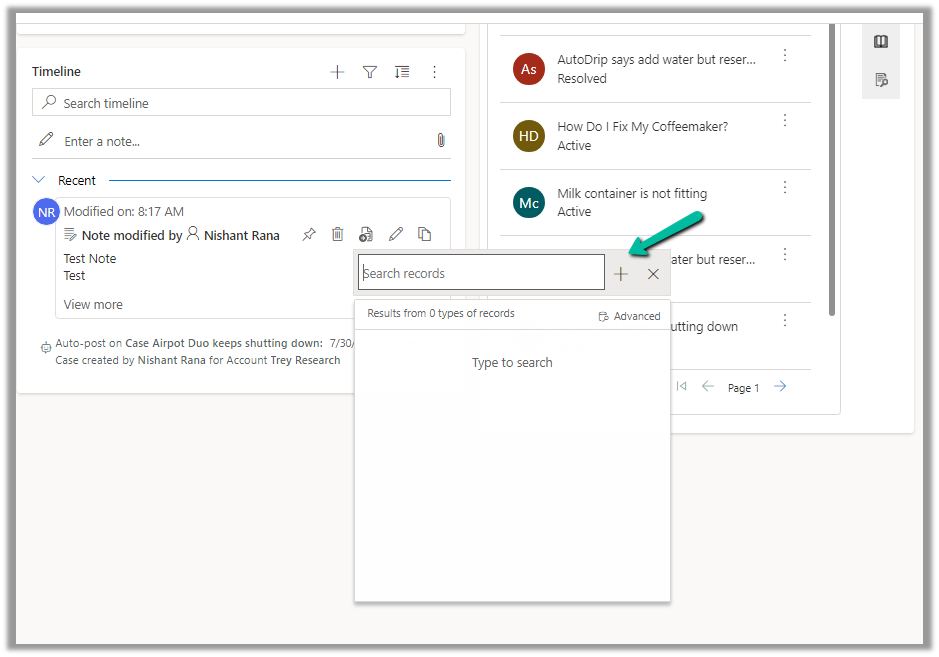
We get the option to search for an existing record (it will show results from tables connected).
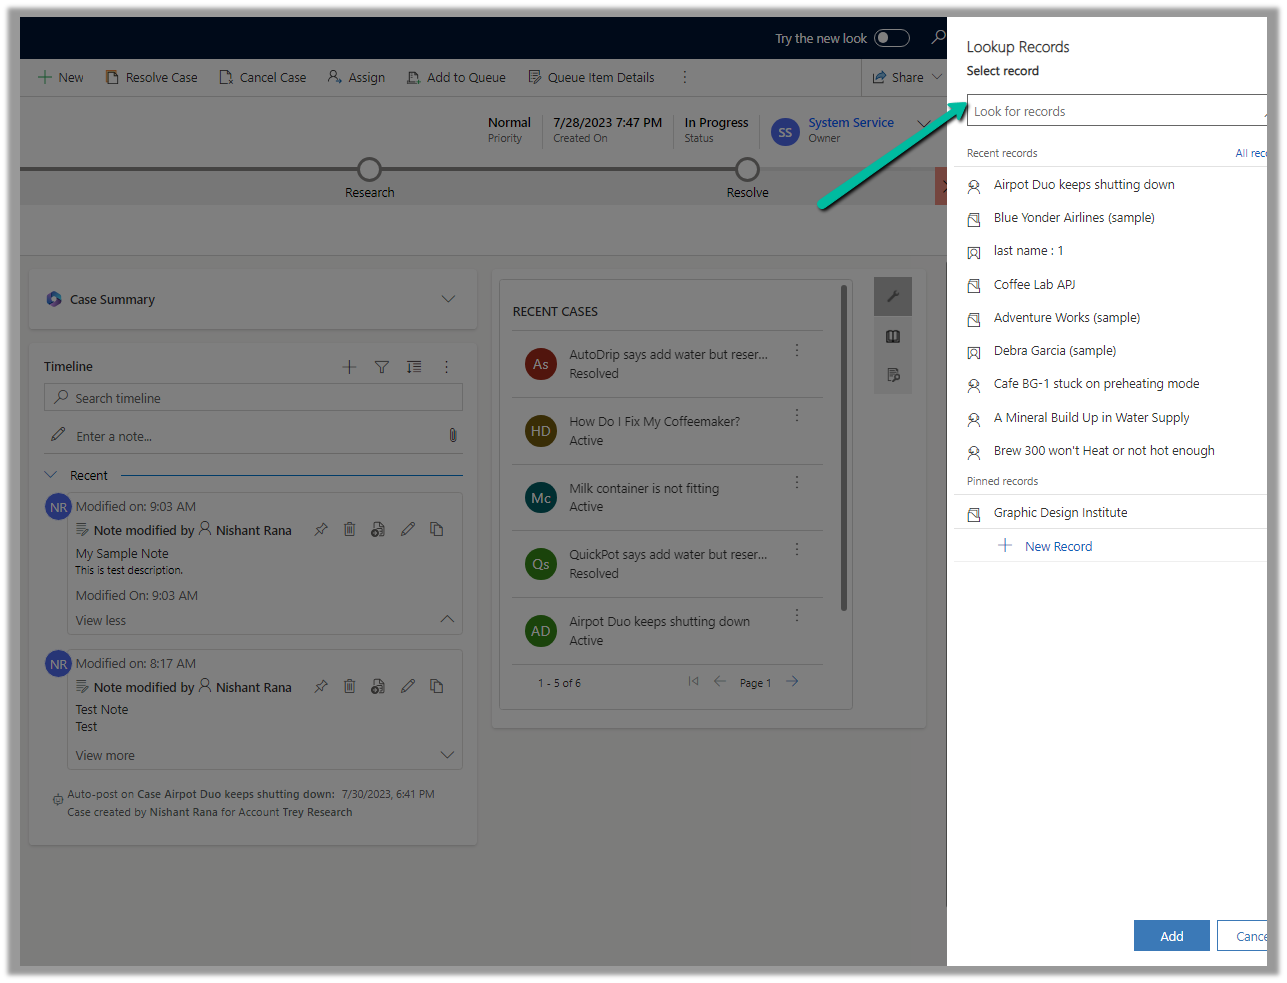
Clicking on Advanced opens the lookup dialog.
On Associating to an existing record, the notes get linked to the new record and unlinked to the current record.
We can see the notes record associated with the contact record and removed from the existing case record.
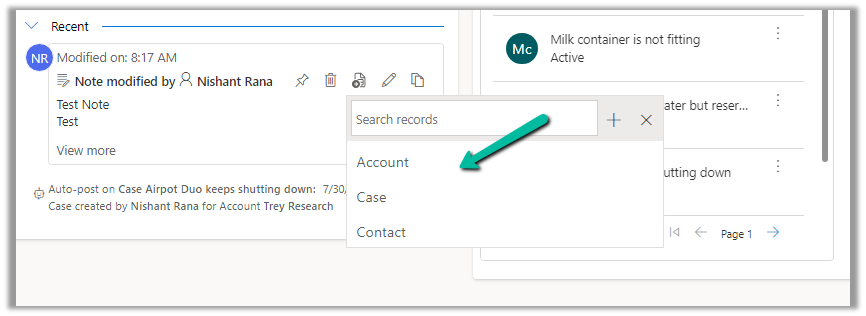
We can also use the plus + sign to create new records of the tables connected from the notes.
Account, Case, and Contact in this case.
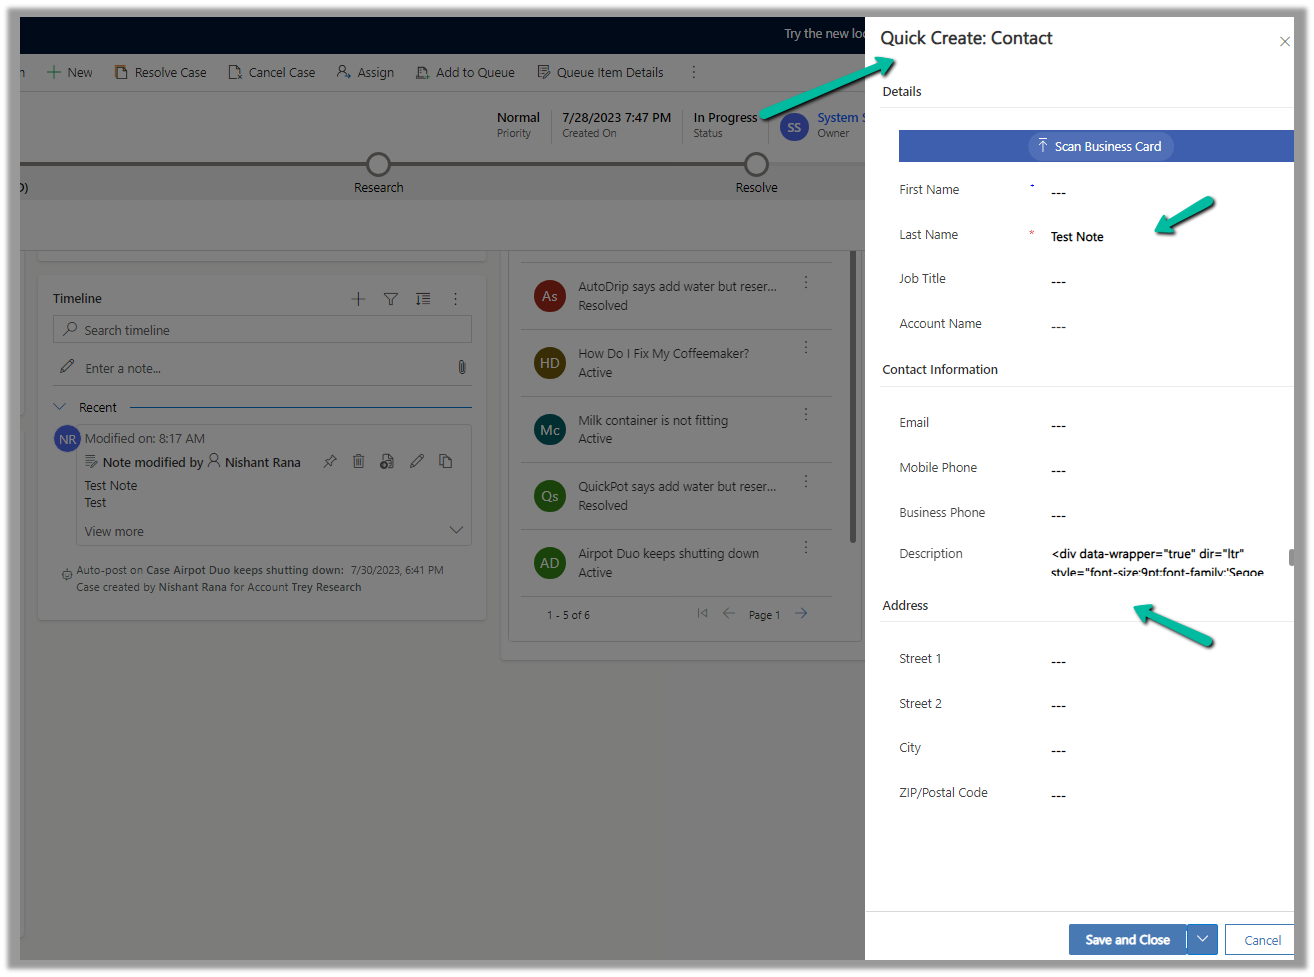
This opens the Quick Create form, with the title and description field of the notes mapped.
After the new record gets created, we are again presented with the option to Unlink that existing note from the current record.
Below we can see the new record with the note associated with it.
Here we’d have a quick look at the analytics capabilities of the extension.
To enable it, inside Visual Studio, navigate to Tools >> Options >> Kupp Code Analytics >> General or Extensions >> Kupp Code Analytics >> Analytics >> Configure Analytics
Set “Enable C# Code Analyzer” to “True”. Requires Visual Studio to be restarted on change.
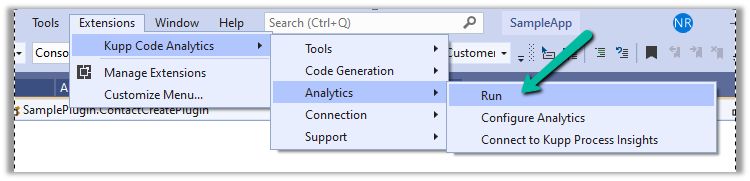
To run the analytics, select Extensions >> Kupp Code Analytics >> Analytics >> Run
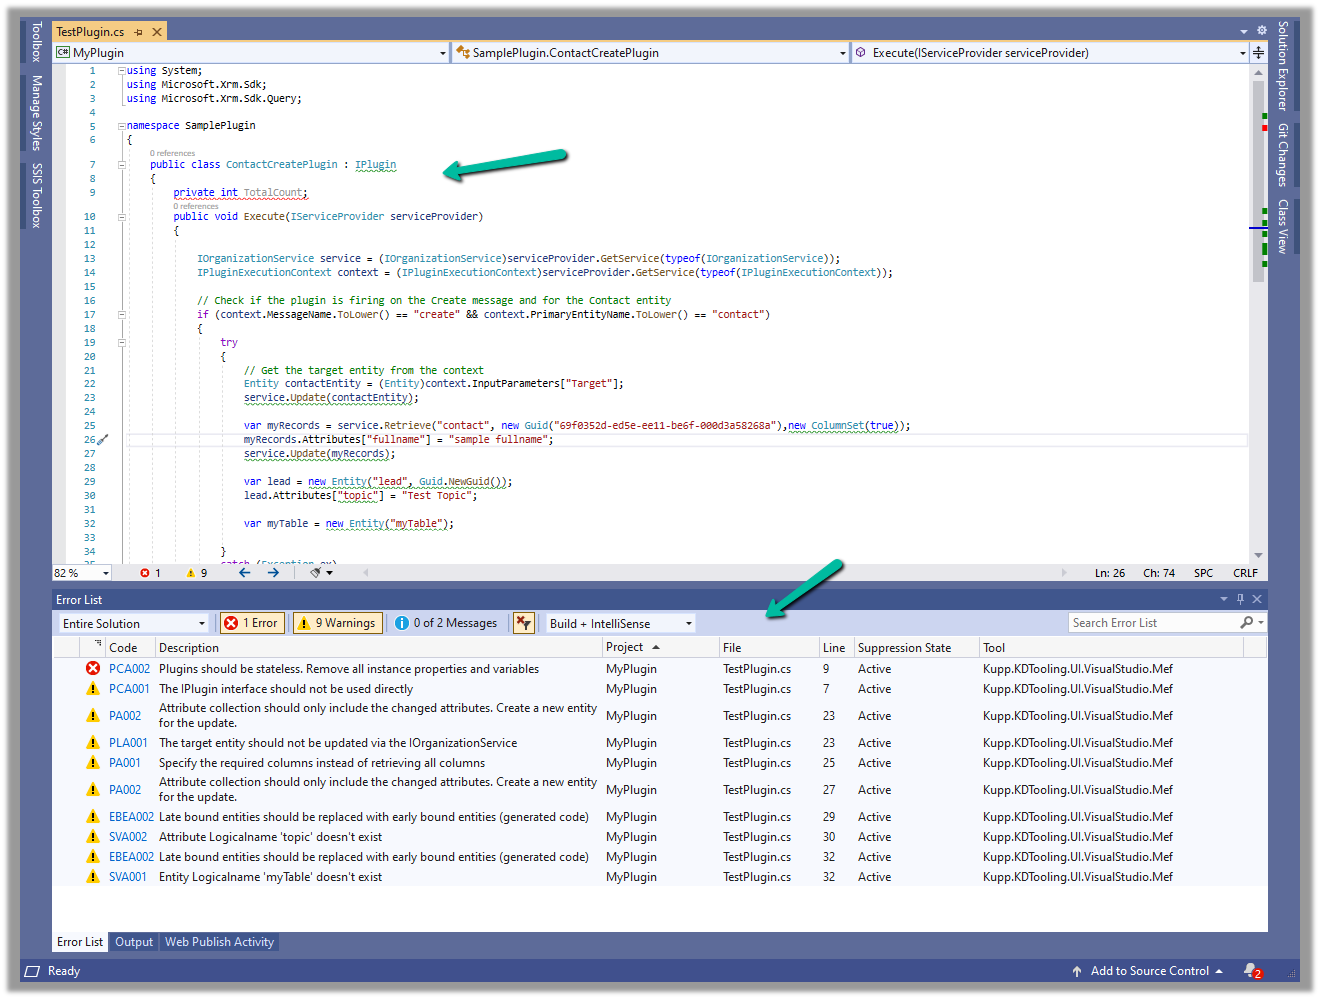
Below we can see the results of running the analytics on our sample plugin class.
Let us see the code analysis rules one be one.
PCA001: The lPlugin interface should not be used directly.
The suggestion is to use a custom base class instead to handle the call delegation, using the context information of the plugin.
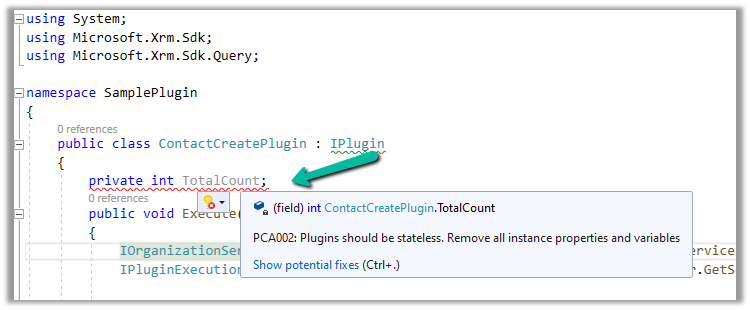
PCA002: Plugins should be stateless. Remove all instances properties and values.
Plugins are instantiated on a per-request basis and handle specific execution contexts. The plugin instances are short-lived and should not be assumed to persist across multiple requests. Also if multiple plugin instances execute especially in the case of bulk operations, it could lead to concurrency issues.
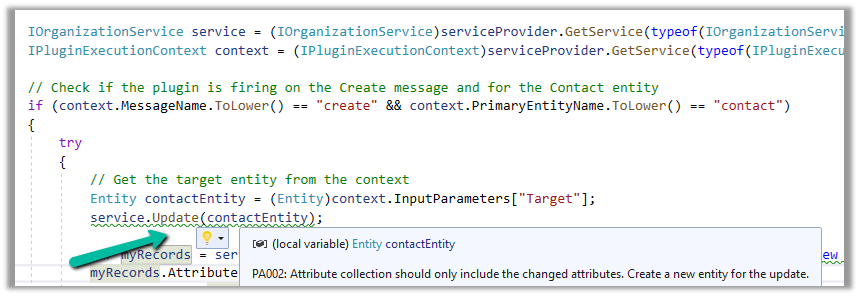
PA002: Attribute collection should only include the changed attributes. Create a new entity for the update
While updating the table or entity, create a new Entity instance and only include those attributes that are changed.
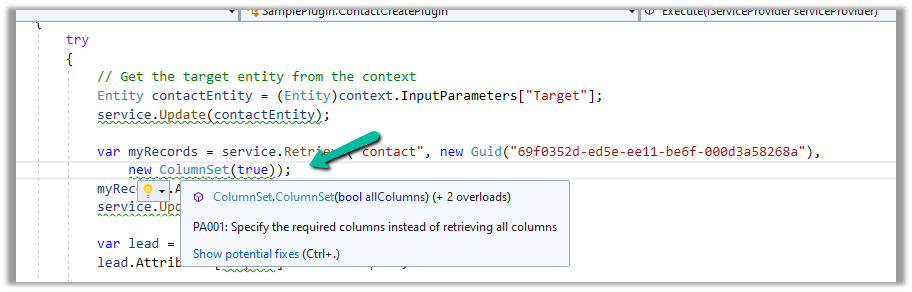
PA001: Specify the required columns instead of retrieving all columns.
Specify the required attributes to be retrieved instead of all columns as this would impact the performance.
EBEA002: Late bound entities should be replaced with early bound entities.
It is suggested to use early bound entities as they provide Type Safety and IntelliSense Support decreasing the likelihood of runtime errors and can enhance productivity through auto-completing and context-aware suggestions.
These were a few of the examples, that show the key capabilities of the extension, for the complete list, please refer to the product documentation