New Sort Date DateTime attribute added in Activity Entity in Dynamics 365.


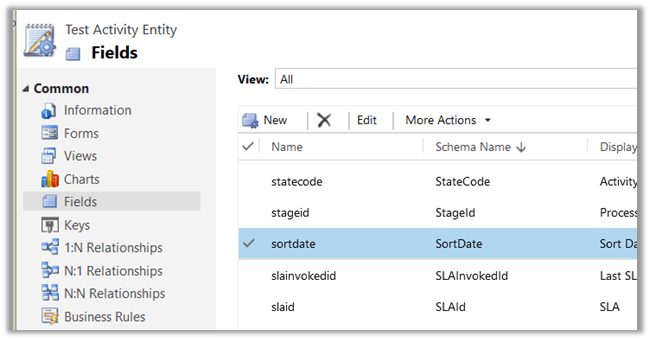
A new SortDate attribute of type DateTime is added for Activity Entity (so basically to all child Task, Phone Call, Email activity etc.)

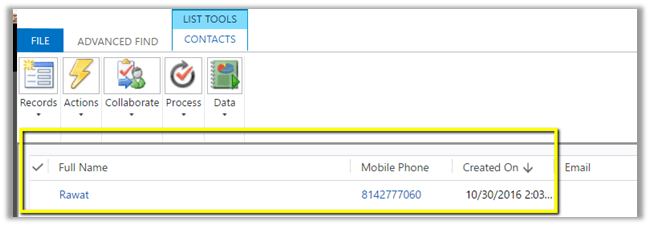
The value is null for it for the existing records and for the new record as well until we populate it through Business Rule, Plugin or any other method. The basic use could be to use it for sorting apart from OOB Modified on and Created on in View, Report, Chart as well as in Social Pane.

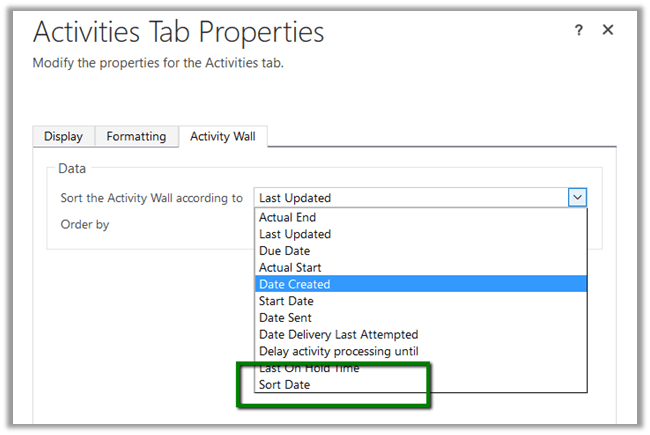
Check this awesome tip

http://crmtipoftheday.com/2016/11/15/change-the-default-order-of-activities-on-the-social-pane/

I remember while working in Oracle CRM On Demand project, where in we can add fields to the base Activity Entity and it would be available in all the child Activity entities. However, in Dynamics CRM the Activity Entity has always been locked i.e. we can’t add new fields in it.

Now what if we create a new custom activity entity?

Yes the field will be available in new custom activity entity as it would derive from the baes Activity Entity to which this new field has been added.

Hope it helps..

Sample code to connect to Dynamics 365 Online through Console App (C#)


  • Create a console application add Newtonsoft and Active Directory Authentication Library. Or we can add the below Helper Sample Code package which will add the above libraries.

  • Add reference to System.Net.Http

  • Register the app

https://nishantrana.wordpress.com/2016/11/13/register-a-dynamics-365-app-with-azure-active-directory/

  • Sample Code

using System;
using System.Net.Http;
using System.Net.Http.Headers;
using System.Threading.Tasks;
using Microsoft.IdentityModel.Clients.ActiveDirectory;
using Newtonsoft.Json;
using Newtonsoft.Json.Linq;

namespace Dynamics365ConsoleApp
{
internal class Program
{
// username and password
private const string UserName = "sapnarana@nishant365.onmicrosoft.com";
private const string Password = "mypassword";
// Crm Url
private const string Resource = "https://nishant365.crm8.dynamics.com";
// Application's Client Id
private const string ClientId = "d08b641c-2dc8-4f33-8a57-b1573da88a22";
// Redirct Uri specified during registration of application
private const string RedirectUri = "http://localhost";
// Authroiztion Endpoint
private const string Authority = "https://login.windows.net/nishant365.onmicrosoft.com";

private static AuthenticationResult _authResult;

private static void Main(string[] args)
{
// without prompt
var authContext = new AuthenticationContext(Authority, false);
var credentials = new UserCredential(UserName, Password);
_authResult = authContext.AcquireToken(Resource, ClientId, credentials);

// with prompt
AuthenticationContext authContext = new AuthenticationContext(authority);
authResult = authContext.AcquireToken(resource, clientId, new Uri(redirectUri));

Task.WaitAll(Task.Run(async () => await GetFullNameSystemUsers()));
}

private static async Task GetFullNameSystemUsers()
{
var httpClient = new HttpClient
{
BaseAddress = new Uri(Resource),
Timeout = new TimeSpan(0, 2, 0)
};
httpClient.DefaultRequestHeaders.Add("OData-MaxVersion", "4.0");
httpClient.DefaultRequestHeaders.Add("OData-Version", "4.0");
httpClient.DefaultRequestHeaders.Accept.Add(new MediaTypeWithQualityHeaderValue("application/json"));
httpClient.DefaultRequestHeaders.Authorization = new AuthenticationHeaderValue("Bearer",
_authResult.AccessToken);

var retrieveResponse =
await httpClient.GetAsync("api/data/v8.1/systemusers?$select=fullname");
if (retrieveResponse.IsSuccessStatusCode)
{
var jRetrieveResponse =
JObject.Parse(retrieveResponse.Content.ReadAsStringAsync().Result);

dynamic systemUserObject = JsonConvert.DeserializeObject(jRetrieveResponse.ToString());

foreach (var data in systemUserObject.value)
Console.Write(data.fullname.Value);
}
}
}
}

For in depth understanding please refer the following post

https://debajmecrm.com/2016/02/23/understanding-in-depth-cross-origin-resource-sharing-cors-in-dynamics-crm-2016/

Hope it helps..

Register a Dynamics 365 app with Azure Active Directory


  • Sign in to Microsoft Azure Management Portal or Sign up for a free trial. The account should be in the same Office 365 tenant where we would like to register the app. (or link existing Azure Subscription not in same tenant as CRM)

https://manage.windowsazure.com/

  • Inside Azure Management Portal select Azure Active Directory

  • Select App registrations and click Add

  • Provide required details for the App and click Create

  • Select the App created to get the required details

  • To give permission to App to access Dynamics CRM, click on Required Permissions in API Access section

  • Click on Add

  • Select Dynamics CRM Online

We’d get the notifications.

  • Along with Client id we would also need Authorization Endpoint, when we develop App.

Hope it helps..

Create Apps in Dynamics 365 using new App Designer and Site Map Designer in Dynamics 365


Similar to the apps that we see in Menu Bar for Dynamics 365, we can create our own apps.

First we need to enable the Preview for it.

Go to Administration à System Settings

Go to Settings à My Apps

Click on Create App


It will take us to App Designer, provide details.

Different components that we can add

Or drag drop

First we need to configure the SiteMap for the app. Click on arrow inside Sitemap area to configure.

Inside Site map designer we can add Area, Group and Sub Area (the usual components of Site Map)

Update properties of Area, Group and Subarea and add new Sub Areas.

Area Properties.

For Group

For SubArea

Different Types of Sub Area can be defined.

This is how the app looks inside Site Map Designer

Save and close to go back to App Designer

It has added Dashboard along with Contact and Lead Entity View.

Now let us add Form and Views to Contact and Lead Entity View using Entity assets.

Select Contact in Entity View and select Forms in Entity Assets

Similarly, for Views

Repeat the same steps for Lead entity.

Click on Validate

It will show up all the dependencies

Required tab will list all the dependencies. For time being let us add all the dependencies

Publish the app.

The apps would appear now in Dynamics 365 menu

We can specify specific roles which could access the apps.

Hope this helps ..

Quick Walkthrough – Editable Grid in Dynamics 365.


Let us try exploring Editable Grid in Dynamics 365

We’d enable it on Contact Entity ( editable grid works for custom entities as well)

  • Go to Contact entity, control tab and click on Add Control

  • Add Editable Grid

  • Enable Editable Grid as default for Web, Phone and Tablet

  • Save and Publish the change.
  • Go to Contact Home Grid. (fields now can be edited, Status, Composite fields etc are not editable)

  • We can do Group By on the grid

  • Similarly, in Associated View of Contact we have the same behavior

  • To switch back to Read Only Grid, select SHOW AS command

  • Back to our old Read Only Grid (no grouping)

  • We can add JScript for fields inside grid.
  • Let us try Adding function on OnChange of Address 1: City field inside Editable Grid

  • On changing the City field in the grid

For Subgrid,

subgrid.png

sg1.png

Hope it helps..

PowerApps in CRM 2016 (Microsoft Dynamics 365)


Let us quickly create a PowerApp that allows a user to create Contact record inside CRM (using Microsoft Flow).

  • Login to PowerApps with Office 365 Account

https://web.powerapps.com/home

  • Click on New app

  • Let us use PowerApps studio for Windows here (much easier to use then PowerApps for web)

  • Select a Blank App (Phone Layout)

  • Insert Text Box, Text Box Input and Button controls and apply Theme

  • Select Add to CRM button and select Flow in Action menu to connect with the flow.

  • Create a new Flow

  • Search for PowerApps

  • Select Add an action

  • Select “Create new a record” Action and select Contacts in Entity Name.
  • For Last Name field, click on “Ask in PowerApps” which will add a new field to be mapped inside PowerApps

  • Do same for mobile phone field

  • Click on Create flow to create the flow

  • Now back in PowerApps, select the newly created flow.

  • Specify formula to map the fields

  • Run the application

  • Specify the values for Last Name and mobile number and click on Add to CRM button.

  • This creates the contact record in CRM using the Flow defined.

  • We can save the app in cloud and the share it with the other users inside the org.

  • Click on Share (Enter name or email addresses of the users with whom we’d like to share the app)

  • App being published

  • Once Published, it would be available to the other users.

Hope it helps..