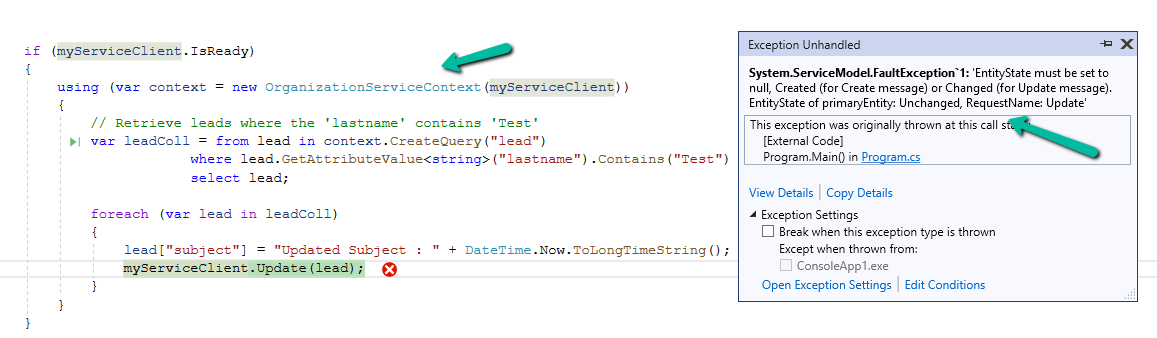
We might get this error while trying to update one of the records.
Exception Message: EntityState must be set to null, Created (for Create message) or Changed (for Update message).
EntityState of primaryEntity: Unchanged, RequestName: Update
ErrorCode: -2147220989
The error occurs when OrganizationServiceContext tries to update an entity that has not been marked as modified. The EntityState remains Unchanged, and Dataverse expects it to be Changed or null for update operations.
OrganizationServiceContext automatically tracks entities’ states. When we retrieve an entity, it is set to Unchanged by default.
If we modify the entity without informing the context (e.g., using UpdateObject()), the context still thinks the entity is Unchanged, leading to this error during the update process.
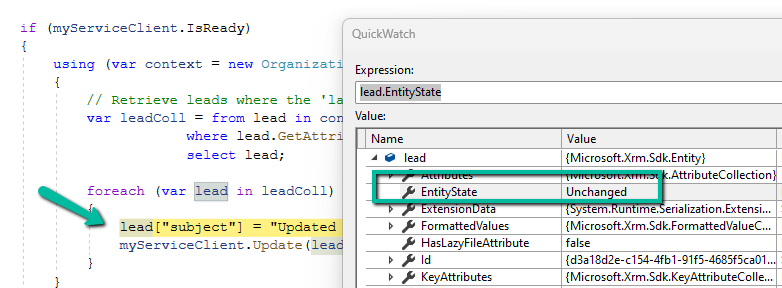
This error typically happens within OrganizationServiceContext since it relies on internal state-tracking mechanisms, with IOrganizationService (e.g., Retrieve or RetrieveMultiple), we typically don’t run into this error because entities retrieved via IOrganizationService aren’t tracked in the same way.
There are 2 ways to resolve this error.
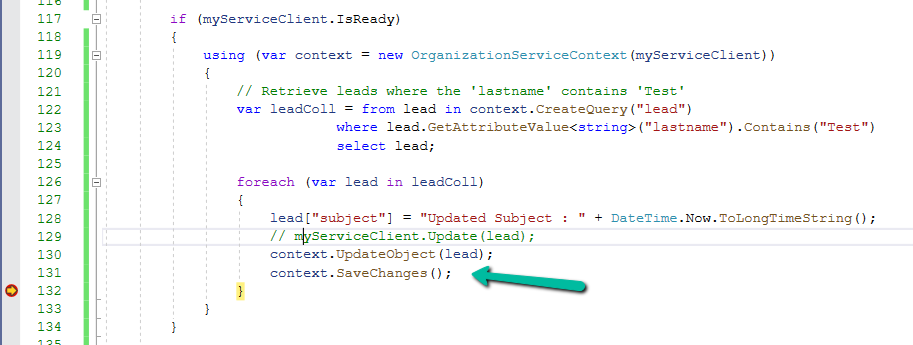
- Use UpdateObject, it explicitly tells the context that the entity has been changed followed by SaveChanges() to commit the changes.
2. Create a new Entity object for update.
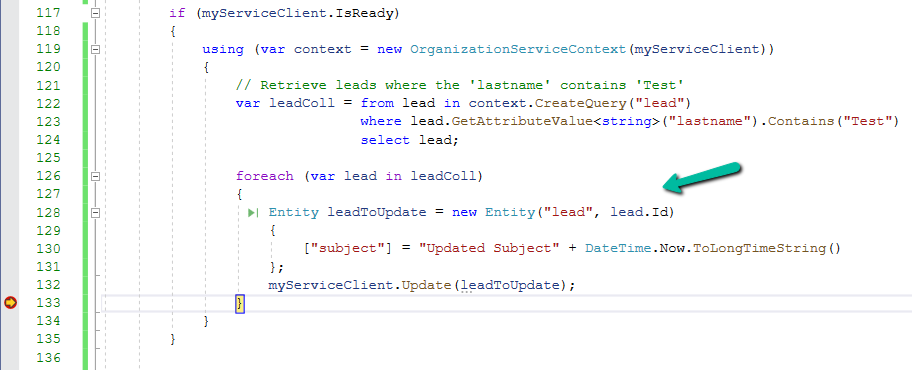
Sample Code –
 if (myServiceClient.IsReady)
        {
            using (var context = new OrganizationServiceContext(myServiceClient))
            {
                // Retrieve leads where the 'lastname' contains 'Test'
                var leadColl = from lead in context.CreateQuery("lead")
                               where lead.GetAttributeValue<string>("lastname").Contains("Test")
                               select lead;

                // use Update Object
                foreach (var lead in leadColl)
                {
                    lead.Attributes["subject"] = "Updated Subject" + DateTime.Now.ToLongTimeString();
                    context.UpdateObject(lead);
                    context.SaveChanges();
                }

                // or create a new Entity object
                foreach (var lead in leadColl)
                {
                    Entity leadToUpdate = new Entity("lead", lead.Id)
                    {
                        ["subject"] = "Updated Subject" + DateTime.Now.ToLongTimeString()
                    };
                    myServiceClient.Update(leadToUpdate);
                }
            }
        }
Hope it helps..