Recently while trying to debug a plugin with Persist to Entity mode on the update step, we didn’t find any profile record getting created.
One option is to try to reinstall the profiler. This could happen when we are using a different version of the plugin registration tool and it has the Profiler already installed/configured from the other version of the tool.
If that doesn’t help, then opt for Exception mode, that has always worked.
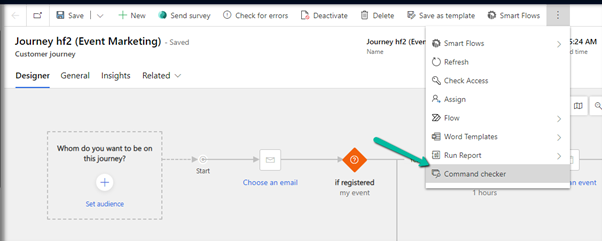
Appending ribbondebug=true to the record’s URL adds the new Command checker button in the command bar, which could help us in troubleshooting any unexpected behavior with ribbon.
Recently we added one enable rule to an existing button (Go Live) in the Customer Journey table. The rule was calling a JavaScript web resource based on the security role assigned to the user hiding or showing the button on the form.
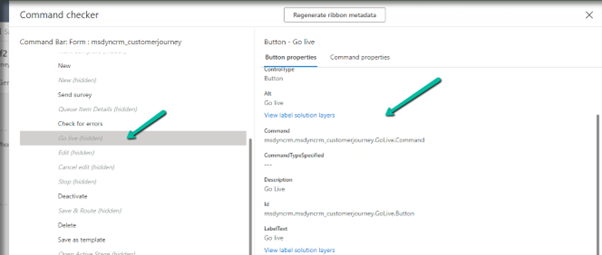
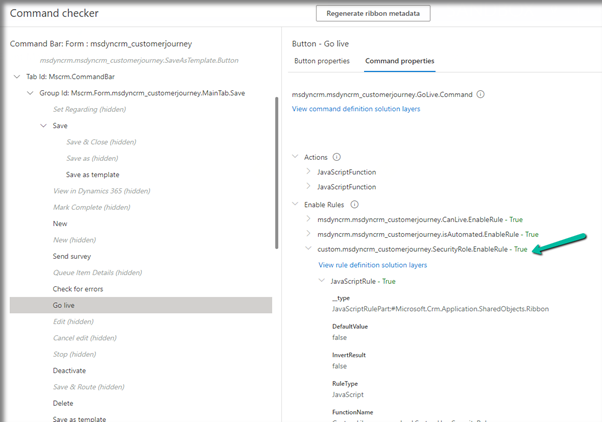
Click on the Command checker to open the window on the side pane, where we can then select our button.
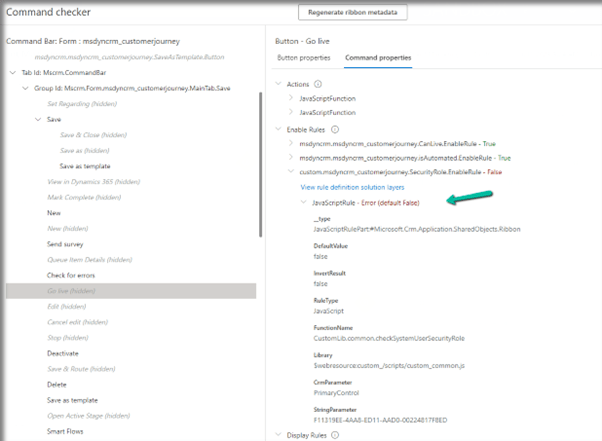
In the command properties tab, we can see our custom enable rule showing an error.
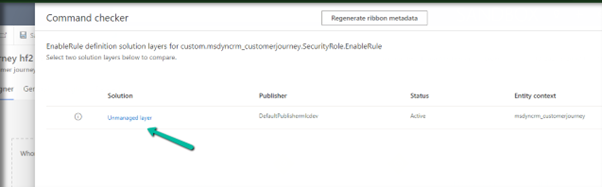
Also here clicking in View rule definition solution layers provides us the detail that this rule has been added as part of an unmanaged layer.
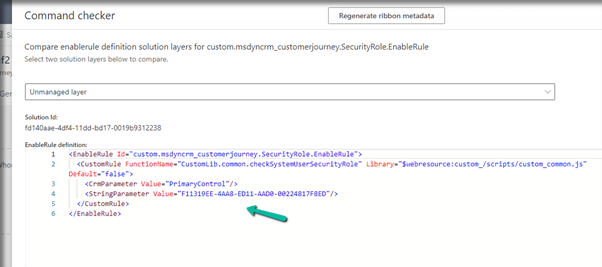
Clicking on the Unmanaged layer further provides us with the definition of the enable rule.
Going back to the error, we figured out that the function was missing from the web resource, and adding the function fixed the issue for us.
Back in the Command checker, we can see the custom Enable Rule getting evaluated correctly.
Recently we were writing a plugin that on the creation of a lead updates the originating lead of a contact record. The value was neither getting updated nor we were getting any errors.It was after we spent a good amount of time debugging, realized that this field cannot be updated.So basically, we can specify a value for it during create of contact but cannot update it.
Recently while designing the custom page, we realized that the format property is missing for the Date Picker control. This is because Date Picker control is based on Fluent UI Library.
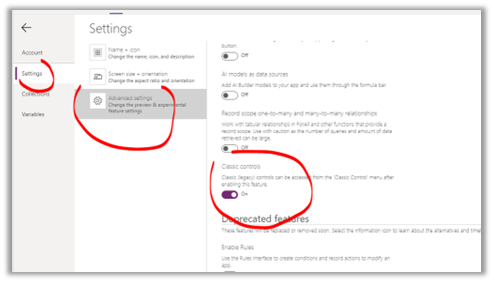
One option earlier was to enable the Classic Controls from Settings
And replace the existing control with the classic control
Recently we were working on Facebook Leads integration with Dynamics 365. Webhook for Leads can be configured to send real-time notifications of the Leads ads changes.
The first step of setting up Webhook requires creating an HTTPS endpoint that can process 2 types of HTTP Requests – Verification and Event notifications.
Here we will see how to configure the Power Automate flow for verification.
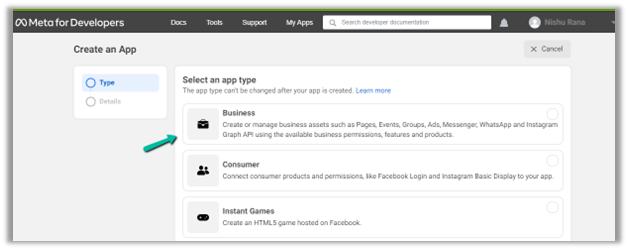
Login to Meta for Developers – Facebook and create an app.
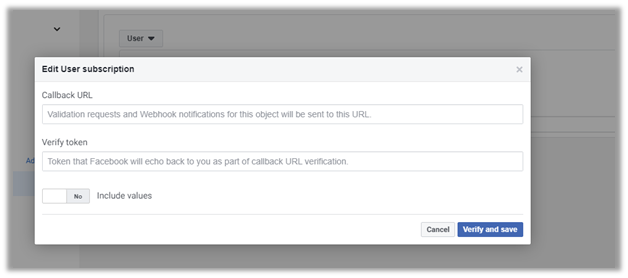
It asks us to specify the Callback URL and Verify token.
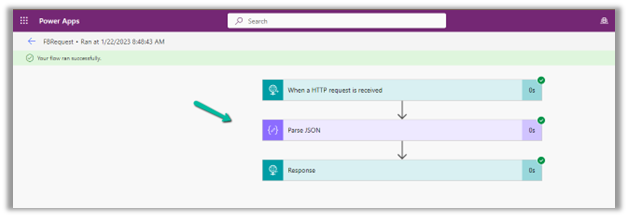
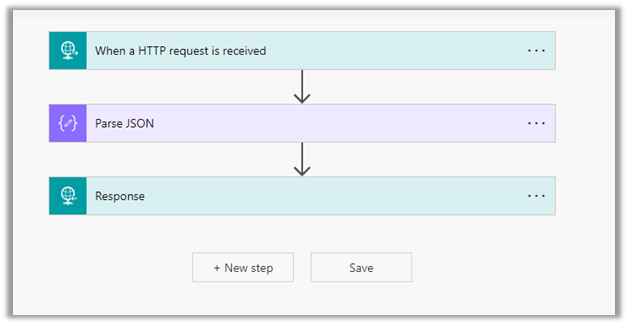
Back in Power Automate create a Flow with Request type Trigger, followed by Parse JSON and Response actions.
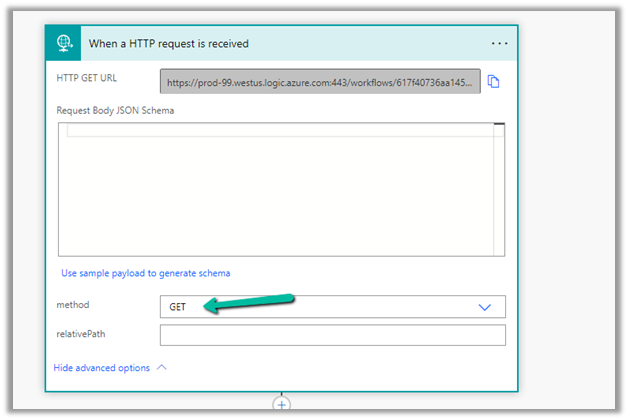
For HTTP Request, select GET as the method, as FB will send a GET request to the endpoint URL, with the verification requests included in the endpoint of the URL.
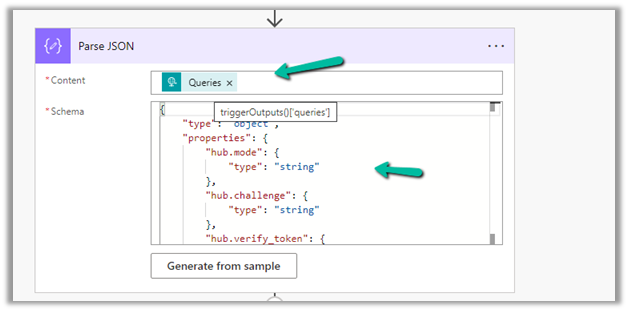
Next, Parse the JSON and specify the Content and Schema
Content –
triggerOutputs()['queries']
Schema –
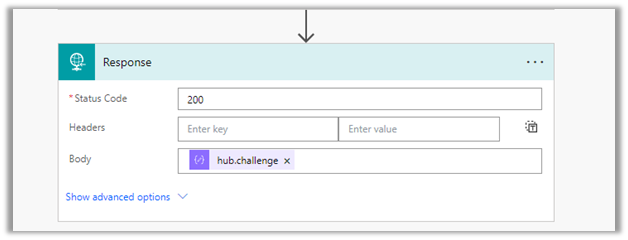
Lastly in Response, set Status Code as 200 and Body as hub.challenge.
Here FB expects the Endpoint to verify the hub.verify_token (which we haven’t set up yet) and respond with hub.challenge value after verification.
Save the Flow, and copy the URL generated for the HTTP Request trigger.
Back in Meta for Developers, in edit user subscription paste the Callback URL and for now in place of token specify any value and click on Verify and Save.
We should now have a Webhook endpoint (Flow) successfully configured
We can also see our Flow ran successfully.
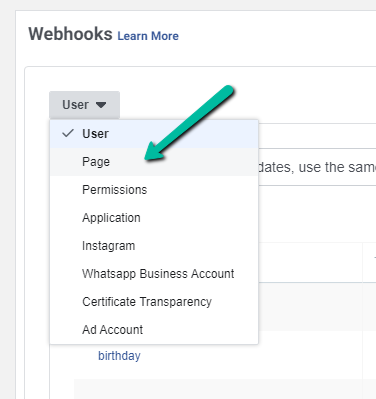
Here in the example we configured the webhook validation for User events, for Facebook Lead we need to configure it for Page, the other options available are Permissions, Application, Instagram etc.


 We should now have a Webhook endpoint (Flow) successfully configured