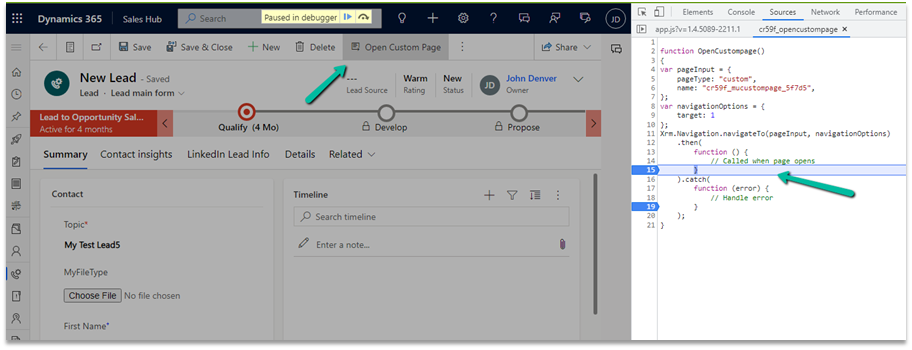
We got the below error while trying to use the Relate function – “Value must be a data entity record”

As the error message clearly states and also if we see the syntax, the Relate function expects a record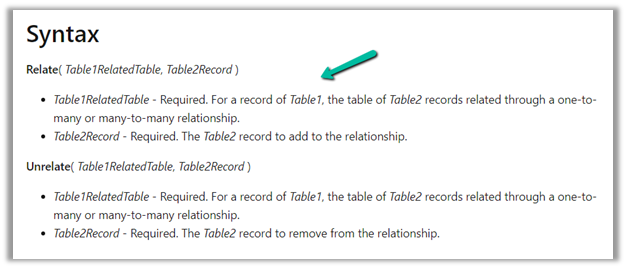
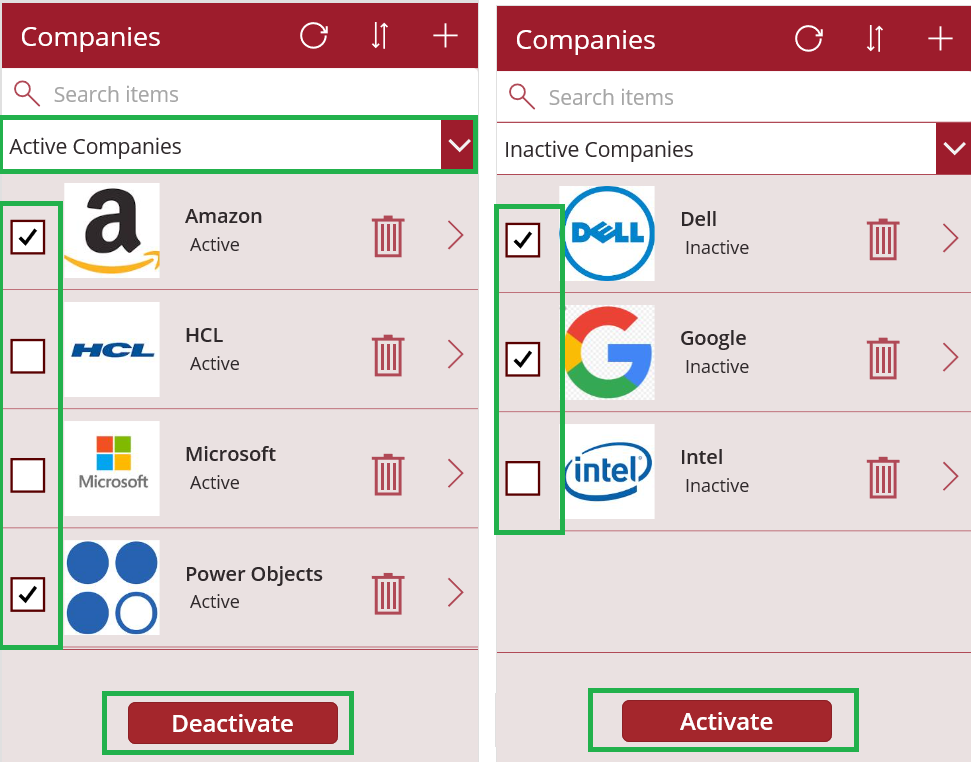
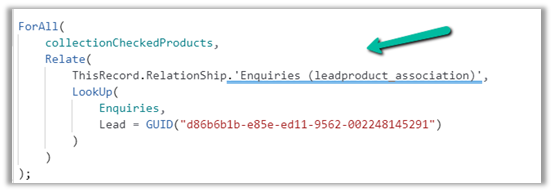
Below was our formula for OnSelect, which was throwing the error

Here instead of passing the record, we were passing the table in the Relationship which was the reason for the error.
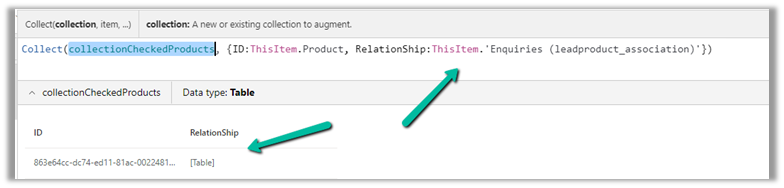
We changed it to store the ThisItem

And also updated the OnSelect
This fixed the issue for us.
Hope this helps..
Advertisements