New Visual Designer for Business Rules in Dynamics 365


In Dynamics 365 we have new visual designer for Business Rules (and Business Process Flows).

Condition and Actions can be added through Add button or dragged and dropped

Conditions and Action can be copied, cut. delete and pasted in designer window.

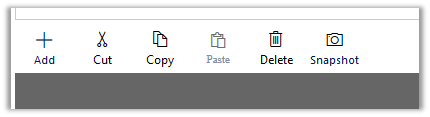
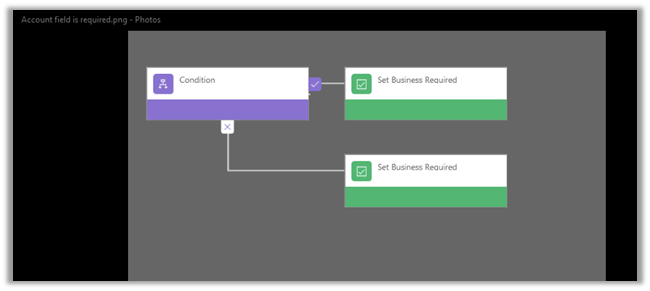
Snapshot creates a snapshot of the business rules. (image file with png extension)

Conditions can be defined in the Properties window

Still we can only specify either Add or OR conditions

Changing it to OR replaces AND condition

May be in future release we’d have that feature as well.

Hope it helps..

New Metadata Query features in Web API in Dynamics 365


Metadata API improvements in Dynamic 365

Debajit's avatarDebajit's Dynamic CRM Blog

Dynamics 365 is in and just like me, CRM enthusiasts all over the world are simply WOW’ed by its wonderful offerings. After all, this has been a giant leap by Microsoft and indeed a great opportunity for all consultants to me to plunge into unknown territories and conquer it.

In this blog post, I will walk you through the new Metadata Query features that has been introduced with Dynamics 365 Web API. Off late I have been developing some tools using were using the WEB API endpoint and these new additions to the WEB API will really help developers to query the metadata in a very simple way. So without wasting more time, let me straight way give you a flavor of this.

With Dynamics 365, the Web API endpoint has been upgraded to v8.2. So it would be typically in this format – /api/data/v8.2/”>https://<organizationUrl>/api/data/v8.2/

For my trial organization, below…

View original post 279 more words

Quick Walkthrough – Editable Grid in Dynamics 365.


Let us try exploring Editable Grid in Dynamics 365

We’d enable it on Contact Entity ( editable grid works for custom entities as well)

  • Go to Contact entity, control tab and click on Add Control

  • Add Editable Grid

  • Enable Editable Grid as default for Web, Phone and Tablet

  • Save and Publish the change.
  • Go to Contact Home Grid. (fields now can be edited, Status, Composite fields etc are not editable)

  • We can do Group By on the grid

  • Similarly, in Associated View of Contact we have the same behavior

  • To switch back to Read Only Grid, select SHOW AS command

  • Back to our old Read Only Grid (no grouping)

  • We can add JScript for fields inside grid.
  • Let us try Adding function on OnChange of Address 1: City field inside Editable Grid

  • On changing the City field in the grid

For Subgrid,

subgrid.png

sg1.png

Hope it helps..

PowerApps in CRM 2016 (Microsoft Dynamics 365)


Let us quickly create a PowerApp that allows a user to create Contact record inside CRM (using Microsoft Flow).

  • Login to PowerApps with Office 365 Account

https://web.powerapps.com/home

  • Click on New app

  • Let us use PowerApps studio for Windows here (much easier to use then PowerApps for web)

  • Select a Blank App (Phone Layout)

  • Insert Text Box, Text Box Input and Button controls and apply Theme

  • Select Add to CRM button and select Flow in Action menu to connect with the flow.

  • Create a new Flow

  • Search for PowerApps

  • Select Add an action

  • Select “Create new a record” Action and select Contacts in Entity Name.
  • For Last Name field, click on “Ask in PowerApps” which will add a new field to be mapped inside PowerApps

  • Do same for mobile phone field

  • Click on Create flow to create the flow

  • Now back in PowerApps, select the newly created flow.

  • Specify formula to map the fields

  • Run the application

  • Specify the values for Last Name and mobile number and click on Add to CRM button.

  • This creates the contact record in CRM using the Flow defined.

  • We can save the app in cloud and the share it with the other users inside the org.

  • Click on Share (Enter name or email addresses of the users with whom we’d like to share the app)

  • App being published

  • Once Published, it would be available to the other users.

Hope it helps..

How to – Use Update to change the status and update owner (instead of SetState and Assign Request) in CRM 2015/2016


Prior to CRM 2015 Update 1, if we had to change the owner or set the state of the record we had to use Assign and SetState Request.

Now we can use our Update request for the same.

For e.g. we have below Active record owned by user named Nishant Rana.

Using below Update Request we can change the owner as well as set the record as inactive in a single request.

</p>
<p>Entity demoEntity = new Entity("new_demoentity");</p>
<p>// here we are using alternate key to update the record instead of Guid<br />
demoEntity.KeyAttributes.Add("new_alternatekeyfield", "My Alternate Key 2");</p>
<p>demoEntity.Attributes["new_name"] = "Updated record at " + DateTime.Now.ToShortTimeString();</p>
<p>// update owner id<br />
demoEntity.Attributes["ownerid"] = new EntityReference("systemuser", new Guid("16406B31-5E97-E611-80E3-FC15B42877A8"));</p>
<p>// set record as inactive<br />
demoEntity.Attributes["statecode"] = new OptionSetValue(1);</p>
<p>organizationProxy.Update(demoEntity);</p>
<p>


Point to remember is that if we have plugin registered either PRE or POST on Update and Assign both will be triggered.

Hope it helps..

Advertisements

Sample Code to use UpsertRequest in CRM 2015\2016


UpsertRequest was a new request introduced in CRM 2015 Online Update 1.

The request based on the alternate key specified, looks for the record, if the record is existing it updates it else it creates a new record.

https://nishantrana.wordpress.com/2016/10/25/alternate-keys-in-crm-2015crm-2016/

UpsertResponse has a property named RecordCreated which is false if the record is found and updated else it is true if record is created. The Target property holds the reference of the record created or updated.

Suppose we have following record created. It has Alternate key defined on “Alternate Key Field”

Sample Code

As we have demo entity record with alternate key field having value as “My Alternate Key 1” it will update the record.

Running it again this time changing the value for the alternate key field.

It creates a new record.

Hope it helps..