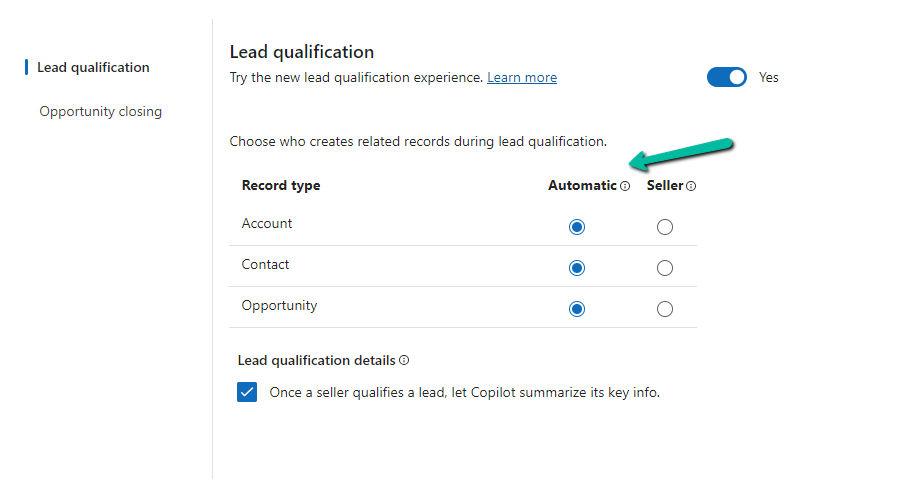
To enable the new lead experience, navigate to App Settings >> Lead + opportunity management in the Sales Hub App.
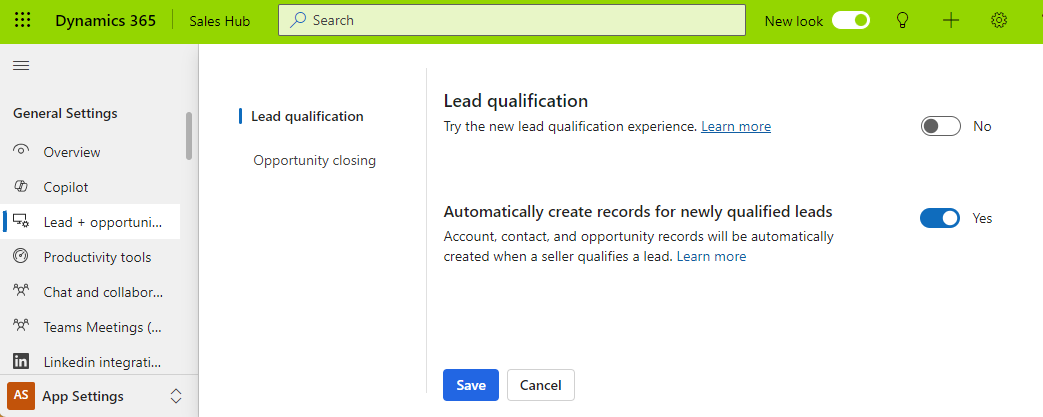
On enabling it, we get the option to specify whether the Account, Contact, and Opportunity records are created automatically or the user (seller) has the option to specify which record to create.
We also see the option to Copilot summarizing the case once a lead is qualified.

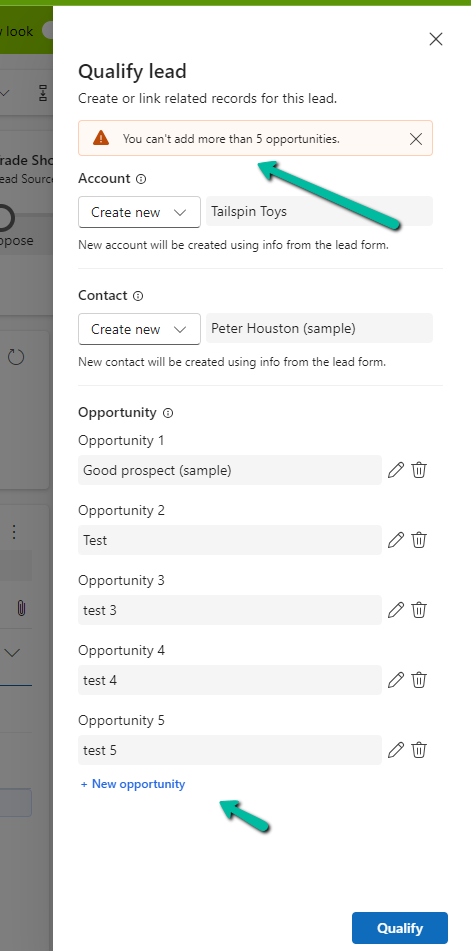
For opportunity, if we select Seller, we get an additional option to modify the Opportunity form by adding or removing fields and also the option to allow a maximum of 5 new opportunities during lead qualification.
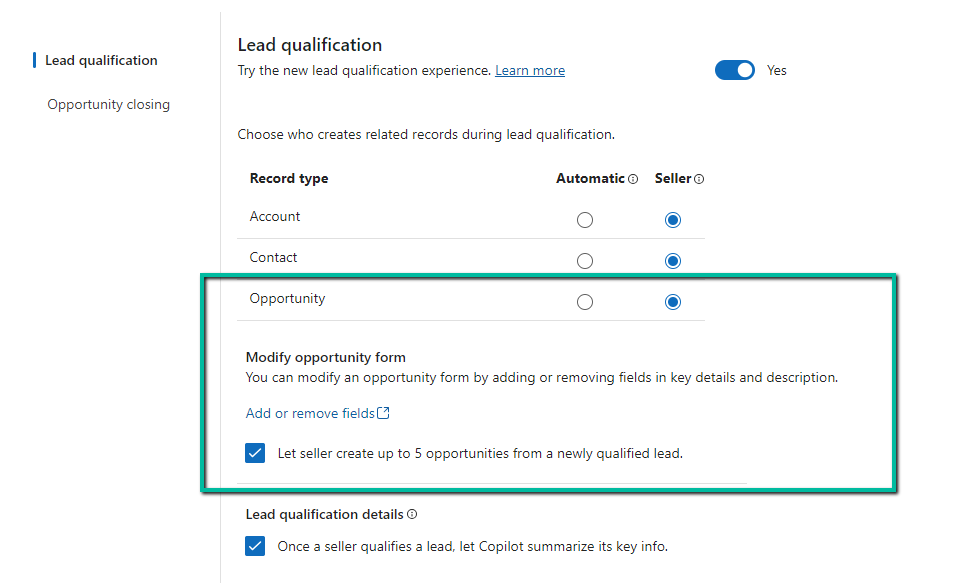
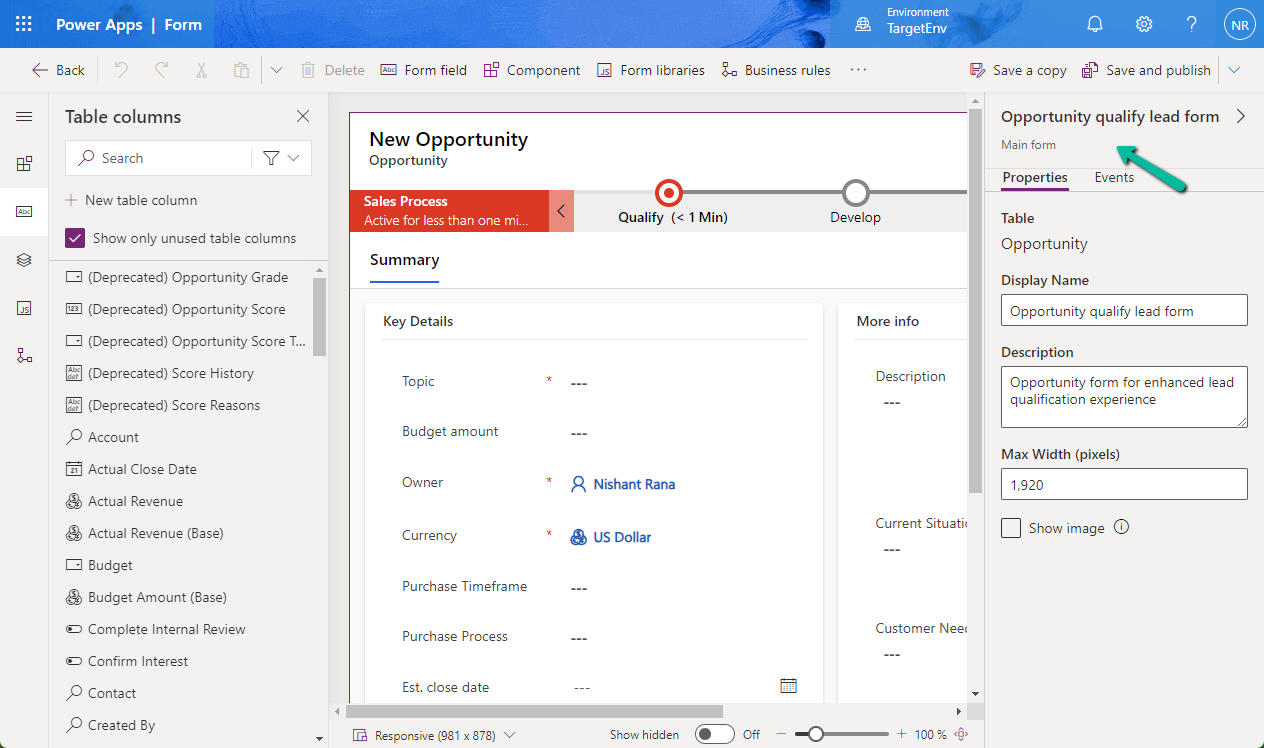
Clicking on the Add or remove fields link opens the Opportunity qualify lead form for customization.
Let us see it in action.
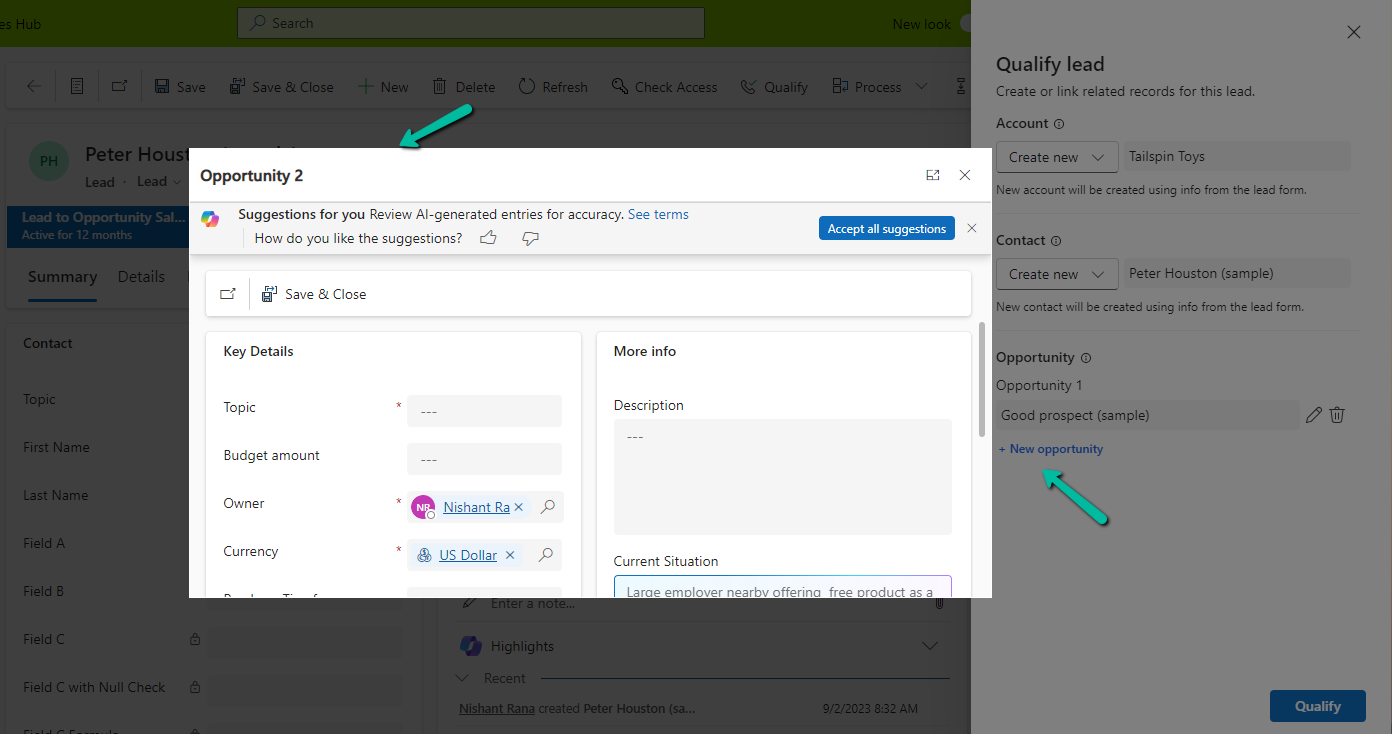
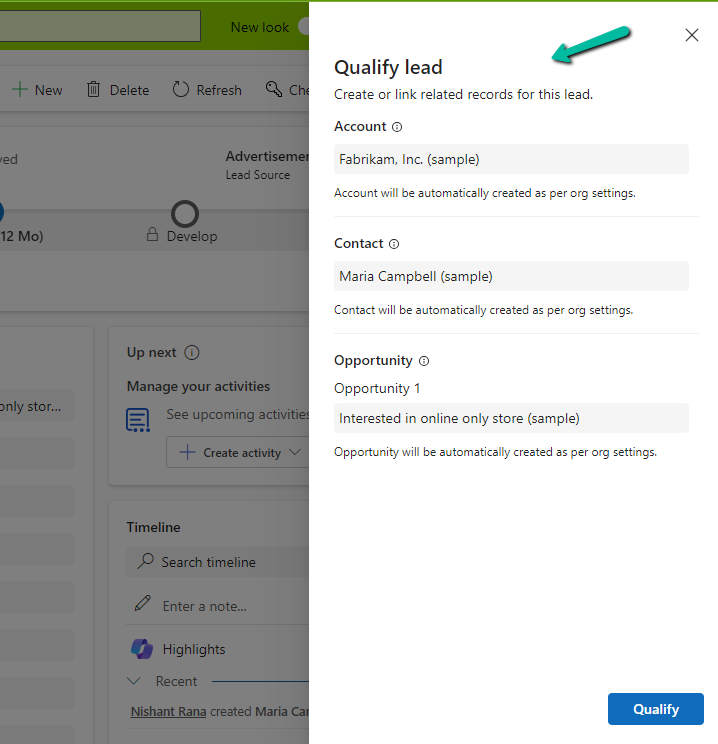
On clicking the Qualify command, we can see the new Qualify lead dialog opened in the side pane.
It gives us the option to create a new Account, Contact, and/or Opportunity record.
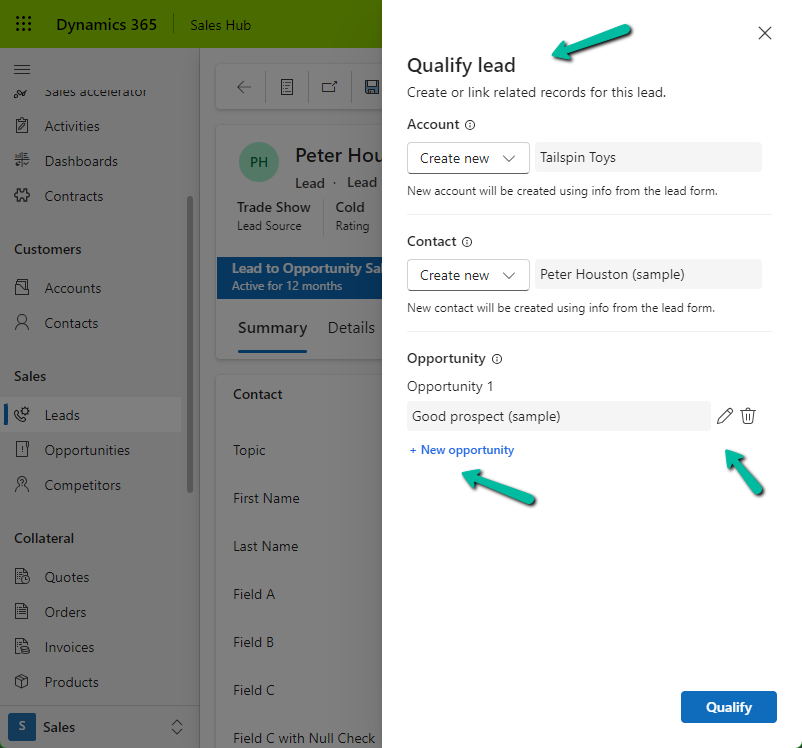
For Account and Contact, we can specify an existing record or select none if we do not want the Account and Contact record to be created.
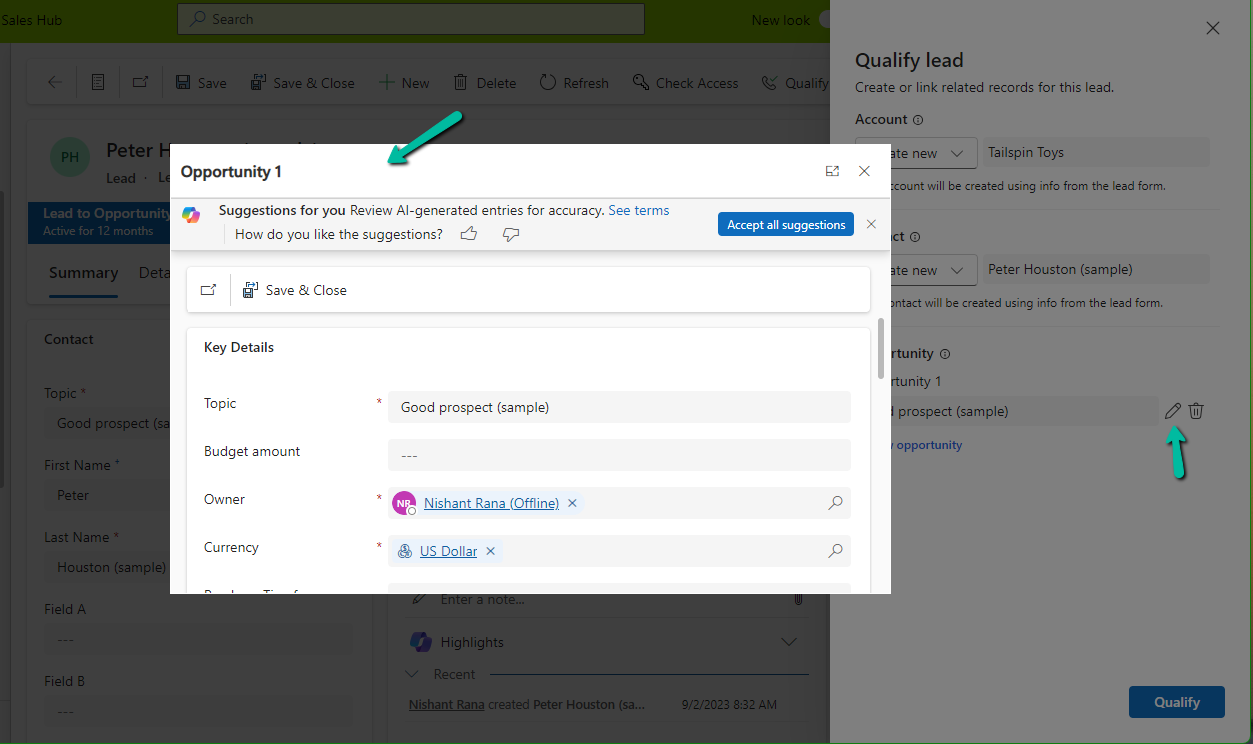
For opportunity, we can click on edit icon to update the details of the opportunity record to be created. It will open the Opportunity qualify lead form.
Similarly clicking on + New opportunity allows us to specify a value for the new opportunity record.
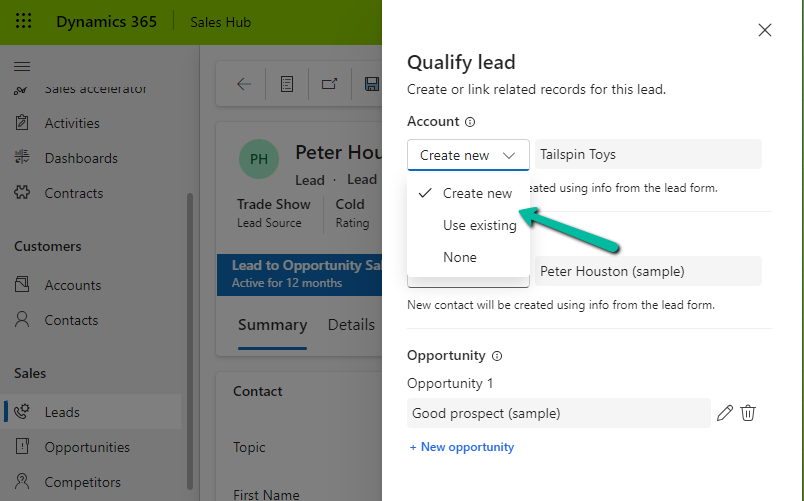
As we had selected the option of a maximum of 5 opportunities, we got the below message on trying to specify the 6th opportunity record.
“You can’t add more than 5 opportunities.”
Let us click on Qualify.
We can see below details, the link to the records generated, and the summary.
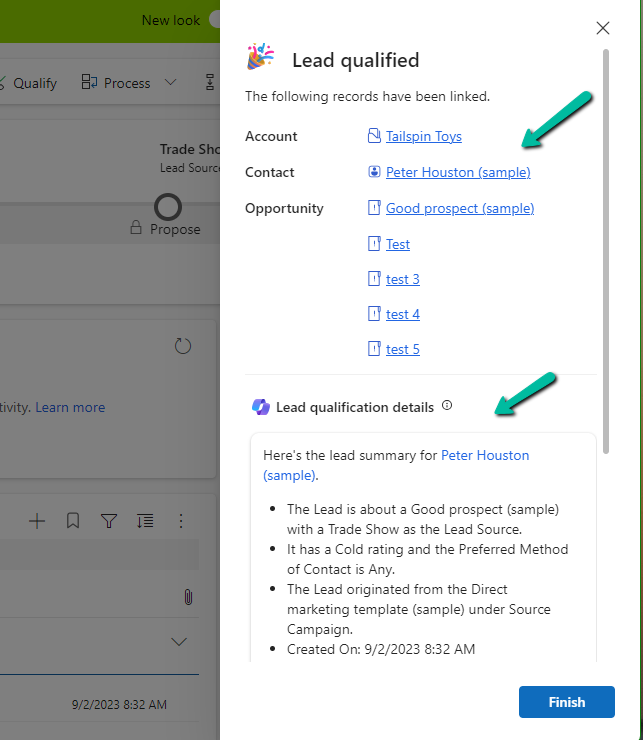
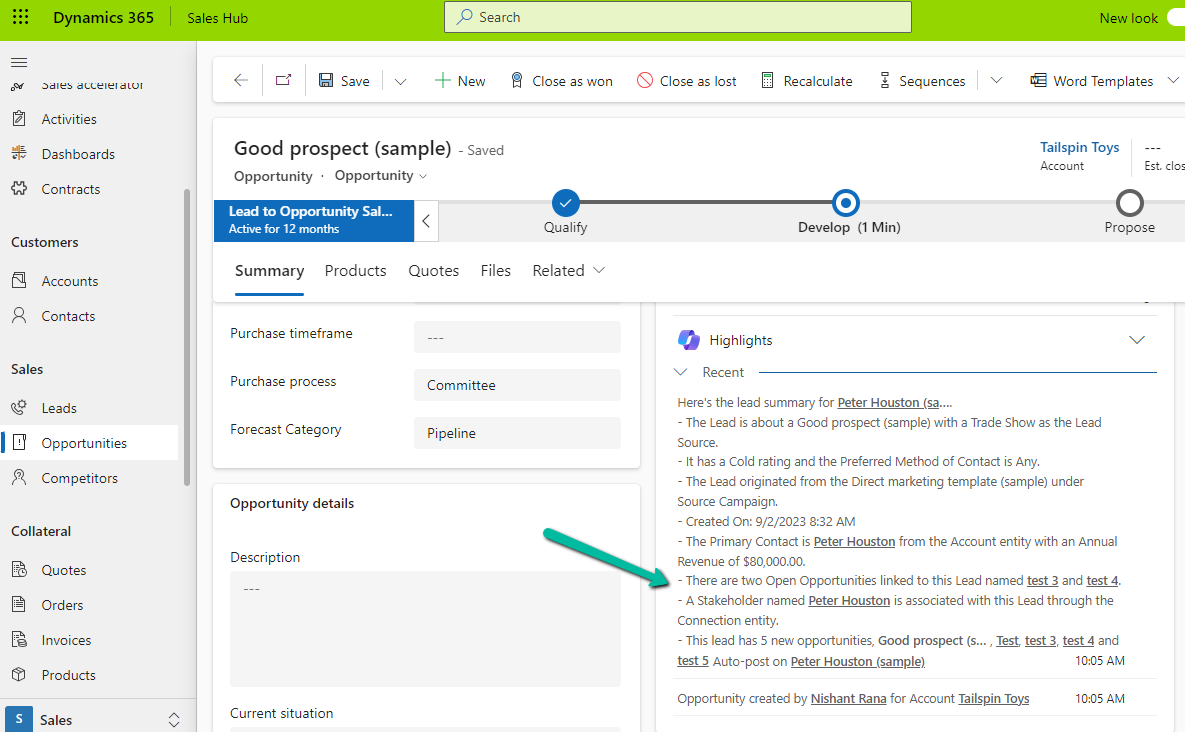
Clicking on Finish opens the 1st opportunity record. We can also see the summary added to it.
On setting all the options to Automatic,
we can see the below details in the Qualify lead dialog, all as read-only information.
Get all the details here
Hope it helps..