Let us continue with our previous posts on using Microsoft Bot Framework
Getting Started with Microsoft Bot Framework.
Using Dialogs in Microsoft Bot Framework
To better understand the FormFlow refer to the below article.
https://docs.botframework.com/en-us/csharp/builder/sdkreference/forms.html
Here we will update our Bot Application to use the FormFlow instead of Dialog.
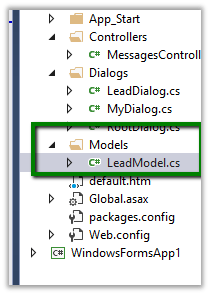
As FormFlow are bound to a model, we will create a model class first.
Create a new folder named Model and a new class named LeadModel in it.
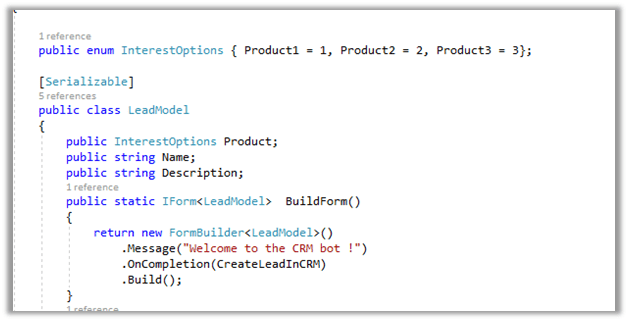
The class has an enum for selecting Product Type. It defines property for capturing Name and Description.
Here we define a static method named BuildForm that returns the IForm of type LeadModel.
The message defines the initial message that will be shown to the user and oncompletion we are defining a callback method that will be called on completion which we will be using to create lead record in CRM.
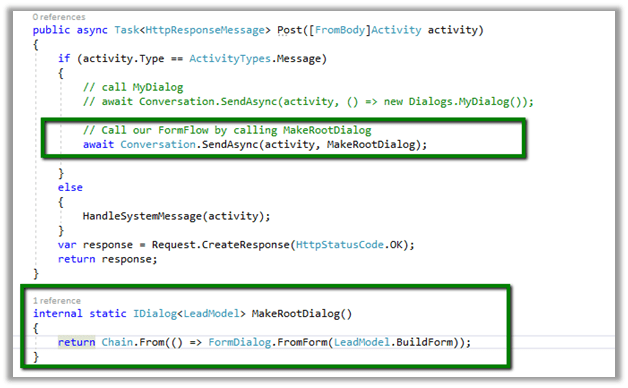
Next update the MessageController.cs to call this Lead Model instead of dialog which we did in our previous post.
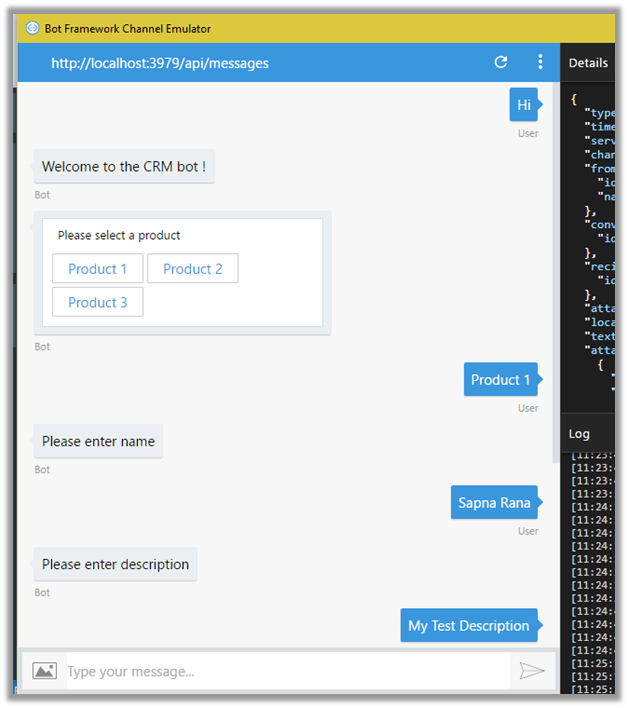
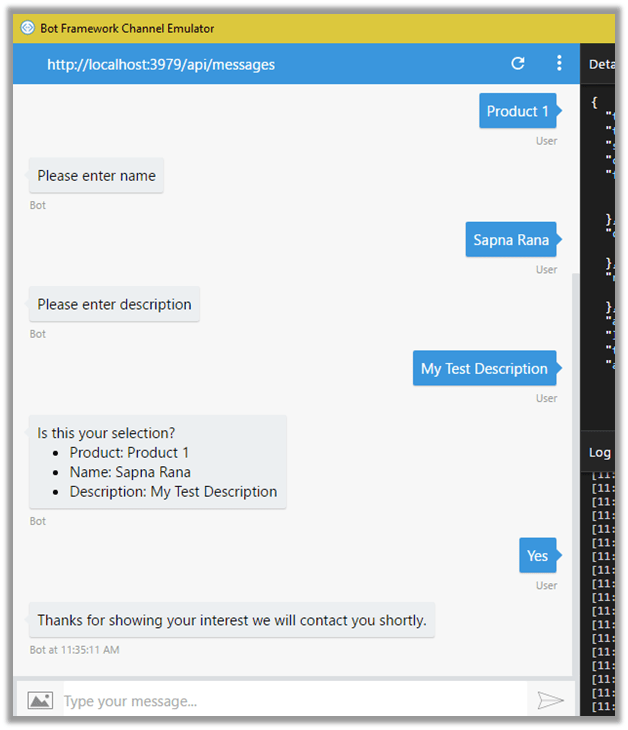
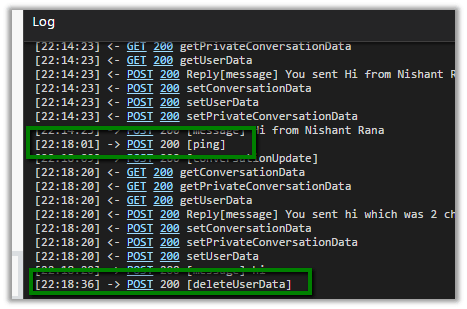
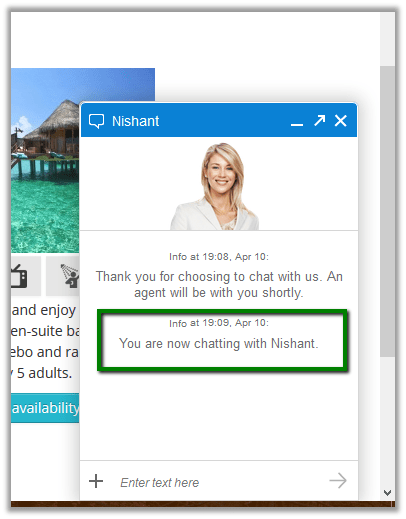
The conversation between the Bot and the User.
The lead record created in CRM.

Source Code –
using Microsoft.Bot.Builder.FormFlow;
using System;
using Microsoft.Bot.Builder.Dialogs;
using System.Threading.Tasks;
using Microsoft.Xrm.Sdk.Client;
using Microsoft.Xrm.Sdk;

namespace Bot_Application1.Models
{

public enum InterestOptions { Product1 = 1, Product2 = 2, Product3 = 3};

[Serializable]
public class LeadModel
{
public InterestOptions Product;
public string Name;
public string Description;
public static IForm<LeadModel> BuildForm()
{
return new FormBuilder<LeadModel>()
.Message("Welcome to the CRM bot !")
.OnCompletion(CreateLeadInCRM)
.Build();
}
private static async Task CreateLeadInCRM(IDialogContext context, LeadModel state)
{
await context.PostAsync("Thanks for showing your interest we will contact you shortly.");
Entity lead = new Entity("lead");
lead.Attributes["subject"] = "Interested in product " + state.Product.ToString();
lead.Attributes["lastname"] = state.Name;
lead.Attributes["description"] = state.Description;
GetOrganizationService().Create(lead);
}

public static OrganizationServiceProxy GetOrganizationService()
{
IServiceManagement<IOrganizationService> orgServiceManagement =
ServiceConfigurationFactory.CreateManagement<IOrganizationService>(new Uri("https://nishantcrm365.crm.dynamics.com/XRMServices/2011/Organization.svc"));
AuthenticationCredentials authCredentials = new AuthenticationCredentials();
authCredentials.ClientCredentials.UserName.UserName = "nishant@nishantcrm365.onmicrosoft.com";
authCredentials.ClientCredentials.UserName.Password = *****";
AuthenticationCredentials tokenCredentials = orgServiceManagement.Authenticate(authCredentials);
return new OrganizationServiceProxy(orgServiceManagement, tokenCredentials.SecurityTokenResponse);
}
}
}
using System.Net;
using System.Net.Http;
using System.Threading.Tasks;
using System.Web.Http;
using Microsoft.Bot.Builder.Dialogs;
using Microsoft.Bot.Connector;
using Microsoft.Bot.Builder.FormFlow;
using Bot_Application1.Models;

namespace Bot_Application1
{
[BotAuthentication]
public class MessagesController : ApiController
{
/// <summary>
/// POST: api/Messages
/// Receive a message from a user and reply to it
/// </summary>
public async Task Post([FromBody]Activity activity)
{
if (activity.Type == ActivityTypes.Message)
{
// call MyDialog
// await Conversation.SendAsync(activity, () => new Dialogs.MyDialog());

// Call our FormFlow by calling MakeRootDialog
await Conversation.SendAsync(activity, MakeRootDialog);

}
else
{
HandleSystemMessage(activity);
}
var response = Request.CreateResponse(HttpStatusCode.OK);
return response;
}

internal static IDialog<LeadModel> MakeRootDialog()
{
return Chain.From(() => FormDialog.FromForm(LeadModel.BuildForm));
}

private Activity HandleSystemMessage(Activity message)
{
if (message.Type == ActivityTypes.DeleteUserData)
{
// Implement user deletion here
// If we handle user deletion, return a real message
}
else if (message.Type == ActivityTypes.ConversationUpdate)
{
// Handle conversation state changes, like members being added and removed
// Use Activity.MembersAdded and Activity.MembersRemoved and Activity.Action for info
// Not available in all channels
}
else if (message.Type == ActivityTypes.ContactRelationUpdate)
{
// Handle add/remove from contact lists
// Activity.From + Activity.Action represent what happened
}
else if (message.Type == ActivityTypes.Typing)
{
// Handle knowing tha the user is typing
}
else if (message.Type == ActivityTypes.Ping)
{
}

return null;
}
}
}
The next posts in this series
- Using LUIS AI in Microsoft Bot Framework Part 1
- Using LUIS AI in Microsoft Bot Framework.- Part 2
- Publishing Bot to Azure and adding it to Skype
- Publishing Bot to Facebook Messenger
Hope it helps


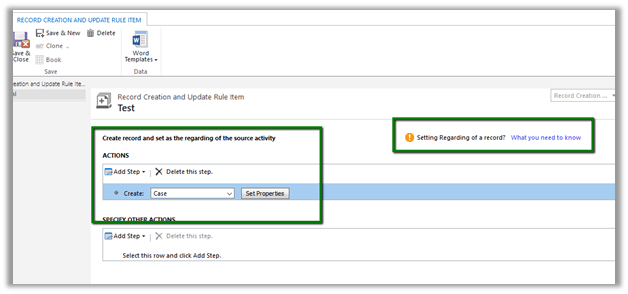

 Workflow ran but the case record was not created.