Use Sales Copilot to see the pipeline (Dynamics 365)


Using the “Sales Copilot” we can get the list of opportunities assigned to us.

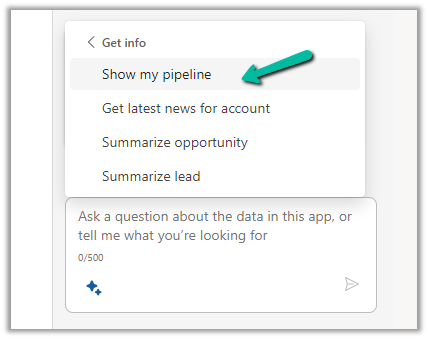
For this, we can use the “Show my pipeline” prompt

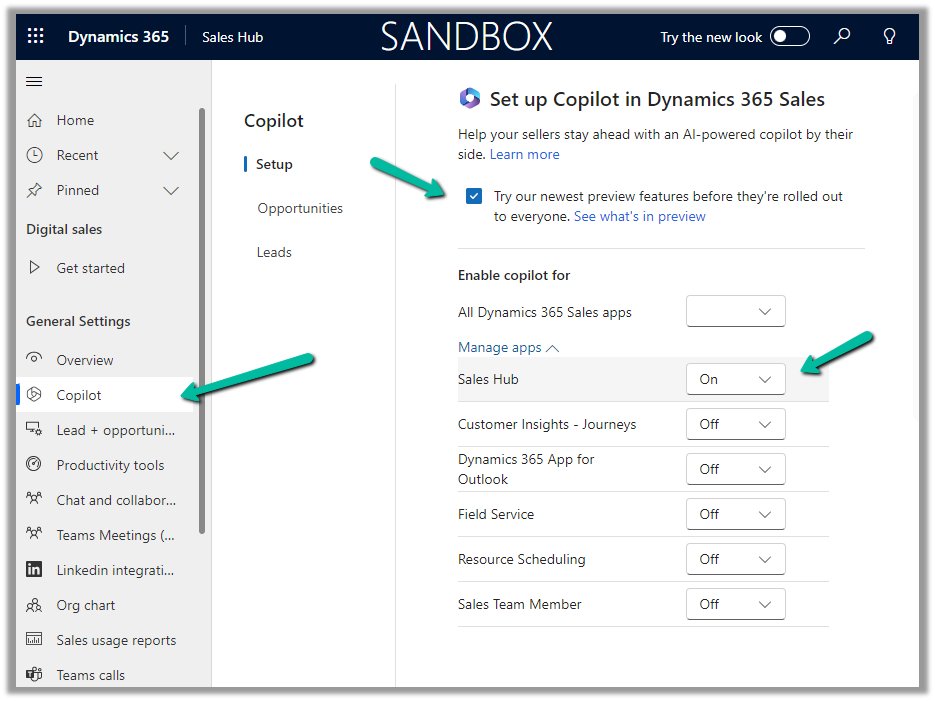
To enable Sales Copilot, Inside Sales Hub, navigate to App Settings >> Copilot (General Settings) and specify the Sales Apps in which we want the Sales Copilot to be enabled.
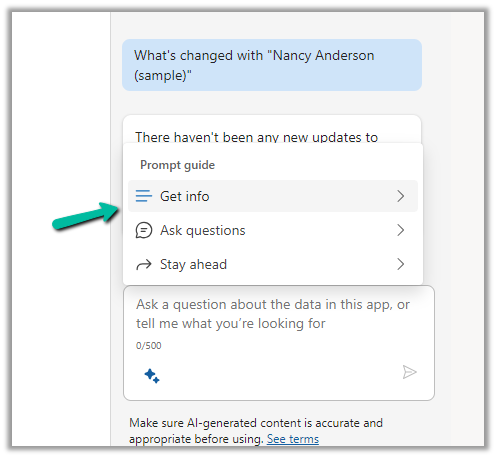
To see it in action, open the Sales Copilot Help Pane, select the Sparke Icon to open the Prompt Guide, then Get Info >> Show my pipeline
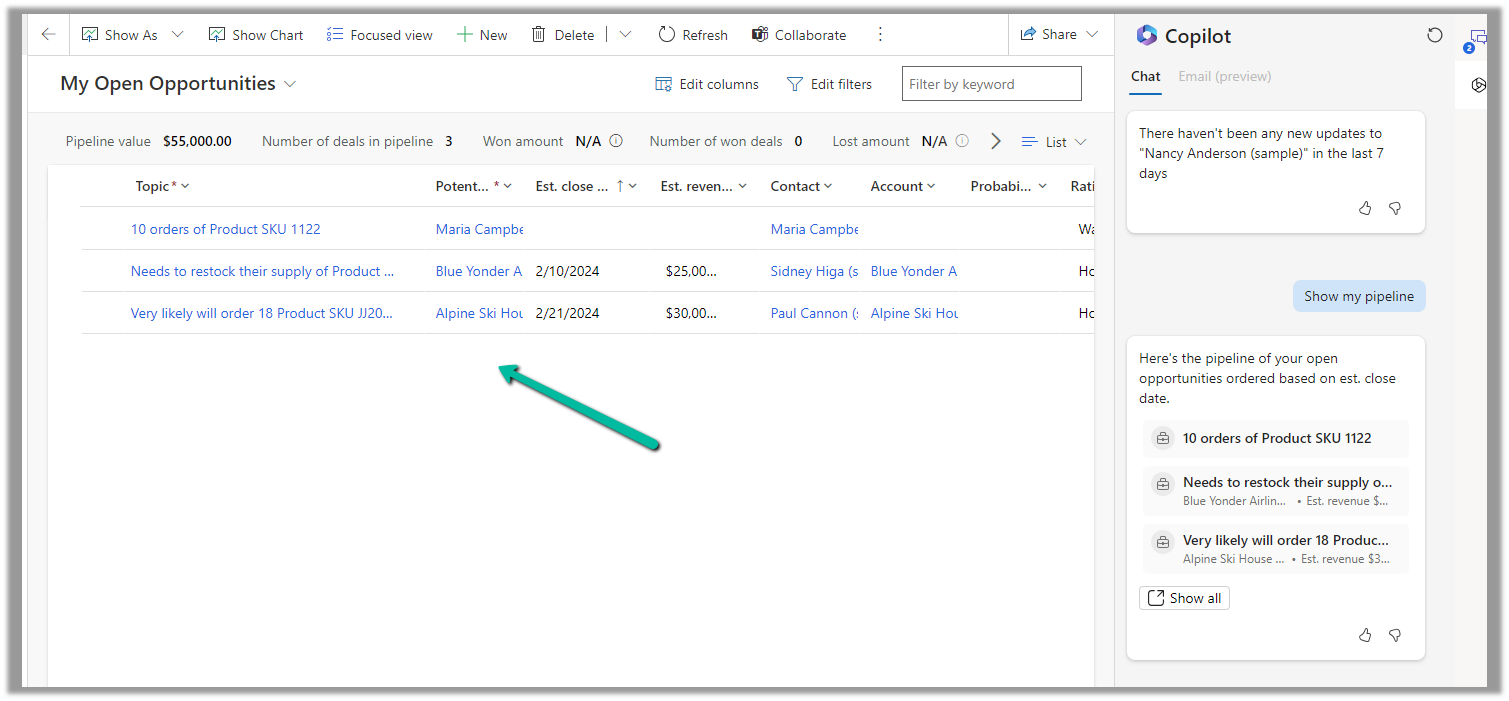
The result shows the opportunities sorted based on the estimated close date.

Clicking on “Show all” opens the corresponding opportunity view.
Hope it helps..

Advertisements

How to – Submit multipart/form-data using HTTP action in Power Automate (Dataverse)


Recently we were calling an API (that expects multipart/form-data) to pass the image uploaded in Dataverse’s Image Column.

We used Power Automate for this i.e. to get the image uploaded and use HTTP Action to call and pass the Image details to it.

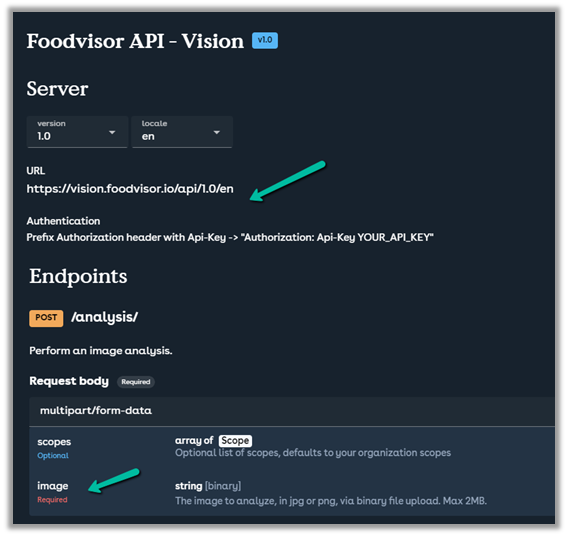
Below is the specification of the API

https://vision.foodvisor.io/docs/#/paths/analysis/post

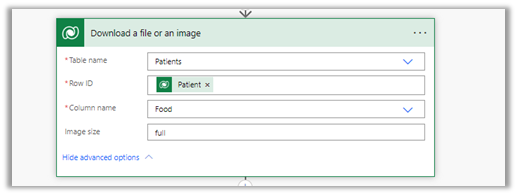
We used the “Download a file or an image” action to get the Image details

Below is how the HTTP action was used to pass the required details.

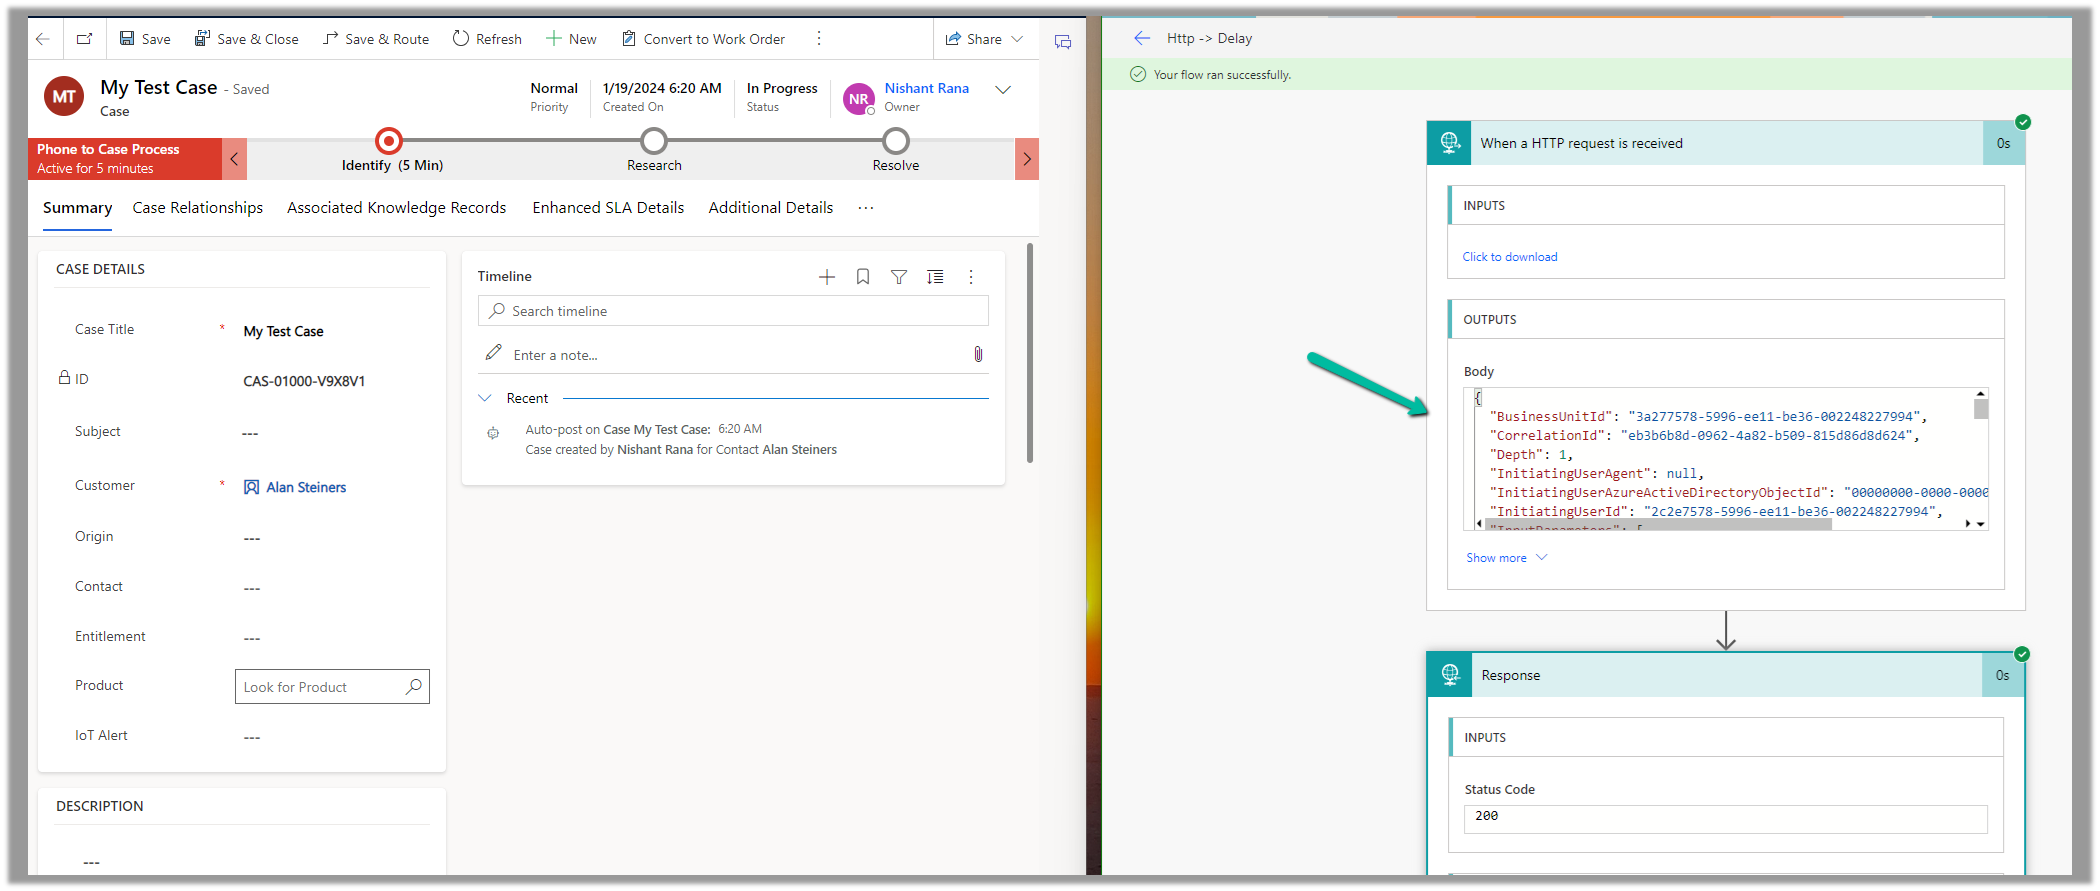
The successful response –

The body of the HTTP action –

{
"$content-type": "multipart/form-data",
"$multipart": [
    {
      "headers": {
        "Content-Disposition": "form-data; name=\"image\"; fileName=\"@{items('Apply_to_each_2')?['filename']}\""
      },
      "body": @{body('Download_a_file_or_an_image')}
    }
  ]
}


If we want to pass more than one data, we can have multiple headers defined as shown below

Helpful post –

Hope it helps..

Advertisements

Timestamp Frequency (Field Service Settings) in Dynamics 365 Field Service


The Timestamp frequency defines when the Booking Timestamp record should be created from the Bookable Resource booking record.

  • Per Booking Status Change
  • Per Field Service Status Change

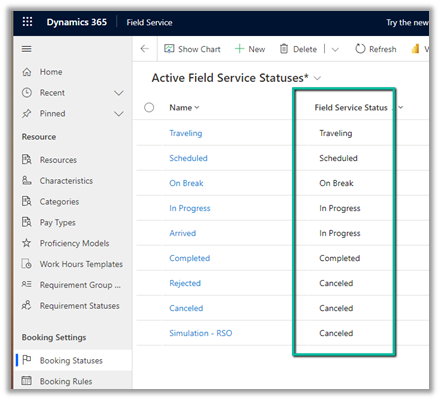
By default, it is Per Field Service Status Change, in this case, the Booking Timestamp will be created on the change of Field Service Status.

Let us update a Bookable Resource Booking record’s status from In Progress to Arrived.

Here we will not see any Booking Timestamp record created as the Field Service Status remains the same – “In Progress”

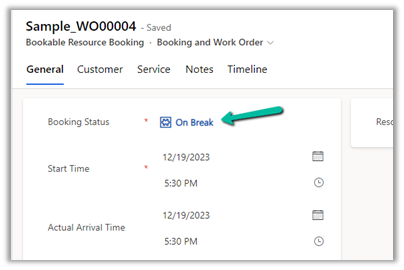
On changing it to On Break, we can see a new booking timestamp record created as that changes the Field Service Status.

The booking timestamp record :-

In the case of Timestamp Frequency as “Per Booking Status Change”, the booking timestamp record will be created on the change of the booking status in the Bookable Resource Booking record.

Also in the case of “Pre Booking Status Change”, the booking timestamp record created will have the Booking Status captured which is blank in the case
of “Per Field Service Status Change” as shown below

Get more details

Hope it helps..

Advertisements

Invoke webhook from a plugin – Dataverse / Dynamics 365

The content describes invoking a Webhook from a custom Azure-Aware Plugin, registered through a plugin registration tool. It includes code to invoke the Webhook using the IServiceEndPointNotificationService interface and a sample code snippet. The process involves updating a case record and provides guidance on the execution context and handling exceptions.


Similar to Azure Service Bus, we can invoke a Webhook from a plugin (custom Azure-Aware Plugin)

Below is our cloud flow that we have registered as a webhook through the plugin registration tool.

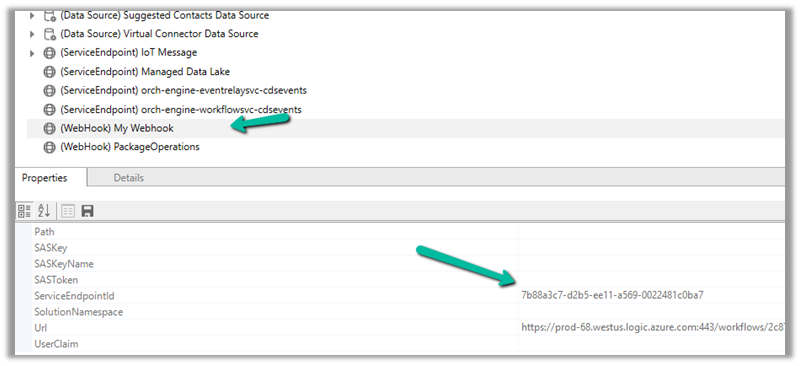
Below is our Webhook registered, note down the ServiceEndpointId.

Below is our code to invoke the Webhook, it uses the same interface, and we IServiceEndPointNotificationService need to provide ServiceEndpointId to it.

We have this registered in the Update message of the Incident.

Let us update a case record and see it in action.

Sample Code –

 public class CallWebhookPlugin : IPlugin
    {
        public void Execute(IServiceProvider serviceProvider)
        {           
            ITracingService tracingService = (ITracingService)serviceProvider.GetService(typeof(ITracingService));
            IPluginExecutionContext context = (IPluginExecutionContext)
                serviceProvider.GetService(typeof(IPluginExecutionContext));
            IServiceEndpointNotificationService webHookService = 
                (IServiceEndpointNotificationService)serviceProvider.GetService(typeof(IServiceEndpointNotificationService));

            try
            {
                tracingService.Trace("Posting the execution context to the Webhook.");
                // pass the GUID (ServiceEndpointId) of the Webhook 
               webHookService.Execute(new EntityReference("serviceendpoint",
                    new Guid("7b88a3c7-d2b5-ee11-a569-0022481c0ba7"))
                    , context);                            
                tracingService.Trace("Passed Successfully.");              
            }
            catch (Exception e)
            {
                tracingService.Trace("Exception: {0}", e.ToString());
                throw;
            }
        }

Hope it helps..

Advertisements

Concurrency Control – Apply to each for improving performance (Power Automate / Dataverse)


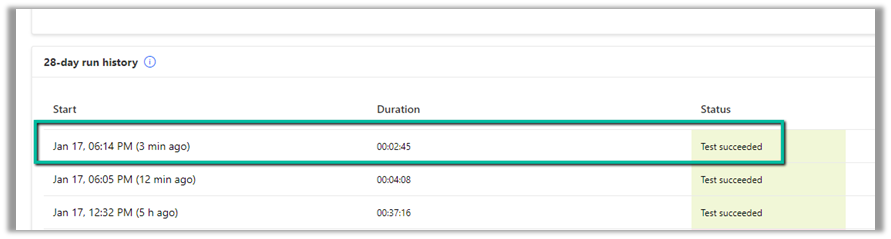
Let us fetch 5000 contact records using List Rows, and then update it using Apply To Each.

It took around – 37 minutes

Now let us enable concurrency control for Apply To Each action, and let it run under 20 (default) degree of parallelism.

This time it took around 4 minutes.

Let us increase it to the maximum this time, i.e. 50.

This time it took around 2:45 minutes.

Thus Concurrency Control option can help in processing records faster by processing records in parallel instead of one by one by using parallel threads. However, if the ordering of the way records need to be processed is critical, then we need to be careful before using it and also at times it can cause the API’s request limit to be hit.

Get more details on Concurrency limits

Hope it helps..

Advertisements
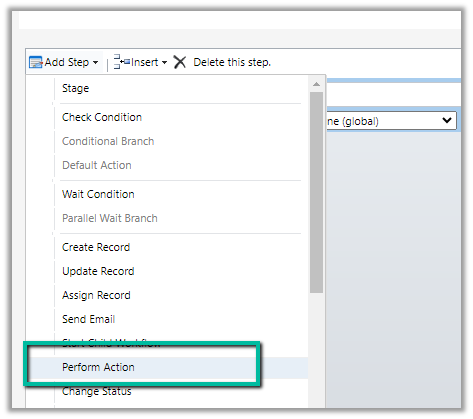
Custom Actions missing in the “Perform Action” step of the workflow (Dataverse / Dynamics 365)


We might see some of the custom actions not appearing in the Actions list inside the Perform Action step of the workflow.

This is because the Custom Action would be using one of the following parameter types, which is not supported for Perform Action like

  • Picklist (Optionset)
  • Entity
  • Entity Collection

E.g. we have the following actions defined few are bound to the Contact table, some are Global, and have different types specified as either Input or output parameter.

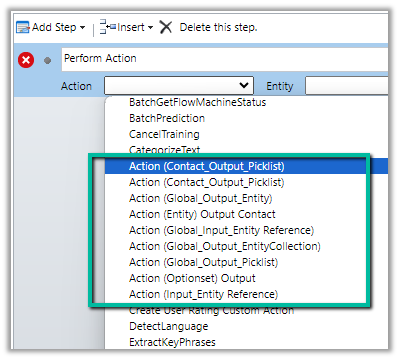
Out of the above actions defined, we can see only the following actions listed inside the perform actions step of the workflow.

The action which has input as Entity Reference are the ones listed, as it is one of the supported types. For the unsupported types, if used as an output parameter, the actions are listed.

https://learn.microsoft.com/en-us/dynamics365/customerengagement/on-premises/developer/create-own-actions?view=op-9-1#execute-an-action-using-a-process

Hope it helps..

Advertisements