Advanced configuration settings – Azure Synapse Link / Export to Data Lake service (Dataverse/ Dynamics 365)


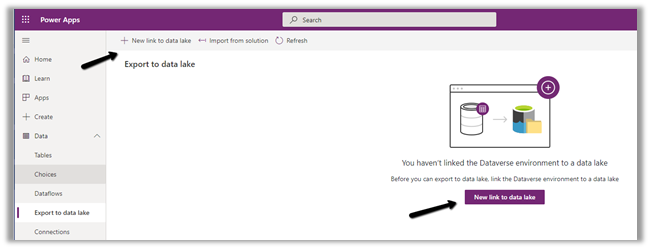
The Export to Data Lake service now has some Advanced configuration settings available.

To learn more on Export to Data Lake service

https://nishantrana.me/2020/12/10/posts-on-azure-data-lake/

The new settings allow us to configure how the DataVerse / CRM table data is written to Azure Data Lake.

  • In-Place update or upsert (default)
  • Append Only

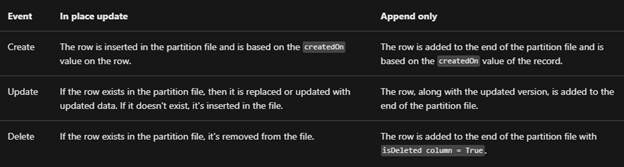
With the in-place update, the default setting, the file will contain the full data set, and any update in the source will update the same in the synced CSV file or the data partition, similarly, any record deleted will delete the row from the data partition, unlike Append Only where a new row will be added in case of both update and delete.

For huge volume of data, Microsoft recommends opting for Append only mode. This mode is also preferable when an organization wants to incrementally review the changed data.

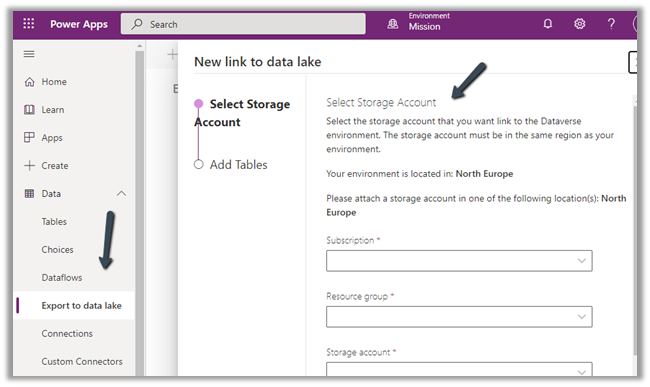
The other option is to define the data partition strategy.

  • By Month (default)
  • By Year

With this option, files generated are partitioned by either year or more granular month-wise, which can be specified per-table basis.

Microsoft recommends Monthly partition if data volume is high.

Now, let us see it in action.

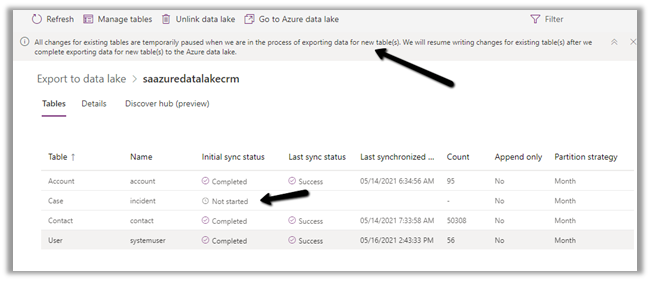
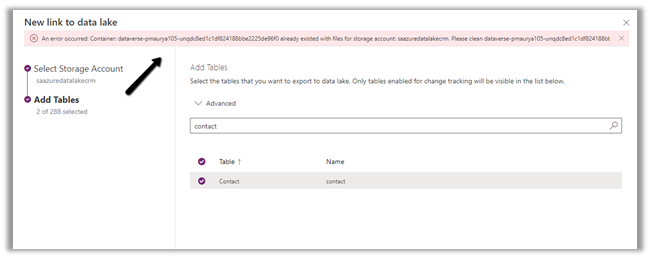
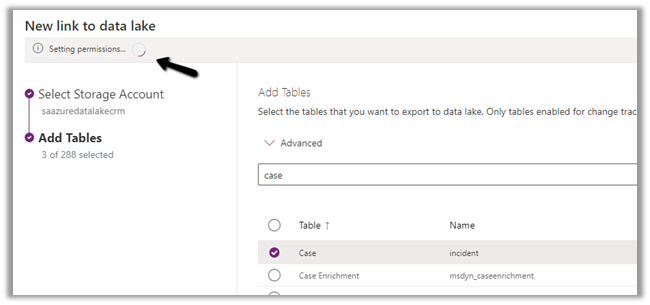
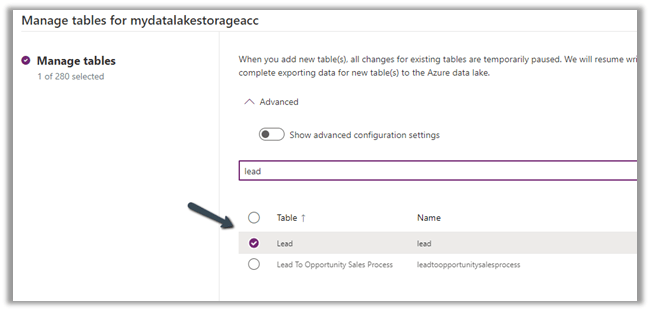
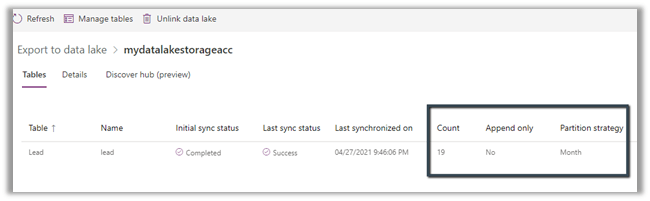
For the Lead table, we haven’t selected the option for advanced configuration settings and are going by default.

  • Append Only – No
  • Partition Strategy – Month

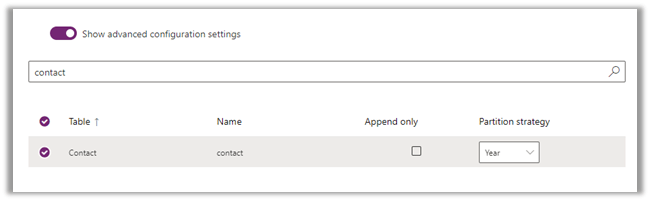
For contact, we have enabled the advanced configuration settings and opted for Partition Strategy as Year.

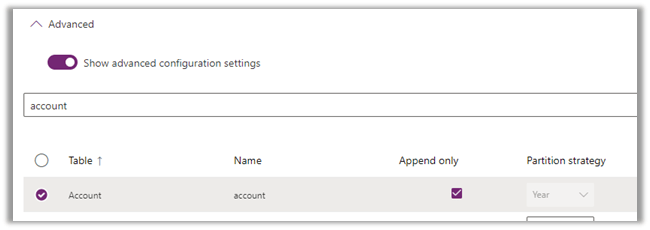
For Account , we have opted for Append Only as true, for which the Partition strategy option is disabled and set as Year.

The final configuration à

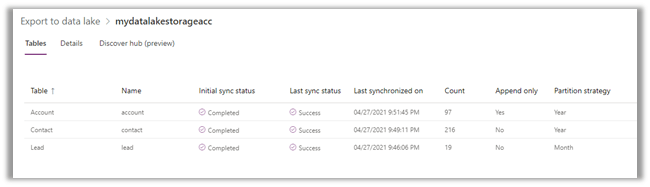
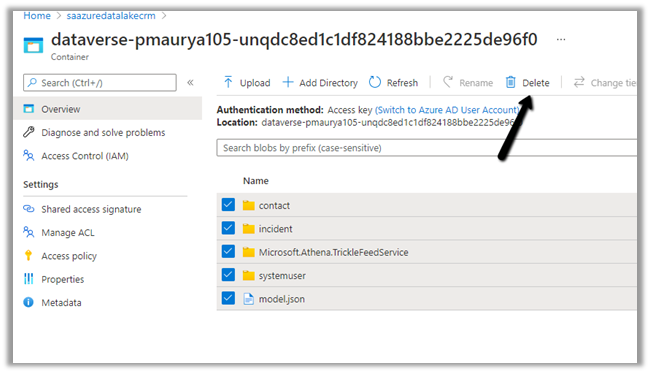
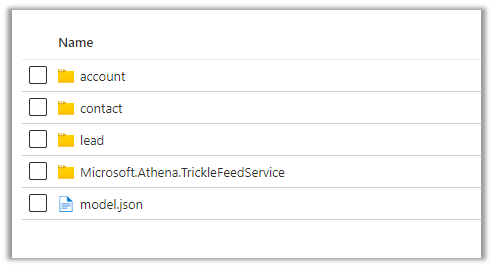
Within the container inside the Storage Account, we can see corresponding folders created per table/entity along with model.json as shown below.

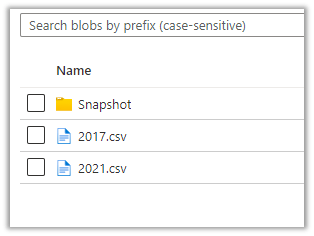
Let us explore the Lead folder –

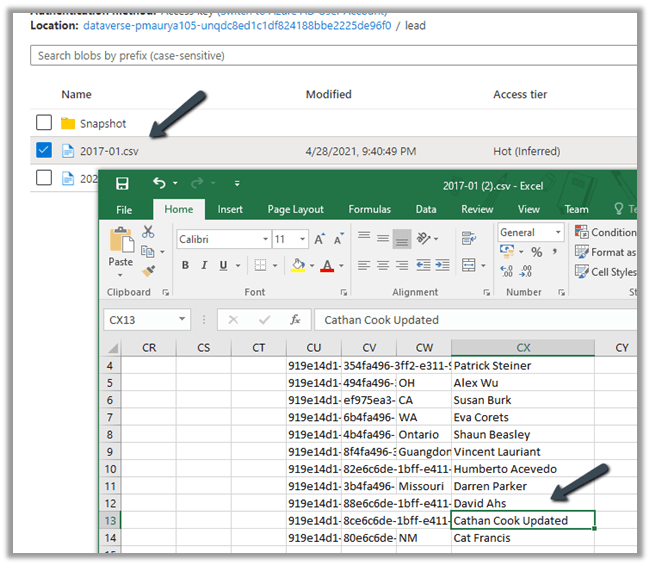
We can see 2 CSV created with format YYYY-MM.csv i.e. having the month part in it because we had specified Partition Strategy as Month i.e. the default value.

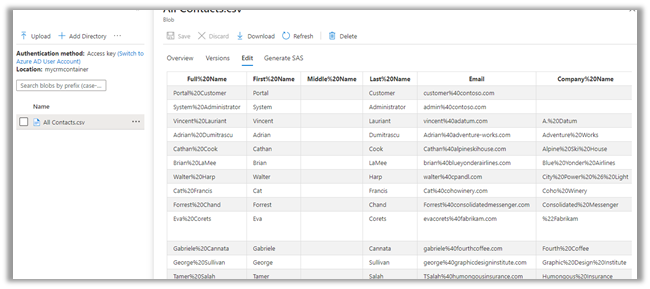
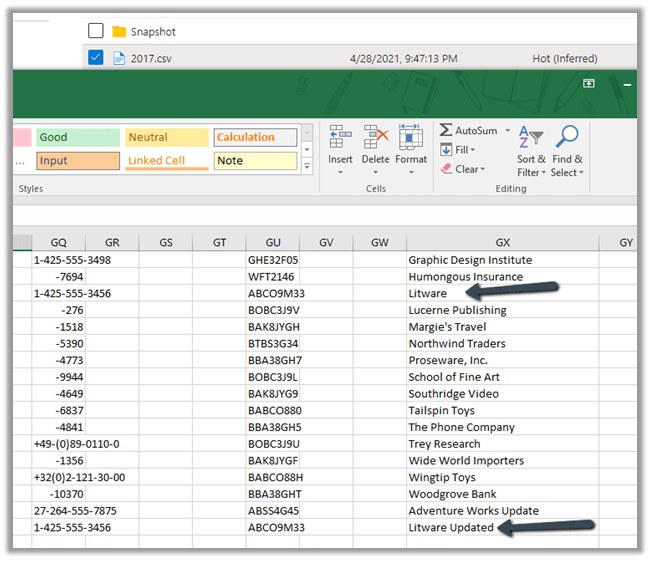
For Contact and Account, the Pattern Strategy was Year, so we have files generated in format YYYY.csv

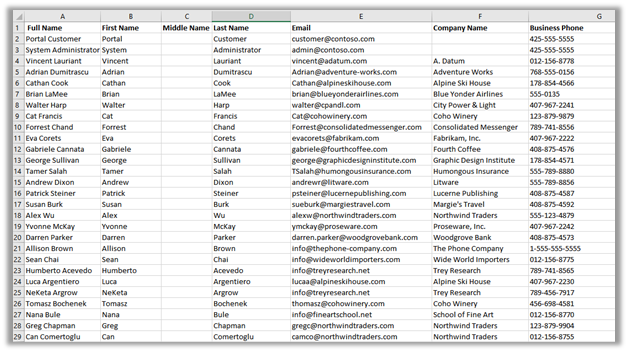
Let us update one of the lead records by appending ‘Updated’ in the last name field.

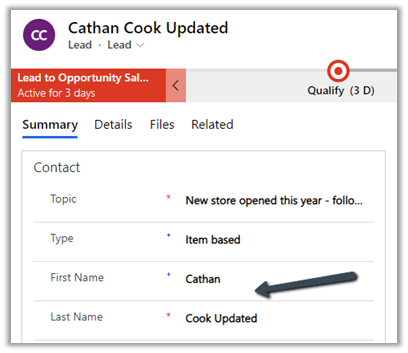
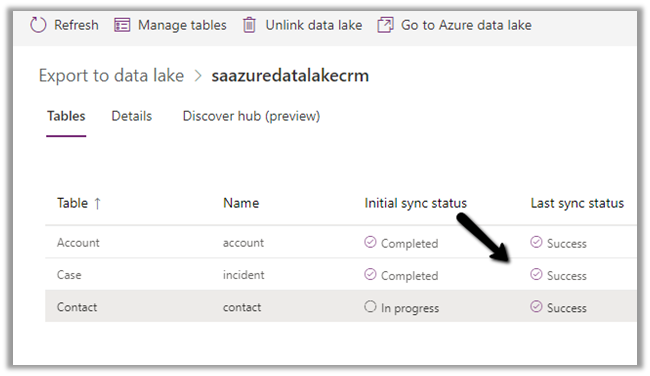
After the successful sync,

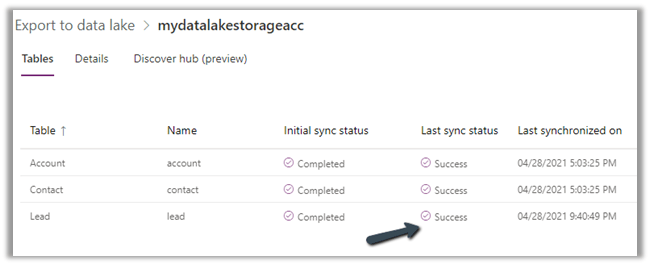
we can see the record updated in the .csv / partition.

The same is the case with the contact record.

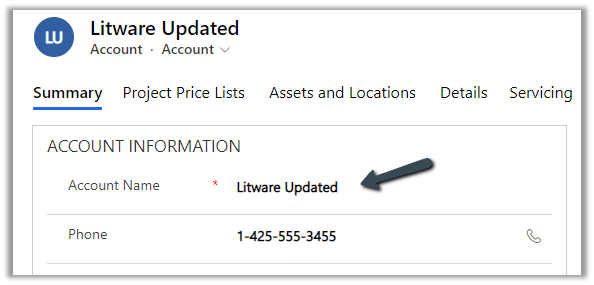
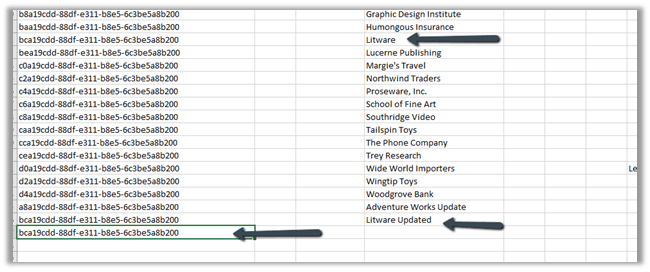
Now let us update an account record, it had Append Only specified as Yes.

Here we update the Account Name field from Litware to Litware Updated.

After the sync

We can see a new row appended with the updated record along with the original record.

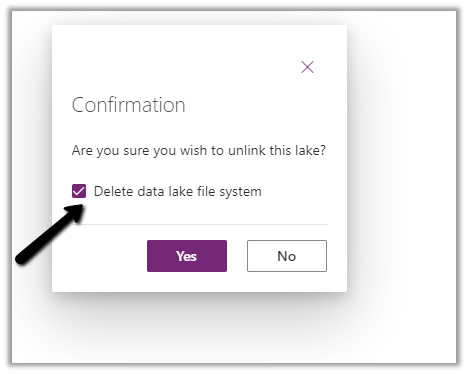
Let us delete the same account record

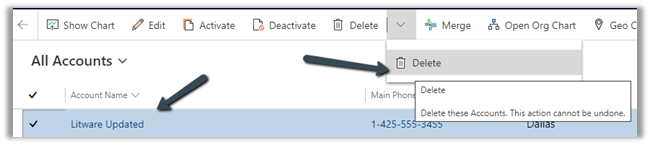
As expected, being Append Only mode, we can see a new row added for the Litware record.

We have 2 additional rows apart from the original row, one created for update and the other for delete action.

Export to Data Lake service is Microsoft’s recommended way of synchronizing Dataverse Data with external storage, and we can see them continuously investing and adding enhancements to it.

Get all the details here –

https://docs.microsoft.com/en-us/powerapps/maker/data-platform/export-to-data-lake#data-partition-strategy

Hope it helps..

Advertisement

Fixed – Initial sync status – Not Started – Azure Synapse Link / Export to Data Lake


Recently while configuring the Export to Data Lake service, we observed the initial sync status being stuck for one of the tables at Not started.

Manage tables option also was not working

All changes for existing tables are temporarily paused when we are in the process of exporting data for new table(s). We will resume writing changes for existing table(s) after we complete exporting data for new table(s) to the Azure data lake.

As it was seemed to be stuck forever, we tried Unlinking the data lake and linking it back.

Select Yes

We left the Delete data lake file system unchecked.

Created a New link to data lake with the same storage account.

We would get the below error à

An error occurred: Container: dataverse-pmaurya105-unqdc8ed1c1df824188bbe2225de96f0 already existed with files for storage account: saazuredatalakecrm. Please clean dataverse-pmaurya105-unqdc8ed1c1df824188bbe2225de96f0

Basically, if we are using the same storage account for linking, we need to first delete or clean the container.

We cleaned the container.

And tried again.

This time it worked

Here we can check the Delete data lake file system option while Unlinking the data lake

This will perform the same step – deleting the files within the container.

If that doesn’t work or is not feasible, we should raise Microsoft Support Ticket.

https://powerusers.microsoft.com/t5/Microsoft-Dataverse/Added-new-Table-to-Export-to-Data-Lake-Now-Sync-is-blocked/m-p/924560#M11400

Check other posts on Azure Data Lake and Dynamics 365 – 

https://nishantrana.me/2020/12/10/posts-on-azure-data-lake/

Hope it helps..

Advertisements

DSF Error: CRM Organization cannot be found while configuring Azure Synapse Link / Export to Data Lake service in Power Platform


Recently while trying to configure the Export to Data Lake service from the Power Apps maker portal, we got the below error.

DSF Error: CRM Organization <Instance ID> cannot be found.

More on configuring Export to Data Lake service –

https://nishantrana.me/2020/12/10/posts-on-azure-data-lake/

The user through which we were configuring had all the appropriate rights.

https://docs.microsoft.com/en-us/powerapps/maker/data-platform/export-to-data-lake#prerequisites

  • The user had System Administrator Security Role in the CRM Organization/ Dataverse Environment.
  • The user also had the Owner Role on the Storage Account.

Eventually, we raised a Microsoft Support Ticket.

We had recently moved our sandbox CRM Environment from UAE Central to UAE North.

Migrate Dataverse environment to a different location within the same Datacentre region – Power Platform

However, as a part of the migration, few steps were still pointing to the old region, which was causing that error. The Microsoft Support / Operation Team quickly corrected it and we were able to configure the Export to Data Lake service without any further issues.

We didn’t face this issue in our Production environment, which was also moved to UAE North.

Posts on Azure Data Lake

Hope it helps..

Advertisements

How to – Migrate Dataverse environment to a different location within the same Datacentre region – Power Platform


When we create an environment in the Power Platform admin center, we get the option of specifying the datacenter region, but not the location within it.

Find the Data Center Region / Location of your Dataverse Environment- https://nishantrana.me/2021/04/27/finding-the-datacenter-region-location-of-the-microsoft-dataverse-environment/

E.g. we have specified Region as the United Arab Emirates.

Now within the UAE region, we had our environment created in the UAE Central location. However as per the data residency guide, UAE North should be the main location, and UAE Central is reserved for in-country disaster recovery.

https://azure.microsoft.com/en-in/global-infrastructure/data-residency/

Considering this we had our other Azure Resources / Subscriptions including Storage Accounts, created in UAE North.

However, while configuring the Export to Data Lake service, we got the below message in the Power Apps maker portal.

The storage account must be in the same region as your Dataverse Environment.

Your environment is located in UAE Central

Please attach a storage account in one of the following location(s): UAE Central

Considering our storage accounts were created in UAE North, we either had the option to create a storage account in UAE Central or to move the Dataverse Environment to UAE North from UAE Central.

Based on the recommendation from Microsoft Fast Track Architect and Azure Architects, we opted for the second option of moving the Dataverse Environment to UAE North from UAE Central.

For this, we raised a Microsoft Support Ticket from the admin portal and scheduled the movement for the non-prod environment first.

The movement took around 30 minutes (around 6 GB storage size), however, it was not reflecting in the Power Apps Maker Portal. The Microsoft team had to perform few steps manually in the background which took around 2 more days for the change to reflect in the portal.

Then we scheduled the same for Production (around 15 GB Storage Size), this time it took around the same 30 minutes and after the confirmation from the Microsoft team after 1 hour or so we were able to see the location updated in the Portal (there were no manual configuration steps needed this time) and were able to configure Export to Data Lake service with the storage account located in UAE North.

Posts on Azure Data Lake and Dynamics 365 – https://nishantrana.me/2020/12/10/posts-on-azure-data-lake/

Hope it helps..

Advertisements

Azure Data Lake Storage Component in KingswaySoft – SSIS


Download and install the SSIS Productivity Pack

https://www.kingswaysoft.com/products/ssis-productivity-pack/download/

Drag the Azure Data Lake Storage Source component in the data flow

Double click and click on New to specify the connection

Provide the connection details and test the connection

  • It supports both Gen 1 and Gen 2

  • Supports the below Authentication modes

Inside the Azure Data Lake Storage Source component, we have specified our CSV file.

  • All Contact.csv file

Item Selection Mode:

  • Selected Item: Retrieves only the item specified by Source Item Path.
  • Selected Level: Retrieves the selected item and all immediate files and folders under the path specified by the Source Item Path option.
  • Selected Level (Files only): Retrieves the selected item and all immediate files under the folder as specified by the Source Item Path option.
  • Recursive: Retrieves the selected item (specified by the Source Item Path option) and all sub items recursively.
  • Recursive (Files only): Retrieves items the same as the Recursive mode but only returns files.

The page size refers to how many records to retrieve per service call

The columns page shows all the available attributes from the object specified in the General page

We have used the script component as the destination to read the values of all the above columns

The value for each of the columns –

datalakecsv

Get all the details here

https://www.kingswaysoft.com/products/ssis-productivity-pack/help-manual/cloud-storage

https://nishantrana.me/2020/12/10/posts-on-azure-data-lake/

Hope it helps..

Use query acceleration to retrieve data from Azure Data Lake Storage


Few key points about query acceleration –

Query acceleration supports ANSI SQL like language, to retrieve only the required subset of the data from the storage account, reducing network latency and compute cost.

Query acceleration requests can process only one file, thus joins and group by aggregates aren’t supported.

Query acceleration supports both Data Lake Storage (with hierarchical namespace enabled) and blobs in the storage account.

Query acceleration supports CSV and JSON formatted data as input.

Let us take a simple example to see it in action.

Within mydatalakegen (StorageV2 (general purpose v2)), we have All Contacts.csv with the mycrmcontainer.

Open the Windows PowerShell command window

Sign in to Azure subscription

  • Connect-AzAccount

Register the query acceleration feature

  • Register-AzProviderFeature -ProviderNamespace Microsoft.Storage -FeatureName BlobQuery

Register the resource provider

  • Register-AzResourceProvider -ProviderNamespace ‘Microsoft.Storage’

Create a console application project in Visual Studio and add the following NuGet Packages

Sample Code –

&lt;/pre&gt;

using System;
using System.Globalization;
using System.IO;
using Azure.Storage.Blobs;
using Azure.Storage.Blobs.Models;
using Azure.Storage.Blobs.Specialized;
using CsvHelper;
using CsvHelper.Configuration;

namespace MyQuery
{
class Program
{
static void Main(string[] args)
{

// Initialize the BlockBlobClient
BlockBlobClient myBlobClient = new BlockBlobClient(connectionString: "DefaultEndpointsProtocol=https;AccountName=mydatalakegen;AccountKey=orc8e1Dpclu5P3Ox9PIlsLG2/x8KZLcmgyhOEgz6yFTmzFJty+EpHQ==;EndpointSuffix=core.windows.net",
containerName: "mycrmcontainer", blobName: "All Contacts.csv");

// Define the query
// First Name - space in the column header
// _4 - referring the 4th column in the csv file
// LIMIT - limit to first 10 records
string query = @"SELECT ""First Name"", _4, email FROM BlobStorage LIMIT 10";

var blobQueryOptions = new BlobQueryOptions();
blobQueryOptions.InputTextConfiguration = new BlobQueryCsvTextOptions() { HasHeaders = true };

var result = myBlobClient.Query(query, blobQueryOptions);
var reader = new StreamReader(result.Value.Content);

var parser = new CsvReader(reader, new CsvConfiguration(CultureInfo.CurrentCulture) { HasHeaderRecord = true });

while(parser.Read())
{
Console.Out.WriteLine(String.Join(" ", parser.Context.Record));
}

Console.ReadLine();
}
}
}
&lt;pre&gt;

Output –

Get all the details here –

https://docs.microsoft.com/en-us/azure/storage/blobs/query-acceleration-sql-reference

https://docs.microsoft.com/en-us/azure/storage/blobs/data-lake-storage-query-acceleration

https://docs.microsoft.com/en-us/azure/storage/blobs/data-lake-storage-query-acceleration-how-to?tabs=azure-powershell%2Cpowershell


Posts on Azure Data Lake

Hope it helps..

Advertisements
%d bloggers like this: