Fixed – ‘InvalidApprovalCreateRequestAssignedToNoValidUsers’. Error Message: ‘Required field ‘assignedTo’ contained no valid users in the organization’.


We would get the below error while using Approvals in Power Automate

“BadRequest. The request failed. Error code: ‘InvalidApprovalCreateRequestAssignedToNoValidUsers’. Error Message: ‘Required field ‘assignedTo’ contained no valid users in the organization'”

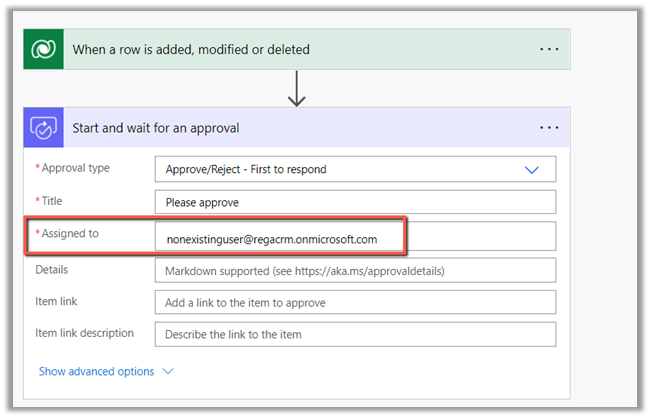
This error occurs if we are trying to send the approval to the user which doesn’t exist in the organization or to the external users.

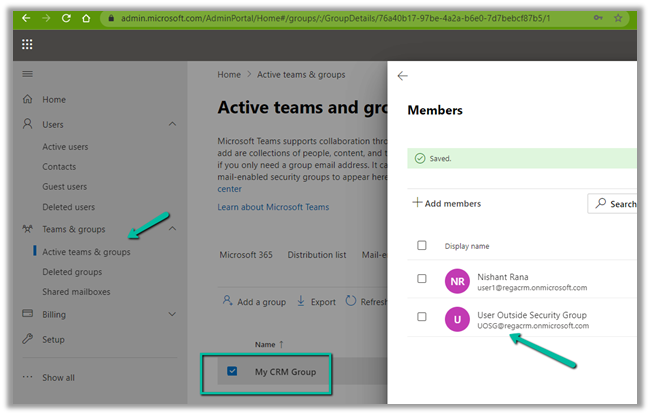
We recently got this error, and interestingly in our case, the user was showing up in the members in the Security Group inside Azure Admin Portal and was also giving us the option to add the user in Assigned To in the Flow.

However the user was not there in the Address Book of the Outlook, that is when we realized that user does not exist in the tenant anymore.

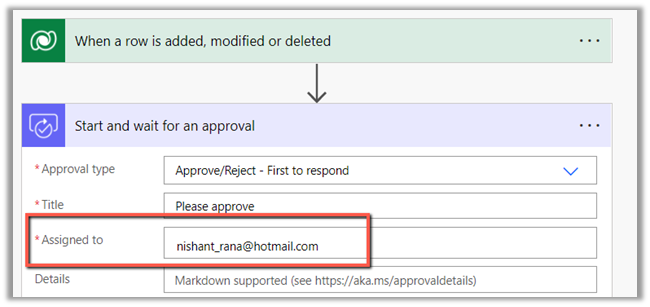
The flow can also fail if Assigned to a user’s personal account.

Here we have an option, to add the user as the Guest User.

Within Admin portal, navigate to Users >> Guest Users 
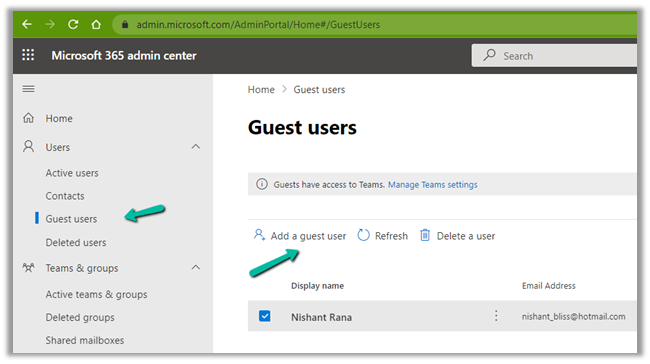
Invite the user 

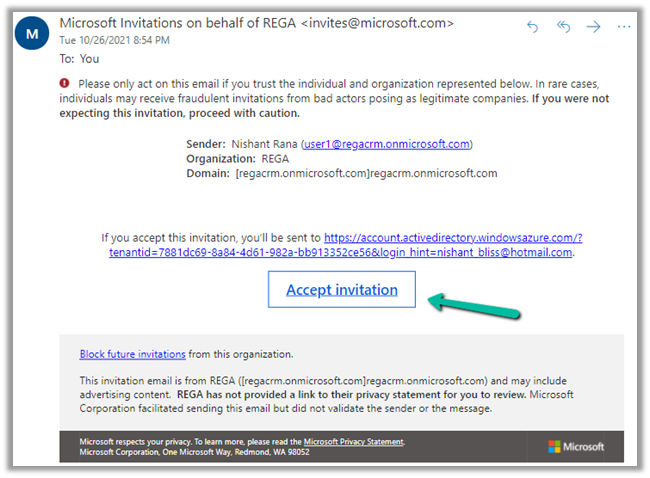
The guest user needs to accept the invitation.

Back in our approval flow, we can now select the guest user added.

We can see the guest user getting the approval request

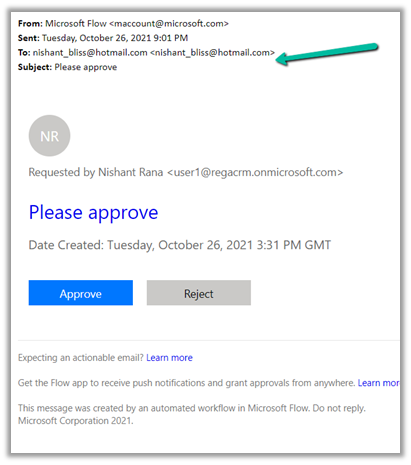
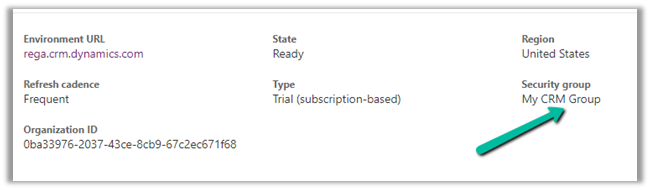
If we are using Security Group for the CRM Environment, than the user needs to be added to the Security Group also, else we will get the below exception – UserNotMemberofCdsSecurityGroup – The user cannot be created in Microsoft Dataverse because the account is not the member of the security group.

Fixed – Error code: ‘UserNotMemberOfCdsSecurityGroup’. Error Message: ‘The user ‘xyz’ cannot be created in Microsoft Dataverse because the account is not a member of group ‘abc’

In case we want to use approval with an external user(s) – without adding them as a guest user, we can use Send Email with Options Action instead of Power Automate Approvals.

https://debajmecrm.com/approvals-with-external-users-in-power-automate-without-consuming-power-automate-flow-license/

Hope it helps..

Advertisements

Dual-write – Step by Step guide


Premkumar's avatarPrem's Dynamics 365 Blog

Dual-write
is an out-of-box infrastructure that provides near-real-time interaction between model-driven apps in Microsoft Dynamics 365 and Finance and Operations apps. When data about customers, products, people, and operations flows beyond application boundaries, all departments in an organization are empowered.

Prerequisite:

Dynamics 365 for Finance and Operations & Dynamics 365 Sales should be installed. You can also use LCS approach to deploy & configure Dual-write.

  • Finance and Operations apps that have build version 10.0.9 (10.0.383.20013) (Quality update) and platform update 33 or later.
  • Model-driven apps in Microsoft Dynamics 365 that have platform version 9.1.0000.11732 or later.

Deployed the CRM Trial Instance (I have used the trial instance for this demo)

Please refer the prerequisite before starting the installation:

  • Uninstall the Prospect to Cash (P2C) solution.
    The P2C solution doesn’t work concurrently with dual-write. Therefore, don’t install the P2C solution. If it’s already installed, you must uninstall it before you enable…

View original post 1,094 more words

Route Case (routecase) attribute and msdyn_ApplyRoutingRuleEntityRecord Action in Dynamics 365 Customer Service


The case entity/table in Dynamics 365 CE has a Boolean type field named Route Case.

It has a default value as Yes.

On manually creating the record from the user interface, although Route Case shows the default value as Yes

On saving the record, the value changes to No, the field is also locked.

So basically no routing rules are applied when a case record is created from the user interface.

To apply routing rules, we need to use the “Save and Route” option

Or “Apply Routing Rule” command from the Grid

This also however will not update or set the Route Case field to Yes on the case record.

Now if we create the case record programmatically, the field would be set and saved with its default values as Yes.

The same goes for cases created from Flow.

Route Case is set to Yes.

So basically routing rules will be triggered on the records created from outside the User Interface as Route Case will be set Yes for those records.

Now if we want to run the routing rules against the case record created from the user interface, we can make use of the following action –

msdyn_ApplyRoutingRuleEntityRecord

Within Flow –

Within Plugin or any custom code–

msdyn_ApplyRoutingRuleEntityRecord can be used for other entities apart from the case.

In the case of Case entity, we can also make use ApplyRoutingRule action also.


Hope it helps..


Advertisements

Fixed – Error code: ‘UserNotMemberOfCdsSecurityGroup’. Error Message: ‘The user ‘xyz’ cannot be created in Microsoft Dataverse because the account is not a member of group ‘abc’


We would get this error within Power Automate Approval Flow if we are using Security Group to control access to Dynamics 365 Environment and are sending Approval to a user who is not a member of that security group.

Below is the User within the Tenant but is not member of the My CRM Group Security Group associated with that Environment.

The Security Group – My CRM Group – assigned to Environment against which flow  is created.

So to fix the issue, as the error message indicates, we need to add the user to the Security group.

After adding the user to the Security Group, the flow runs successfully

Also, the User (unlicensed in our case) gets added to CRM with Approvals
User security role as shown below.

Check other posts on Approvals – 

Approvals – Power Automate & Dynamics 365

Hope it helps..


Advertisements

{Power 2021 – Wave 2} Dataverse search 101: The new way to search in Dataverse


deepeshsomani2013's avatarMSDYNAMICSBLOG BY DEEPESH

Microsoft has recently introduced a great feature which is the new cool way to search in Dataverse – Its termed as Dataverse search.

How to enable it?

Production environments: Enabled by default

Non-Production environments: Navigate to Power platform Admin centre and you can enable the setting which is highlighted below:

clip_image002

Tip: Scroll down and don’t forget to hit the Save button on the above screen after enabling it. It will take some time first time you enable this feature(Indexes are being created in the background) – so wait for a while for awesomeness

What tables are enabled by default?

21 in total are enabled by default, here is the list:

Without D365 Apps enabled:

Account (8)
Contact (11)
Goal (19)
Goal Metric (3)
Knowledge Article (56)

With D365 Apps enabled:

Campaign (2)
Campaign Activity (4)
Campaign Response (6)
Case (5)
Competitor (1)
Contract (7)
Invoice (4)
Lead (6)
Marketing List…

View original post 485 more words

Using DataSourceInfo and RecordInfo function for checking permissions for a Dataverse table or record in Canvas App


DataSourceInfo function can be used to check the Table / Entity level permission.

We can check for Create, Read, Edit, and Delete Permission and can disable, hide and show the corresponding create, edit and delete buttons for the users.

  • DataSourceInfo.CreatePermission
  • DataSourceInfo. DeletePermission
  • DataSourceInfo. EditPermission
  • DataSourceInfo. ReadPermission

DataSourceInfo function can also be used to obtain information about a particular column of the data source like Display Name, Max Length, Max Value, Min Length, Required.

https://www.inogic.com/blog/2020/11/how-to-use-datasourceinfo-in-canvas-app/

  • DataSourceInfo.DisplayName
  • DataSourceInfo.MaxLength
  • DataSourceInfo.MaxValue
  • DataSourceInfo.MinValue
  • DataSourceInfo.Required


Similarly, the RecordInfo function can be used to get the information about the record of a Dataverse data source.

We can check for the Read, Edit, and Delete Permission.

  • RecordInfo. ReadPermission
  • RecordInfo. EditPermission
  • RecordInfo.DeletePermission

Hide Show control based on Security Role in Canvas App

Here for our sample Canvas App we have a button and a Gallery  having Data source as Cases

1 

Visible    

Button

If(DataSourceInfo(Cases,DataSourceInfo.ReadPermission), true, false)

2 

Visible   

Edit

If(RecordInfo(Gallery1.Selected, RecordInfo.EditPermission),true, false)

3 

Visible    

Delete

If(RecordInfo(Gallery1.Selected, RecordInfo.DeletePermission),true, false)

Now to test it, we have assigned the below custom security role/rights to another user – Test User 1 (along with Basic User security role)

i.e. Read, Write and Delete permission at the User Level on Case.

We have also shared the Average order shipment time record with Test User 1 assigning him the Write Permission.

Now when Test User 1 will open the Canvas App, the first button will be visible as he has the Read permission on the Case table.

In the gallery only the one record shared will be visible along with the Edit button on the same.

Let us just share one more case record with only Read permission to Test User 1.

We can see the record displayed for Test User 1.

It shows the Edit button for the new record, although we shared the record with the Read permission.

We have the following formula for the Edit button’s OnSelect

Patch(Cases, LookUp(Cases,’Case Number’ = lblCaseNumber.Text), {‘Case Title’:”Sample Title”})

So clicking on Edit for the new record shared ‘Complete overhaul required‘ gives the below Permission error

Now pressing the same edit button for the ‘Average order shipment time’ record will update the record (set title as Sample Title) as it was shared with Write permission with Test User 1.

Get all the details here –

https://docs.microsoft.com/en-us/powerapps/maker/canvas-apps/functions/function-datasourceinfo

https://docs.microsoft.com/en-us/powerapps/maker/canvas-apps/functions/function-recordinfo

Hope it helps..

Advertisements

Nishant Rana's Weblog

Everything related to Microsoft .NET Technology

Skip to content ↓