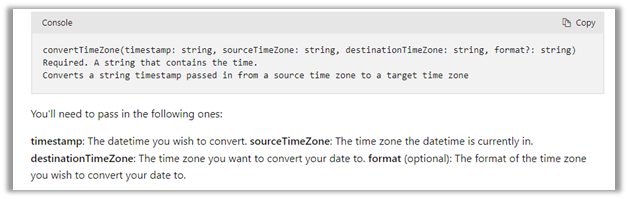
As we know now we have the bulk operation messages – CreateMultiple, UpdateMutiple, and DeleteMultiple (only for elastic tables) released with UpsertMutilple coming soon.
The messages allow us to work with records in bulk. Get more details here
And in fact, now we can also write plugins against the CreateMultiple and UpdateMultiple messages. Get more details here
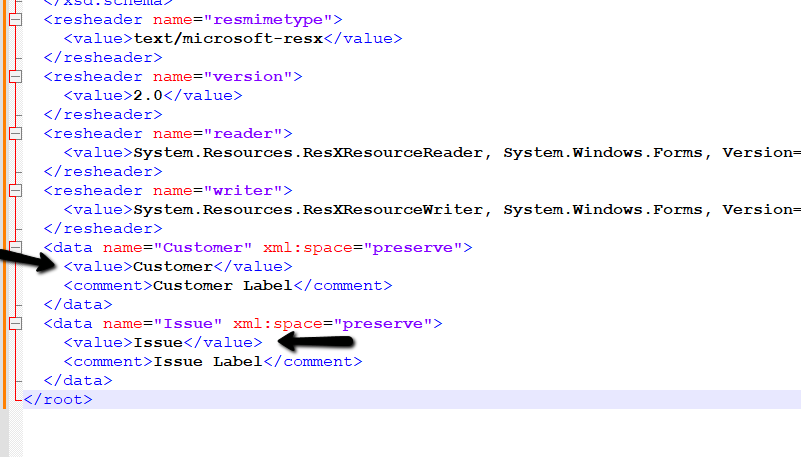
These messages are available for all the custom tables, but not all the standard tables.
To check availability with standard tables
<fetch>
  <entity name="sdkmessagefilter">
    <attribute name="primaryobjecttypecode" />
    <link-entity name="sdkmessage" from="sdkmessageid" to="sdkmessageid" link-type="inner">
      <filter>
        <condition attribute="name" operator="eq" value="CreateMultiple" />
      </filter>
    </link-entity>
  </entity>
</fetch>
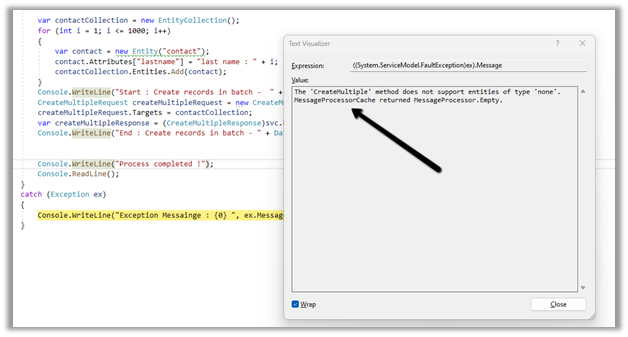
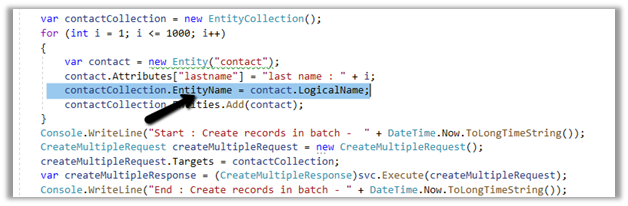
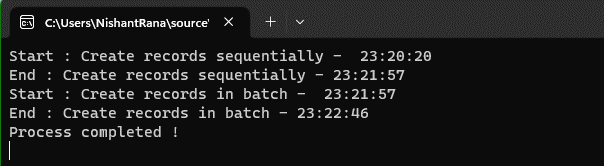
Just to quickly try it out, we created 1000 contact records one by one and then used the CreateMultipleRequest in bulk.
We got the time-out error.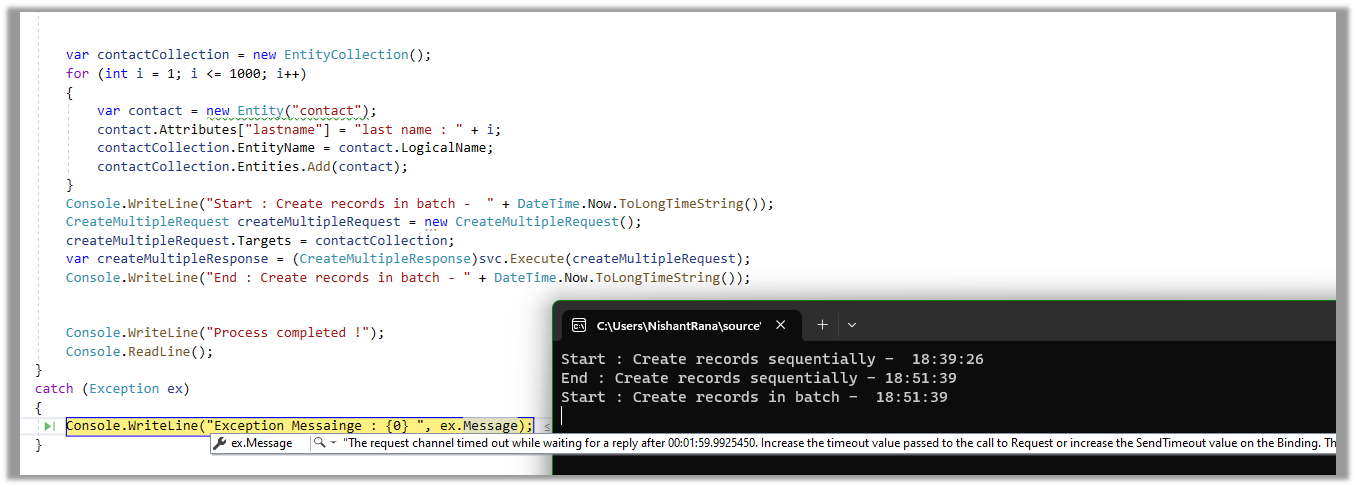
Same error message while working with 500 and then 200 records.
Finally, we got success with 100 records.


We should use the bulk message in multiple parallel threads under different application users to improve the performance – https://nishantrana.me/2021/06/08/data-migration-optimum-batch-size-and-threads-for-maximum-throughput-microsoft-dataverse-dynamics-365/
Hope it helps..


 Check this thread that talks about it –