Use tag parameter to add a shared variable to the plugin – Dataverse / Dynamics 365


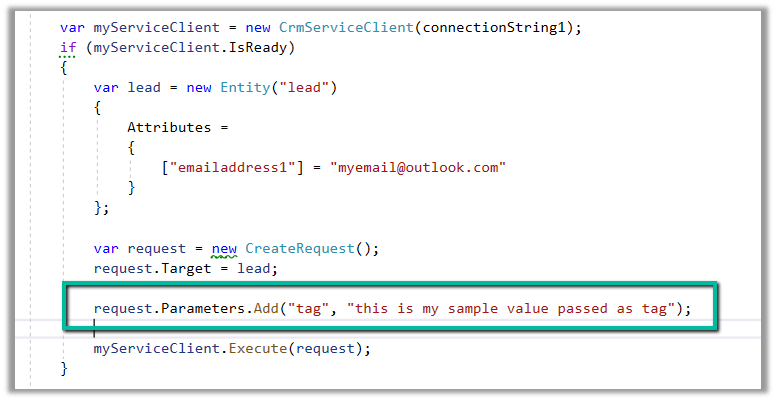
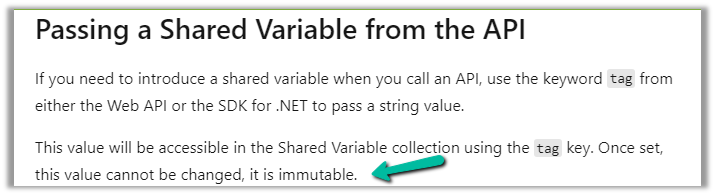
We can use the tag parameter in the request to pass any additional information to the plugin. This is added as a shared variable to the plugin execution context.

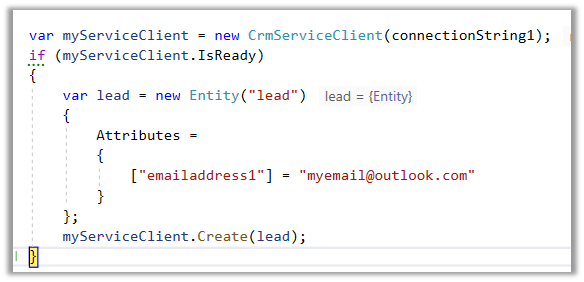
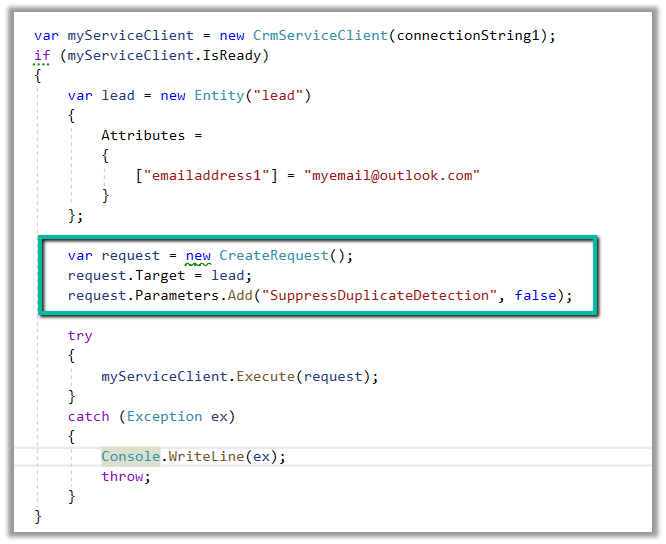
Below we are creating a lead record and passing the tag parameter in the CreateRequest

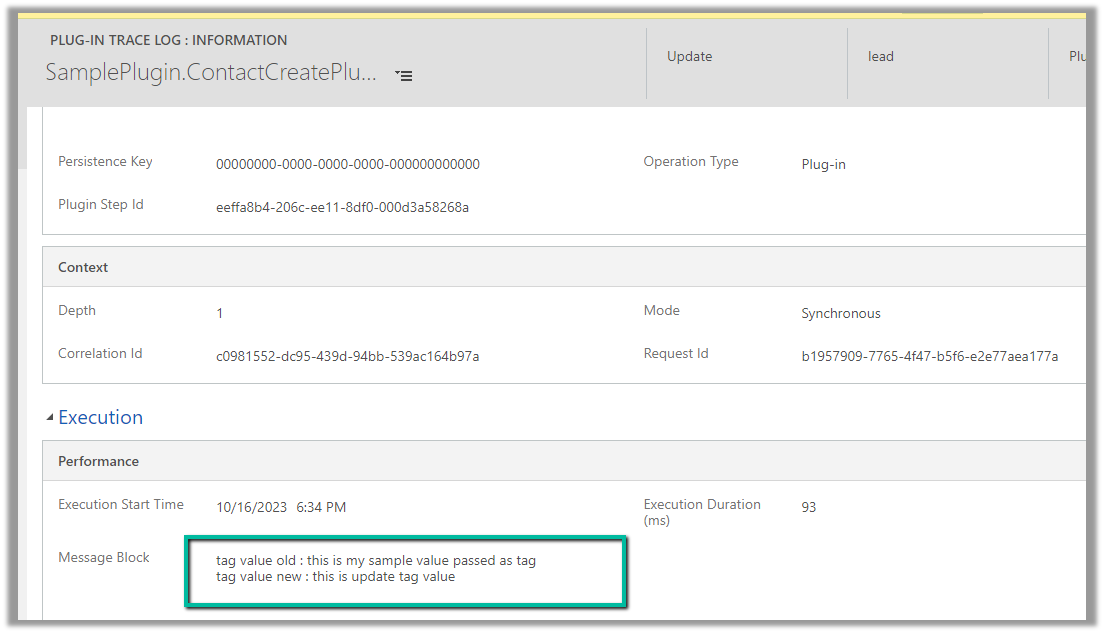
And below is our plugin, that gets the tag parameter passed from the shared variable collection.

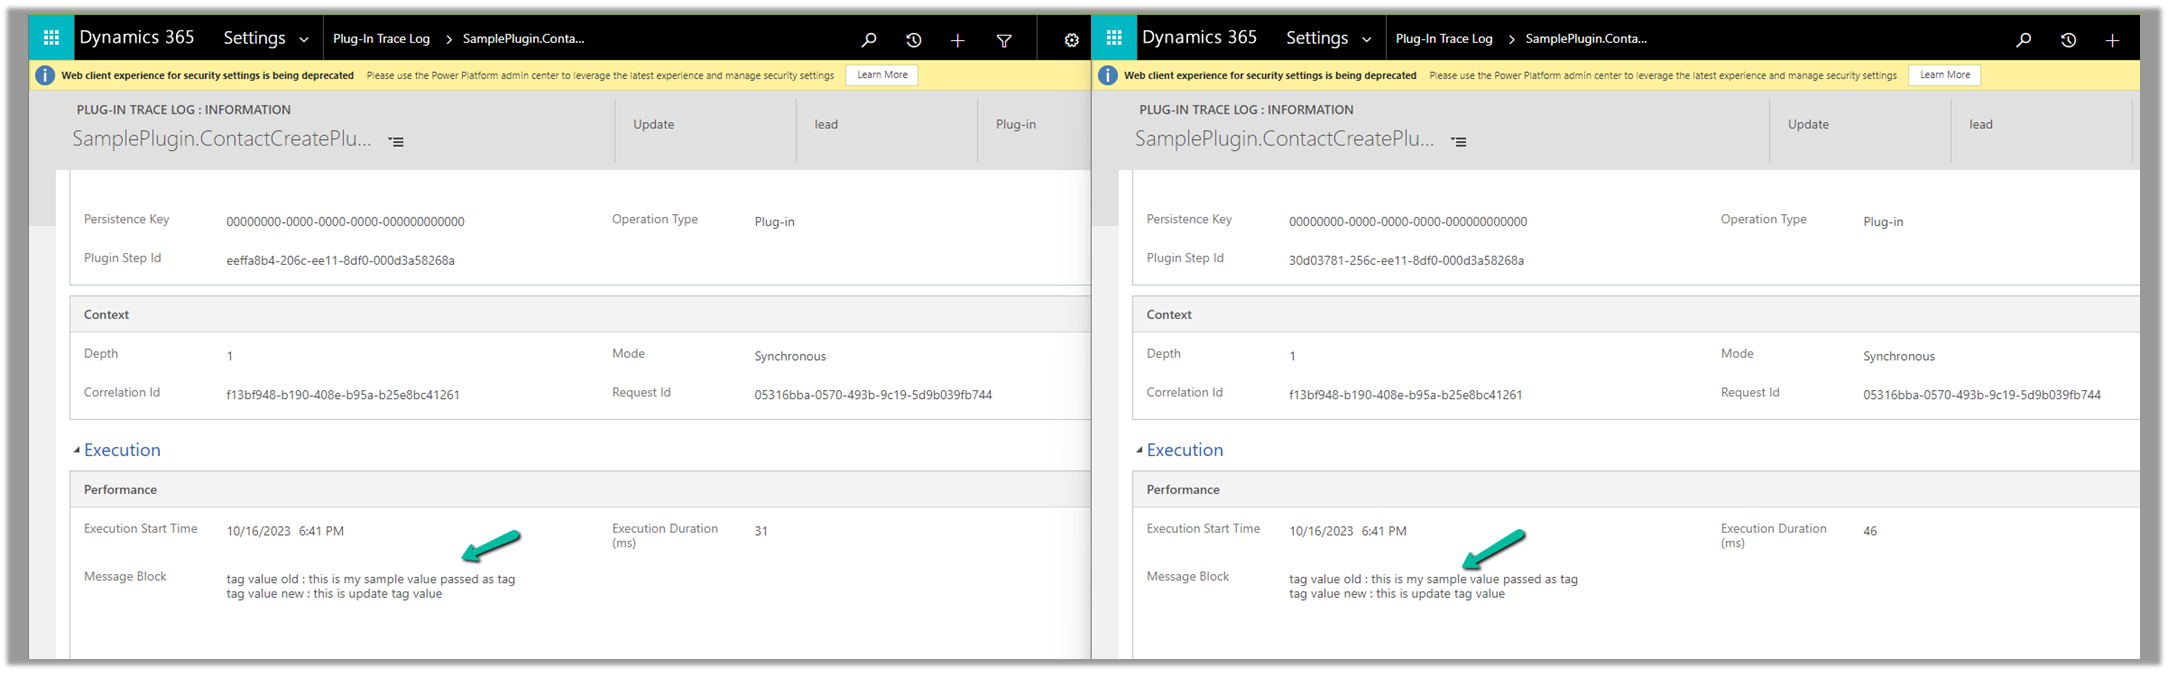
We can see the value of the tag parameter in the trace log.

Below is an example of where we are passing it in UpdateRequest

The trace log –

Also, the tag parameter is immutable, once set from the API, its value cannot be changed.

Below we had the same plugin registered in pre and post-operation, and we were getting the same value for the tag passed during the create request.

As per the Microsoft documentation, we can use this field to pass any additional details from the client application, that we can use to apply specific logic in the plugin.

Get more details here

Refer to for more details

Hope it helps..

Advertisements

Use RetrieveDuplicates request to check for duplicates before creating/updating a record – Dataverse / Dynamics 365


In the previous post, we saw how we can use the SuppressDuplicateDetection parameter to throw errors in case of duplicates when creating or updating a record.

Here instead of relying on exception, we can make use of the RetrieveDuplicatesRequest message to detect the duplicates.

Let us take the “Leads with the same e-mail address” duplicate detection rule to see it in action.

We can see 3 lead records already existing in the system with the same email address.

Below is our code that is trying to create a new lead record with the same email address and using the RetrieveDuplicatesRequest to check for the duplicates.

Below we can see that not only do we get the total number of duplicates found, but we can also get the details of the duplicate records found.

Get all the details here.

Hope it helps..

Advertisements

Use SuppressDuplicateDetection parameter of Request to throw an exception in case of duplicates – Dataverse / Dynamics 365


We can make use SuppressDuplicateDetection optional parameter of the Request if we want the configured duplicate detection rules to run and throw an exception while creating or updating the record.

We will use the below out-of-the-box duplicate detection rule, that checks for lead having same email address.

Below is our code and we can see the lead records with the same email address getting created without any exception.

Now we have updated the code to use the SuppressDuplicateDetection optional parameter. We have set it as false.

As expected this time we get the exception.

Hope it helps..

Advertisements

Preferred Solution (preview) in Dataverse / Dynamics 365


With the preferred solution (preview), now we can specify a solution to which all our changes, that are made outside of the context of the unmanaged solution, should get automatically added.

To enable it, navigate to Settings >> Features >> Preferred solution (Preview)

Inside the Maker Portal, now we can see a new section added, asking us to specify the preferred solution, and we can see Common Data Services Default solution set as the preferred solution as default.

We can click on Manage to specify any of the existing unmanaged solutions as the preferred solution or to create a new solution.

Here we have set one of the solutions as the preferred solution.

Now let us add an update existing table outside the context of the solution. Here we are updating its form by rearranging some of the fields in it.

We have moved the Fax field to be the last field in that General Information section and have published the changes.

Back in our preferred solution, we can see the form we updated, automatically added.

Similarly, any other changes, i.e. any solution components added or updated, outside the context of the unmanaged solution, will be added to the preferred solution. (apart from changing the Default Solution where all the solution components reside).

Also, other users/makers can specify their preferred solution.

To add the cloud flows or canvas apps, created outside the context of the solution, in the preferred solution, we can enable the below features.

Here we have created this sample flow from outside the solution and also a canvas app.

We can see them added to our preferred solution.

Get all the details here

Hope it helps..

Advertisements

How to – Connect Dynamics 365 records and views to Microsoft Team channels – Dynamics 365


To enable the feature that allows linking existing Dynamics 365 records and views to a Team channel,

we need select the environment and navigate to Settings >> Team Integration Settings

Select Yes for the “Turn on the linking of Dynamics 365 records to Microsoft Teams channels” and save it.

Now back in Microsoft Teams, from a team channel, select the Add (+) option

Select Dynamics 365

Specify the environment, and the corresponding Dynamcis 365 Apps in it.

Check Rememer this preference and click on Select.

Next, we get the option to search and filter for a record to link to.

Here we have selected the contact Nancy Anderson record, click on Save.

We can see the selected contact record pinned.

We also get the below options for the record tab added.


Similarly, if we want to link to a view, we can select the table and then its corresponding view to select and click on Save.

We can see the selected view added.

Also for both records and views pinned, we get the option of starting the conversation.

Clicking in Start conversation adds the below message with the link to the tab where the view or the record has been added or linked.

Get all the details here

Hope it helps..

Advertisements

How to – convert basic queue to an advanced queue – Dynamics 365


We can convert our basic queue to an advanced queue by setting the field “Is Omnichannel Queue” or “Automatic work distribution” schema name “msdyn_isomnichannelqueue“- to Yes.

We would usually do it to use the existing basic queue in the Unified Routing.

We can find that option in the Conflicts Tab of the Queue form

Or in case you cannot find the conflicts tab, you can add the field to the form

Here we need to be careful while converting the basic queue to an advanced queue, as we cannot revert this. If we try to do this we will get the below error –

Get more details here.

Hope it helps..

Advertisements

Nishant Rana's Weblog

Everything related to Microsoft .NET Technology

Skip to content ↓