My notes on Dynamics 365 Data Export Service


Recently we configured Data Export Service in our Production environment. The idea was to export the data to Azure SQL DB that can be used for Power BI report.

https://nishantrana.me/2017/03/19/configuring-data-export-service-in-microsoft-dynamics-365/

Pros:

  • Easy to configure.
  • Takes care of incremental changes.
  • Easy to check the status

Cons:

Issues with the Failed records.

For e.g.

We have around 200K records failed for one entity as shown below.
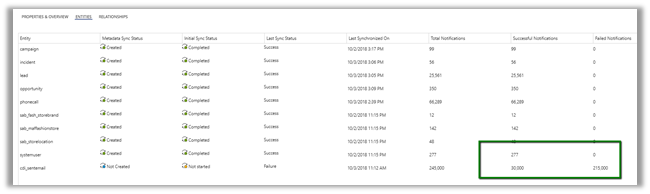
There is preview feature added for retrying the sync for the failed records.
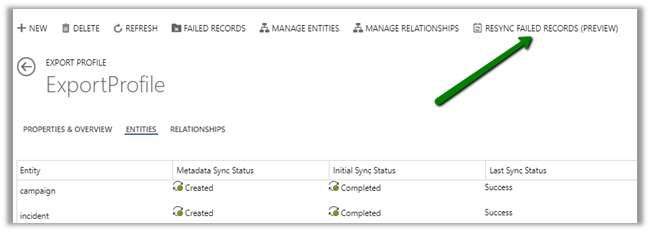
Clicking on Resync Failed Records didn’t help much here as we didn’t see any change in the count of failed records.

And now we are getting the below message for it.
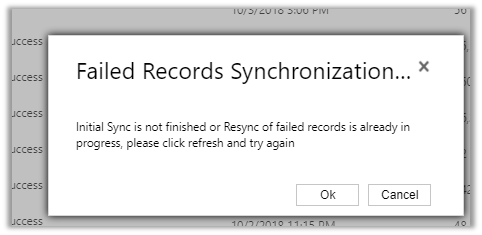
It has been more than 24 HOURS when we had started the Failed Records Synchronization.

This feature being still in preview, we can expect few things not working.

So how do we deal with failed records, how do we figure out the reason for them failing so that we could correct it and retry our export ?

For this we can use the Failed Records feature of Data Export Service to get the logs of the failed records
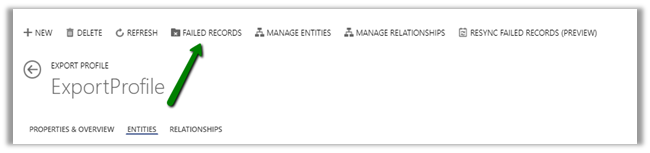
It will give us a Blob URL, which is valid for 24 hours, to which we can connect through Azure Storage Explorer and check the logs.
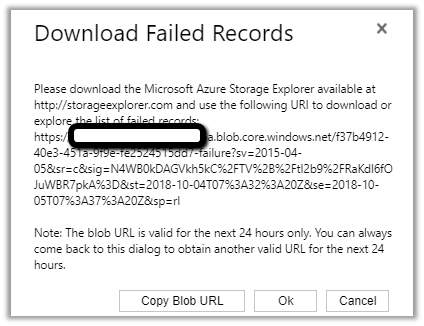
Copy the Blob URL

Download the Azure Storage Explorer

https://azure.microsoft.com/en-us/features/storage-explorer/

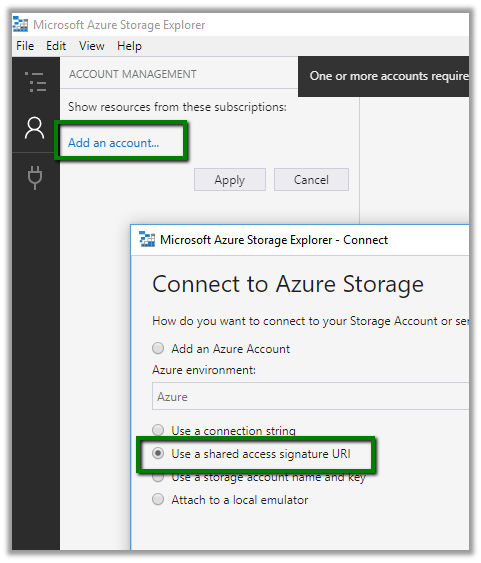
Open Azure Storage Explorer, select the Account section and click on Add an Account.

Select “Use a shared access signature URI” option and click on Next.
Paste the copied Blob URL
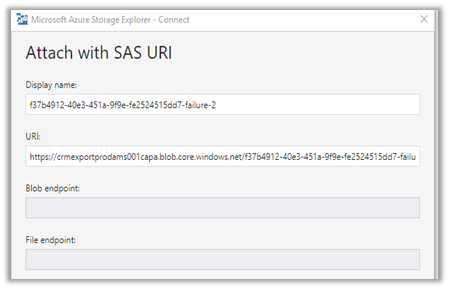
Click Next to get the connection summary and click Connect.
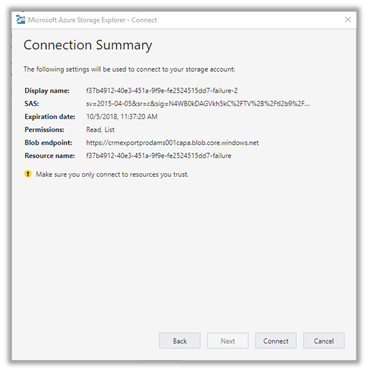
After connecting we should be able to see the log
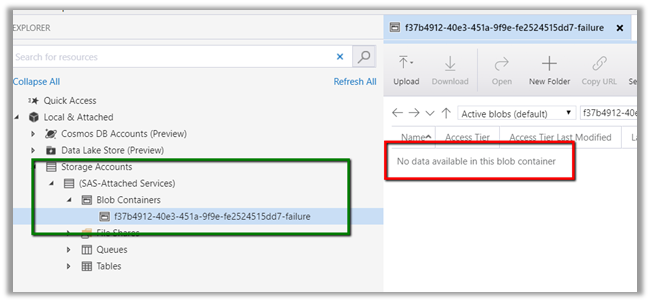
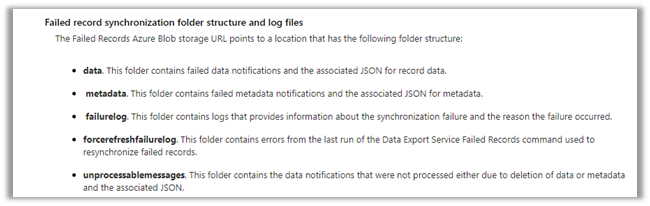
However in our scenario, the blog container was always blank. Ideally it should have the following information
One more limitation that we need to be aware of is that Activity type entities are not supported.
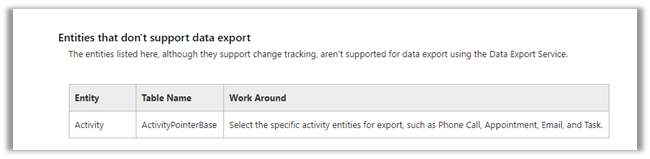
https://technet.microsoft.com/en-us/library/mt744592.aspx#Anchor_17

And also if we delete one of the entities from the export profile and plan to add it later to the same profile or to a new profile, we need to delete its table and corresponding user defined type from the Azure SQL DB else we will get the exception.

https://technet.microsoft.com/en-us/library/mt744592.aspx#Anchor_14

Considering how easy it is to configure and takes care of the incremental data, this feature is well worth considering, however it is the failed records things that could prove a challenge, if we don’t have the logs for them or we are not able to fix them as we do not have much control over the things when compared to writing a custom code or using some tool like KingswaySoft Adapter.

Hope this helps..

Earned “Top 10 in September 2018 Blog Leaderboard” badge in Dynamics 365 Community


I have my blog syndicated to Dynamics 365 Community.

We can request our existing blog to be syndicated to Microsoft Dynamics Community which I would strongly recommend all the Dynamics 365 bloggers out there.

Click the below link to get all the details à

https://community.dynamics.com/w/help/136.request-a-new-blog-or-blog-to-syndicate

With blog syndicated, your blog post would also be published to Dynamics community as well and active participation in the community, either through blog post or through answering in forums etc. is rewarded through badges by Microsoft, which I believe is nice way of encouraging and recognizing the community contributors.

Check all the badges here à

https://community.dynamics.com/badges

In fact, there is a badge if you ask your first question in the forum

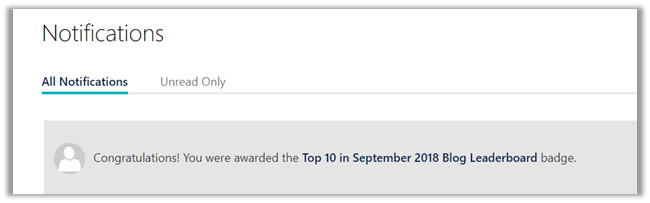
For last month September 2018, I got the Top 10 in September 2018 Blog Leaderboard badge

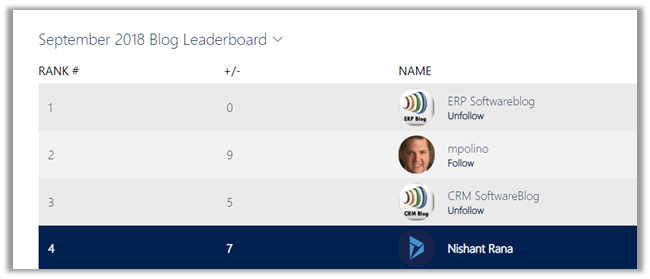
We can also check our rank in the leaderboard

https://community.dynamics.com/leaderboards/243

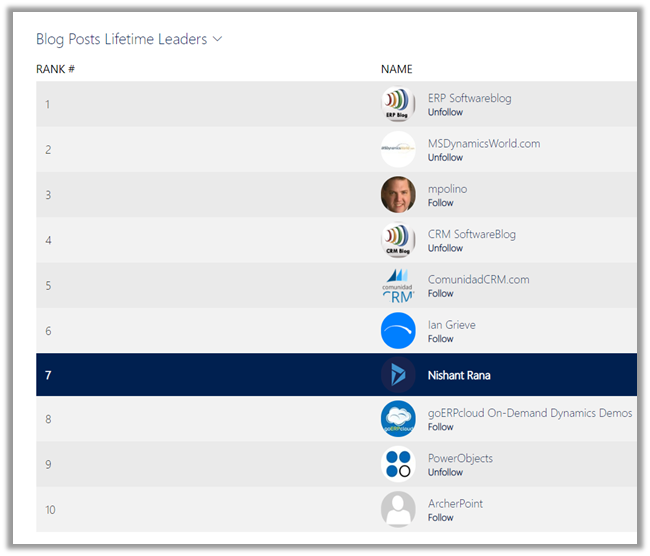
We can also check the leaderboard for the lifetime

https://community.dynamics.com/leaderboards/2

Our Dynamics Community is one of the best out there and so would also request and recommend all the Dynamics 365 Professionals to actively participate and contribute in the community, ask question regarding the issues you are facing, answer few of them or at least read all the answered questions to see what issues one can face during the implementation and the solution to it.

Keep learning..

Error validating profile registration while configuring Microsoft Dynamics 365 Data Export Service


While configuring the Data Export Service we got the below error while validating the profile

It mostly occurs if there is some issue with the connection string specified in the PowerShell Script used for generating the key vault.

Always copy the connection string from the Azure SQL Connection Strings property and double check the username and password provided there. And make sure the user specified has all the required rights.

https://technet.microsoft.com/en-us/library/mt744592.aspx#Anchor_1

Correcting the connection string resulted in successful validation of the export profile.

Hope it helps..

How to – Use Recurrence trigger in Microsoft Flow


Schedule – Recurrence trigger inside Microsoft Flow makes it extremely easy and effective to write a recurring job specially in the context of Dynamics 365, wherein it isn’t straight forward. We can use Workflows with wait and timeout conditions but that isn’t the easiest and efficient way. Each approach has its own pros and cons though.

The scenario we are going to implement is getting basic details of all the leads record created every hour inside Dynamics 365 CE and create a Task in todoist to call that lead.

Login to Microsoft Flow

Navigate to My flows and select Create from blank

Search for recurrence trigger and select it.

Specify interval as 1 and frequency as hour and click on New step and select “Add an action

To get the records from Dynamics 365 CE, we need to use “Dynamics 365 – List records” action. Search for the same and add it.

For List records action, select the organization in the Organization Name, Leads for the Entity Name and for filter query specify “createdon ge addHours(utcNow(), -1)“: i.e. lead records created in last one hour as shown below

Add a new step “Add an apply to each”

Select value (list of items) for “Select an output from previous steps” field of Apply to each and click on Add an action.

Search for todoist and select Create a task action. Login or create a new account in Todoist.

Specify Inbox as the Project Id and for the title use the dynamic value of lead i.e. Last Name, First Name and Mobile Phone.

Save the Flow and click on Test to see it in action.

The run activity will show the status of test run along with any error during the flow execution. In our case it has ran successfully.

Inside Todoist we can see the task created.

Hope it helps..

Advertisements

Could not load file or assembly ‘CrmLibraries, Version=8.0.0.0’ while using Microsoft Dynamics 365 Developer Toolkit


While trying to deploy Plugin through Developer Toolkit we got the below error

Could not load file or assembly ‘CrmLibraries, Version=8.0.0.0, Culture=neutral, PublicKeyToken=31bf3856ad364e35’ or one of its dependencies. The system cannot find the file specified.

   at System.Reflection.RuntimeAssembly._nLoad(AssemblyName fileName, String codeBase, Evidence assemblySecurity, RuntimeAssembly locationHint, StackCrawlMark& stackMark, IntPtr pPrivHostBinder, Boolean throwOnFileNotFound, Boolean forIntrospection, Boolean suppressSecurityChecks)

We will get this error if we haven’t configured the path to Plug-in Registration Tool and CRM SDK Bin Directory in our Visual Studio


Hope it helps..


My Favorite – Visual Studio Tips and Tricks


Sharing some of my favorites

  • Select entire line of code

Put the cursor anywhere in that line of code and without selecting anything just press ctrl + c or ctrl + x

Here I have put my cursor just before the var declaration.

Pressing ctrl + x will cut the entire line


  • Use ALT key to make selection from middle of the line spanning multiple lines and replace the content.

Press and hold Alt while making the selection to select the content from the middle, instead of beginning of the next line.

Also, here we can start typing to replace the content.

  • Change selected text’s case

  • Ctrl +] to move to the matching brace and Ctrl + Shift +] to select everything between matching braces.


  • Move between methods inside using Visual Studio

Using Edit à Next Method and Previous Method we can easily navigate between the methods


  • Use cw code snippet for Console.WriteLine


  • Show Output Window when build starts

Navigate to Tools à Options to enable this setting

  • Use Shift + Enter to place “;” at the end of line
  • Use Peek Definition to get details of the referenced property or method


Use Preview Tooltip for vertical scroll bar

Go to Options à All Languages à Scroll Bars and check Show Preview Tooltip

This will show the preview of the source code at that point.

Hope it helps..