Enhanced Case experience – Full case form – Dynamics 365 Customer Service


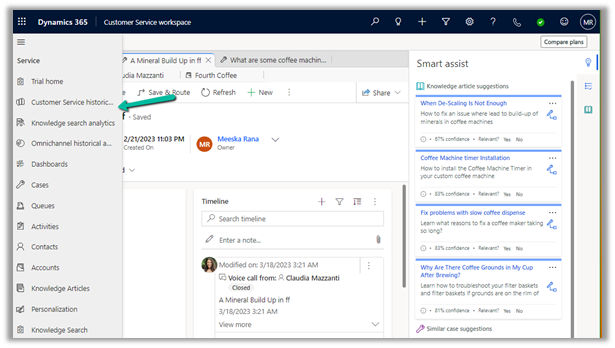
Enhance Case Experience is currently available only for the Customer Service Workspace app which targets to increase the productivity of the agent.

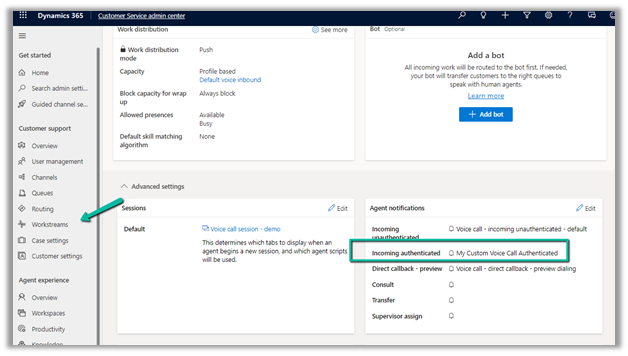
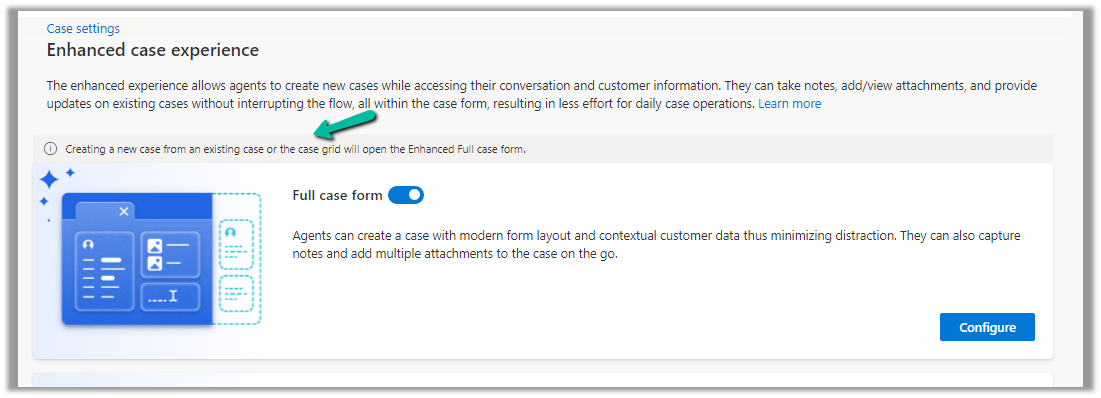
To enable it, navigate to Customer Service Admin Center >> Customer Support >> Case Settings >> Enhanced case experience (Manage)

Enable the options – Here we have enabled the Full case form experience.

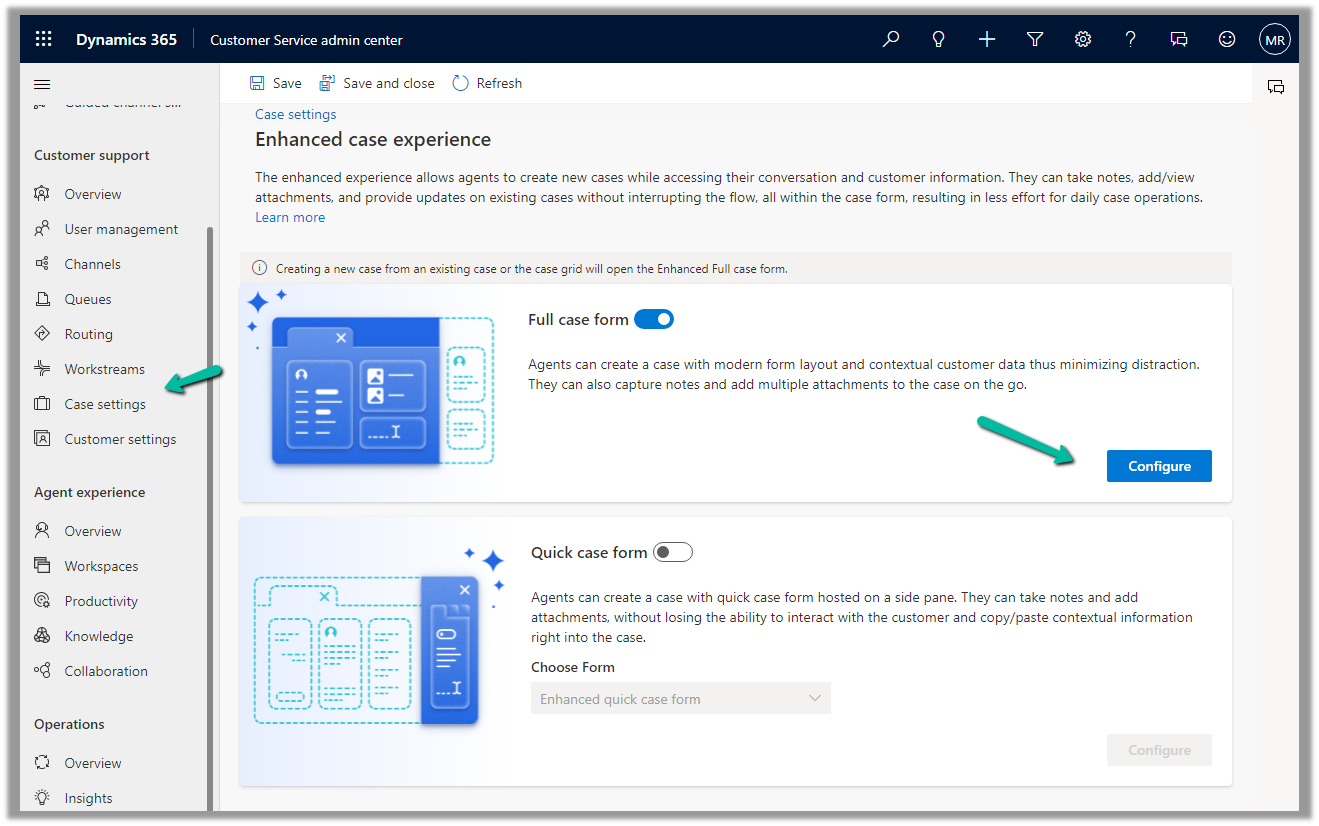
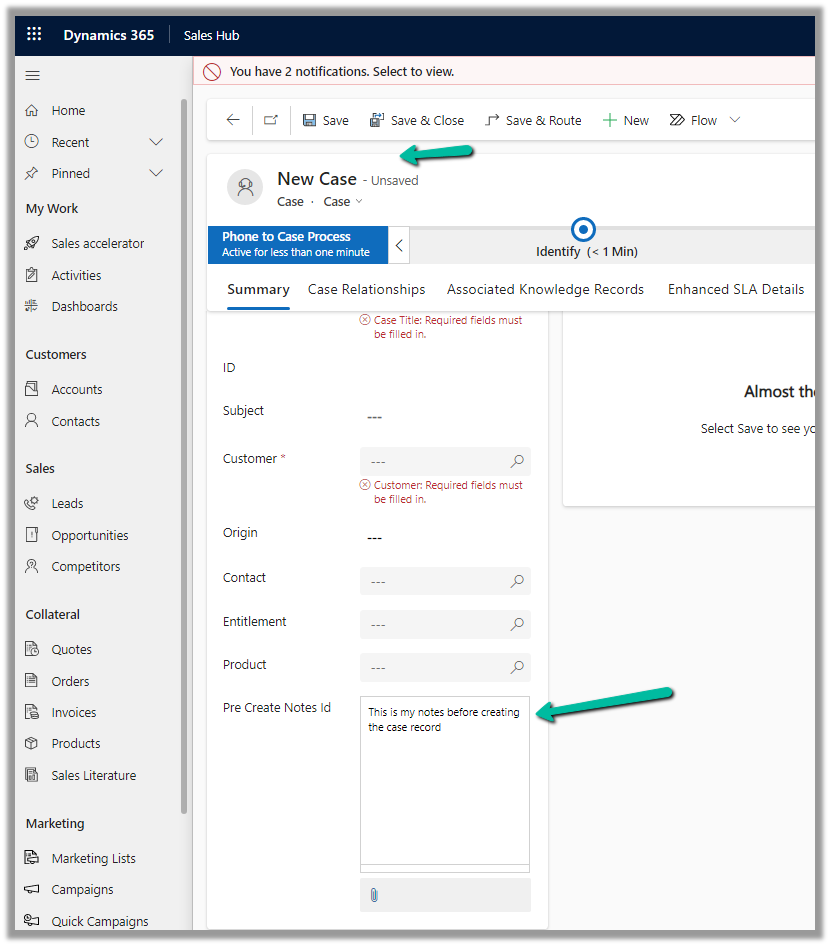
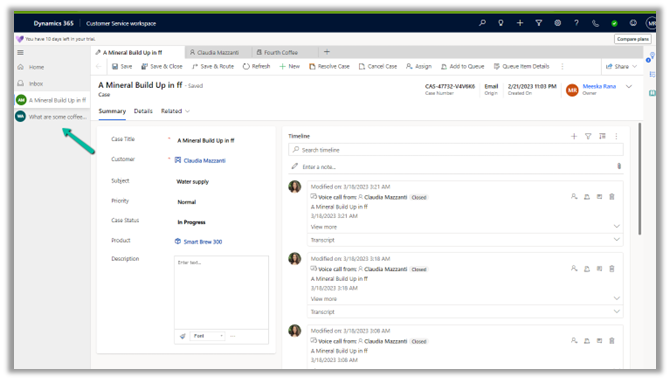
The new case form will show up while creating a new record from an existing case or the case grid.

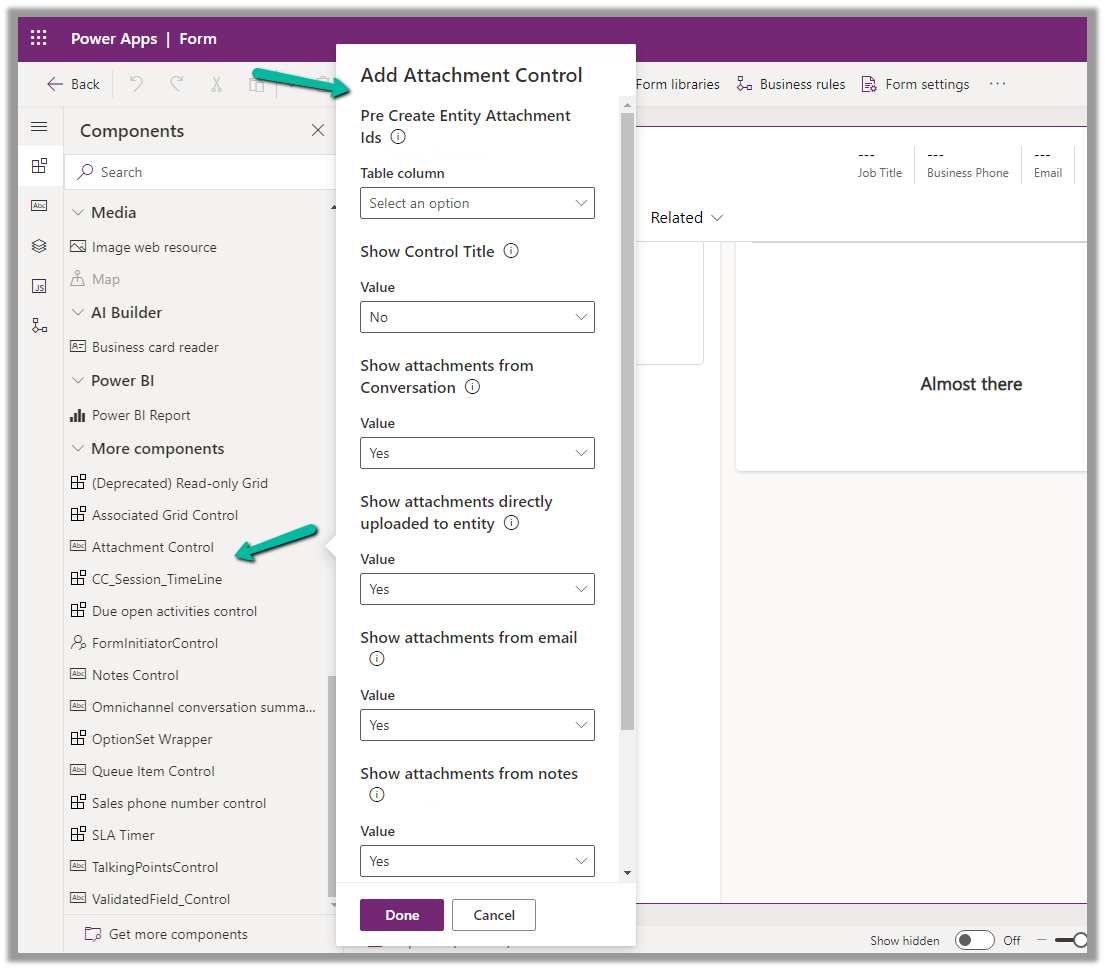
Clicking on Configure opens the form in the Maker Portal.

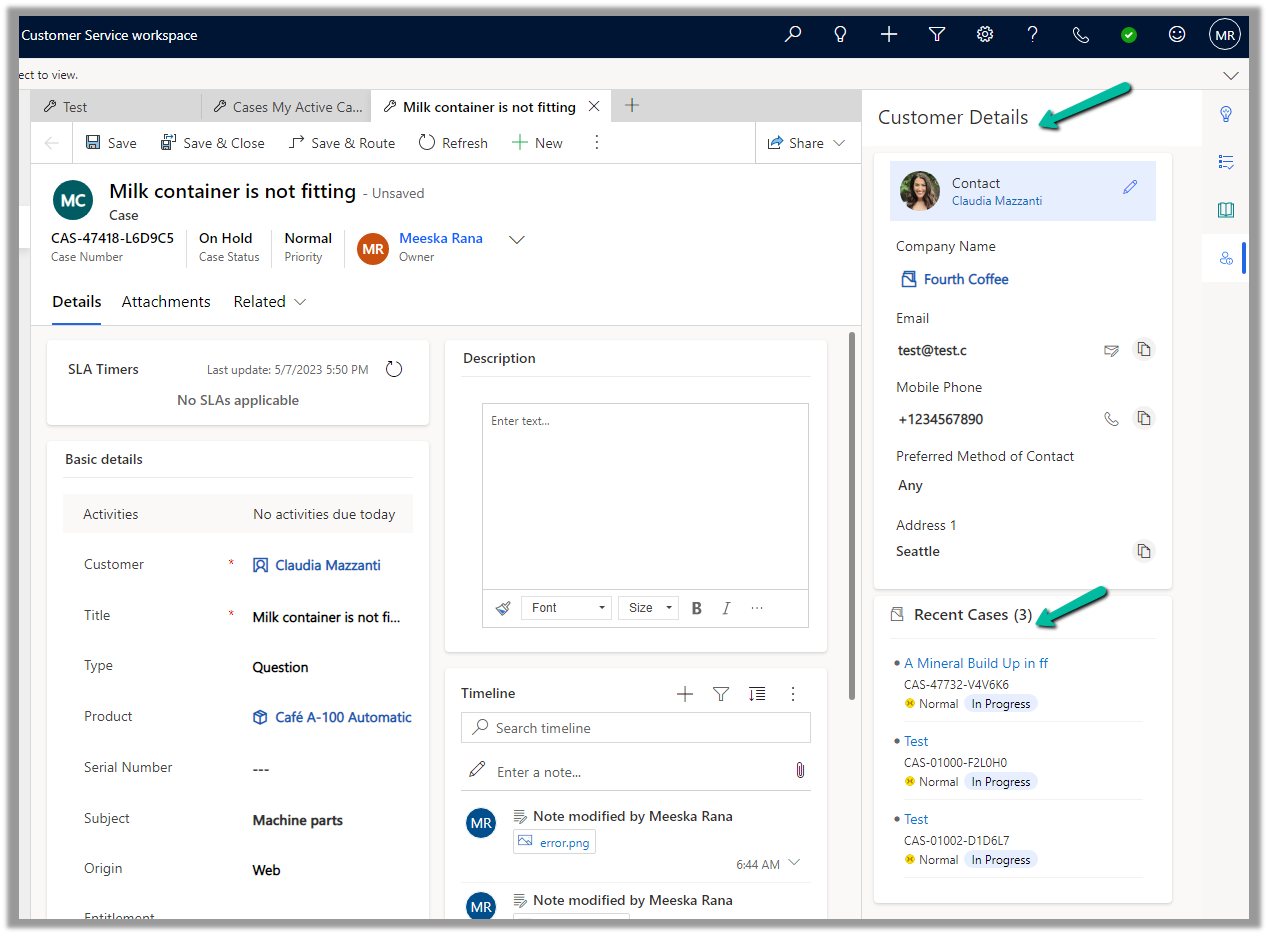
The new Full Case form has the following new components added to it –

Grid Control – Case Associations (showing associated knowledge articles, similar cases, merged cases, and child cases)

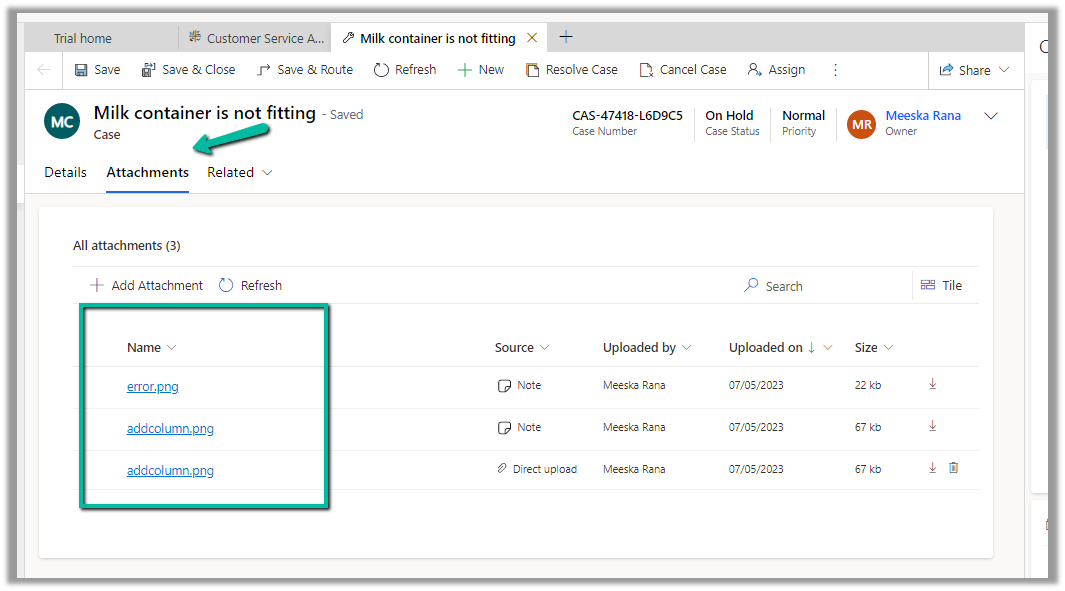
  • Attachment Control – For the Case table, the new attachment control gives the option to directly upload the attachment as well as shows all the attachments either uploaded directly or associated with the notes or emails of the case record.

More on Attachment control:https://nishantrana.me/2023/05/08/new-attachment-control-dynamics-365/

  • Shows Priority and Case Status as color-coded options.

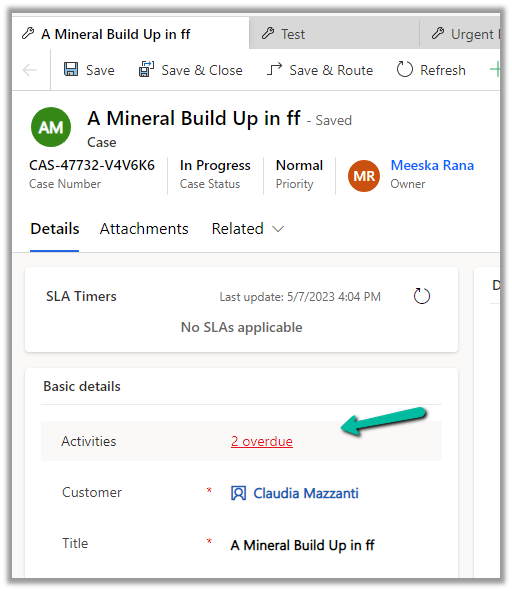
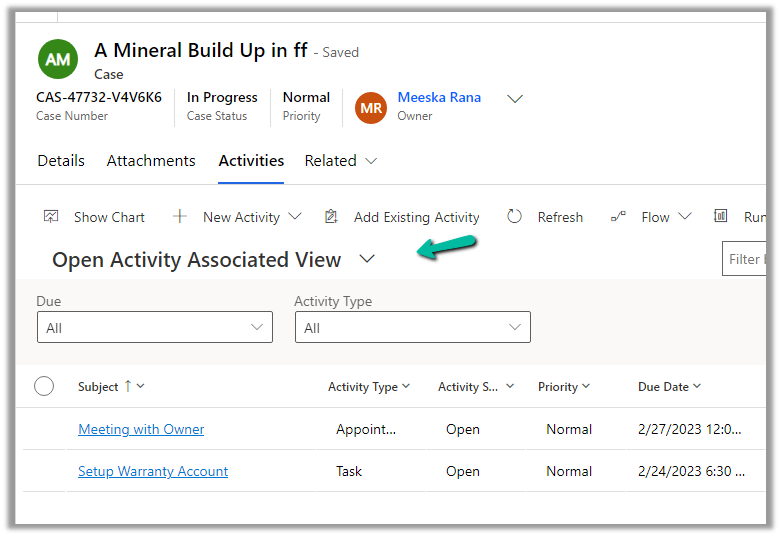
Due Activities Control – shows activities due today or overdue

More on Due Open Activities Control - https://nishantrana.me/2023/05/09/due-open-activities-control-dynamics-365/

It shows the activities overdue

  • Queue control shows the details of the Queue the record belongs to along with Worked By field.
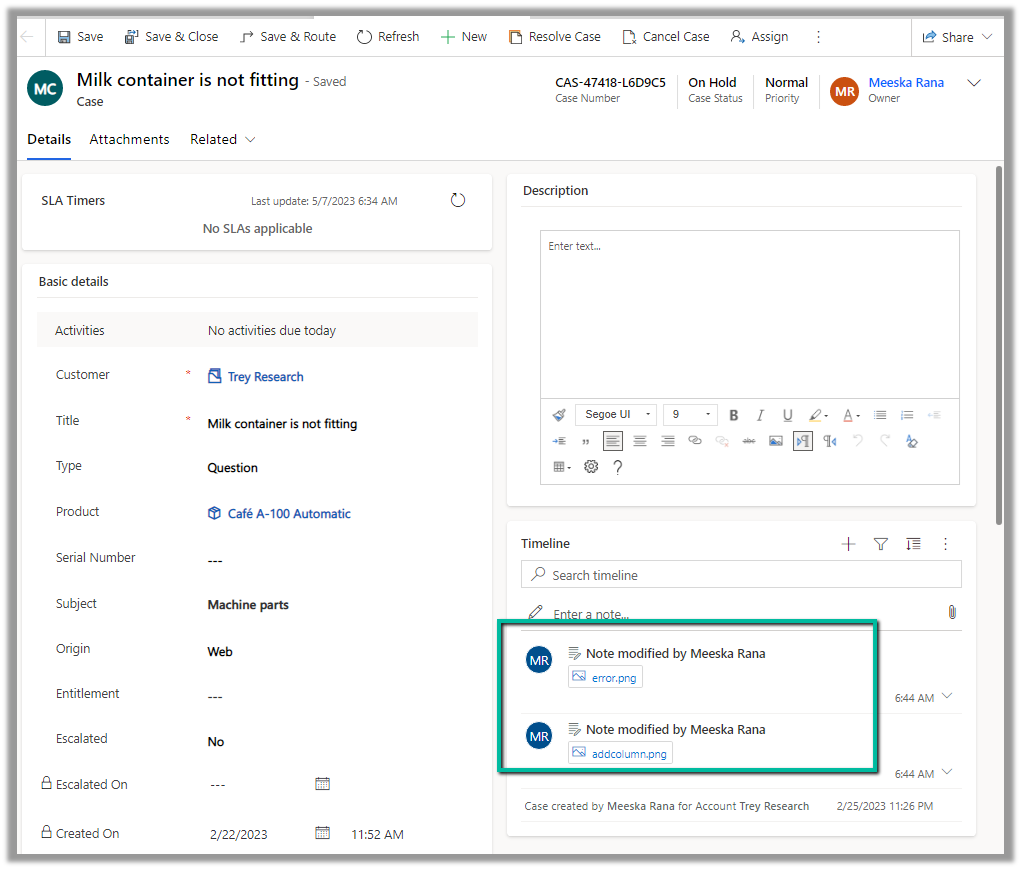
  • Notes control that allows taking notes before saving i.e. in a new record.

More on Notes control - https://nishantrana.me/2023/05/10/notes-control-dynamics-365/

  • It also displays the Customer Details section based on the Customer selected in the case, as well as recent cases created.

Get more details on Enhanced Case Form

Hope it helps..

Advertisements

Notes Control – Dynamics 365


We now have new Notes control for the Case table.

The new notes control allows us to associate/create note without the need to create the case record first.

Here we are adding the Notes control in our Case form.

Specify Pre Create Notes Id (Text) as Table Column for Bound Attribute.

Save and publish the changes.

On creating the record we can see notes added to the timelines.

Also, we can observe that the control now shows – “No Data Available”.

In the case of the Enhanced Case Form, we have a script that hides that section after creation.

Due Open Activities Control – https://nishantrana.me/2023/05/09/due-open-activities-control-dynamics-365/

Attachment Control  – https://nishantrana.me/2023/05/08/new-attachment-control-dynamics-365/

Hope it helps..

Advertisements

Due Open Activities Control – Dynamics 365


The due open activities control shows the activities due today or overdue. It is added by default in the Enhanced Case form but can be added in the forms of other tables.

Hovering over it shows the details of the records.

Clicking on it opens the Associated Activity view (tab).

Below we are adding the Due open activities control to the Contact’s form.

Check Show related records, set table to Activities (Regarding) and Default view to Open Activities.

Set Static value Property as navActivities to open the Activities tab on click of the link.

Save and Publish the changes, and we can see the Due Date Activities control in our Contact form.

Clicking on the Test (Subject) link in the popup takes us to Open Activity Associated View

Get all the details here

Also check – Attachment Control  

Hope it helps..


Advertisements

Attachment Control – Dynamics 365


The new attachment control allows users to upload , download, delete, and view attachments that are added to a table through notes or emails or directly (for Case Table).

Below we have 2 attachments added to the case record.

We can see both the attachments there in the Attachments control along with an additional attachment directly added (Direct Upload) .

We can perform a search as well as change the view.

The Tile view –

The Delete option is only available in the case of files directly uploaded not the ones showing up from notes / emails.

For the Case table, the table column property is mapped to the Pre Create Entity Attachments Id field, which allows uploading attachments even before saving or creating the case record. (This is only available for the Case table)

Below we have uploaded attachments to a new case record.

We can add the Attachment Control to other tables as well.

Below we are adding it to the Contact form.

For tables other than Case, it can only be used to View the Attachments, we do not get the option to upload there.

Get all the details here

Due Open Activities Control – https://nishantrana.me/2023/05/09/due-open-activities-control-dynamics-365/

Notes Control – https://nishantrana.me/2023/05/10/notes-control-dynamics-365/

Hope it helps..

Advertisements

How to – switch between Enhanced and Legacy (Default) multisession workspace in Customer Service Workspace


Update – We can use the below option – Customer Service Admin Center >> Operations >> Miscellaneous >> New and upcoming features – Multisession Layout ImprovementsEnhanced

With the Enhanced multisession layout in Customer Service Workspace, we have different sessions open in different tabs at the top and different tabs inside each session, along with the Navigation on the left.

To revert to the old default workspace or legacy navigation (deprecated), open the developer tools in the browser.

And paste the following command in the Console tab.

Xrm.Utility.getGlobalContext().saveSettingValue(“msdyn_MultiSessionLayoutImprovements”,false)

Or

Xrm.Utility.getGlobalContext().saveSettingValue(“msdyn_MultisessionNavigationImprovements”,false)


We can see the layout changed to the legacy one–

To enable the new enhanced layout (recommended) back, in the console window of developers tools paste the below command.

Xrm.Utility.getGlobalContext().saveSettingValue(“msdyn_MultiSessionLayoutImprovements”,true)

Hope it helps..

Advertisements

Notification template in Omnichannel Voice (Dynamics 365 Customer Service)


Below is the default notification the agent receives on incoming conversations/calls.

It is defined through the below out-of-the-box template.

Property

Description

Title

To define the title.

Icon

To define the icon.

Show Timeout

Yes / No – to hide/show the timer (timer still runs in the background)

Time (seconds)

For the Phone Call / Voice workstream the maximum value = is 150 seconds.

Auto-assign work items

Auto-assign incoming work item

Accept Button

Specify the text of the Accept Button

Reject Button

To hide or show the button

Show desktop notification

Never / When the app is in the background

Notification Fields

Specify fields to be shown in the notification using Slugs.

To make changes in the notification, we need to create a new notification template as we cannot update the box notification template.

Navigate to Agent Experience >> Workspaces >> Notification Templates (Manage)


Here we will create a new notification template to be used in place of Voice call – incoming authenticated – default template

For our custom template, we have made the following changes –

Increased the timeout value, and changed the text for Accept and Reject buttons.

Added notification fields and enabled Desktop notification.

Let us update one of our workstreams to use this custom notification template.

Navigate to Customer Support >> Workstreams – Open the workstream and open the Advanced Settings and update the Incoming Authenticated template in the Agent notifications section.

We can see the changes reflected in the Notification.

And also in the desktop notification –


Get all the details here-

https://neilparkhurst.com/2020/06/29/omnichannel-for-customer-service-notifications/

Hope it helps..

Advertisements