Suppose we want to Test & Enable Mailbox of the below user programmatically.
We can see the below notification for the disabled mailbox.
This mailbox is disabled for email processing. For more information, see the alerts.
Below is the sample code –
On running the code, we can see the notification removed and the mailbox for the user enabled successfully.
C# Code –
      CrmServiceClient svc = new CrmServiceClient(ConnectionString);

            if (svc.IsReady)
            {
                var mailBox = new Entity("mailbox", new Guid("C88A539A-F493-EC11-B400-000D3A4F37D3"));

                // testemailconfigurationscheduled = Indicates if the email configuration test has been scheduled for a mailbox record
                mailBox.Attributes["testemailconfigurationscheduled"] = true;

                svc.Update(mailBox);
Suppose we want to Approve the Email for the mailbox of the user(s) programmatically.
We’d see the below notification for the user whose mailbox is not yet approved.
Email won’t be processed for this mailbox until the email address of the mailbox is approved by an Office 365 Global Administrator or by an Exchange Administrator. For more information, contact your system administrator.
Below is the sample code –
On running the code, we can see the notification for the email address approval removed or the mailbox approved for the user.
C# Code –
            CrmServiceClient svc = new CrmServiceClient(ConnectionString);

            if (svc.IsReady)
            {

                var systemUser = new Entity("systemuser", new Guid("C48A539A-F493-EC11-B400-000D3A4F37D3"));

                // emailrouteraccessapproval - status of the primary email address
                //0	= Empty, 1 = Approved, 2 = Pending Approval, 3 = Rejected
                systemUser.Attributes["emailrouteraccessapproval"] = new OptionSetValue(1);

                svc.Update(systemUser)
The code should run under the context of the user who has either Global Admin or Exchange Admin role.
In the previous post, we saw how we can create a user filter (outlook) for a particular user and apply the same to other users through Sync Filter Manager – XrmToolBox plugin.
In this post, we’d achieve the same through System View.
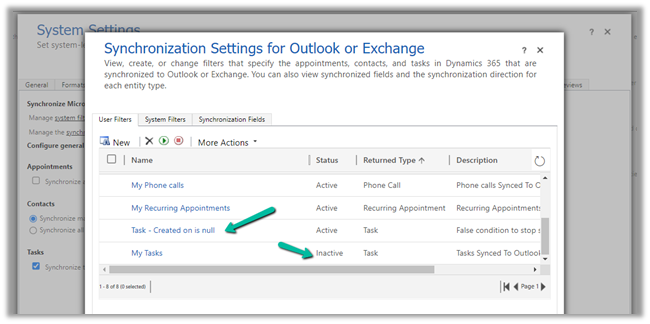
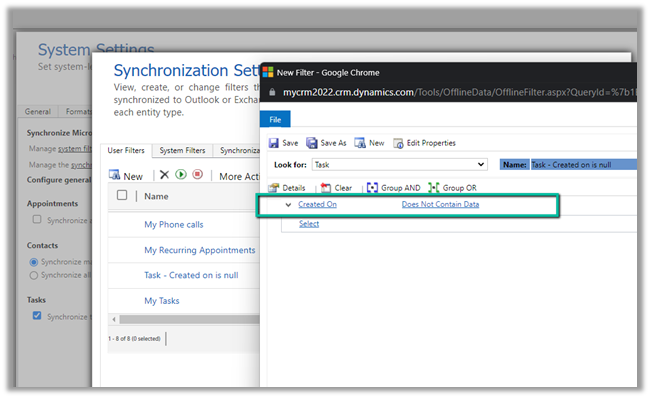
Here we have created below System View on Tasks entity/table.
The Created On Doesn’t Contain Data False Condition will make sure none of the records of the task are synced.
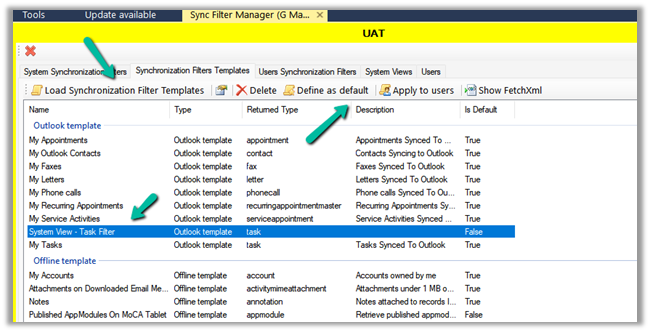
Open the Sync Filter Manager, navigate to the System Views tab and click on Load System Views
Select the new System View- Task Filter which we created earlier and click on Create – System Synchronization Filter Template from selected view(s)
Select Outlook Template for System Rule Type
We are presented with the option to specify the user(s) to who we want to apply the new template.
If we select Yes, we get the Select users dialog box to select the user(s).
Inside the Synchronization Filters Templates tab, we can click on Load Synchronization Filter Templates to list down all the outlook templates.
We can see our custom template listed there.
From there again we apply it to the user(s) or define it as the default filter.
After applying Define as default, we can see the custom filter applied to the new users. It won’t be applied or make changes to the filters of the existing users.
So for the existing users, we have to explicitly apply this filter using Apply to users option
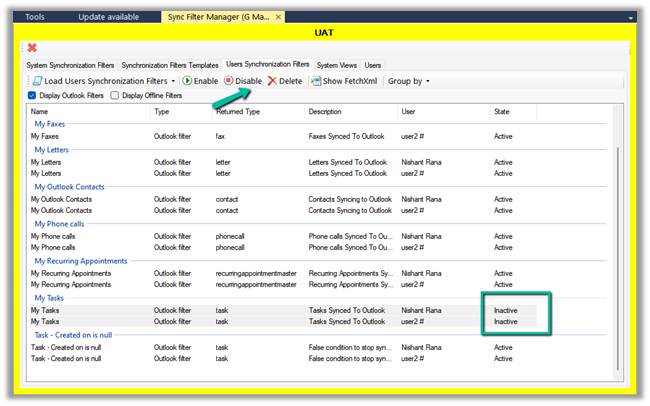
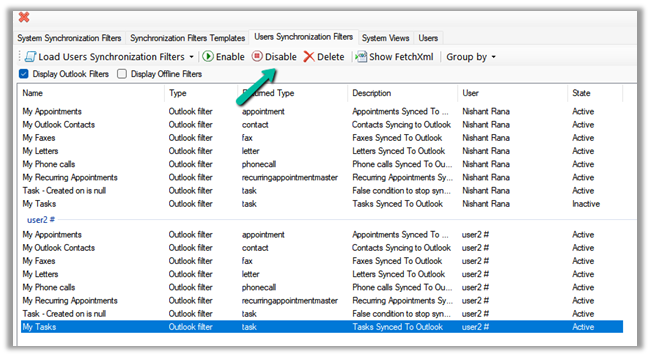
As the last step, we need to disable or delete any other filter on the task, to make sure that we only have the new filter applied.
On disabling the filter, we can see their status updated as inactive.
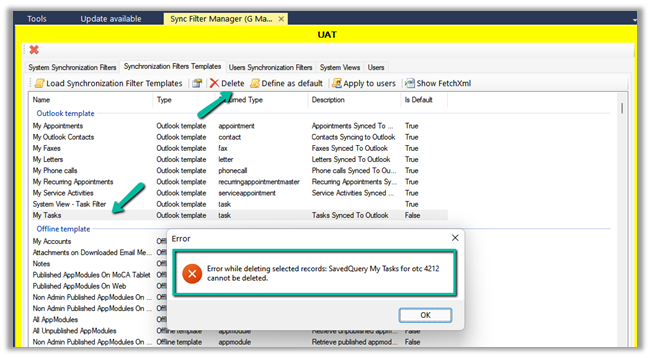
Lastly, we can only delete Custom Outlook Template, if we try deleting any default out of the box template we will get the below error.
E.g. on trying to delete the My Tasks default filter, we will get the below error
“Error while deleting selected records: SavedQuery My Tasks for otc 4212 cannot be deleted”
In this post, we will how to use the wonderful Sync Filter Manager (XrmToolBox Plugin) for managing the outlook filters.
Suppose we don’t want Tasks to be synced for some of the users.
Here we already have a custom user filter (Task- Created on is null) defined for one of the users, specifying the condition which will always be false.
We have also disabled the default filter on tasks – My Tasks for that user.
For that particular user, now we do not see any tasks getting synced.
Now to apply the same setting to the others users, we can use the wonderful Sync Filter Manager – XrmToolBox plugin.
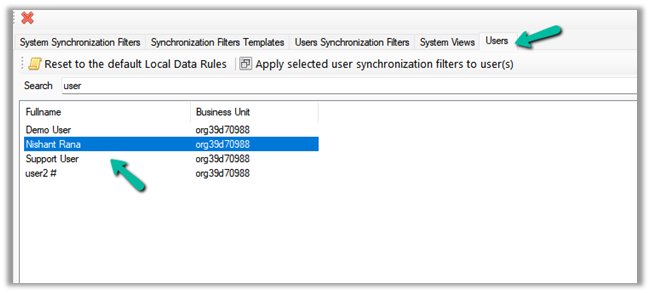
Navigate to the Users tab, search for the user whose setting we want to apply to other users, and select it.
Here we have selected the source user record
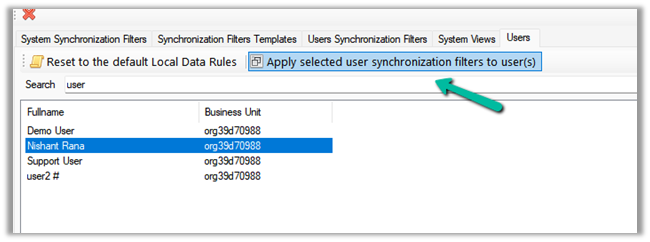
Click on Apply selected user synchronization filer to user(s) button.
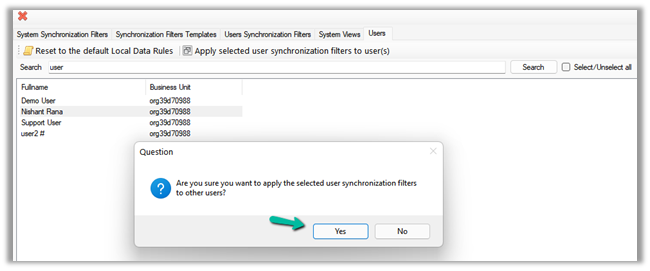
For Question Dialog Box – “Are you sure want to apply the selected user synchronization filters to other users ?” – select Yes
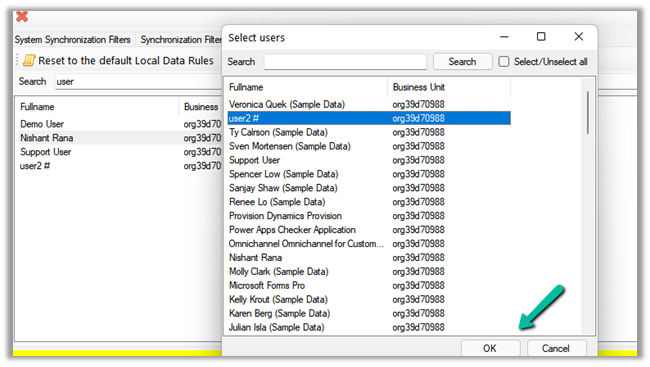
For now, we have selected only User 2. We can select multiple users or select / unselect all the users.
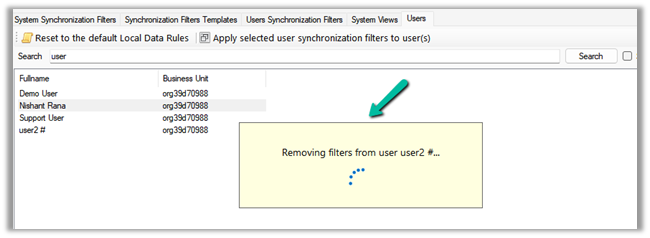
It will remove the default / or existing filters from users. User 2 in our case.
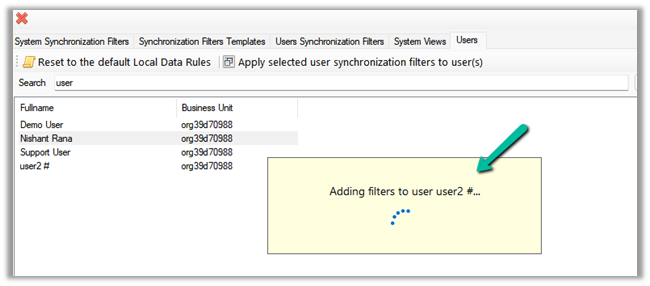
And will add the filters from the selected user to it.
After some time, we can see the filters updated for User 2, with the Task – Created on is null filter added.
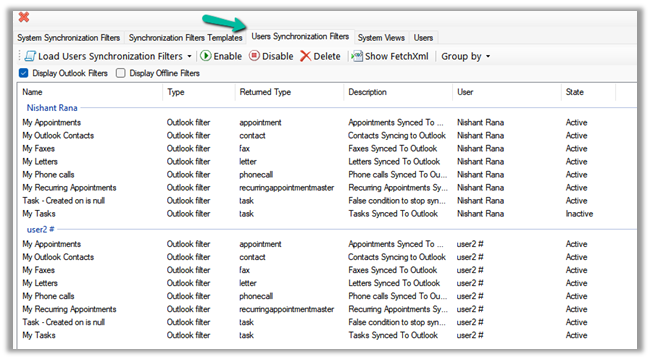
We can also verify it from the User Synchronization Filters tab, where we can load the synchronization filters for all the users.
As a last step we just need to deactivate/delete the default My Tasks filter for User 2 also(or all the other users for who we want to disable task sync) and we are done.
We can see few default User Filters already defined that syncs records owned by the current user.
Users can create new filters, edit the existing filters, delete, activate, deactivate and reset the filters.
These filters like personal filters applied to that particular user only.
The same can also be accessed from Personalization Settings
Personal Options > Synchronization tab
Similar to User Filters we can define System Filters that apply to the entire organization or all the users.
As we can see there are no options (no new button) to create new System Filters from the user interface. The only way we can create them is through SDK.
Suppose we don’t want any tasks to be synced.
For this, we can create a filter like “sync only those tasks where created on doesn’t have value” which will always evaluate to false.
On executing the below code
We can see the system filter created successfully.
Hope it helps..
Entity savedQuery = new Entity("savedquery");
                savedQuery.Attributes["name"] = "System Filter for Task";
                savedQuery.Attributes["description"] = "To restrict sync of tasks";
                savedQuery.Attributes["isquickfindquery"] = false;

                // saved query is of type outlook fiter
                savedQuery.Attributes["querytype"] = SavedQueryQueryType.OutlookFilters;

                savedQuery.Attributes["returnedtypecode"] = "task";

                // sync only those tasks which have created on as null
                // this is to restrict task sync

                savedQuery.Attributes["fetchxml"] =
                    @"<fetch>" +
                     "<entity name='task'>"+
                     "<attribute name='activityid'/>" +
                     "<filter>" +
                     "<condition attribute='createdon' operator='null'/>" +
                     "</filter>" +
                     "</entity>" +
                     "</fetch>";

                var response= svc.Create(savedQuery);


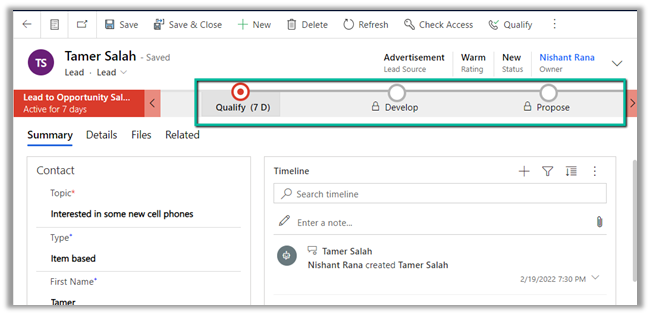

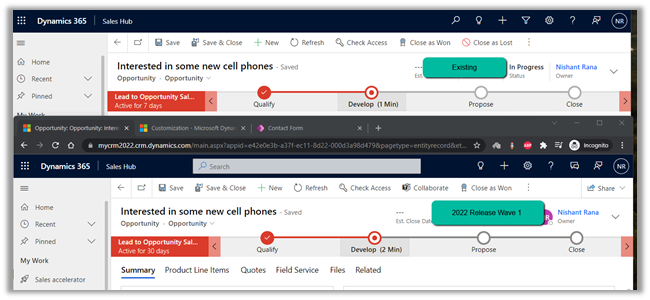
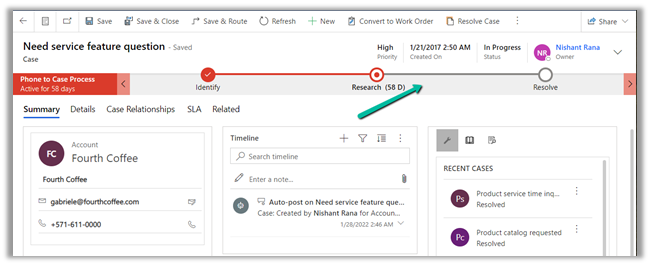 making it easy for an agent to understand the stages to be followed in the business process flow.