via Capturing Dynamics 365 client side performance telemetry with Azure Application Insights by Dilip Kumar
Author: Nishant Rana
I love working in and sharing everything about Microsoft.NET technology !

Fixed – Wi-Fi Network not showing up in Windows 10
[Update – 6th June 2018]
Finally working now –
Tried starting all the network and update related services randomly in Windows Services (Run –> Services.msc).

Here are the list of services running in my machine
Try starting them and see if it works for you .
https://drive.google.com/file/d/1GD1HG4S5goMod8u4GgbcvORIeC7Z3VXi/view?usp=sharing
[Update – 2nd June 2018 – Still can’t see the wifi network, have tried all the option. I think will have to format it. Meanwhile using the below approach]
Few days back I saw that my Lenovo (Windows 10 ) laptop was not showing any WIFI networks.

I tried everything that was suggested out there i.e. update drivers, configuring WLAN Auto Config, Auto Discovery On etc. etc. (except the last resort of formatting the operating system) but none worked.
Interestingly it was showing all the available networks on the lock screen, through which I was finally able to connect.

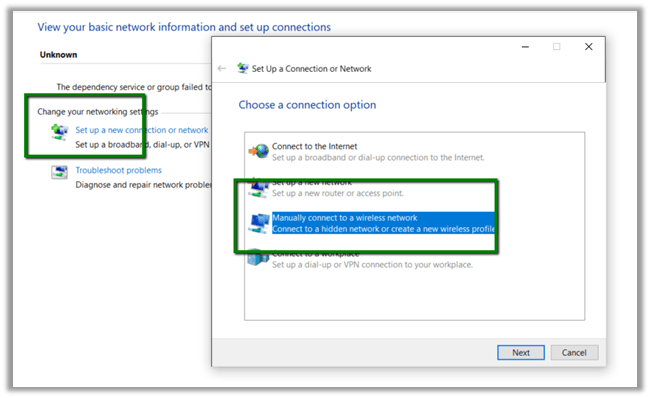
The other option that could help is, from the command prompt delete the existing profile using the below command
netsh wlan delete profile name=”WifiName”
and create a new wifi connection manually and start it automatically.

I think some of the Windows updates might be the reason for this issue, so still waiting for a newer update that might fix it. Till then at least I have the above workaround.
Hope it helps.
Share It -

Using Azure Hybrid Connections to connect to SQL On-Prem Database from Azure WebJob.
Updated = 23rd September 2018.
- Hybrid Connections allows Azure Web Sites and Services to securely connect to the on-premises resources hosted within the corporate network, without requiring any change to firewall or network.

Prerequisites: –
- Azure Subscription
- TCP/IP protocol needs to be enabled.
- SQL Authentication (1433 Default Port for Default Instance)
- Windows Server 2008 or later and outbound internet connection and can talk with LOB application – SQL Database.
- Multiple Hybrid Connection Manager can be installed in separate server that can do the load balancing.
- Hybrid connection implements Transport Layer Security between the cloud and the on-premise endpoint for data encryption.
- Hybrid Connection Uses Shared Access Signature for securing the End Points.
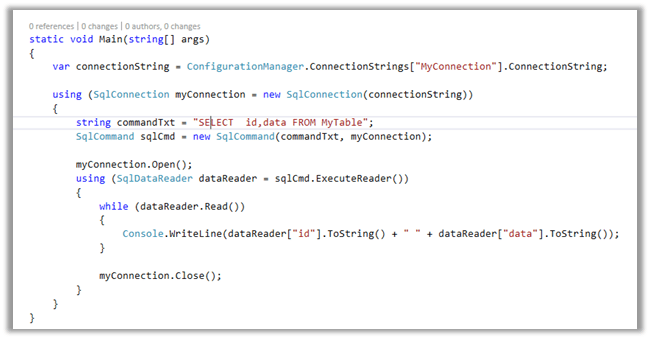
Here we’d take a simple example of creating an Azure WebJob that will connect to the SQL On-Prem Database.
To start with, create a console application that connects to SQL On-Prem Database and pulls information from a table inside it.
Publish it as Azure WebJob.

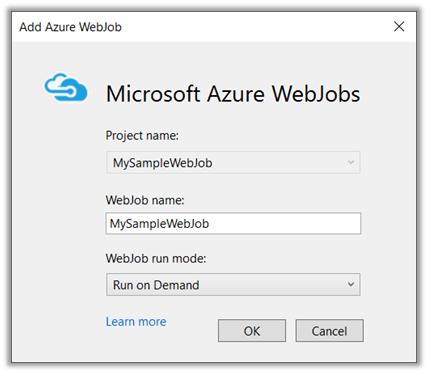

Click on Publish to publish the WebJob.
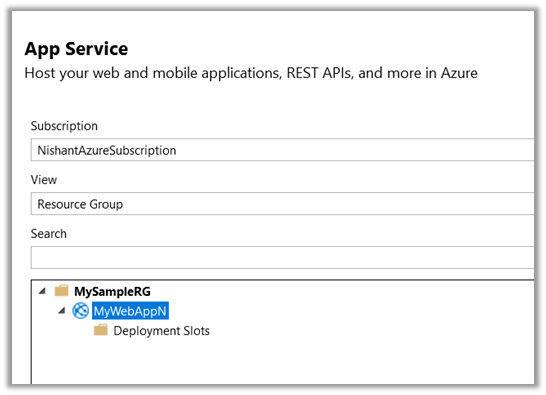
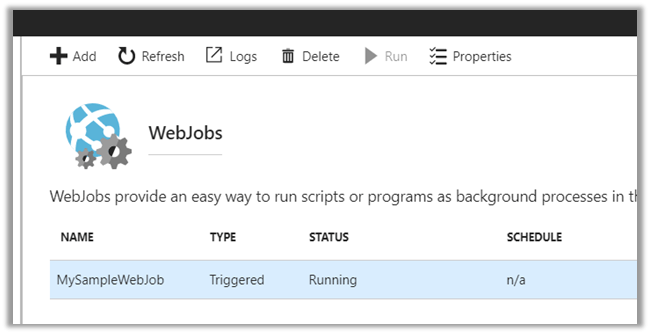
Back in Azure Portal, we’d see our WebJob. Click on Run to start the WebJob. And click on Logs.
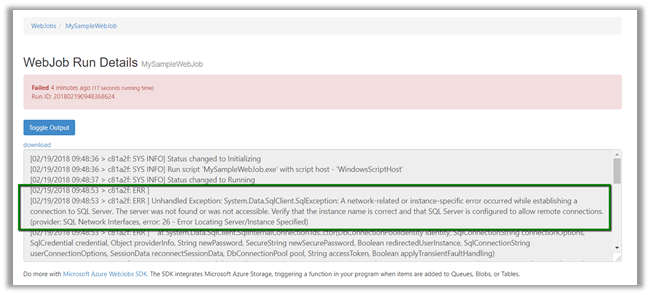
As expected we’d get the SQL Exception as Web Job will not be able to connect to the On-Prem Database.
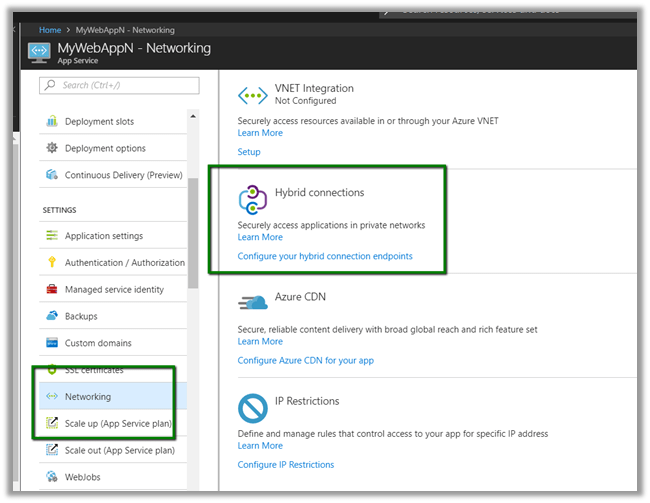
Now let us configure Hybrid Connection to get the WebJob up and running properly. Inside the App Service select Networking and click on Configure your hybrid connection endpoints.
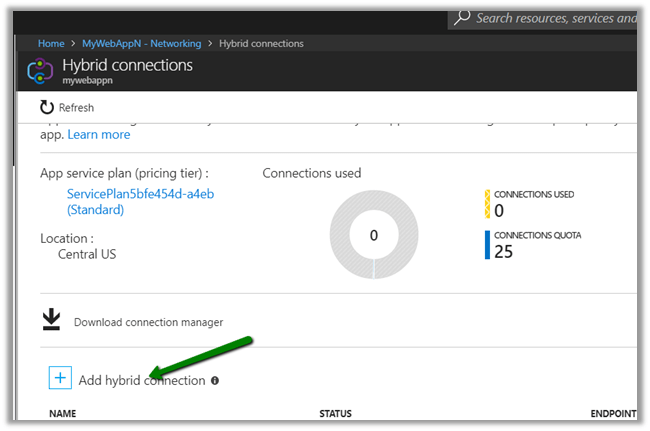
Click on Add hybrid Connection.
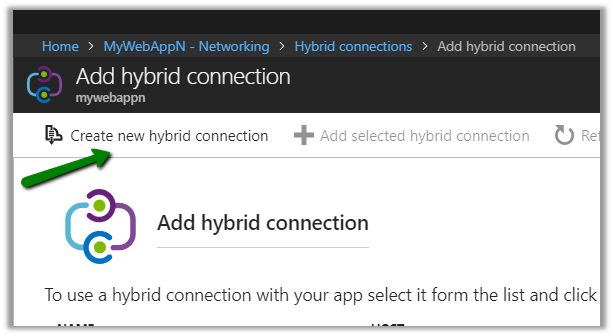
Here Endpoint Host will be the name of our OnPrem Machine\Server, Endpoint Port will be the Port for the SQL Server (1433 for the default instance).

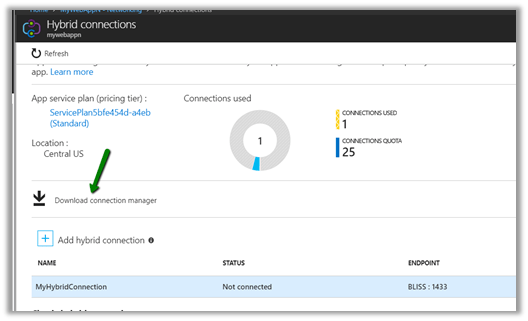
Next step is to install and configure Hybrid Connection Manager.
Once installed, open the Hybrid connection manager and click on Add a new Hybrid Connection
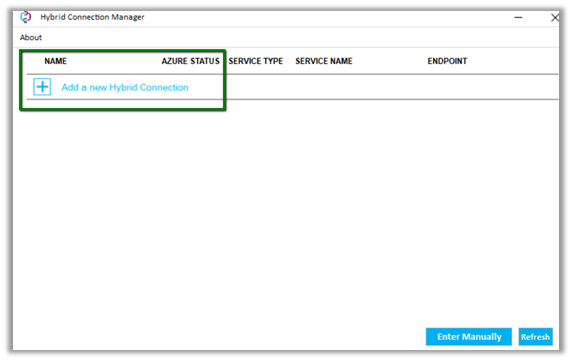
Log in with the Azure Subscription Credentials and select the Hybrid Connection created there.

If everything is correct, it should show the status as connected.
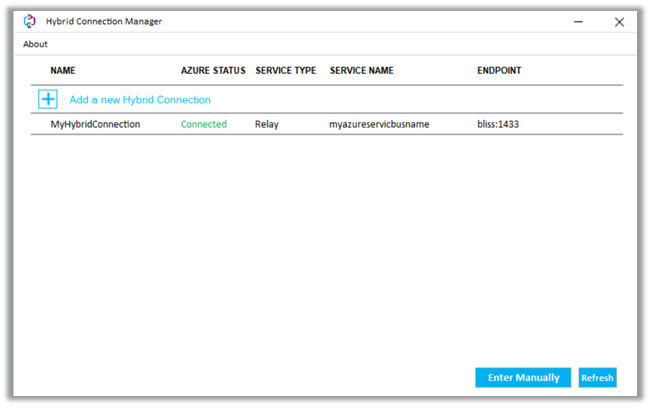
*I had to restart the Azure Hybrid Connection Manager Service after adding the connection for the Azure status to show as connected

Now back in our WebJob, let us click on Run.

In logs,

we’d see the data successful fetched from our SQL On-Prem DB.


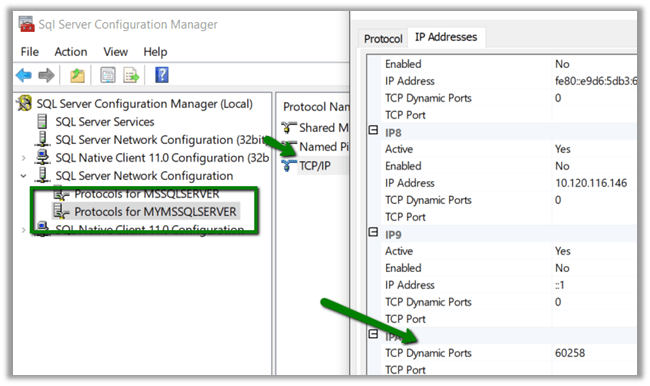
In case of named instance of SQL, we need to create a new hybrid connection with the specific TCP Port used by that named instance.
To find the port used by the named instance, open SQL Server Configuration Manager, select the named instance of SQL and copy the value of TCP Dynamic Ports.
This is how our Hybrid Connection string will look like
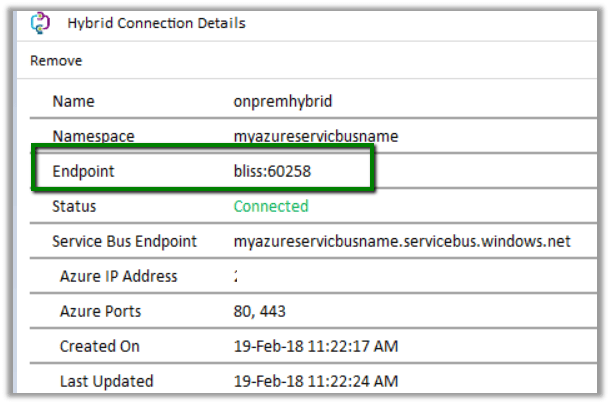
The other important point to remember is that the connection string used should also specify the port.

Hope it helps..
Share It -

Using Azure SQL Data Sync to Sync On-Premise and SQL Azure Database
Suppose we have an Azure SQL DB named MyDB which we would like to sync with an On-Prem DB.
Here we’d be using Azure SQL Data Sync. The sync can be bi-directional, one way from Azure to On-Prem and On-Prem to Azure or Azure to Azure DB(s) as well.
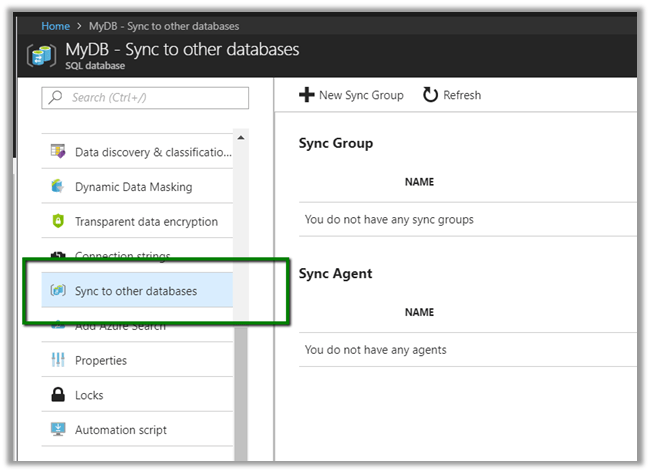
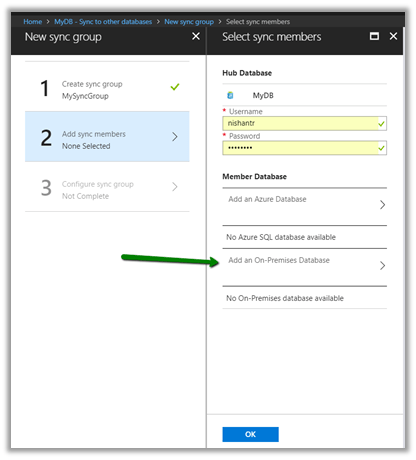
In Azure Portal, select the Azure SQL DB and select Sync to other databases and click on Click on New Sync Group.
Specify values for the Data Sync Group.
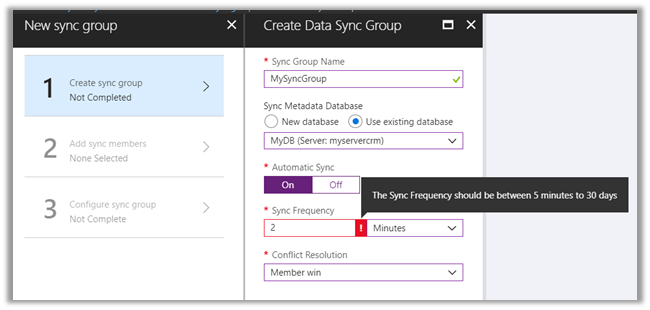
We have selected existing database MyDB, selected Automatic Sync – On. The Sync frequency can be defined in seconds, minutes, hours and days – It needs to be between 5 minutes to 30 days.
Conflict Resolution can be Member Win or Hub Win. Hub here specifies the Azure SQL DB that we have selected here.
Next click on Add On-Premise database to specify the database to which we want to sync.
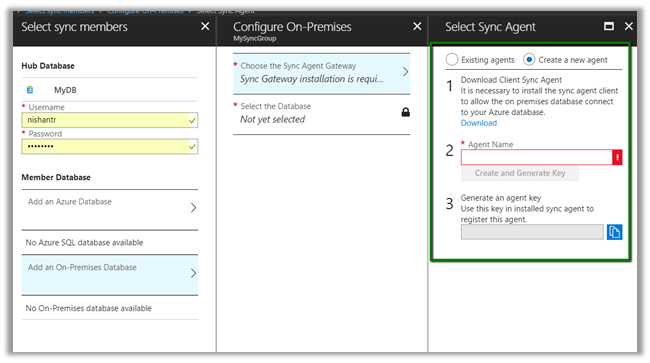
Here we need to specify the Data Client Sync Agent, which requires downloading and configuring the Sync Agent first.
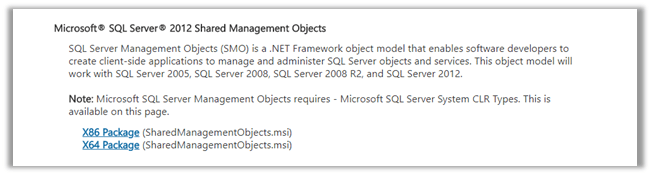
Before installing the Data Sync Agent we need to install the following prerequisites
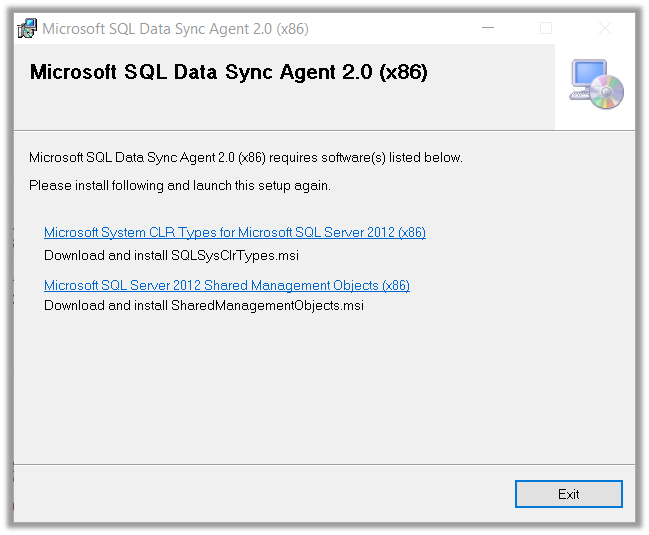
Make sure to download the X86 one.

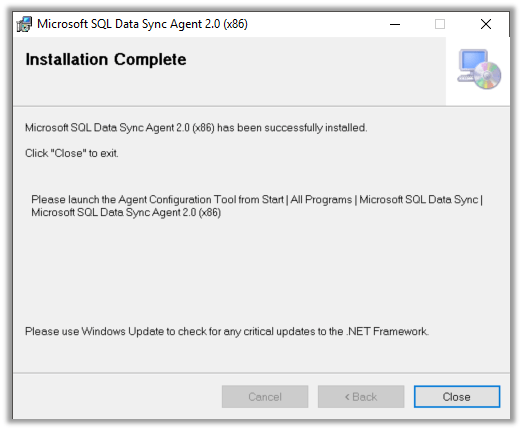
Run the Data Sync Agent installer, specify the Account that can connect to the On Prem DB and finish the installation.
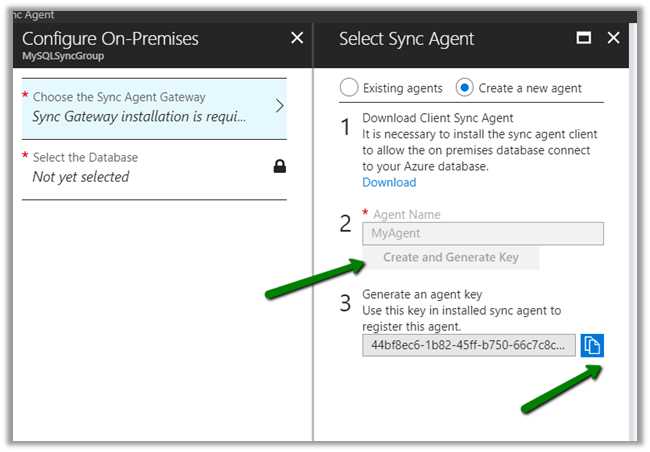
Back in Azure inside Sync group, click on Create and generate a key and copy the key.
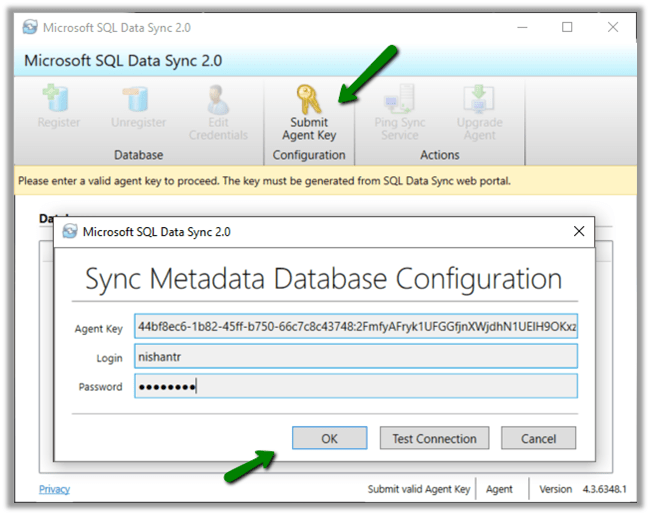
Run the Data Sync Agent and click on Submit Agent Key and specify Agent key along with the credentials to access the Azure SQL DB.
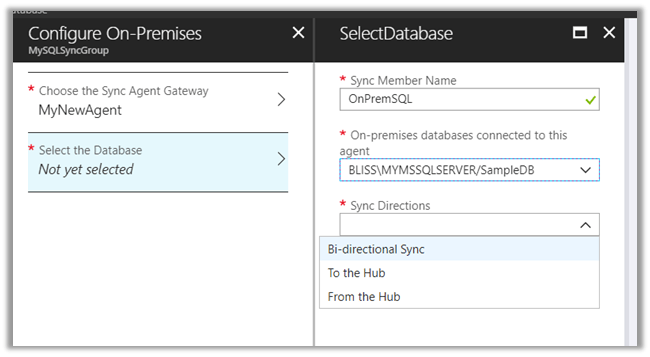
Next click on Register button to register the On-Prem DB as shown below.

Once registered we can select the On-Prem SQL DB registered along with the Sync Directions.
As the last step, select Configure Sync Group and select the Hub Database and the table and column that we want to sync along any of the table of On-Prem DB.

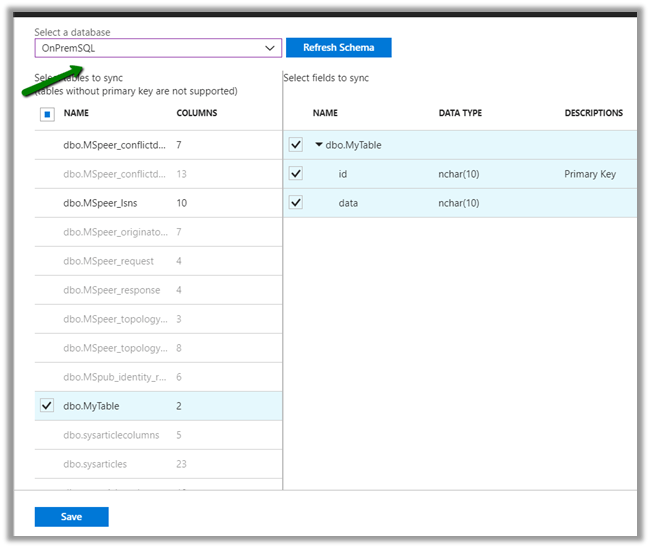
The corresponding tables will be created in the database. For e.g. if we have selected Person table in our Hub Azure SQL Database, it will be created in the our On-Premise Database.
This completes the configuration.

We’d see the Sync running every 5 minutes as we had configured. Update\Insert any data on Azure SQL DB or On-Prem SQL DB, we’d see the same reflecting back in other DB in case of Bi-Directional Sync.

Summary:-
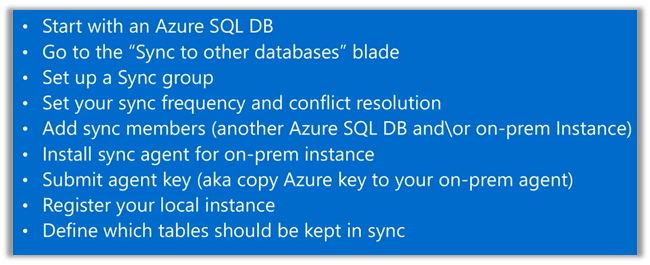
More details here
https://www.youtube.com/watch?v=Kw94bP2WKWY&t=612s
Hope it helps..
Share It -

Hide “Sign in with an external account” from Dynamics 365 Portal
To hide the Sign in with an external account section from the Sign In and Register page of the portal.
Set the following site settings value to false à

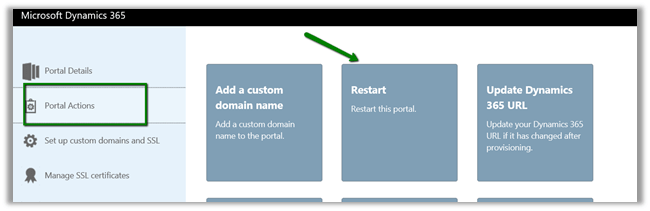
Followed by Restart of the portal.
To add any additional JavaScript or HTML, for e.g. we wanted to disable the Email text box on the Register page,
Go to Portals à Content Snippets and create a new code snippet record

The output:-


The helpful post –
http://benitezhere.blogspot.ae/2018/01/hiding-sign-in-with-external-account.html
http://arpitmscrmhunt.blogspot.ae/2017/12/customise-registration-page-in-crm.html
Hope it helps..
Share It -

Dynamics 365 CRM Online – Power BI Reporting using Data Export Service
Power BI is one of the top reporting tool that allows almost anything as its data source. Here we will cover how can we bring CRM Online data to Power BI for reporting.
There are two ways of doing it
- Odata Connection
- Data Export Service
In this blog I will cover on how you can use Microsoft’s Data Export service to use CRM Online’s data for Power BI reporting.
Prerequisites
- Azure Subscription
- Microsoft CRM Online 2016 or later version
Steps
- Create a new CRM Online Instance
- We will not go into the details of creating a new CRM Online instance. The steps for the same is specified under the link above.
- Go to Microsoft Dynamics 365 – Data Export Service

- Click GET IT NOW
- Agree to terms and conditions & click Continue

- Connect to your D365 CRM online instance from the drop down and click Agree.

- Under Manage your…
View original post 1,104 more words

