With Release Wave 2, we can see the below features added to Grid.
The option to Group By, Column Width, Move Left and Move Right.
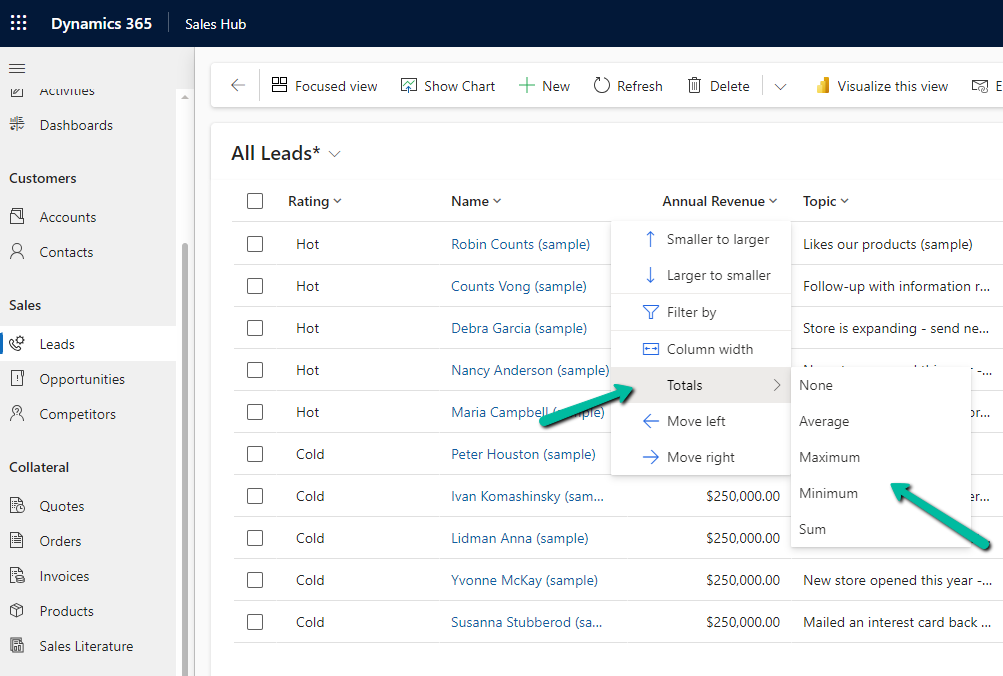
Group By (Rating) –
Move Left and Move Right as expected will move the selected column accordingly. Not only that we can also Drag and Drop the columns, here we have dragged the Rating column as the 1st column.
Column Width – allows us to specify the preferred width of the column.
Totals > None, Average, Maximum, Minimum, Sum.
For the numerical column, Annual Revenue in this case we get the option to calculate the total
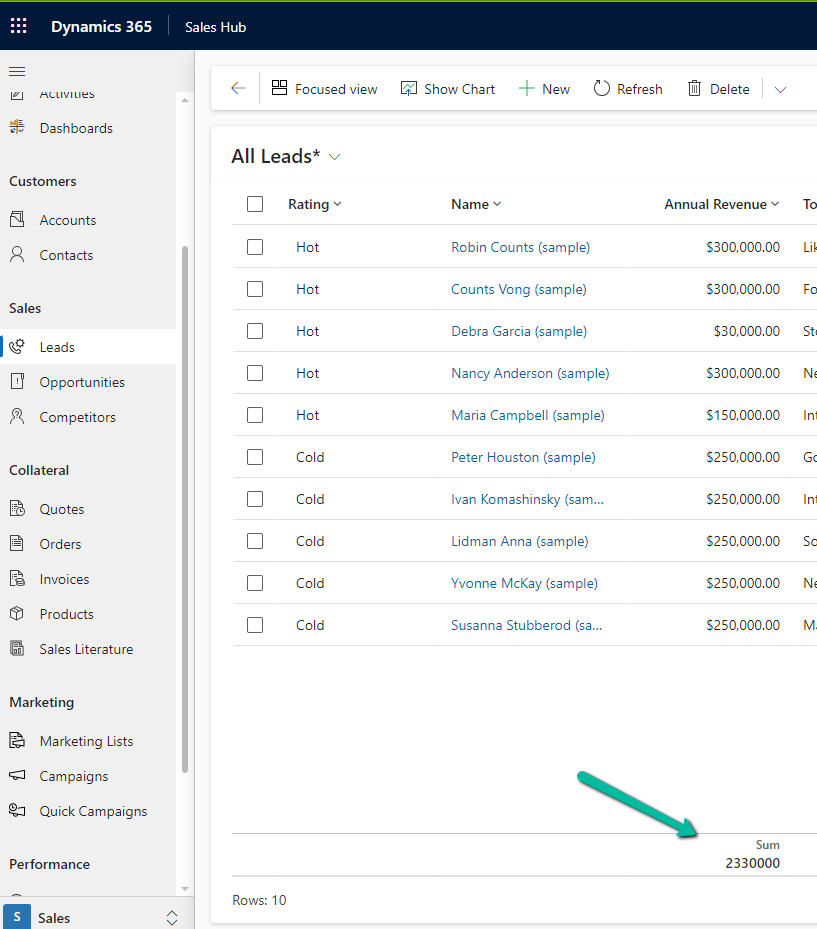
Selecting Total > Sum, adds a row at the bottom, showing the total sum
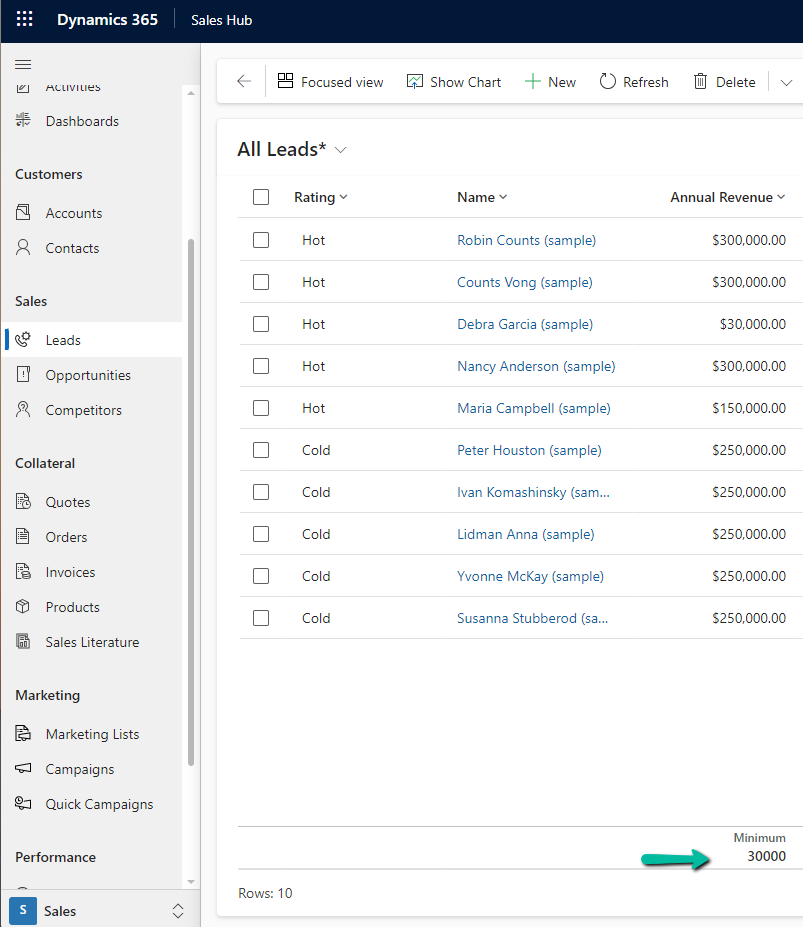
Similarly selecting minimum shows the minimum value.
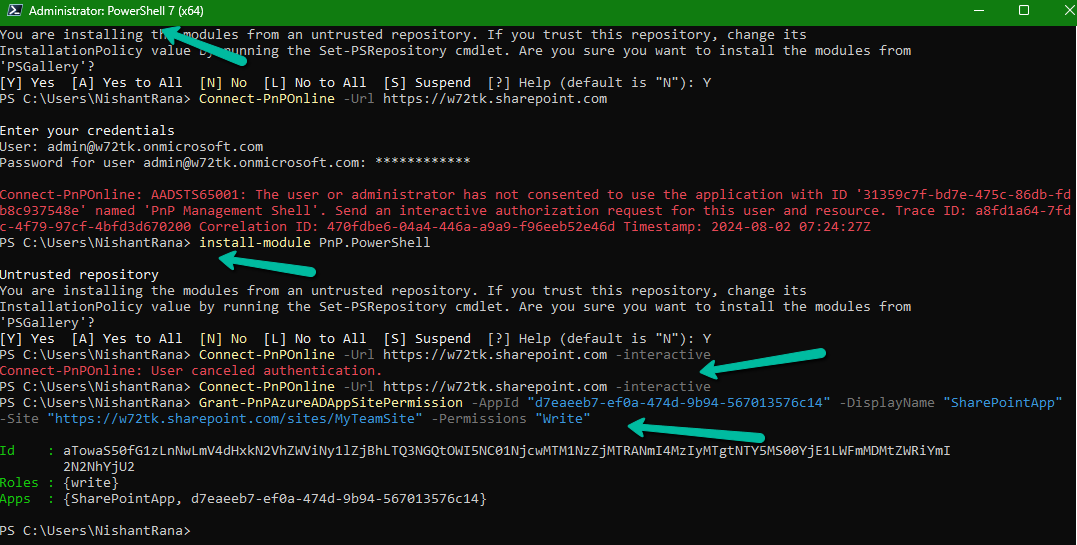
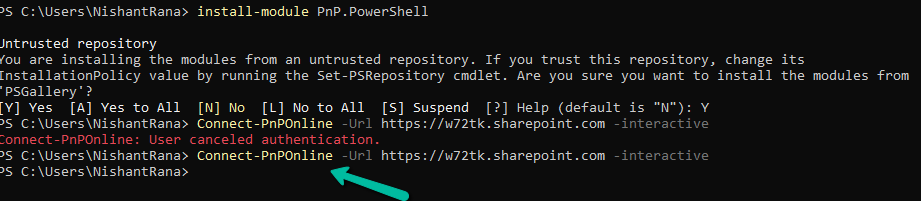
If you are getting the below error even after running the Install-Module PnP.PowerShell command, it could be because of the older version of PowerShell.
The minimum PowerShell version required for PnP.PowerShell is PowerShell 7.2.
Check the current version using the command – $PSVersionTable
Below are different ways to get the latest version of PowerShell
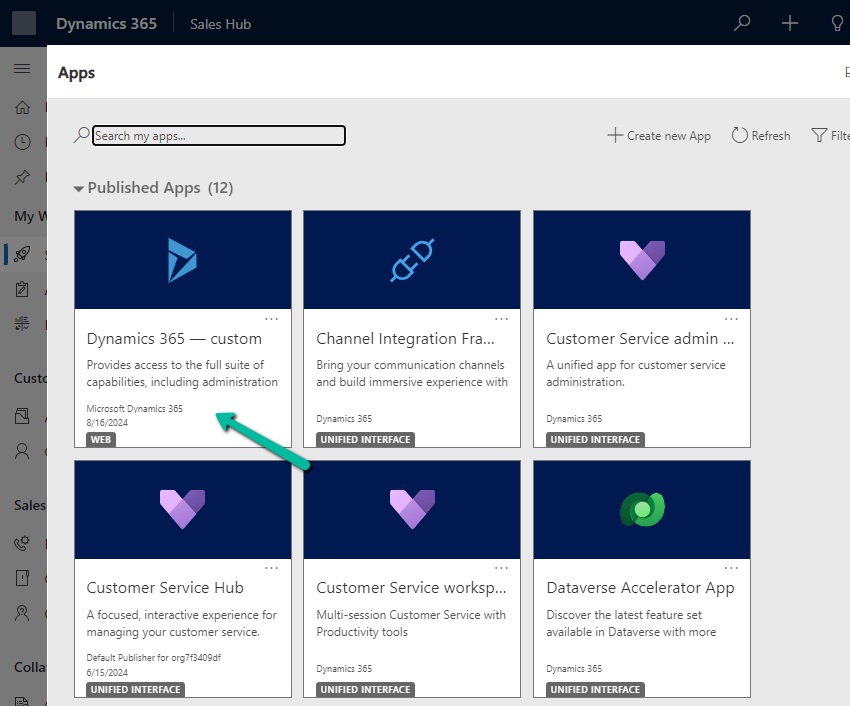
From the Power Platform Admin Center for a particular Environment, through Settings >> Product >> Behaviour >> Show legacy app for admins option, we can control visibility of the Legacy App (Dynamics 365 – Custom) for admins.
If Show legacy app for admins = On –
An admin can see the app
By setting it to Off
We can see the app hidden for the admins also.
The aim is that all the users including admin must use only the modern, model-driven apps.
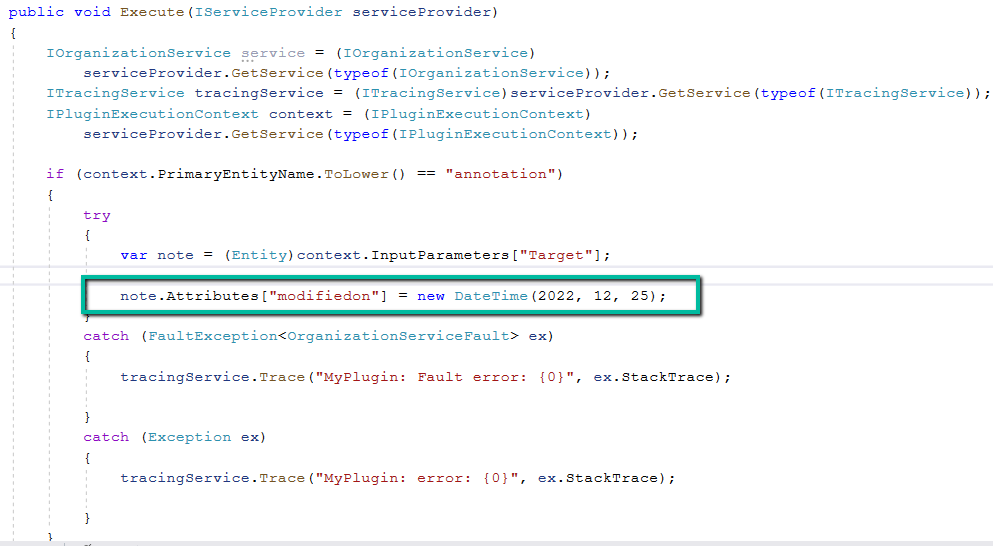
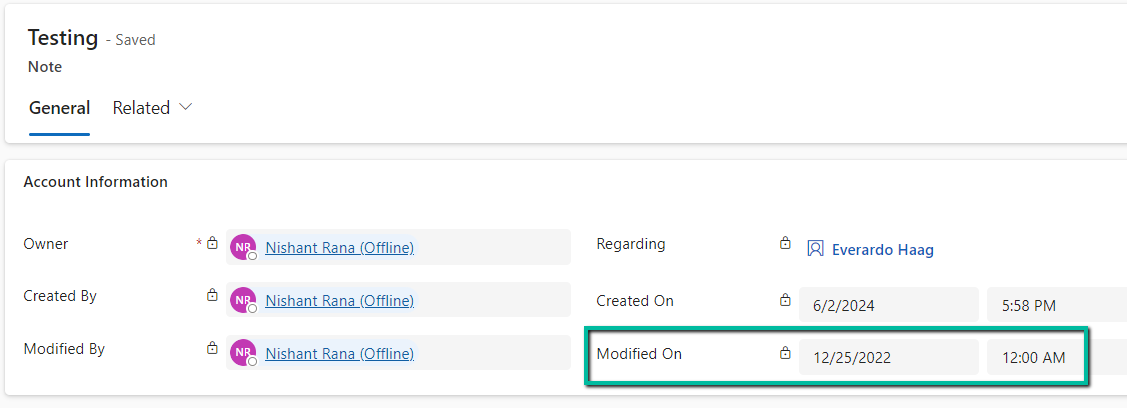
Recently we had a requirement to update the modifiedon date of a few of the records of notes table.
The we can achieve this is by implementing an update plugin on preoperation.
Below is our test record
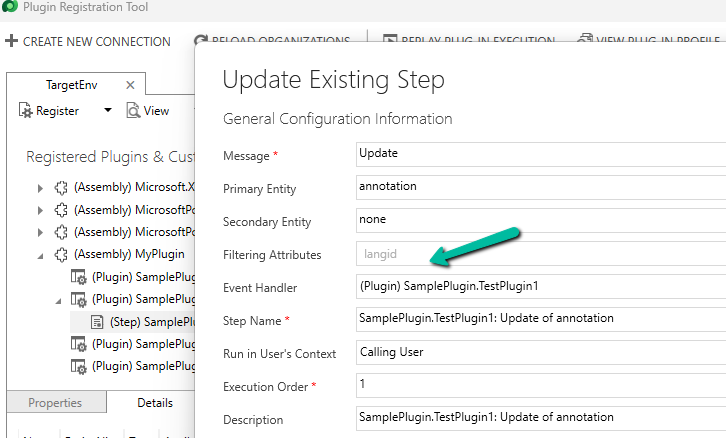
Below is our plugin on the preoperation update to update the modifiedon date.
On updating the note record, we can see the modifiedon date updated as shown below.
Below are some other records where we have modifiedon updated (test records)
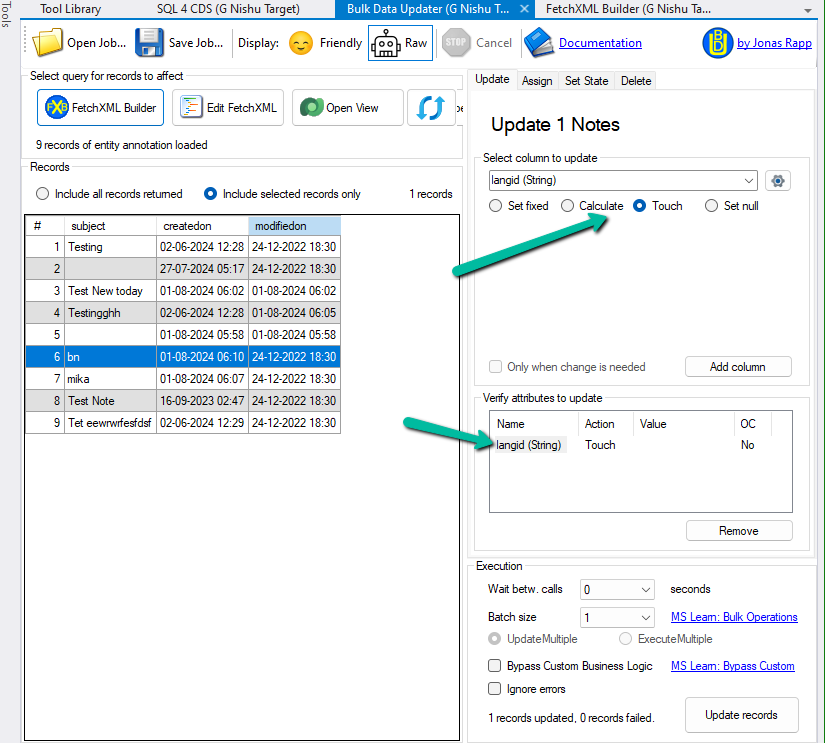
As we had multiple records to be updated on production, eventually we updated the plugin step to be triggered on the update of langid attribute (which won’t be updated by users) and used the awesome XrmToolBox Plugin – Bulk Data Updater to perform touch on langid field. This is to make sure it doesn’t get triggered on the creation or update of any existing records unless explicitly triggered from the Bulk Data Updater for that field and than disabled the plugin.