Sub grid and form tabs improvements in Power Apps Mobile App


There are couple of improvements in user experience for sub grids and form tab in Power Apps Mobile app.

Check other blog posts on Release 2020 Wave 2

  • Headers are more protruding for sub grid to separate it from rest of the sections of the form.
  • There is also an option (+ New Case – below) to add new record inline for empty sub grids.

  • Commands on sub grid opens as a drawer from the bottom of the screen.

  • Form tabs can be scrolled horizontally and selecting the tab automatically adjusts the header.

Hope it helps..

Use custom browser protocol to launch desktop applications from Dynamics 365


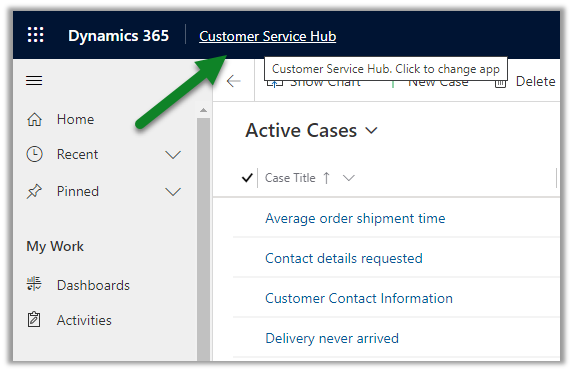
Recently we had a requirement to launch a .NET desktop application installed in the user’s machine from within Dynamics 365 and also pass parameters to it.

One of the ways of implementing is by using the Custom URL Protocol.

Modern browsers and operating systems allow us to implement a custom URL protocol and register an external application to handle it. So when a user clicks  on the link that uses that custom URL Protocol, the browser will open the application that is registered.

Check a few examples here

https://docs.microsoft.com/en-us/windows/uwp/launch-resume/launch-app-with-uri

So, let us start and register our Custom URL Protocol.

Below is the source code for creating a new key


var applicationPath = @"C:\MyParamApp\MyApp\bin\Debug\MyApp.exe";
var KeyTest = Registry.CurrentUser.OpenSubKey("Software", true).OpenSubKey("Classes", true);
RegistryKey key = KeyTest.CreateSubKey("OpenAppP");
key.SetValue("URL Protocol", "OpenAppP");
key.CreateSubKey(@"shell\open\command").SetValue("", "\"" + applicationPath + "\" \"%1\"");

Here OpenAppP is the protocol name and the application path that holds the path of application that we want to execute.

For key.CreateSubKey we have specified %1 for passing the parameter.

If we do not want to pass the parameter then we do not need to append it.

On running the above code, we can see the key added with the value specified

Below is the source code of our console application, basically it reads and writes the parameter in the output window.

Below is our Html page that we will call from within a button on a form from Dynamics 365 and which will open the MyApp.exe in turn.

Here we have published the page in Azure.

The html page on onload will retrieve the id query parameter and append it to the link for the custom protocol

OpenAppP:id

Back in CRM, we have a custom ribbon button named Open Console App added with the following definition.

Url Command Action and Crm Parameter in it to pass the id.

Clicking on the button

as expected, opens the alert along with opening the console app with the parameter passed to it.

Get more details

https://www.vdoo.com/blog/exploiting-custom-protocol-handlers-in-windows

Hope it helps..


Advertisements

App Switcher, Back option and other changes in Dynamics 365 – 2020 Release Wave 2


Below are some of the updates in the product as part of 2020 Release Wave 2.

  • To switch between the Dynamics 365 Apps, we need to click on down arrow icon next to Dynamics 365.

With 2020 Release Wave 2, we can click on the app name i.e. which opens up the pop-up windows listing all the apps.

We can search, create a new app, assign roles, filter etc.

Earlier to access the same we had to navigate to Advanced Settings à Apps

  • Next is the change in the Breadcrumb navigation

Is now seems to be replaced with the back button functionality

  • Also the User Account menu has also been updated earlier,

and now in 2020 Release Wave 2

View account takes user to the My Account page in Office 365

MyAccount

Check other blog posts on Release 2020 Wave 2

Hope it helps..

Queue Item details change in Dynamics 365 – 2020 Release Wave 2


Queue Item details for a Queue Item earlier used to open in a new window.

Thus losing the context

2020 Release Wave 2 provides an immersive experience for the agents, as the queue item details open in the context of the parent window.

Small but nice update for the agents.

Check other blog posts on Release 2020 Wave 2

Refer to below articles to understand more on Queues

MB2-714 (Microsoft Dynamics CRM 2016 Customer Service) : Queue Management

https://www.itaintboring.com/dynamics-crm/working-with-queues-in-dynamics/

https://carldesouza.com/releasing-queue-item-behavior-in-dynamics-365/

Hope it helps..

Using SQL Server Management Studio to deploy and run SSIS package in Azure Data Factory


In our previous post, we created the SSIS Catalog (SSISDB) in Azure and deployed the SSIS package using SSDT.

Supported version for SSDT – SQL Server Data Tools to deploy SSIS package to Azure.

  • For Visual Studio 2017, version 15.3 or later.
  • For Visual Studio 2015, version 17.2 or later.

In this post, we’d use SSMS to deploy the packages in Azure.

Connect to the Azure SQL Server

Expand the Integration Services Catalog, right-click the Projects folder, and select the Deploy Project option.

Enter the source details in the deployment wizard

Select the option SSIS in Azure Data Factory

Select the existing or create a new folder for the project

Click on Deploy after successful validation and review.

Here in our case, it failed with the below message

There is no available node. Please check node status on the monitoring page of the ADF portal and ensure that at least one node is in running 1 and try again. (Microsoft SQL Server, Error: 50000)

The error is because the Azure-SSIS Integration runtime is in the status Stopped.

navigate to your Azure Data Factory instance, and start the runtime.

After around 10 minutes or so the service would be up and running.

This time deployment is successful.

We can see the packages available within the pipeline.

Hope it helps..

How to – Deploy and run SSIS package in Azure Data Factory


Before the SSIS package can be deployed to Azure Data Factory we need to provision Azure-SQL Server Integration Service (SSIS) runtime (IR) in Azure Data Factory.

In the previous posts, we had created an Azure data factory instance had used Azure SQL Database as the source.

Within Azure Data Factory in the Let’s get started page, select Configure SSIS Integration.

Specify the appropriate values to integration runtime.

Select Create SSIS Catalog option to deploy packages in SSISDB, provide Azure SQL Database server endpoint, and the admin credentials to connect.

Test the connection.

Specify advanced settings as appropriate.

This starts the creation of Azure-SSIS Integration Runtime.

Meanwhile below is our SSIS package that we would be deploying to Azure Data Factory.

It extracts a text file named contacts.txt from the blob source and loads it into destination blog storage.

Right-click the project  and select Deploy.

(Deploying individual package is not supported right now)

Select SSIS in Azure Data Factory.

Specify Server name and credentials and connect.

Click on Browse.

Create a new folder or select an existing folder and click on Ok

Once the validation is successful, click on Deploy and start the deployment.

After successful deployment, create a new pipeline in the Azure Data Factory, and drag the Execute SSIS Package activity

Connect to the package deployed.

Click on debug to trigger and test the pipeline.

On the successful run, we can see the contact.txt file extracted from mycontainer1 and loaded to mycontainer2.

Hope it helps..

Advertisements