The new Allocate Capacity feature allows administrators to manage and optimize storage allocation across different environments. It allows administrators to strategically distribute available storage among the Dataverse environments based on each environment’s unique needs ensuring each has the right amount of storage to maintain performance and avoid service interruptions.
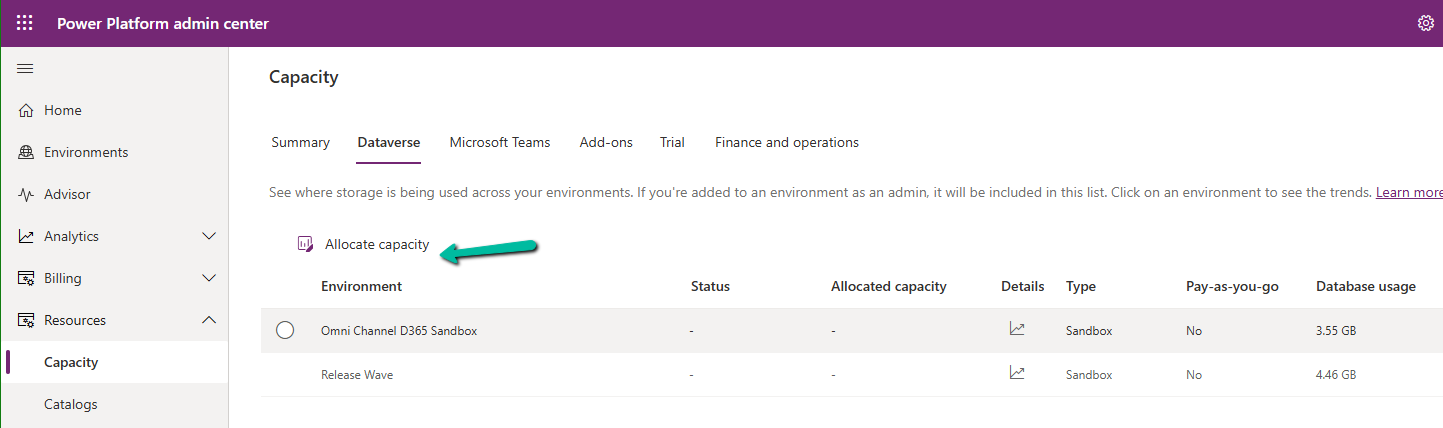
Navigate to Resources >> Capacity >> Dataverse inside the Power Platform Admin Center and select an environment to make the Allocate capacity option visible.
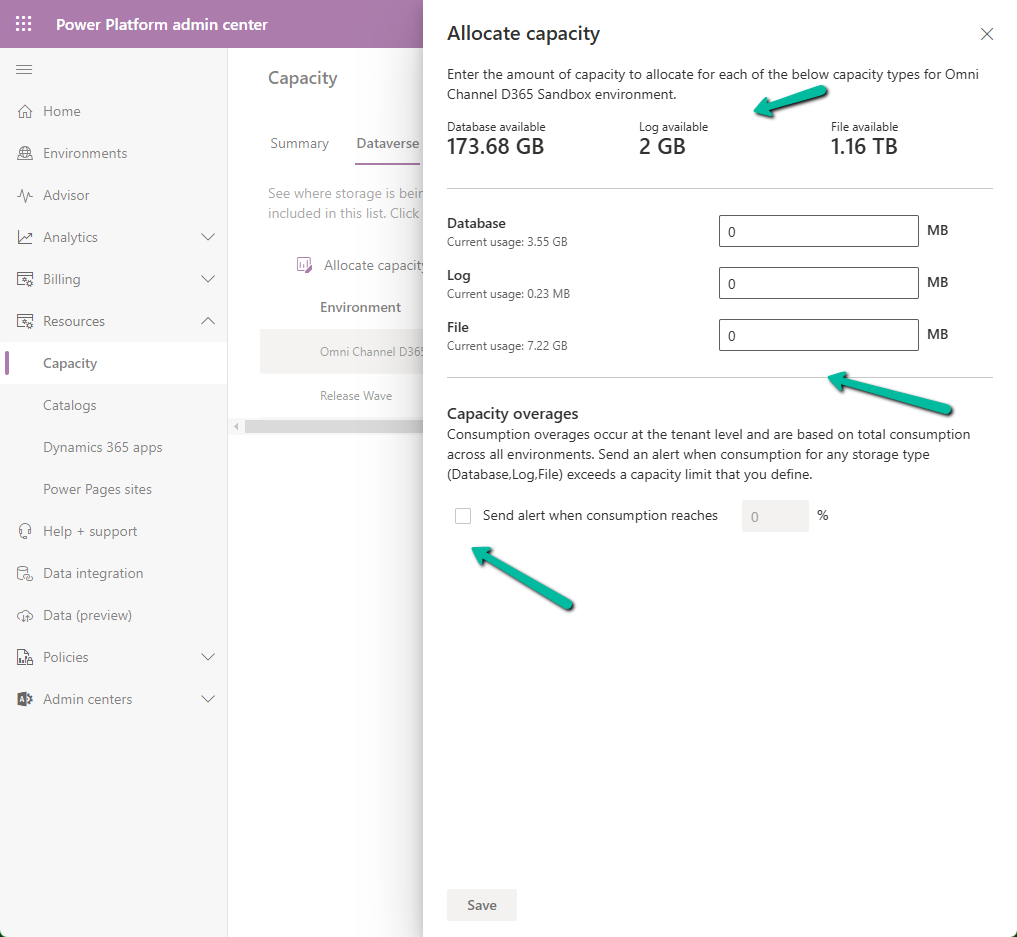
It shows the available storage, and current usage of the environment selected.
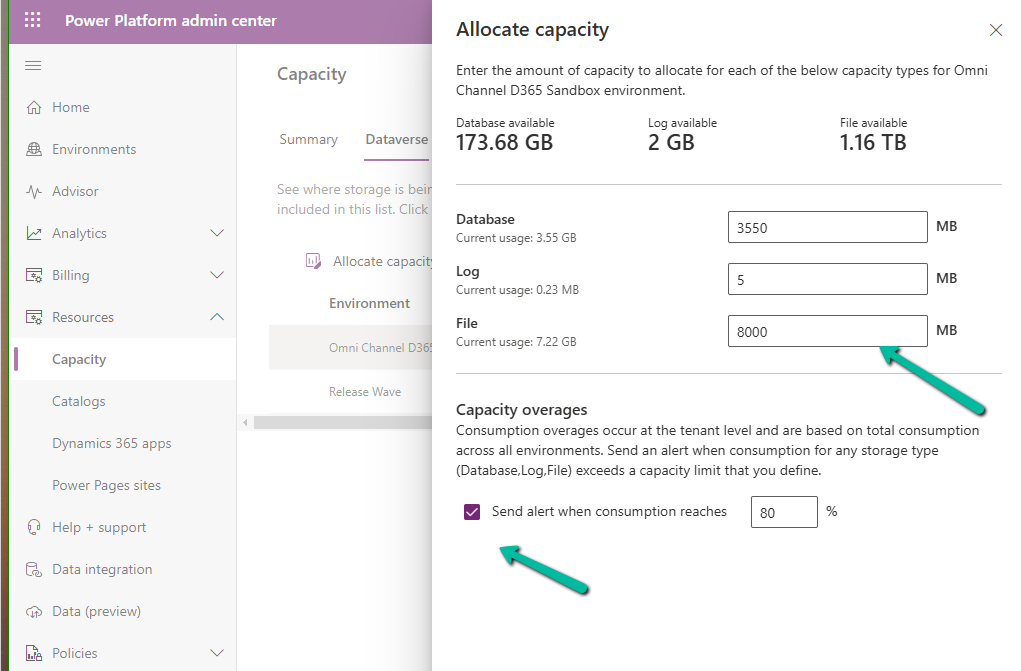
We can allocate Database, Log, and File-specific storage and also configure alerts.
If an environment exceeds, it shows up as “Overage” as shown below
Using this new feature, admins can Allocate Capacity effectively by monitoring the storage usage across environments, setting alerts when the environment nears its capacity limit, and allocating the capacity strategically e.g. production environment will get higher allocation compared to the development environment. Admins can also purchase additional storage and allocate it as required to ensure each environment runs smoothly.
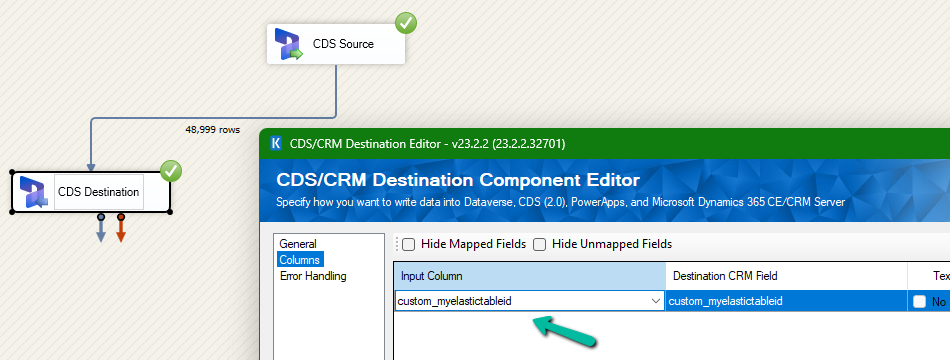
We had mapped the primary field for deletion and the package was also showing success.
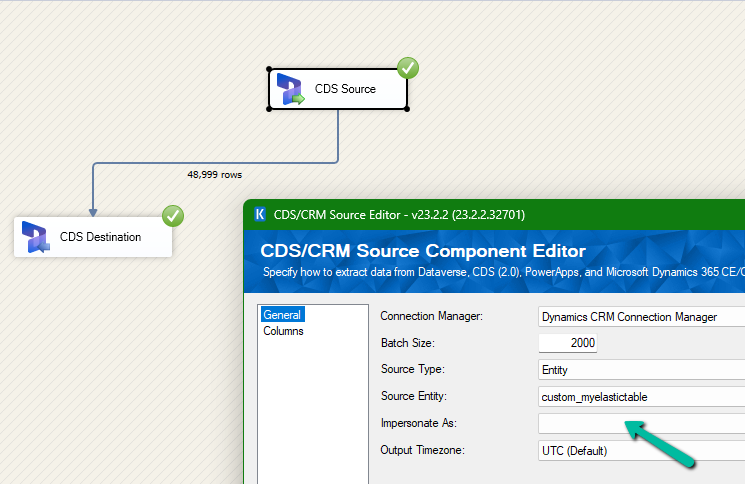
However back in our CRM / Sales Hub app, we saw that none of the records were deleted (total – 48999)
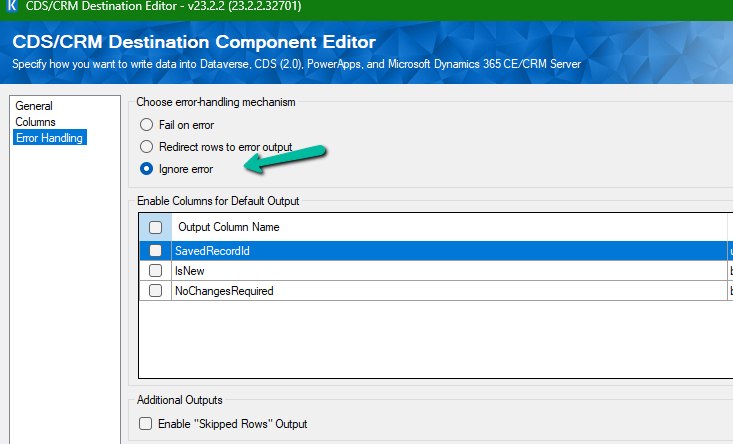
The reason it was showing success is that we had specified the Ignore Error option in our CDS Destination component.
Then we created 2 more records but didn’t specify the partition ID for them.
This time on the successful run of the package we can see those 2 new records getting deleted for which we didn’t specify any partition ID i.e. Test 1 and Test 2 records were deleted successfully.
If we check the Microsoft docs it mentions that we need to include the partition ID using the alternate key to delete those records using the DeleteMultiple request.
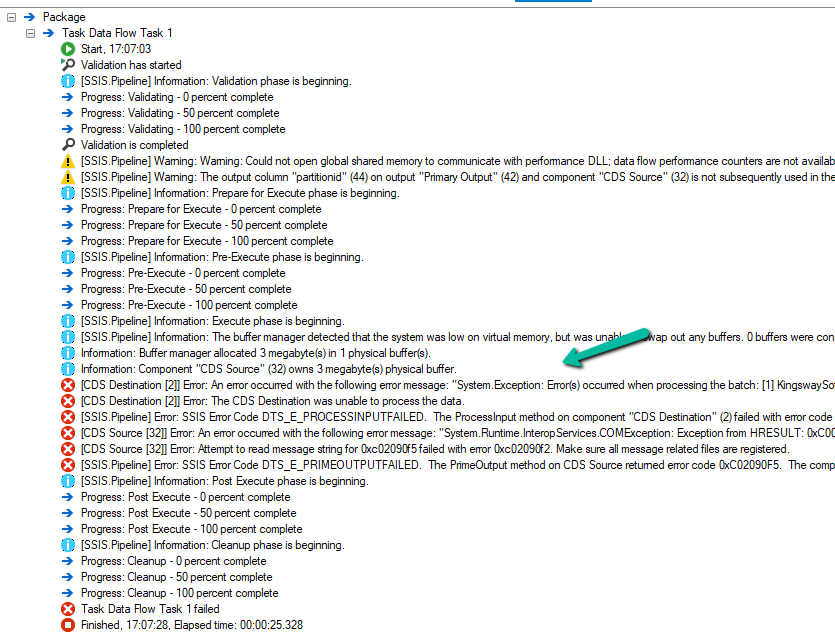
Could not find a way to specify an Alternate Key in the CDS Destination component for the Delete message and if we try deleting the records one by one instead of using the DeleteMultiple request we get the below error.
[CDS Destination [2]] Error: An error occurred with the following error message: “System.Exception: Error(s) occurred when processing the batch: [1] KingswaySoft.IntegrationToolkit.DynamicsCrm.WebAPI.WebApiServiceException: The remote server returned an error: (404) Not Found. (Error Type / Reason: NotFound, Detailed Message: {“error”:{“code”:”0x80040217″,”message”:”The HTTP status code of the response was not expected (404).\n\nStatus: 404\nResponse: \n{\”error\”:{\”message\”:\”Could not find item ‘b3a70971-9674-ef11-a671-6045bdfe58ee’.\”,\”details\”:[{\”message\”:\”\\r\\nErrors : [\\r\\n \\\”Resource Not Found. Learn more: https://aka.ms/cosmosdb-tsg-not-found\\\”\\r\\n]\\r\\n\”}]}}”}}) (SSIS Integration Toolkit for Microsoft Dynamics 365, v23.2.2.32701 – DtsDebugHost, v16.0.5270.0)System.Net.WebException
As expected, using CrmServiceClient also if we do not include partitionid we will get the below error for the records that have partition id specified.
The HTTP status code of the response was not expected (404).
Response:
{“error”:{“message”:”Could not find item ‘b3a70971-9674-ef11-a671-6045bdfe58ee’.”,”details”:[{“message”:”\r\nErrors : [\r\n \”Resource Not Found. Learn more: https://aka.ms/cosmosdb-tsg-not-found\”\r\n]\r\n”}]}}
Here we can specify the partitionId parameter to delete those records having the partitionId specified in the DeleteRequest
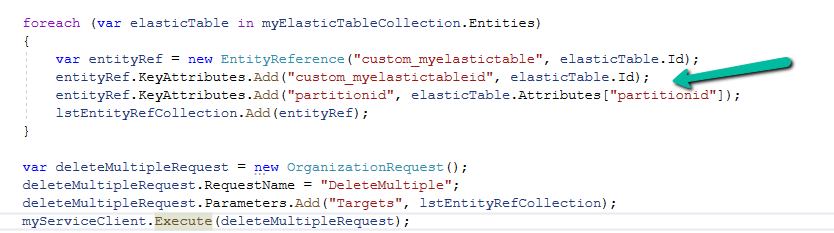
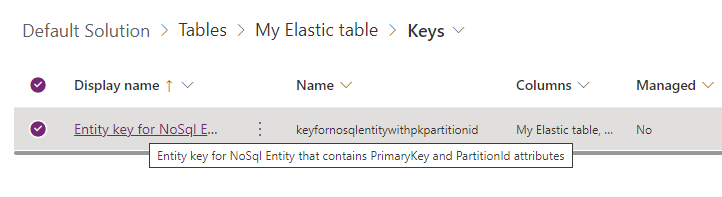
For DeleteMultiple Request we need to provide the alternate key as shown below.
We will have the alternate key auto-created by the system when we create an elastic table.
Sample Code –
 var myServiceClient = new CrmServiceClient(connectionString);
        var query = new QueryExpression("custom_myelastictable");
        query.ColumnSet.AddColumns("custom_name", "partitionid");
        var myElasticTableCollection = myServiceClient.RetrieveMultiple(query);
        var lstEntityRefCollection = new EntityReferenceCollection();

        // Delete Request
        foreach (var elasticTable in myElasticTableCollection.Entities)
        {
            var deleteRequest = new DeleteRequest();
            deleteRequest.Target = new EntityReference("custom_myelastictable", elasticTable.Id);
            deleteRequest.Parameters["partitionId"] = elasticTable.Attributes["partitionid"];
            var response = myServiceClient.Execute(deleteRequest);
        }

        // DeleteMultiple Request

        foreach (var elasticTable in myElasticTableCollection.Entities)
        {
            var entityRef = new EntityReference("custom_myelastictable", elasticTable.Id);
            entityRef.KeyAttributes.Add("custom_myelastictableid", elasticTable.Id);
            entityRef.KeyAttributes.Add("partitionid", elasticTable.Attributes["partitionid"]);
            lstEntityRefCollection.Add(entityRef);
        }

        var deleteMultipleRequest = new OrganizationRequest();
        deleteMultipleRequest.RequestName = "DeleteMultiple";
        deleteMultipleRequest.Parameters.Add("Targets", lstEntityRefCollection);
        myServiceClient.Execute(deleteMultipleRequest);
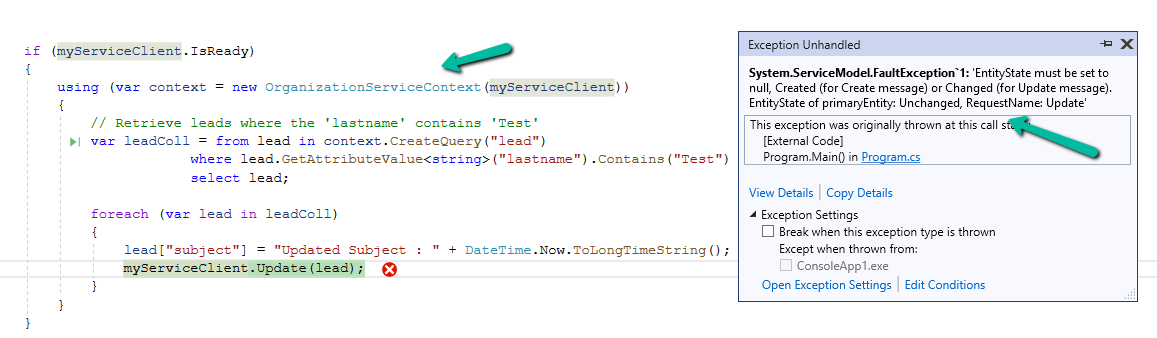
We might get this error while trying to update one of the records.
Exception Message: EntityState must be set to null, Created (for Create message) or Changed (for Update message).
EntityState of primaryEntity: Unchanged, RequestName: Update
ErrorCode: -2147220989
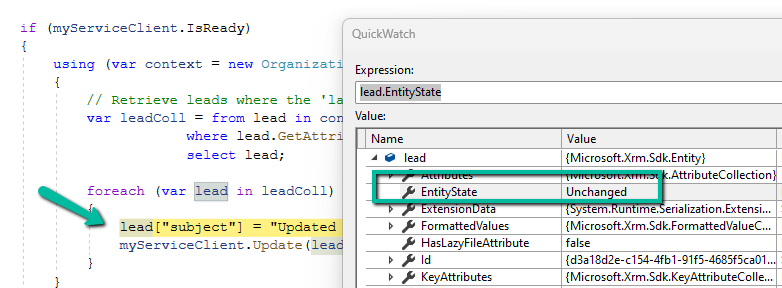
The erroroccurs when OrganizationServiceContext tries to update an entity that has not been marked as modified. The EntityState remains Unchanged, and Dataverse expects it to be Changed or null for update operations.
OrganizationServiceContext automatically tracks entities’ states. When we retrieve an entity, it is set to Unchanged by default.
If we modify the entity without informing the context (e.g., using UpdateObject()), the context still thinks the entity is Unchanged, leading to this error during the update process.
This error typically happens within OrganizationServiceContext since it relies on internal state-tracking mechanisms, with IOrganizationService (e.g., Retrieve or RetrieveMultiple), we typically don’t run into this error because entities retrieved via IOrganizationService aren’t tracked in the same way.
There are 2 ways to resolve this error.
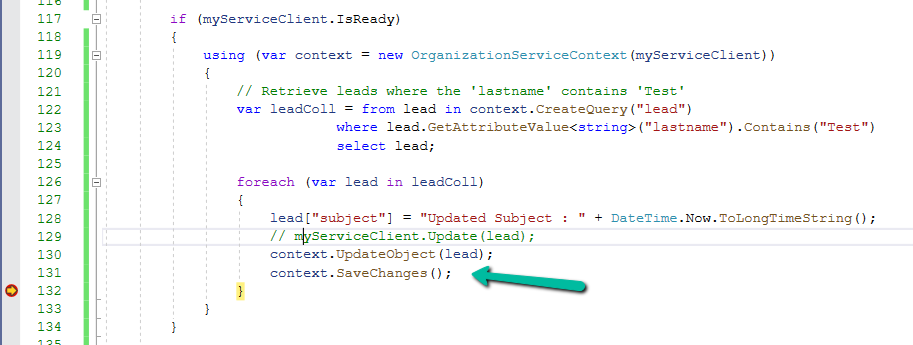
Use UpdateObject, it explicitly tells the context that the entity has been changed followed by SaveChanges() to commit the changes.
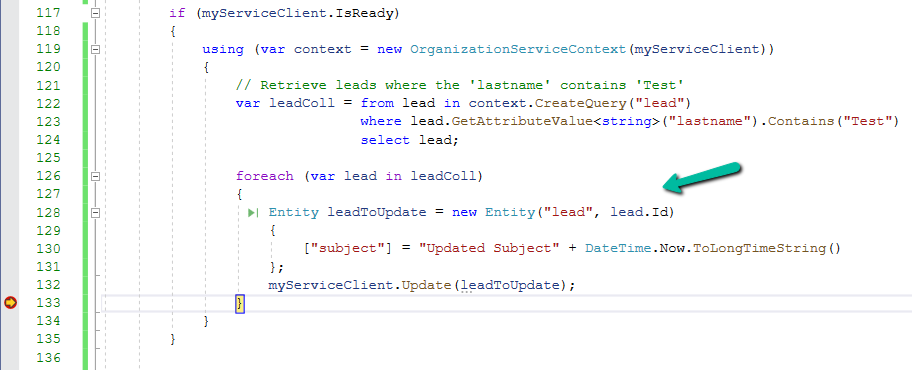
2. Create a new Entity object for update.
Sample Code –
 if (myServiceClient.IsReady)
        {
            using (var context = new OrganizationServiceContext(myServiceClient))
            {
                // Retrieve leads where the 'lastname' contains 'Test'
                var leadColl = from lead in context.CreateQuery("lead")
                               where lead.GetAttributeValue<string>("lastname").Contains("Test")
                               select lead;

                // use Update Object
                foreach (var lead in leadColl)
                {
                    lead.Attributes["subject"] = "Updated Subject" + DateTime.Now.ToLongTimeString();
                    context.UpdateObject(lead);
                    context.SaveChanges();
                }

                // or create a new Entity object
                foreach (var lead in leadColl)
                {
                    Entity leadToUpdate = new Entity("lead", lead.Id)
                    {
                        ["subject"] = "Updated Subject" + DateTime.Now.ToLongTimeString()
                    };
                    myServiceClient.Update(leadToUpdate);
                }
            }
        }
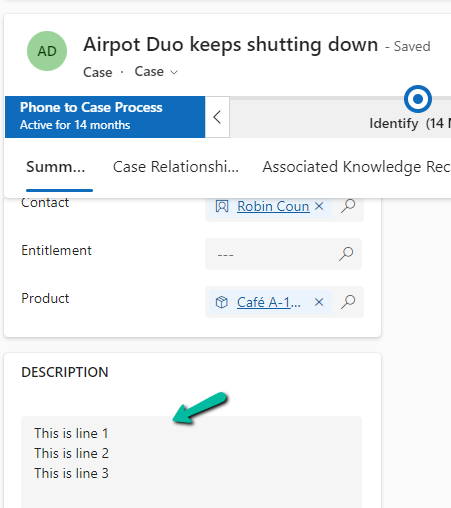
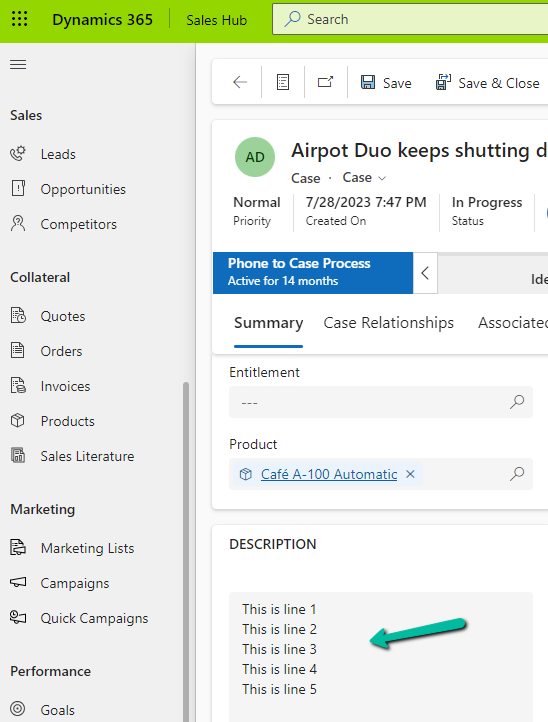
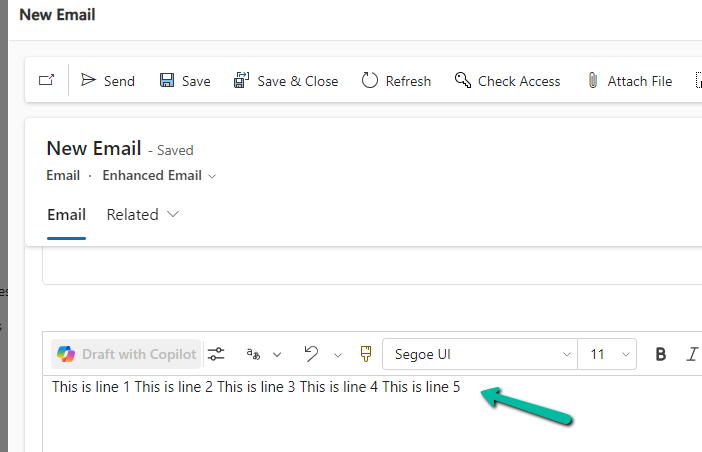
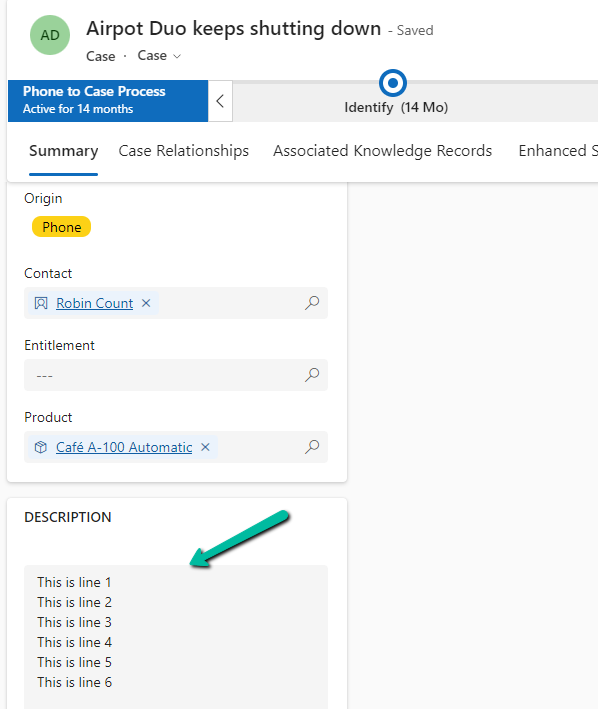
In one of our requirements, we wanted to create/send an email on the creation/update of the case with the description of the email same as the description of the case.
In our Case record, for the description, we have the line break (\n) specified.
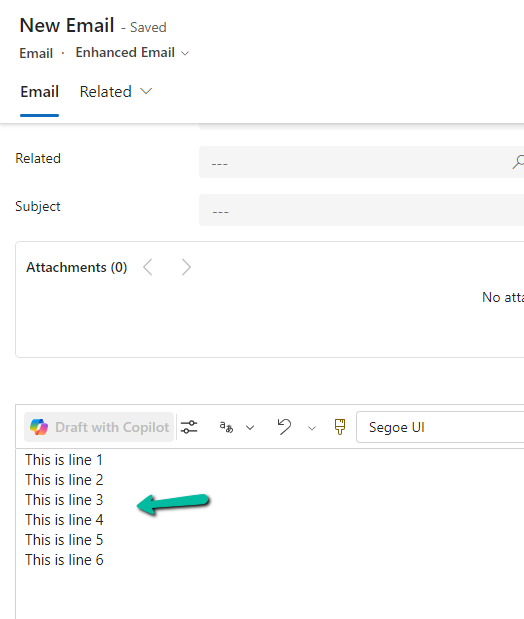
However, for the email created, we see the line break ignored.
To fix this we might think of applying the below formula by replacing “\n” with “”.
This time we followed more or less the same steps, the main difference was this time we used our favorite XrmToolBox plugin SQL4CDS to perform the delete operations instead of the bulk deletion job.
However, even after deleting all the Activity type records (except one appointment record which was giving some error on deletion), as shown below, the ActivityPointer was still showing 13 GB of space occupied.
select activitytypecodename,activitytypecode, Count(activitytypecode) as Total
from activitypointer
group by activitytypecode, activitytypecodename
order by Total desc
And the same was true for the WorkflowLogBase, we used a bulk deletion job for deleting the system jobs with status as succeeded which deleted around 1200 records, however running the same query in SQL4CDS showed us around 70K records with status as success.
On trying to run the following query it gave us an “Expected non-empty Guid” error and we could not delete the records.
Eventually, we raised the Support Ticket for it, and the team ran the script in the background to delete/reduce the size of the Activity Pointer and Workflow Log table and eventually we were able to reduce the database usage (we also deleted few other table records)