Attachment Control – Dynamics 365


The new attachment control allows users to upload , download, delete, and view attachments that are added to a table through notes or emails or directly (for Case Table).

Below we have 2 attachments added to the case record.

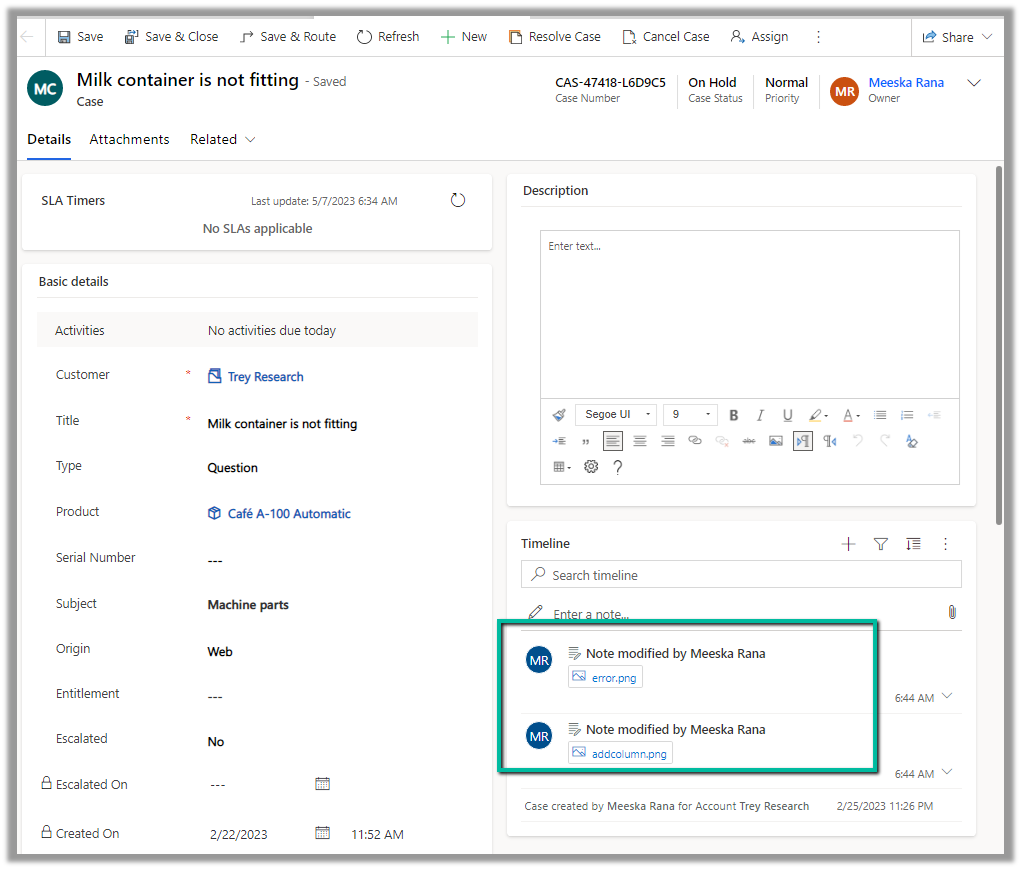
We can see both the attachments there in the Attachments control along with an additional attachment directly added (Direct Upload) .

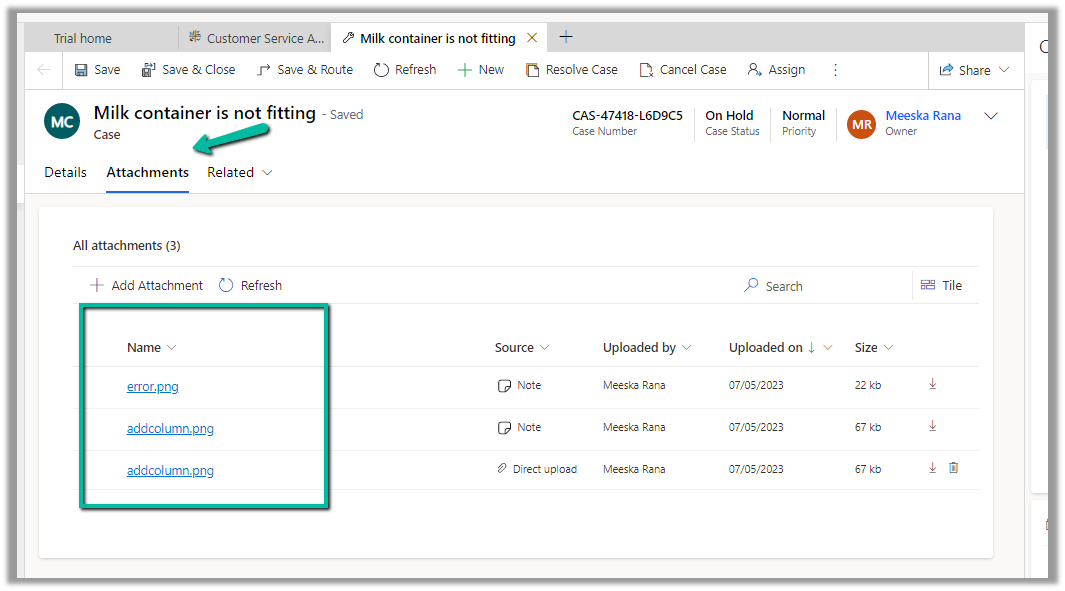
We can perform a search as well as change the view.

The Tile view –

The Delete option is only available in the case of files directly uploaded not the ones showing up from notes / emails.

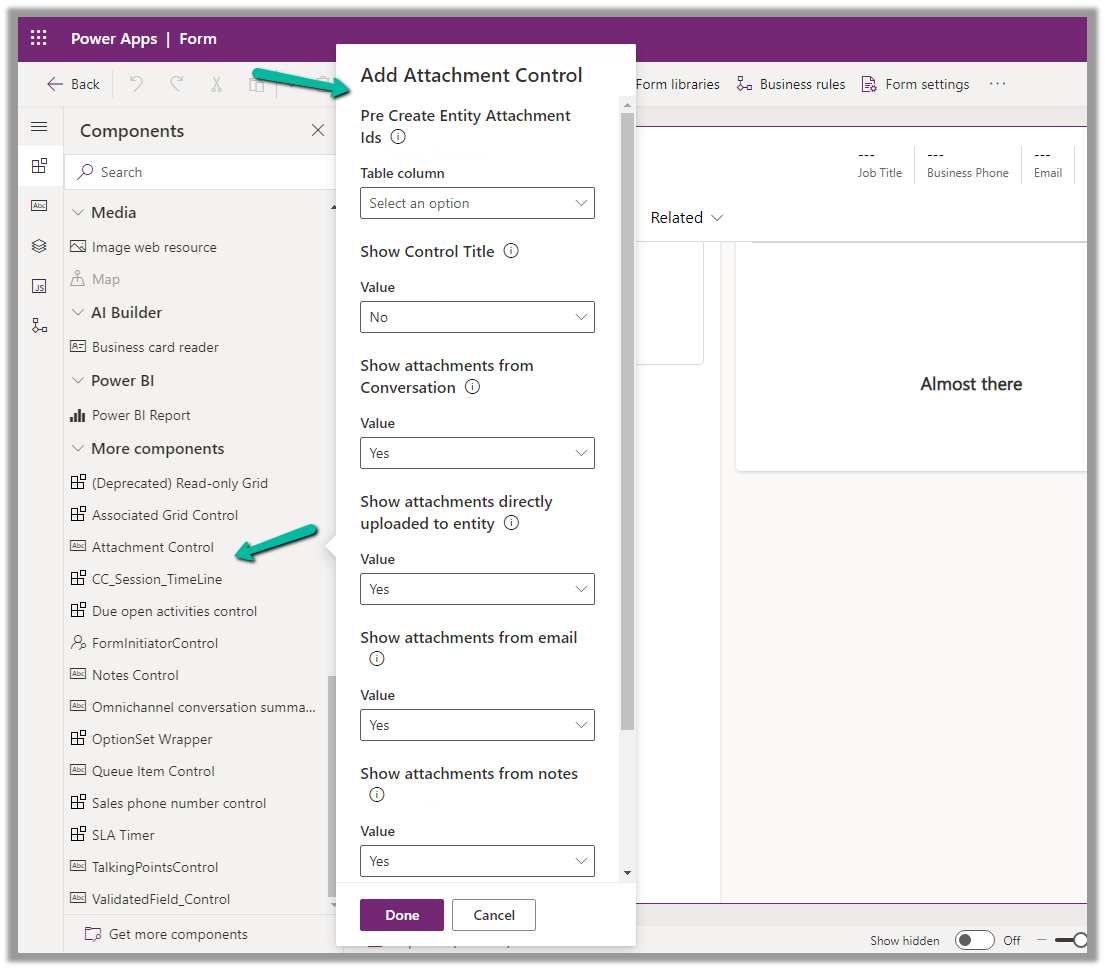
For the Case table, the table column property is mapped to the Pre Create Entity Attachments Id field, which allows uploading attachments even before saving or creating the case record. (This is only available for the Case table)

Below we have uploaded attachments to a new case record.

We can add the Attachment Control to other tables as well.

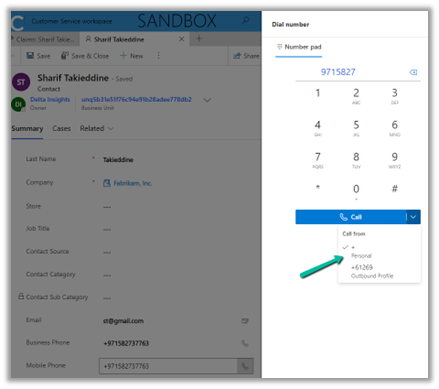
Below we are adding it to the Contact form.

For tables other than Case, it can only be used to View the Attachments, we do not get the option to upload there.

Get all the details here

Due Open Activities Control – https://nishantrana.me/2023/05/09/due-open-activities-control-dynamics-365/

Notes Control – https://nishantrana.me/2023/05/10/notes-control-dynamics-365/

Hope it helps..

Advertisements

Agents not receiving calls in Omnichannel Voice – Dynamics 365 Customer Service


Recently we saw a few of our agents were not receiving the calls/notification for incoming conversations.

Apart from checking the Routing Diagnostics, we can refer to the Omnichannel Ongoing Conversation Dashboard (available for the Omnichannel Supervisor role)

In our case, we realized that the ongoing conversation was in Wrap-up status for the agent.

And also as we had a work item limit of 1 along with assignment blocking defined through the capacity profile for that agent, the agent wasn’t receiving the incoming notifications.

So here we can ask the agent to close the session correctly.

Or as a supervisor, we can force close the conversation from the Omnichannel Ongoing Conversation Dashboard.

Force Close-

Hope it helps..

Advertisements

Understanding Overflow handling – Work item limit exceeds in Voice Channel – Omnichannel (Dynamics 365 Customer Service)


Say for one the Advanced Queue of type Voice we have the following Overflow handling defined (the queue has only 1 user assigned to it).

i.e.

Condition = Work item limit exceeds 1

Action = Voicemail

And it also has an Out of operation hours condition defined.

Now, if the customer calls during working hours and if the user’s presence is Available, the agent will receive the notification and the first conversation will have the Status as Active. If we make a second call its status will be open and it won’t go to Voicemail. Now if we make a 3rd call to that number it will go to Voicemail.

This is because we have set the Work item limit exceeds as 1, so it will keep one conversation in the open status, and any subsequent calls after that will go to the Voicemail.


Now here if the user is either in DND, Away, Offline, or not logged into CRM during work hours (if a customer calls outside work hours it will directly go to the Voicemail as we have the Out of operation hours condition defined), the first conversation will have the status as open and then any subsequent calls will go to the Voicemail.

In short,

More detail – Queue Overflow

Hope it helps..

Advertisements

How to – assign a personal phone number to agents in Voice Channel (Omnichannel)– Dynamics 365 Customer Service


The reason we would assign a personal phone number to the agents is that they can use that number to make an outbound call to the customers or in some scenarios, the customer wants to directly call the specific agent for direct follow-up on a particular case.

Let us first add a new phone number.

Navigate to Customer Service Admin Center >> Customer Support (Channels) >> Phone numbers (Manage)

Select + New number (in case we have purchased a number from Microsoft)

In case of Direct Routing, click on Advanced
>> Bring your own number via Azure Direct Routing

Specify the Phone Number, Carrier, Country / Region, and Number type, and select Receive calls and Make calls.

Open the system user’s record, and specify the phone number added in the Omnichannel Phone field in the Omnichannel tab.

Now login to Customer Service Workspace with the agent’s account.

The agent will now have the option to make an outbound call using the personal number assigned.

Also, we can see the agent receiving a call on that number directly.

Get more details – https://learn.microsoft.com/en-us/dynamics365/customer-service/voice-channel-outbound-calling?tabs=customerserviceadmincenter#assign-personal-phone-numbers-to-agents

Hope it helps..

Advertisements

How to – Enable inbox for agents in Dynamics 365 Customer Service Workspace / Omnichannel


Inbox view in the agent workspace allows agents to quickly perform a preliminary assessment of the service requests coming from different channels for a timely response. Agents can view cases, conversations, and activities assigned in the inbox tab.

To enable inbox for the agents, inside the Customer Service admin center

Navigate to Agent Experience >> Workspaces >> Agent Experience profiles >> Manage


We can create new profiles or can add users to any of the existing profile that has inbox enabled

E.g. Customer Service Trial profile has the inbox enabled.

Below is the agent experience profile record, that doesn’t have inbox enabled.

Let us add one of the users to the below profile.

The Customer Service workspace before the user’s inbox is enabled. We can only see the Home tab.

After adding the user to the profile.

The agent can see the Inbox tab.

The agents can see the views configured in the profile inside the inbox tab.

Read more about Configuring the Inbox

To learn more about Voicemail- https://neilparkhurst.com/2022/11/08/omnichannel-for-customer-service-voicemail/

Hope it helps.

Advertisements

Manage Custom Presence – Dynamics 365 Customer Service (Omnichannel)


To manage presences, navigate to Customer Service Admin Center >> Agent Experience >> Productivity >> Custom Presence

Out of the box we have the following presences.

Only the below presences will be available for the agents to select.

The inactive and offline statuses will be automatically set by the system.

Although we can deactivate the presence, that doesn’t remove it for the agents.

The agents can still see all the presence statuses.

We cannot delete the default presence; we will get the below error if we try to delete them.

We can edit the Presence text for the default presence.

For the agent –

We can create custom presences that are based on the existing base status.

For the agents –


Unlike default presence, we can delete the custom presence status.

Hope it helps..

Advertisements