When working with historical or test data in Dynamics 365 Field Service, we often come across the need to clean up old Work Orders and their related records. While it might seem straightforward to just delete the Work Order, there are quite a few interdependent entities and plugin validations that can make this task tricky.
We wanted to delete all msdyn_workorder records created before a certain date along with their related child records such as:
Work Order Products
Work Order Services
Work Order Incidents
Bookable Resource Bookings
Time Entries, Service Tasks, Resolutions, etc.
The Field Service solution has many plugins that enforce business rules during deletion.
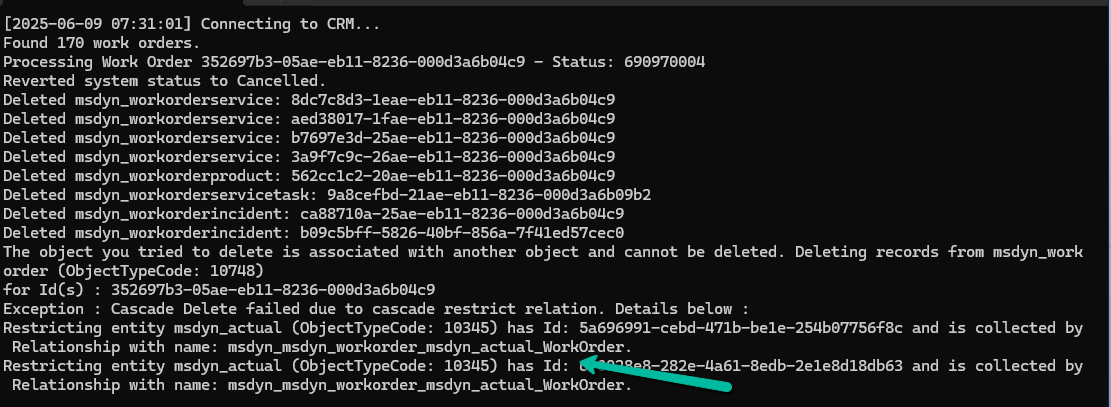
If a Work Order is in a Posted state (msdyn_systemstatus = 690970004), attempting to delete any of its child records will throw errors like:
Failed to delete msdyn_workorderproduct {GUID}: A record can’t be deleted if the work order has been posted.
So to delete the Posted work order, we had to update its status to Cancelled.
If the Work Order has any associated Bookable Resource Booking records, deletion is blocked:
Work order can’t be deleted because there are associated Resource Booking records. Please delete these records first.
And while deleting Bookings, we might hit even deeper integration issues, like this one from a virtual entity plugin
This error originates from the FnO Virtual Entity plugin and usually appears if the user linked to the Booking doesn’t exist in the FnO system — a hard blocker for environments with dual-write enabled.
Also, we had to temporarily change the Delete action to Remove Link from Restrict for the relationship between msdyn_workorder and msdyn_actual_workorder.
Here’s a high-level overview of what we did:
Fetched work orders based on our criteria. Loop through each work order:
Revert the status if it is Posted (so it becomes deletable)
Delete all child records in a proper order
Delete the Work Order itself
Below is the sample code we used for deleting the work orders and its associated records successfully.
   public void DeleteAllWorkOrders()
        {

            QueryExpression query = new QueryExpression("msdyn_workorder");
            query.ColumnSet = new ColumnSet("msdyn_workorderid", "msdyn_name", "createdon", "msdyn_systemstatus");

            query.Criteria = new FilterExpression();
            query.Criteria.Conditions.Add(
                new ConditionExpression("createdon", ConditionOperator.LessThan, new DateTime(2025, 1, 1))
            );
            query.Orders.Add(new OrderExpression("createdon", OrderType.Descending));
            var workOrders = _service.RetrieveMultiple(query).Entities;
            Console.WriteLine($"Found {workOrders.Count} work orders.");

            try
            {
                foreach (var wo in workOrders)
                {
                    var woId = wo.Id;
                    var systemStatusCode = wo.Contains("msdyn_systemstatus") ? ((OptionSetValue)wo["msdyn_systemstatus"]).Value : 0;
                    try
                    {
                        //// 1. If Posted revert status
                        if (systemStatusCode == 690970004) // Posted
                        {
                            var revert = new Entity("msdyn_workorder", woId)
                            {
                                ["msdyn_systemstatus"] = new OptionSetValue(690970005) // Canceled
                            };

                            _service.Update(revert);
                            Console.WriteLine("Reverted system status to Cancelled.");
                        }

                        // 2. Delete dependencies
                        DeleteRelatedRecords("msdyn_workorderservice", "msdyn_workorder", woId);
                        DeleteRelatedRecords("msdyn_workorderproduct", "msdyn_workorder", woId);
                        DeleteRelatedRecords("msdyn_workorderservicetask", "msdyn_workorder", woId);
                        DeleteRelatedRecords("msdyn_workorderincident", "msdyn_workorder", woId);
                        DeleteRelatedRecords("msdyn_workorderresolution", "msdyn_workorder", woId);
                        DeleteRelatedRecords("bookableresourcebooking", "msdyn_workorder", woId);
                        DeleteRelatedRecords("msdyn_timeentry", "msdyn_workorder", woId);

                        // 3. Delete the Work Order
                        _service.Delete("msdyn_workorder", woId);
                        Console.WriteLine($"Deleted Work Order: {woId}\n");
                    }
                    catch (Exception ex)
                    {
                        Console.WriteLine($"Error processing Work Order {woId}: {ex.Message}");
                        Console.WriteLine("Continuing with the next Work Order...\n");
                    }
                }
            }
            catch(Exception ex)
            {
                Console.WriteLine(ex.Message);
            }

            Console.WriteLine("All Work Orders cleaned up.");
            Console.WriteLine("Press any key to continue !");
        }

        private void DeleteRelatedRecords(string entityName, string lookupField, Guid workOrderId)
        {
            var query = new QueryExpression(entityName)
            {
                ColumnSet = new ColumnSet(false),
                Criteria =
            {
                Conditions =
                {
                    new ConditionExpression(lookupField, ConditionOperator.Equal, workOrderId)
                }
            }
            };

            var records = _service.RetrieveMultiple(query).Entities;

            foreach (var record in records)
            {
                try
                {
                    _service.Delete(entityName, record.Id);
                    Console.WriteLine($"Deleted {entityName}: {record.Id}");
                }
                catch (Exception ex)
                {
                    Console.WriteLine($"Failed to delete {entityName} {record.Id}: {ex.Message}");
                }
            }
        }
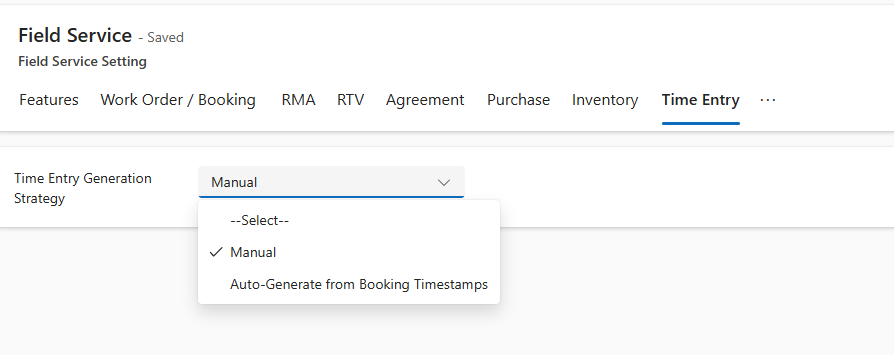
Recently while trying to set Bookable Resource Booking record’s status as completed or trying to change Settings >> General >> Field Service Settings >> Time Entry, we were getting below error
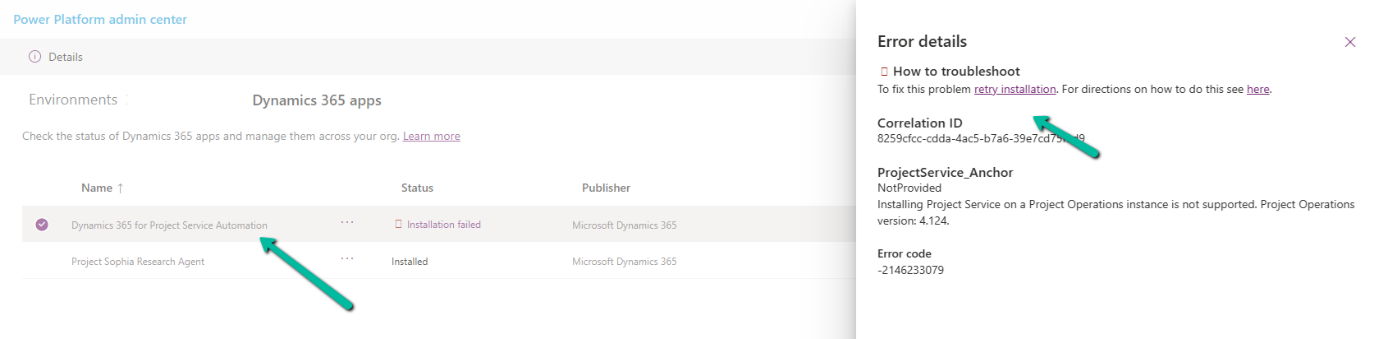
We can see the Dynamics 365 Project Service Installation Failed and on retrying the installation it was giving below error.
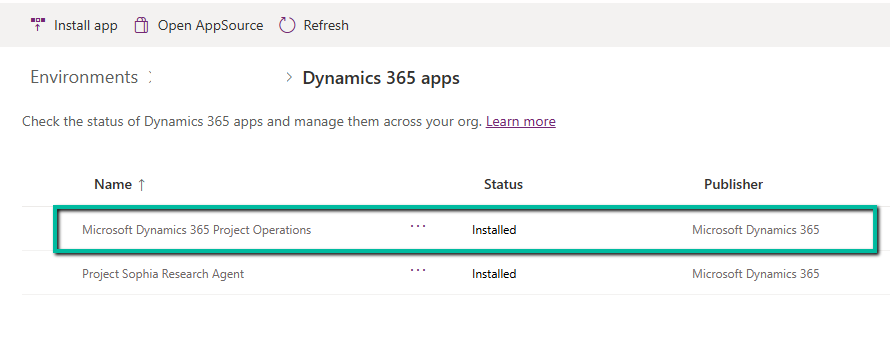
The fix that worked here was to install the Project Operations.
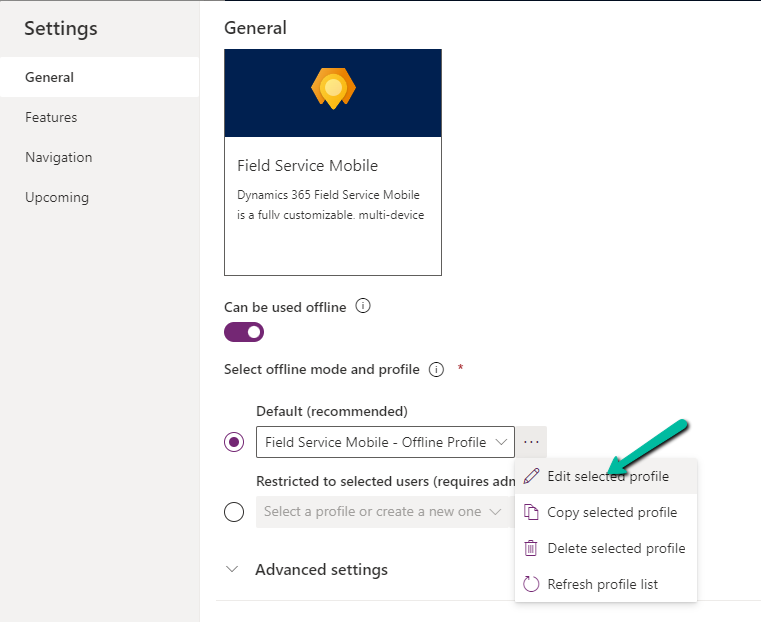
With this new feature (preview) now we can specify the columns to be downloaded on mobile devices for offline use.
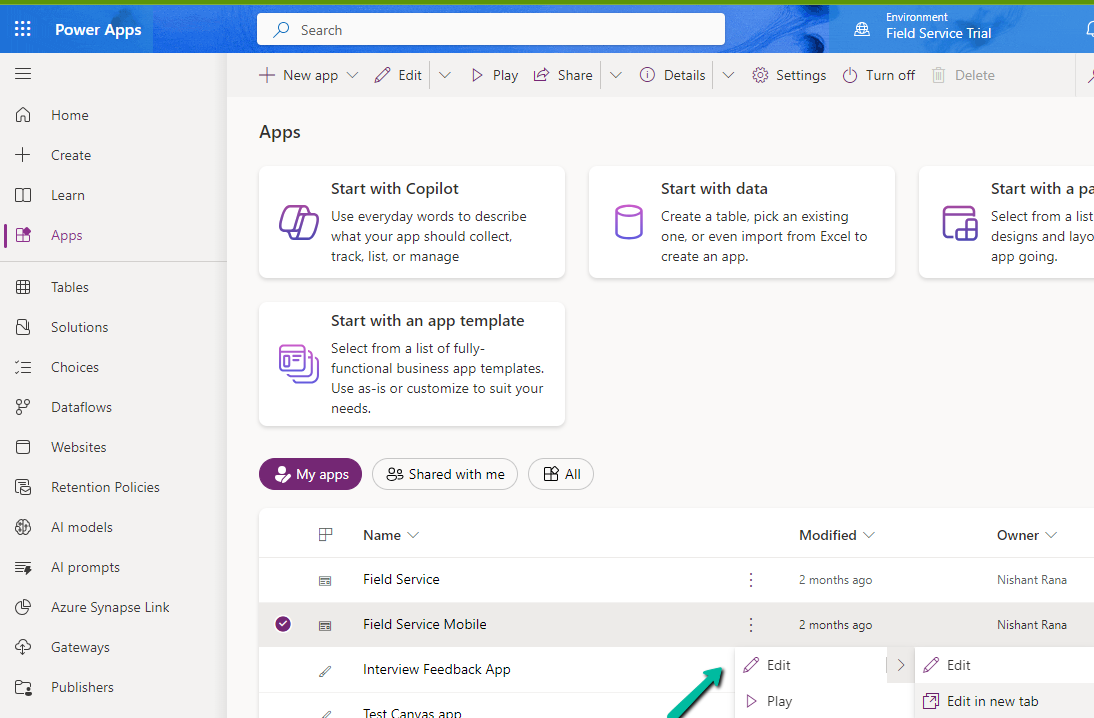
Select edit for the Model-driven app.
Select Settings and select an existing offline profile or create a new profile.
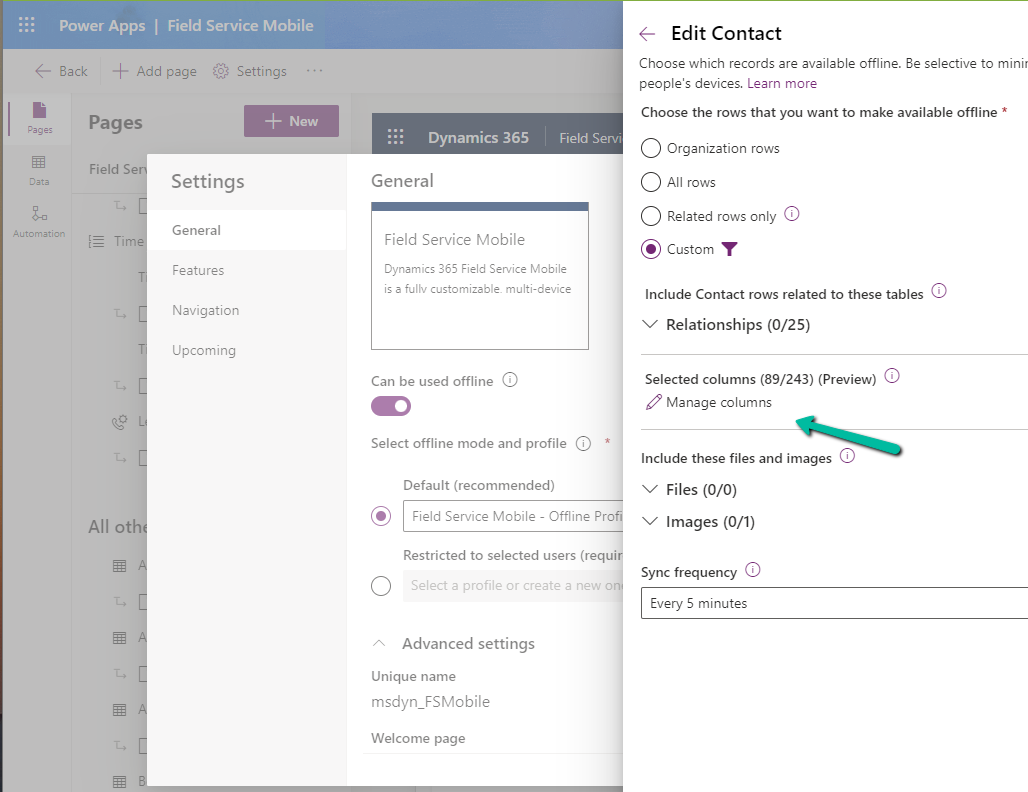
Select a new table or an existing table for the profile, we can see the Manage Columns option for it.
We can see key columns already selected as part of Required Columns.
We can select columns from the other columns section for our offline profile. The fewer the columns the faster the app will download the data for offline usage.
One point to note is that we get this option only from the Maker Portal not from the Power Platform Admin Center.
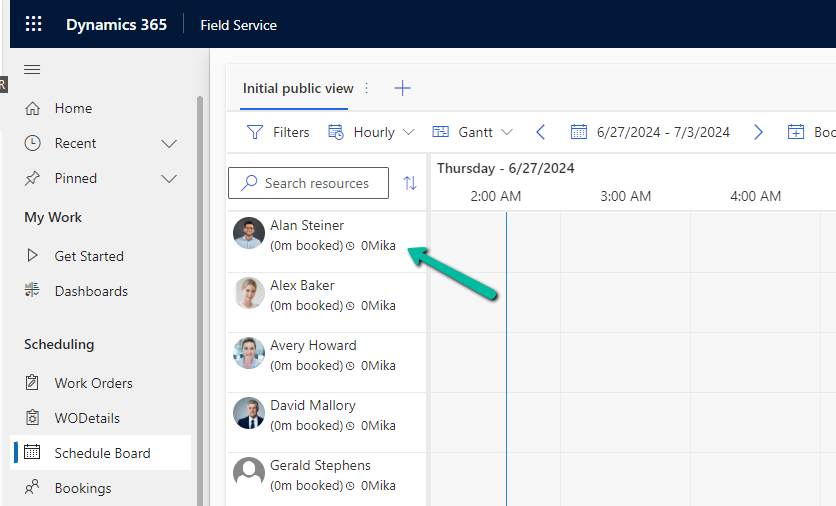
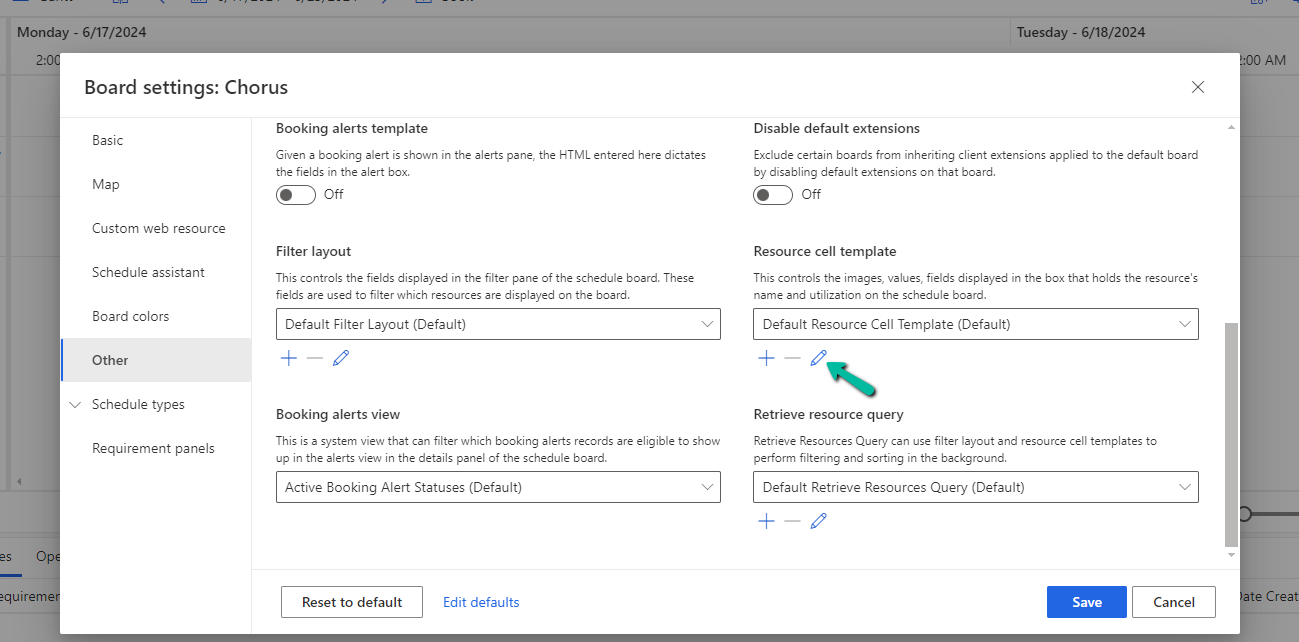
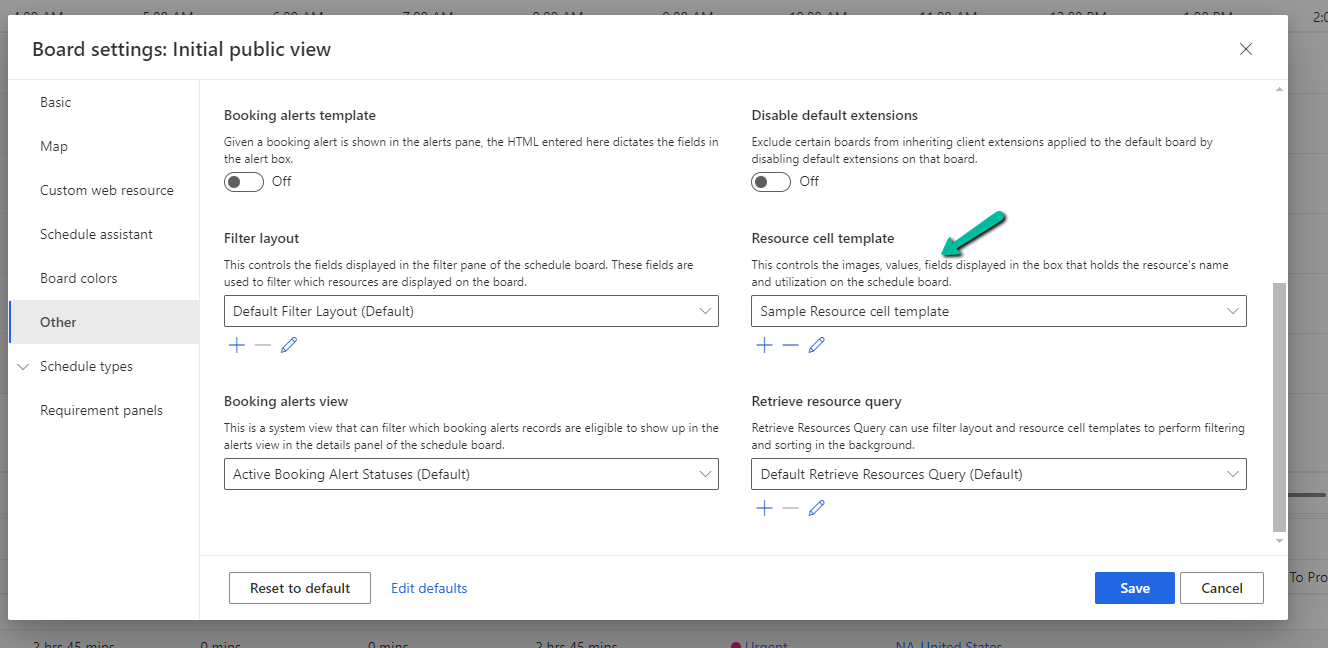
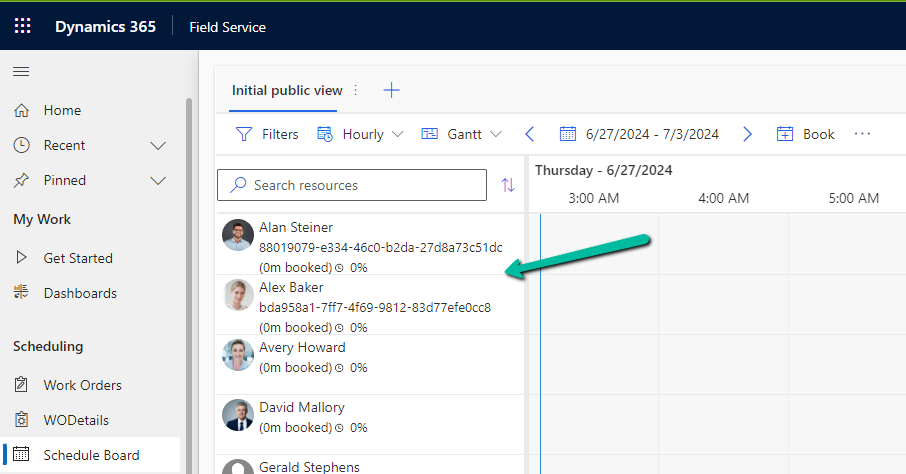
Below we can see the resource cell template (or view) applied that defines the images, values, and fields displayed for the resource in the Schedule Board.
Now suppose we want to show the Account (custom field) value also, that would make it easy for the Dispatcher to schedule them from within the Schedule board.
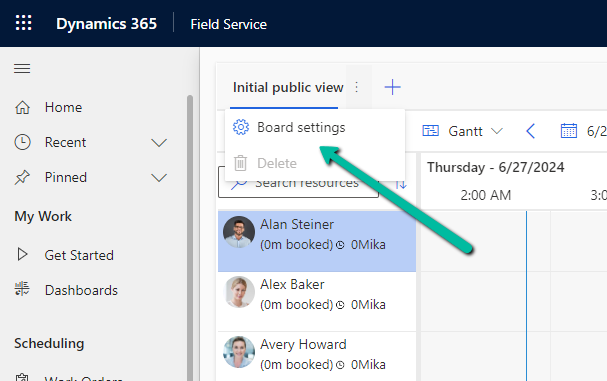
For this, we need to select Board Settings for the Schedule Board.
Navigate to the Other section within the Board Settings.
We’d first start by adding/defining a new Resource Cell Template and a new Retrieve resource query template.
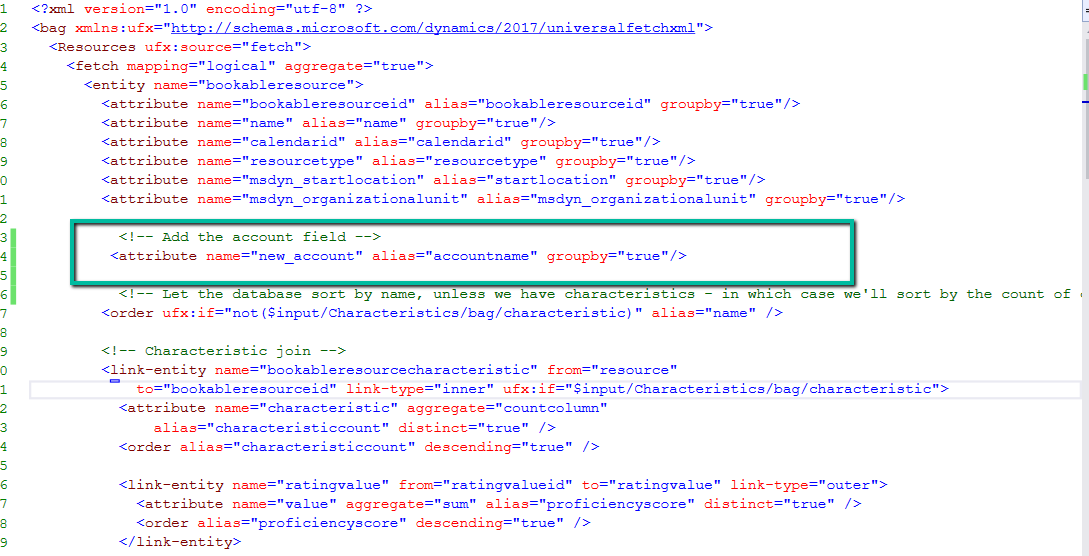
We have added below Div tag below to show the account name.
Save this new template
Next, add the below attribute tag for the account field in the Fetch XML for it to retrieve the value of the account, here name property holds the schema name of the field.
Select Save as new to add the new template.
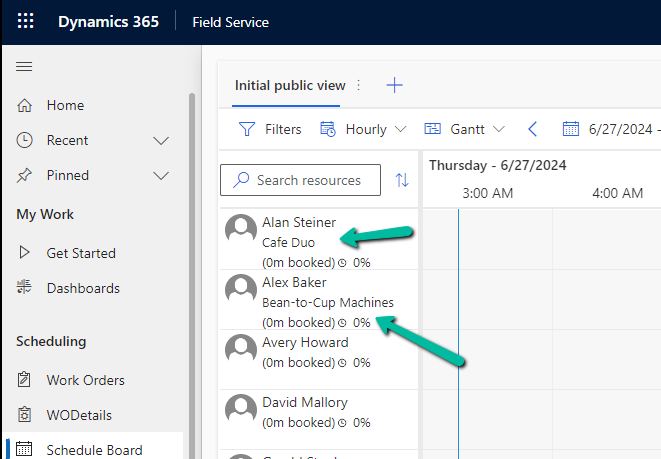
On refreshing the Schedule Board we can see the Account value added to the view, however, it shows the Guid of the account record.
To get the label /name, edit the Resource Cell Template and add the below UFX Bag (UFX directives for querying the data) to fetch the name of the account.
Update the Sample Resource Query, Save the changes, and refresh the schedule board.
We can see the Guid replaced by the Account name there.
Recently we found that in one of the environments, the Date Window Start / End Dates was not showing up on the Work Order Forms, unlike the other environments.
Check the forms below
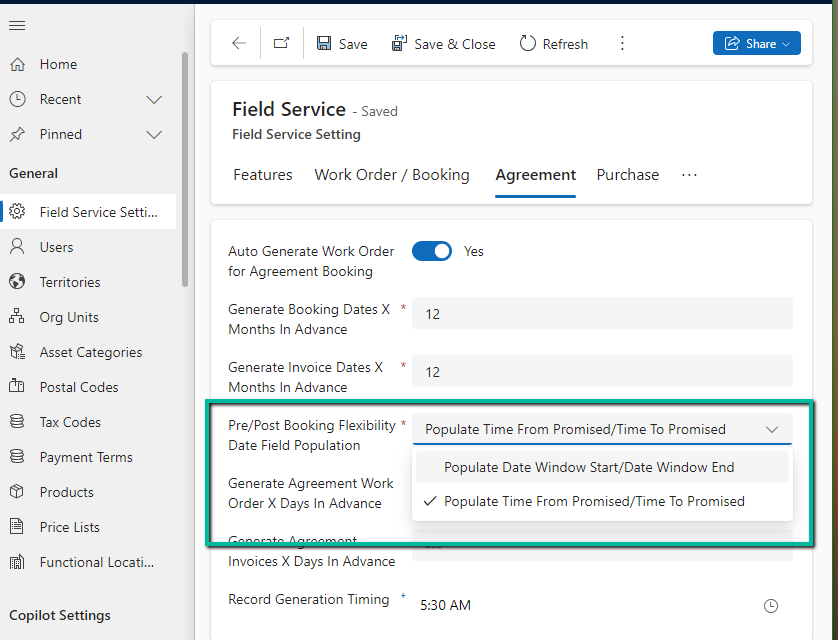
Well, the show and hide of the Date Window Start / End Date is controlled from Field Service Settings >> Fields Service >> Agreement
Setting Pre/Post Booking Flexibility Date Field Population to Populate Date Window Start / Date Window End will unhide the fields on the form.
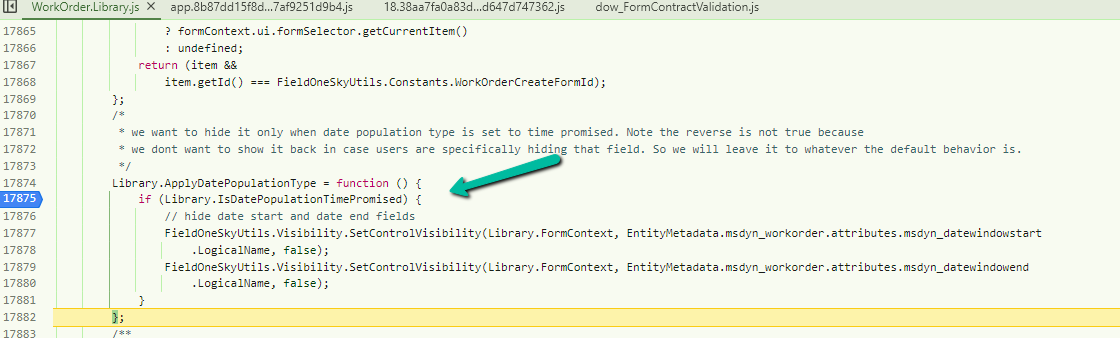
Below is the corresponding out-of-the-box script that shows/hides the fields.
Also worth noting is that these fields are deprecated, as Microsoft recommends using Time From Promised and Time To Promised fields instead to define the date window in which a job is performed.
When setting up an agreement, you can control how work order scheduling works with pre-booking and post-booking flexibility. These fields define a window of time for scheduling each work order.
There are two options for how this window is used:
Date Window Start/End: The agreement populates these fields with the scheduling window. This makes the “Date Window Start/End” section visible on the work order itself.
Time From/To Promised: The agreement doesn’t directly affect these fields, but the scheduling window is considered during the scheduling process. “Date Window Start/End” will be hidden in this case.
This setting essentially determines where the scheduling window information is stored and displayed for work orders generated from this agreement.
While trying to set the Start Location / End location to the Resource Address for Bookable Resource, we might get the below error
Exception Message: The latitude or longitude for the User record associated with this resource is invalid. Please provide a valid latitude and longitude and then set the start and end location for this resource again.
Here as the error message specifies we need to specify the latitude and longitude value for the corresponding resource type record associated with the Bookable Resource.
In the case of Contact, we can use the Geo Code option, and specify the address to populate the Latitude and Longitude details.
In the case of a User record we do not see the Geo Code option so there we can manually specify the values for it.
Now we will be able to update the Start / End Location as Resource Address in our Bookable Resource record, without getting any error.