Recently while working in data migration project, we had a requirement to insert a record in CRM from SQL Database and assign it to the team insert.
For e.g.
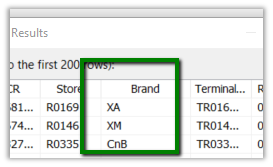
We had a Transaction Record that had a Brand lookup in it i.e. n – 1 relationship.
And the Brand record had a lookup of Team in it again n – 1. So basically, while inserting the transaction record we wanted to assign the record to the team of the corresponding brand in it.
So, for this, we had to set the owner id and owner id type field while inserting the record.
And for owner id i.e. team GUID we had to do a lookup on the Brand entity.
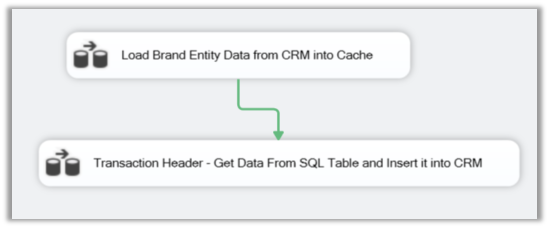
To achieve so, we did the following step
Added 2 Data flow task in the Control Flow, one for Caching the Brand entity’s detail and other for using the fetching data from SQL DB, Lookup Transformation task and inserting the data into CRM.
For the first data flow task,
We added the Dynamics CRM Source and fetched the Brand Name and Team Lookup’ GUID field.
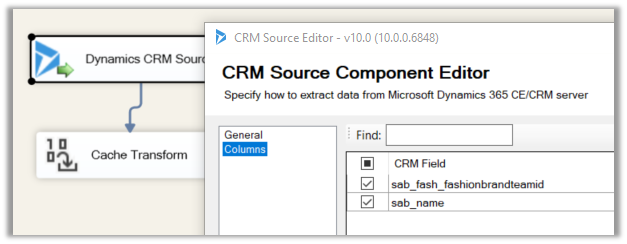
name field which will be used for mapping and teamid field whose value we need from it.
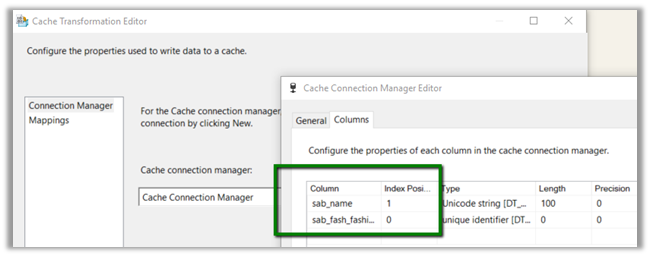
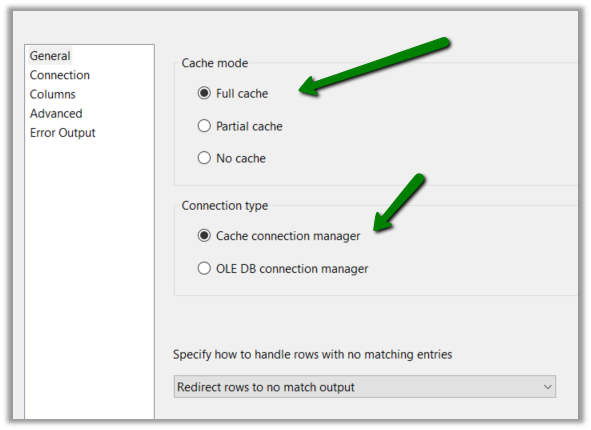
Then we added a Cache Transform task with following details,
Now for our second data task flow,

First, we added the OLE DB Source to fetch data from the source SQL View, having Brand (string) column in it.
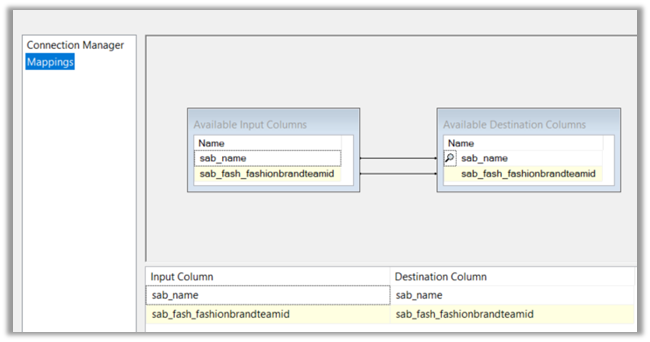
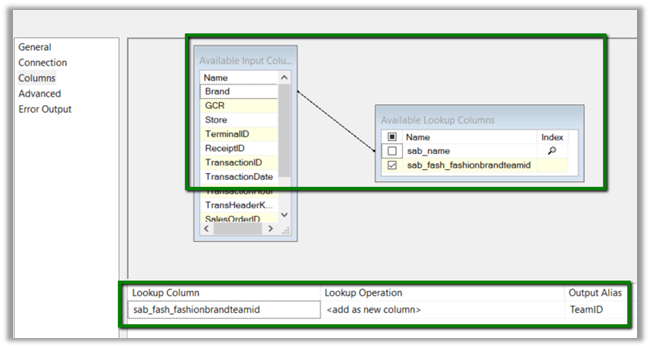
Then we added the Lookup Transformation task with following properties,
Setting Connection to Cache Connection Manager defined earlier.

Now the most important part, the columns properties. Here we defined the mapping between the Brand field of the SQL View and name field of the Brand Entity of CRM and selected the teamid field as the lookup column whose value we would like to fetch as shown below.
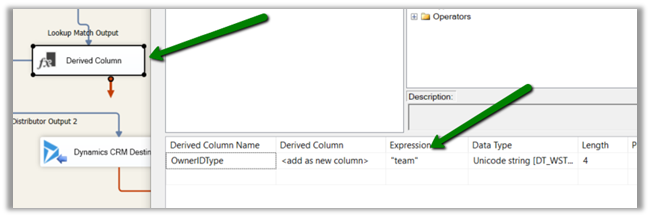
Then we added Derived Column task to add one more column for specifying ownerid type field to be used in CRM Destination Component while mapping. We defined the field type as string and hardcoded the value as “team”.
And as the final step mapped the above fields to the corresponding ownerid and owneridtype field in CRM Destination Component for Create operation.
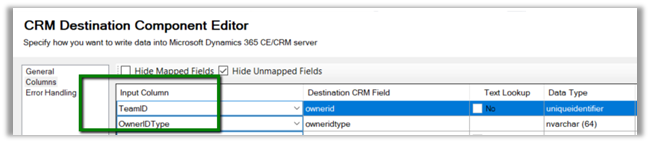
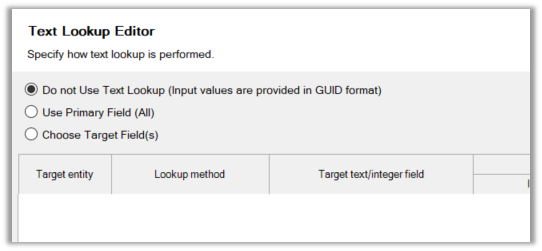
For ownerid, we selected the below option as we were setting the GUID of the team.
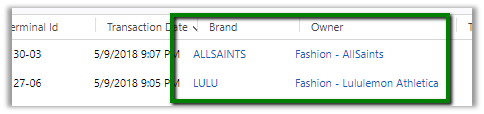
On running the package, we can see the transaction records getting created and properly assigned to the corresponding team of the brand.
The transaction record with Team set as Owner.
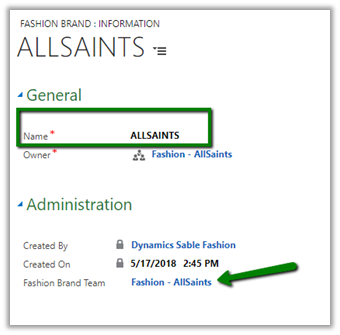
Brand record with Team lookup in it.
Hope it helps..