Save and New Button in Quick Create Form – 2019 Release Wave 2 (Unified Interface)


With 2019 Release wave 2, now we have Save and New button available in Unified Interface.

However, for now, it is limited to the Quick Create Form.
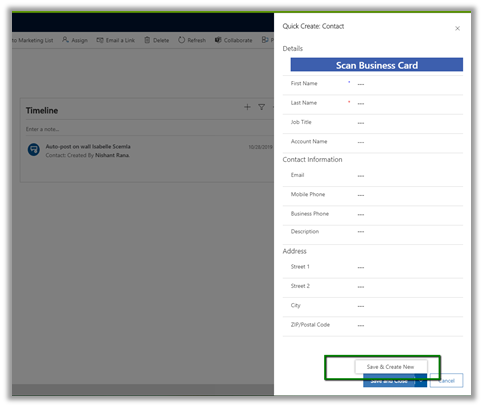
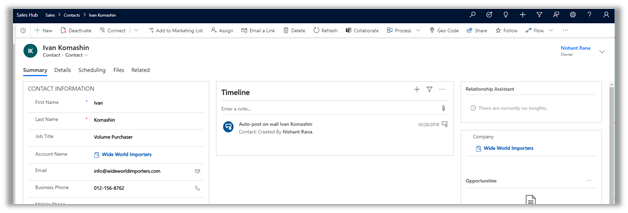
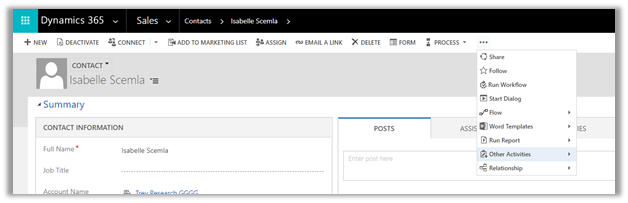
For our main form, for both legacy web client and unified interface form, the Save and New button is not available in the command bar.

  • Unified Interface –

  • Legacy Web Client –

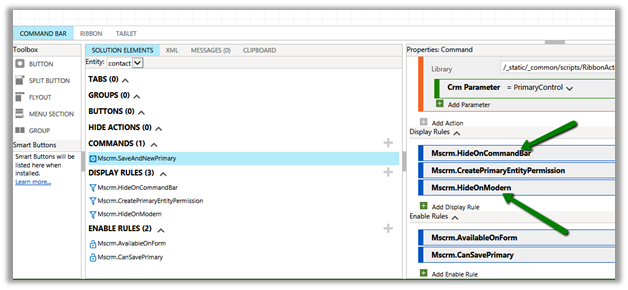
Let us try unhiding the button using our favorite XrmToolBox Plugin – Ribbon Workbench.

Select the Save & New button on the form and click on the Customize
Button.
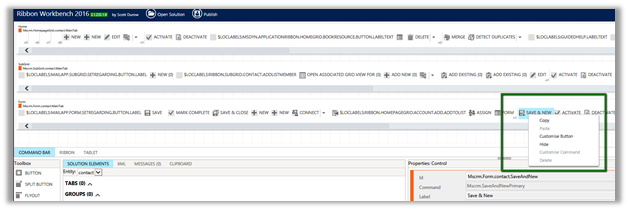
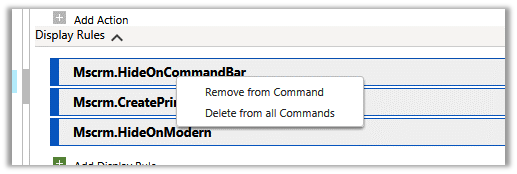
Remove the below display rules and publish the changes

  • Mscrm.HideOnCommandBar
  • Mscrm.HideOnModern

We now have the button available in our legacy web client’s form.
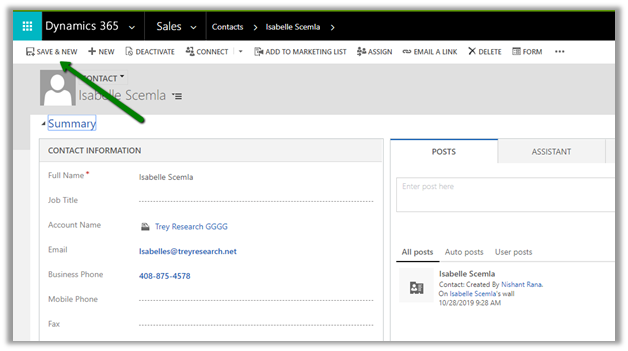
And also, it is working as expected.
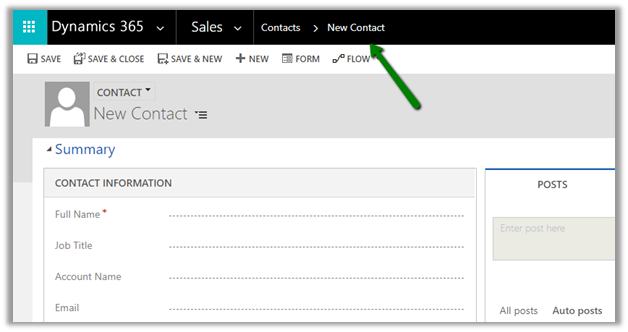
We can also use the shortcut CTRL + Shift + S
to save the form and open a new form for our legacy web client form.

We also have the button appear in our new Unified Interface however it throws the below script error.
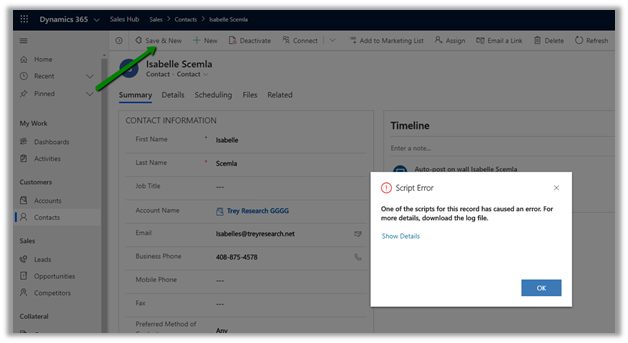
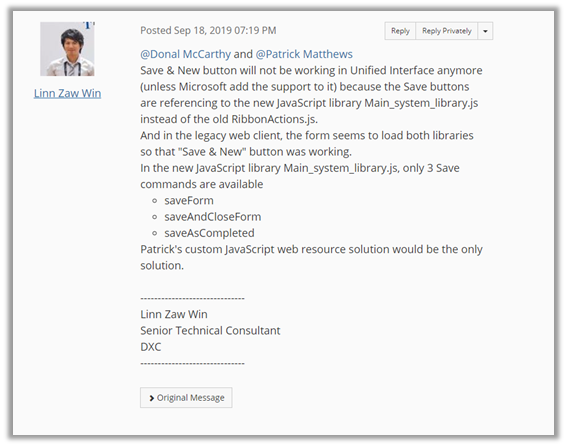
The below answer from Linn Zaw explains the reason for it not working in Unified Interface.
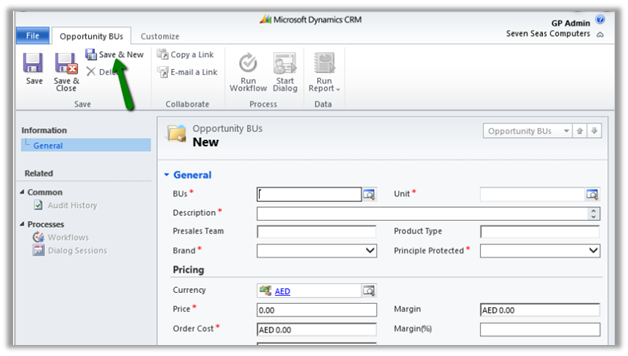
Below is the screenshot of the form (with Save & New button) in CRM 2011 before it was hidden in the product starting from CRM 2013 with the introduction of the new command bar.
Hope it helps..

Advertisements

Contextual Email Communication in Dynamics 365 for Sales – 2019 Release Wave 2 (Unified Client)


The new capability allows salespeople to write an email in the context of the record. Email opening in the non-blocking pop window allows salespeople to refer to the data without navigating away from it, easily attach documents and can leave the drafts record open.

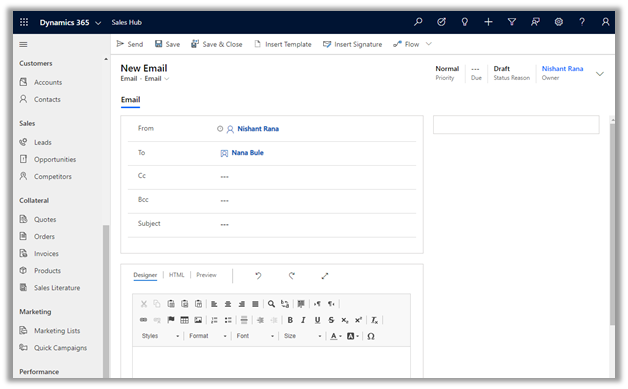
The existing experience à

Clicking on the email

takes us to the new entity create form

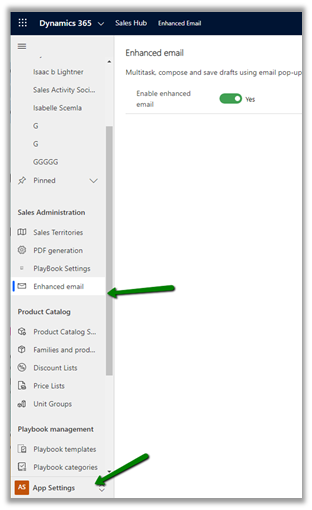
To enable the new experience, navigate to App Settings and apply the Enhanced email

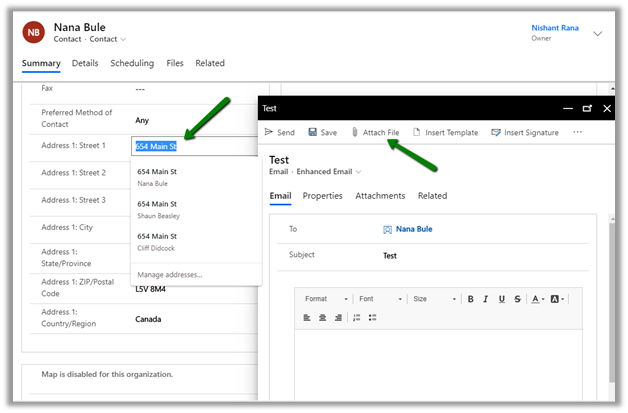
Now with new enhanced email, we can easily refer/copy values from the main record, attach files, insert templates, etc.

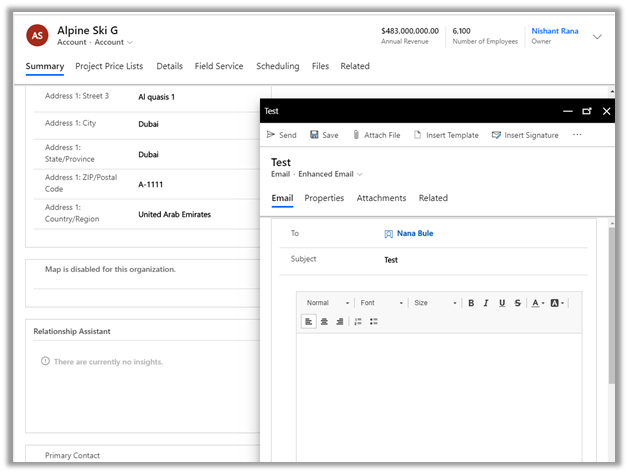
We can also navigate to other records, with the popup email windows still open.

Below we have navigated to the account record and we still have our email window open.

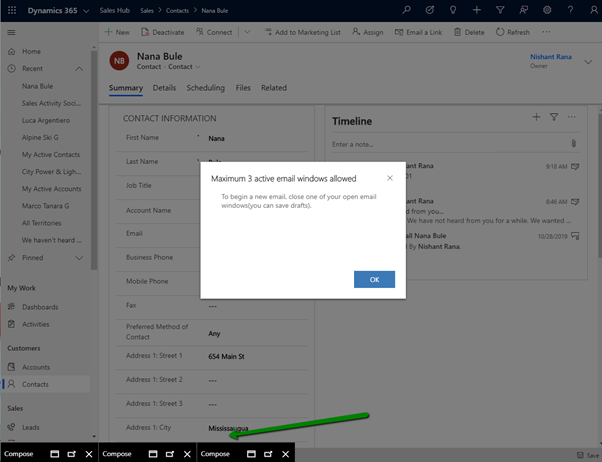
A salesperson can also have multiple active draft emails open simultaneously.

Thus, the new enhanced contextual email feature makes working with email much more intuitive / productive for the salesperson

Hope it helps..

Lead Enhancements in Dynamics 365 for Sales – 2019 Release wave 2


Below are some of the capabilities added in Dynamics 365 for Sales with lead management.

It applies to both Unified Client Interface and Classic Web Client 

When creating a new lead, for Qualify sales stage,

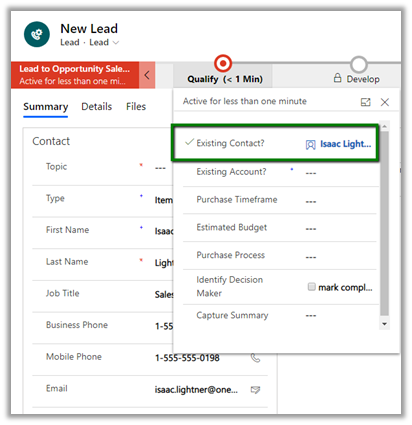
on the selection of Existing Contact

First Name, Last Name, Job Title, Business Phone, Mobile Phone, and Email field will be populated

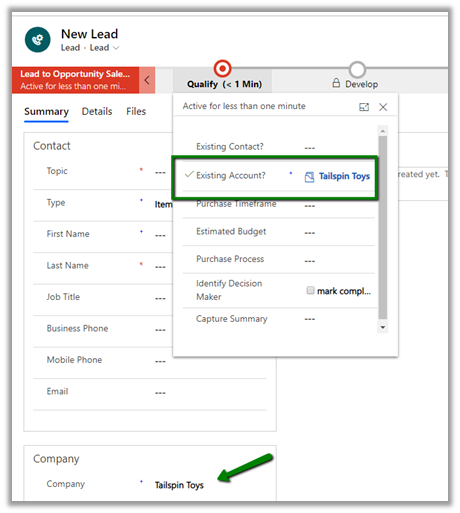
On selection of Existing Account

Company Name will be populated.

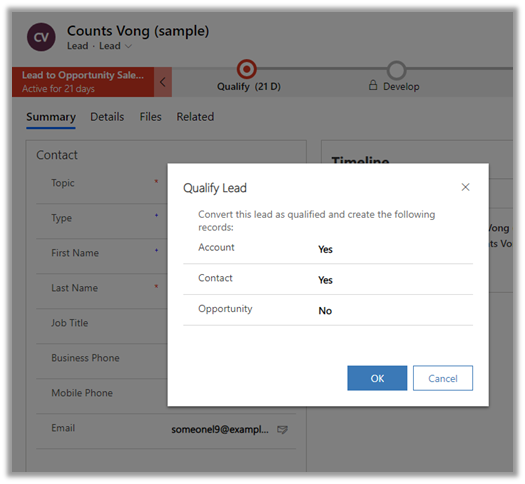
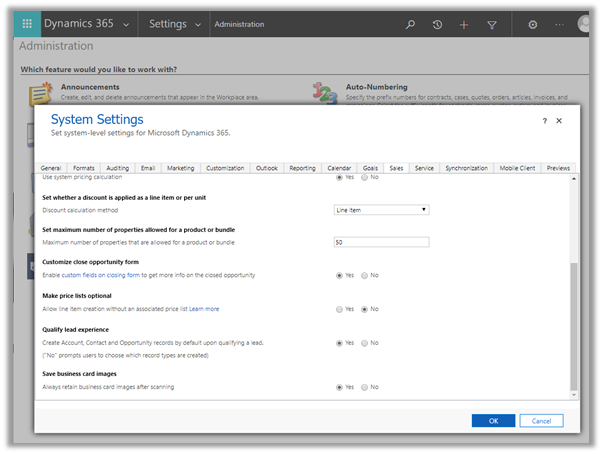
Ability to choose which records to create (Account, Contact and / or Opportunity)

To enable go to Sales Tab of Administration à System Settings

Qualify lead dialog box à

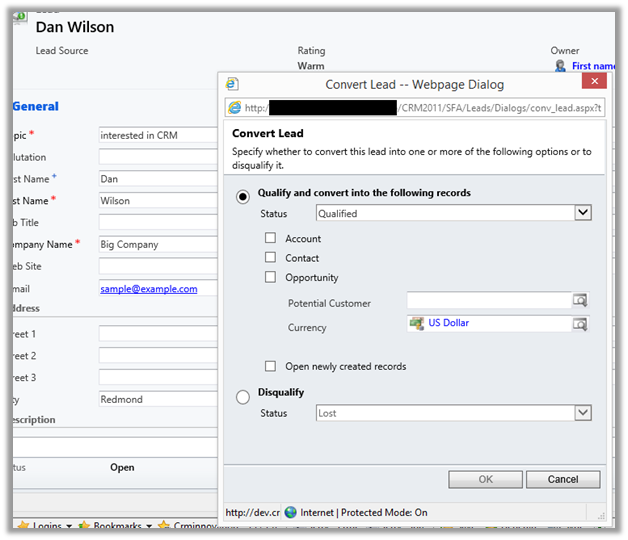
The Qualify Lead dialog box was always part of the product which was removed later, and the contact, account and opportunity records were auto-created based on certain conditions which are nicely explained here.

https://www.crminnovation.com/blog/qualify-lead-crm-2011-vs-crm-2015/

https://ledgeviewpartners.com/blog/how-to-qualify-a-lead-in-microsoft-dynamics-365-crm/

This is how the old dialog box looked like.

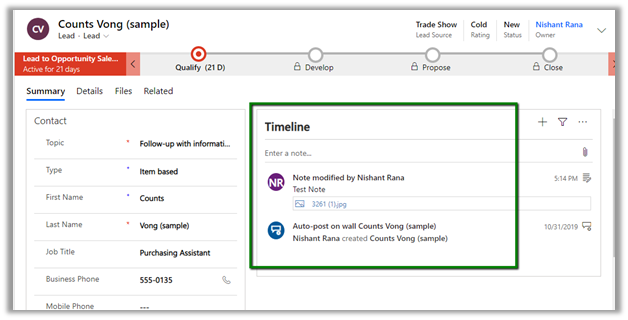
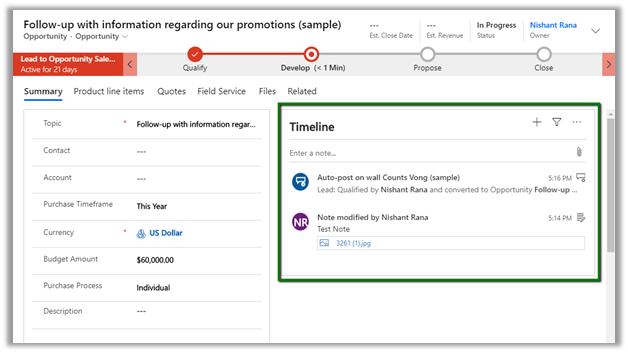
Notes and attachments associated with the lead are displayed in the opportunity record that is qualified from it.

Lead Record à

Opportunity records created from the lead have the notes associated.

Thus, these capabilities bring faster capture of lead information, more control of which records to be created as part of lead qualification and also quick reference on the opportunity records created through lead qualification.

Hope it helps..
Customize Opportunity Close Dialog Box – Dynamics 365 For Sales


With the 2019 release wave 2 plan, finally, we can customize the opportunity close dialog box (Unified Interface only)

Enable it from the Sales tab of System Settings dialog box.

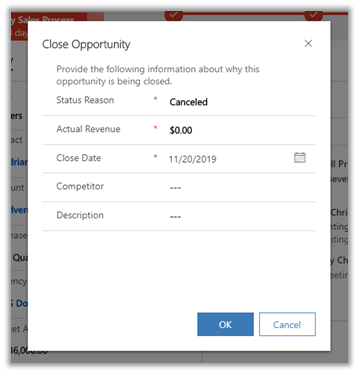
The default out of the box Close Opportunity Dialog Box à

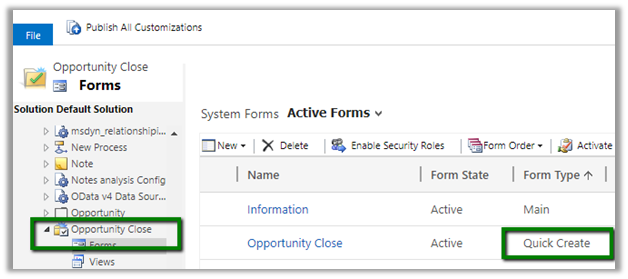
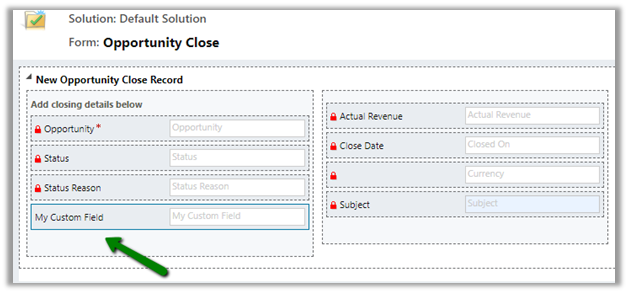
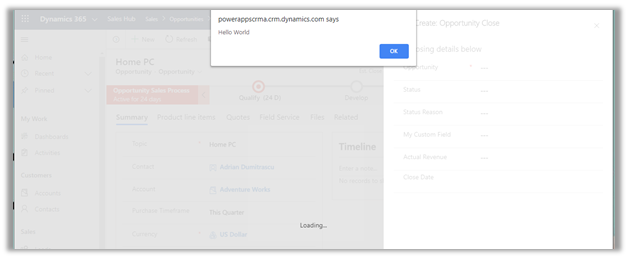
Now to add or remove fields to the dialog box, we need to customize the Quick Create form of Close Opportunity entity.

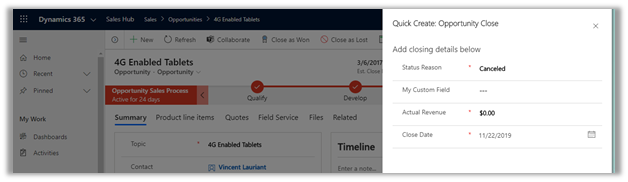
Change the ordering of the fields, added a custom field, removed Competitor and Description dialog box.

Updated Close Opportunity Dialog Box

We can use client-side validation on it

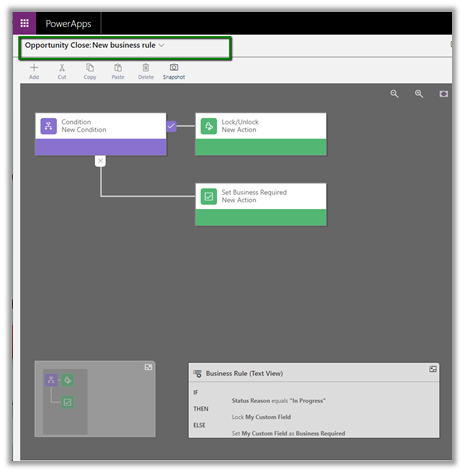
We can specify business rules

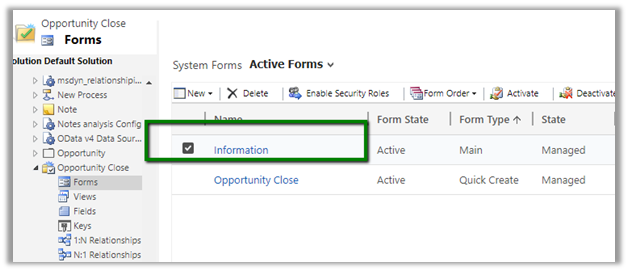
We can also customize the Main (Information) form.

This form can be used to check the details of closed opportunities.

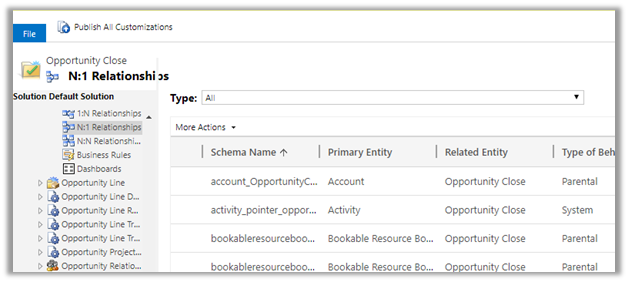
Entity Relationships cannot be customized.

Great to see the feature available as it was one of the most requested features in the product.

https://experience.dynamics.com/ideas/idea/?ideaid=4792dfee-121a-e611-80e2-c4346badc228

Hope it helps..
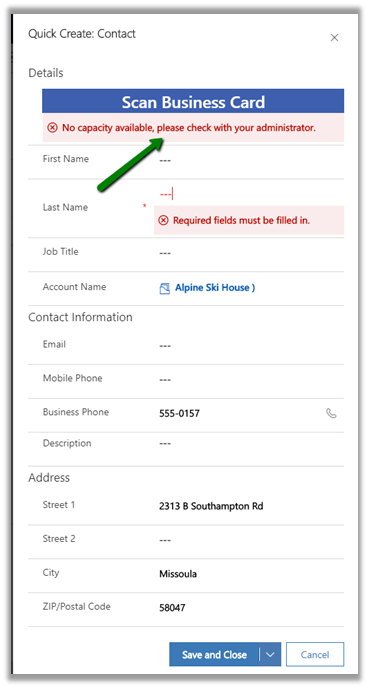
No capacity available please check with your administrator error while using business card scanner control in Dynamics 365 Sales


We might get below error while trying to use scan business card feature in Dynamics 365 Sales

This is because as pre requisite it requires AI Builder licensing.

https://docs.microsoft.com/en-us/ai-builder/administer-licensing

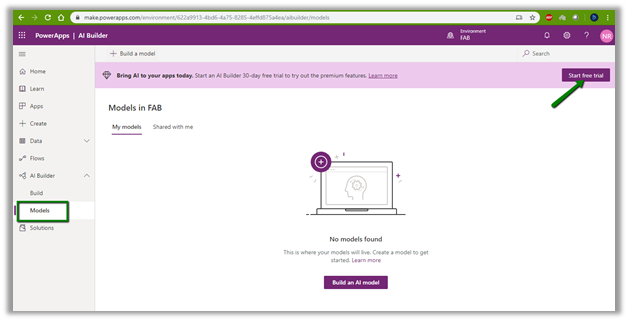
For enabling the 30 day

free trial login to PowerApps

https://make.powerapps.com/

For the AI Builder, start the free trial.

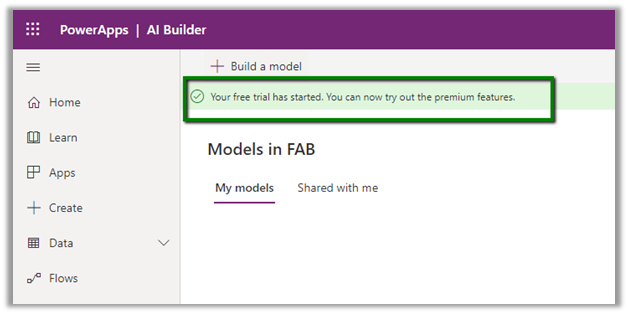
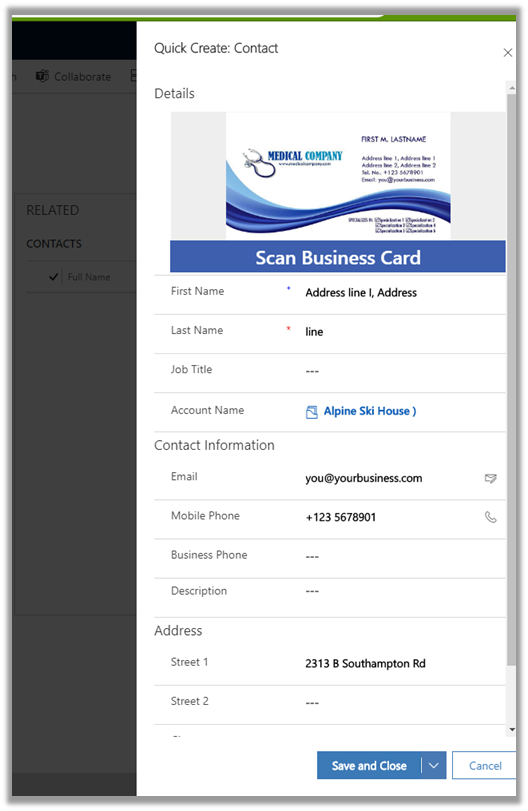
Once enable we can see the business card scanner control working properly.

Hope it helps..
Export Dynamics 365 Data to Excel – different options


There are different options available for exporting Dynamics 365 Entity records to excel. The simplest being Export to Excel feature available in the product.

However, we might run into limitations like below

https://nishantrana.me/2018/08/15/maximum-file-size-exceeded-while-using-export-to-excel-in-dynamics-365-ce/

The easiest way of overcoming these limitations is to use the XrmToolBox plugin – Export to Excel

https://dreamingincrm.com/2015/05/30/new-xrmtoolbox-plugin-export-to-excel/

Other options include writing a windows executable that uses Dynamics 365 Web API for exporting data to excel format.

Use Microsoft Flow and export it to CSV file.

Create an SSRS report with required records \ columns and use Export to excel functionality.

Using KingswaySoft SSIS Integration Toolkit for Microsoft Dynamics 365 and other 3rd party data integration tools.

One such 3rd party tool that makes it easy to export the data to excel and also to schedule is Skyvia’s Export package.

Let us see a simple example to understand how it works.

Here we are planning to export a custom entity record that has 1835629 records.

Here we have already created the required Dynamics CRM Connection.

Navigate to the Data Integration section and create a new Export Package.

For target, we have .csv as the file format. For Target, we have various options of either saving it locally, FTP or in cloud services.

Here we can filter the records, specifying an ordering for them, select the columns we want to export.

Click on Save to create the package. Alternatively, we can also specify the schedule for the package to run at.

Click on Run

We can see the package running and its status in the Run History section.

Each of the options for exporting the excel has its own pros and cons. For e.g. OOB Export to Excel feature has a limitation with the number of records that can be exported, with KingswaySoft we need someone skilled in SSIS to write the package and also, we need to buy the license if we need to schedule it. With other 3rd party apps also we would need to buy the license.

Hope it helps..
Nishant Rana's Weblog

Everything related to Microsoft .NET Technology

Skip to content ↓