You have probably used the copy environment feature in the Microsoft Power Platform admin centre to copy data and customizations between environments.
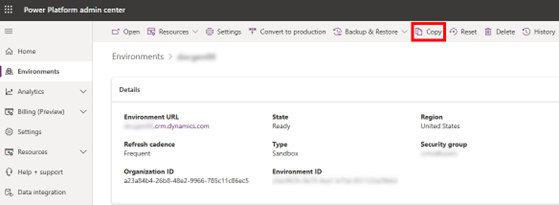
However, there is a crucial aspect to consider data privacy and security. When transferring data, especially to sandbox environments which typically have less stringent access controls, there is an inherent risk of sensitive information becoming exposed to unauthorized personnel. Such scenarios pose a threat to compliance with stringent data privacy regulations, including GDPR, HIPAA, and CCPA.
However, there is no out-of-box to mask data. Here comes Datamask App which helps with data protection by replacing sensitive information with dummy data. 
Diving into the Strength of Data Masking
In the Power Platform sandbox environments, developers, and testers often grapple with the challenge of handling real data without compromising privacy and security. The Data Mask App steps in as a powerful solution to this dilemma. Its primary mission? To mask, anonymize, and obfuscate Dataverse data, offering a shield against potential data breaches.
How does Data Mask app work?
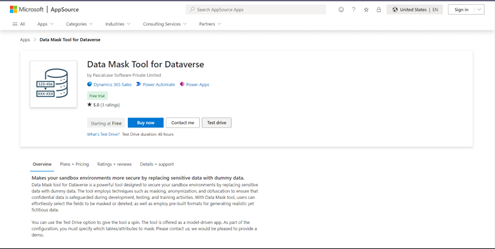
- You can download the app from Microsoft AppSource, Download Data Mask app, and the app is available as managed solution.
- Upon importing the solution, you need to configure the data mask app.
- With configuration, users can selectively mask specific fields, choosing from options, such as replacing with dummy names, generating random strings, or employing asterisks for a discreet approach.

Configuration settings for masking Account number field in Account table.
- Various configuration options for table records provide versatile ways to protect sensitive data configurations, it collectively empowers users to customize data protection strategies based on specific needs and compliance requirements.
- This dynamic approach ensures that sensitive information, like full names and contact details, is transformed into a secure and privacy-preserving version while retaining its integrity.
- When a data mask run is created the masking process starts and we can track the masking of records in the logs section.

Free plan and paid plan
If you would like to test, there is a ‘Test Drive’ option. Otherwise, you can install the app in your environment, but there is a 1000-record limit. If you would like to buy the tool, you can contact https://pascalcase.com for a license.