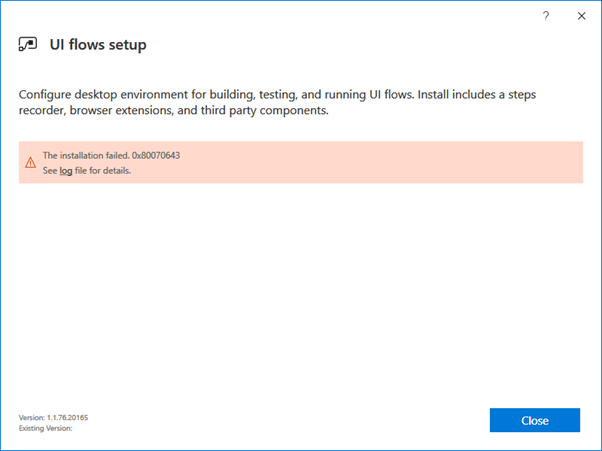
While trying to run the UI flows setup we got the below error
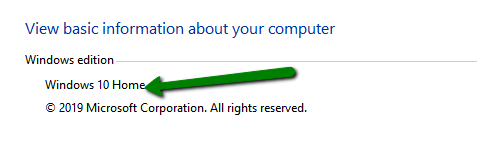
It was because we were trying to install it on Windows 10 Home
https://docs.microsoft.com/en-us/power-automate/ui-flows/setup#limitations

Hope it helps..

While trying to run the UI flows setup we got the below error
It was because we were trying to install it on Windows 10 Home
https://docs.microsoft.com/en-us/power-automate/ui-flows/setup#limitations
Hope it helps..

Let us continue with our previous post where we loaded the data from on-prem SQL DB to CDS using dataflows.
Now suppose we have another table (or any other data source) having the contact details, which we would like to append/merge along with our previous data source.
For simplicity, here we have created a copy of the existing table and added a new record with different values.

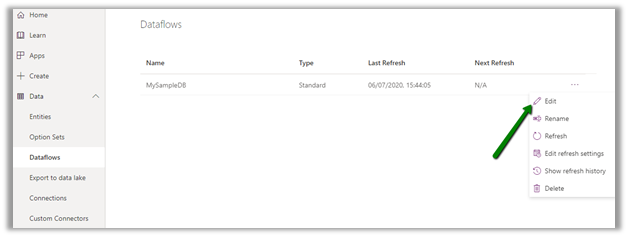
Edit the existing data flow created earlier.
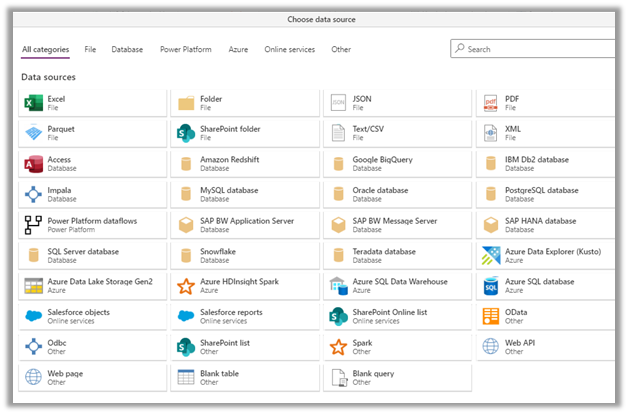
Click on Get data and select the SQL Server database.

*The other data sources that are available.
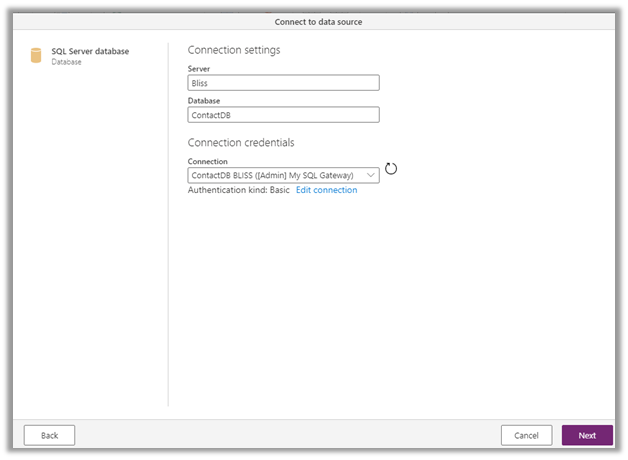
Specify the connection details to connect to the database.
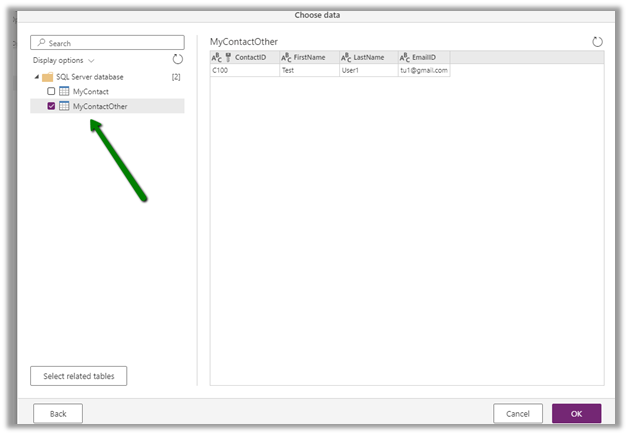
Select the new table that we had created.
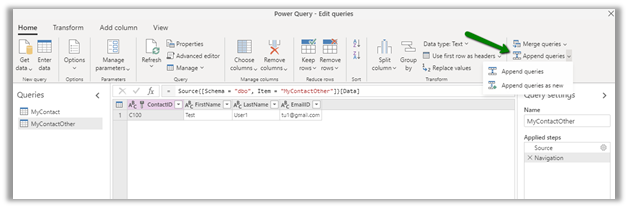
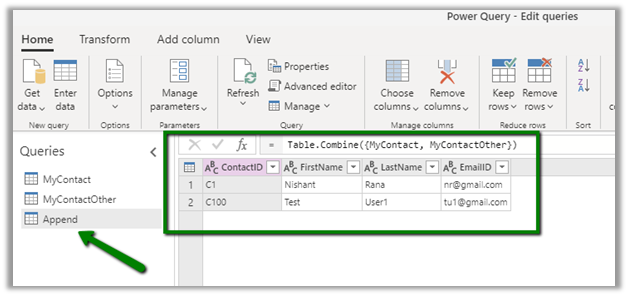
Next click on Append queries, select Append queries as new, to create a new query.

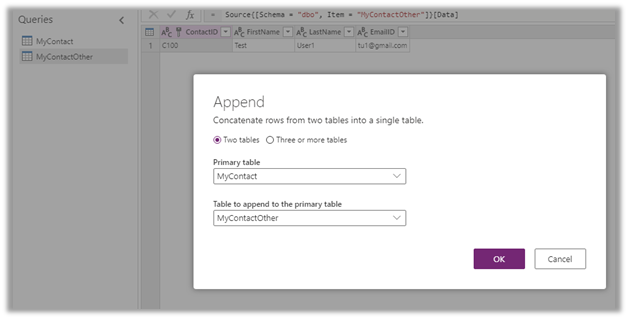
Specify the primary table and table to append.
The new Query by default named Append will have the data from both the tables combined i.e. appended, which can then be used to load data to the existing contact entity or load to a new entity.
Specify the mapping in the data flow that completes the configuration of the dataflow.

That was about Append queries, now let us take another simple example to see Merge queries in action.
Again let us create one more table that has additional detail (e.g. Mobile Number) for the contact records. Just for simplicity, we are creating a table else it could be any of the supported data sources.
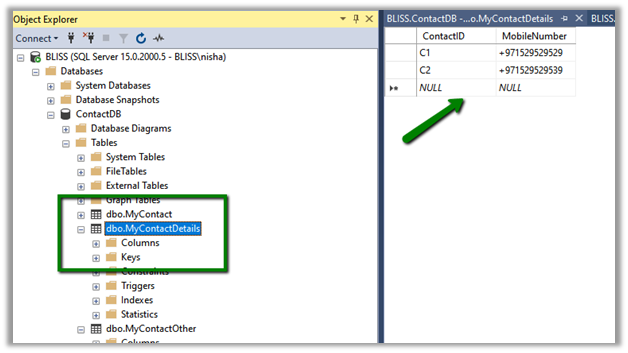
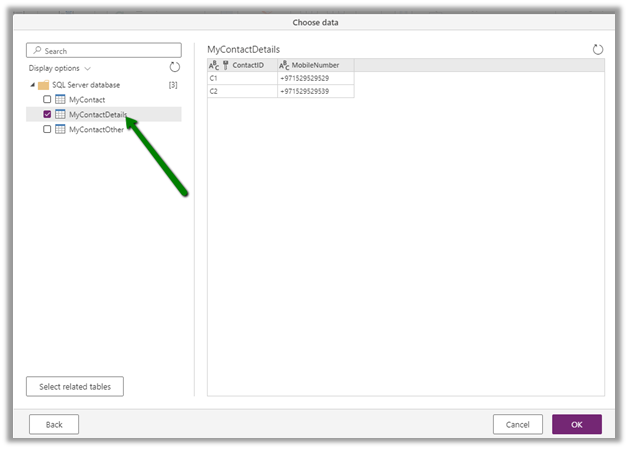
Let us edit the dataflow created earlier, and select Get data to get the data from the SQL Server database.

Here we have selected the new table Contact Details.
This time select Merge queries.


Specify the left table and right table for merge and the join type.

Select the join keys column.
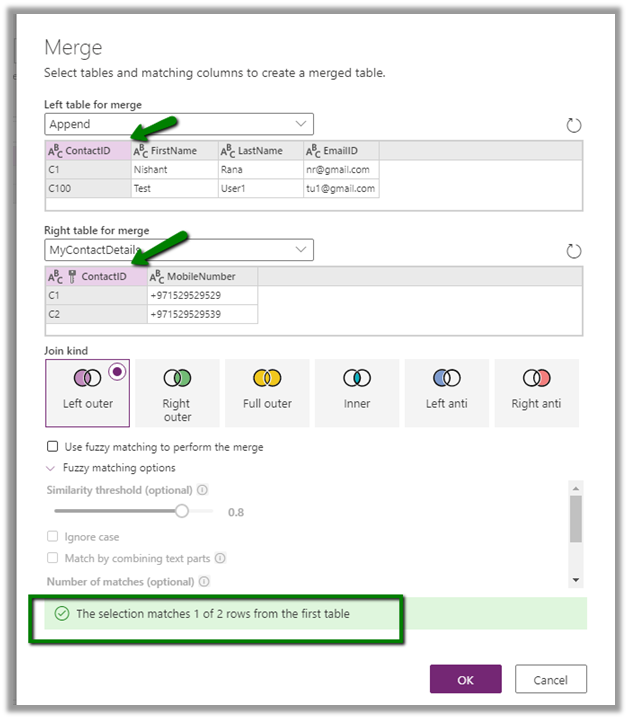
Here we have opted for Inner Join.
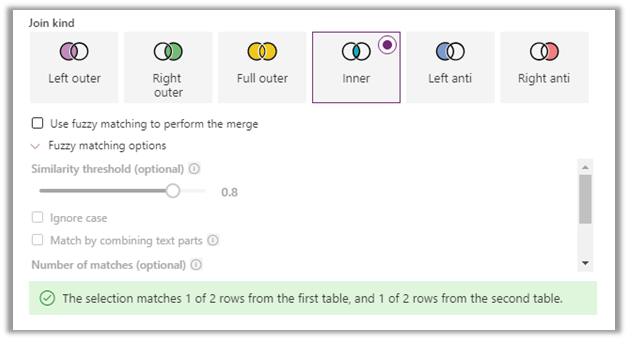
The result includes the 1 matching row.
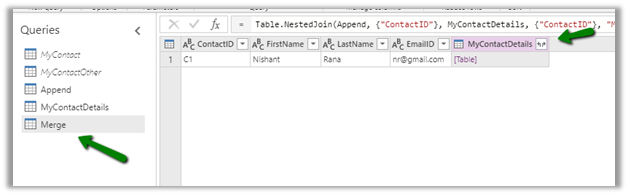
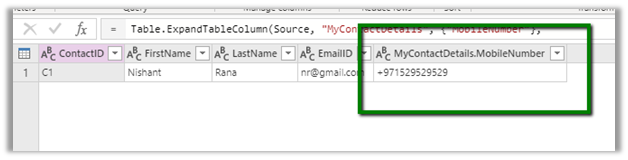
Expand the MyContactDetails column to populate the MobileNumber data.

Now with the data transformed, click on Next and define the mapping using the new merged query.
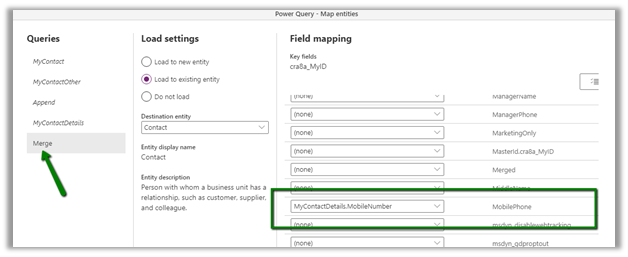

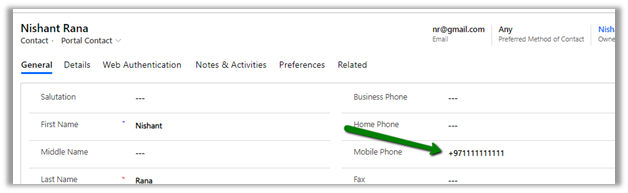
After a successful refresh, we can see the mobile phone field updated.

Let us update the value again for the mobile number field and run the refresh.
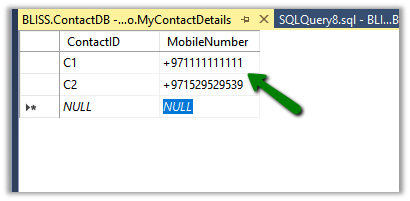
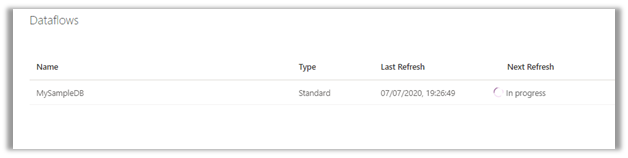
We can see the value updated for the CDS contact entity.
If the tables are already related using foreign key relationship for e.g. Contact and Contact Details, the Get data will load the related table, without any need of merge queries.

Refer below articles for more details on Append and Merge in Power Query.
https://radacad.com/append-vs-merge-in-power-bi-and-power-query
Hope it helps..

In the previous post, we covered conditional access based on the device platform, here we’d look into how we can use the network location to block the access.
We can either use IP ranges or Countries / Regions for defining the location.
Login into the Azure Portal
Navigate to Azure Active Directory – Security – Named locations to define the location.

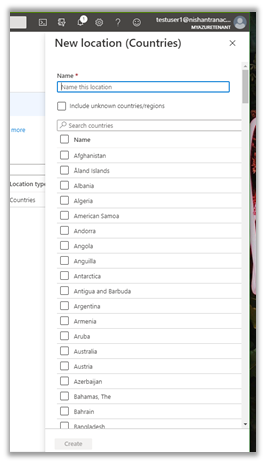
Here we are adding a new countries location record.
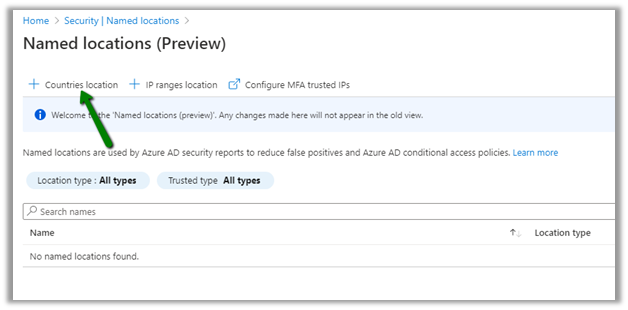
For the new location, we have selected India and UAE.

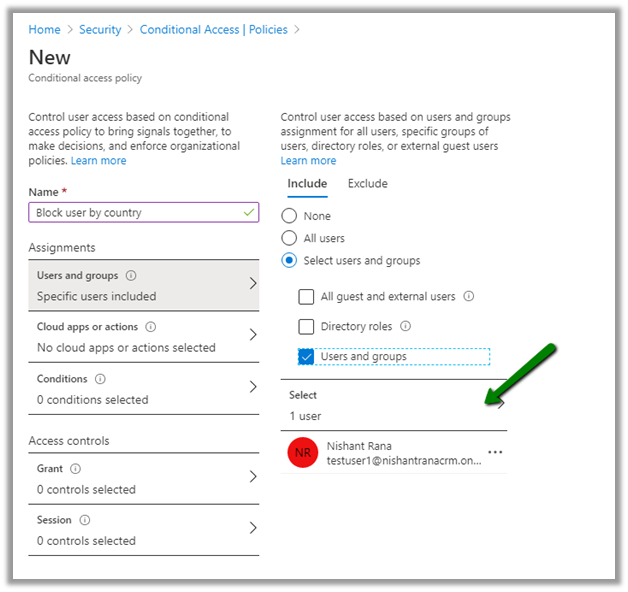
Next click on Conditional Access to define a new policy.

For Users and groups, we have selected a user named testuser1.
For Cloud Apps or actions, we have selected Common Data Service.

For Conditions, we have specified Locations condition with the Restricted Locations record that we had created earlier.

For Access Controls, we have selected Block access.
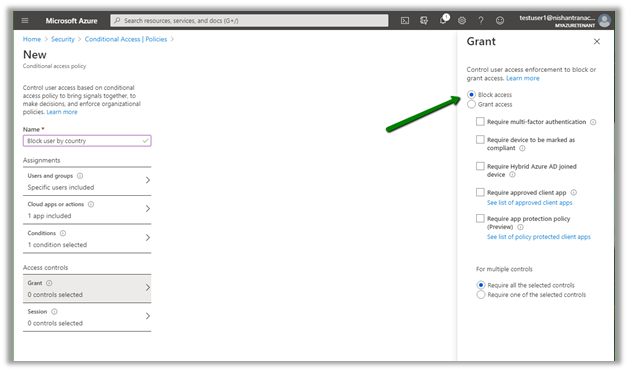
Enable and create the policy.
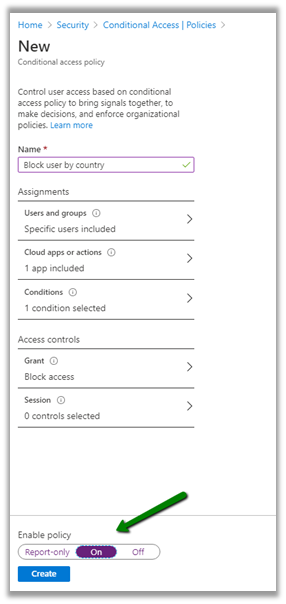
Before the policy was enabled, test user1 was able to access Dynamics 365.

After enabling the policy if we try accessing Dynamics 365 from either UAE or India location, we’d get the below message.

Same for the Dynamics 365 for Phones app.

Test user 3 to which policy doesn’t apply can still access Dynamics 365.

Hope it helps..

Recently we were exploring Azure AD Conditional Access, through which we can define and enforce the organization’s policies regarding access to its resources.
Get more details here
https://docs.microsoft.com/en-gb/azure/active-directory/conditional-access/overview
Here we will define a simple conditional access policy through which we are restricting a user’s access to Common Data Service through Android OS, but allowing the same through the other device platforms.
Login to Azure Admin Portal
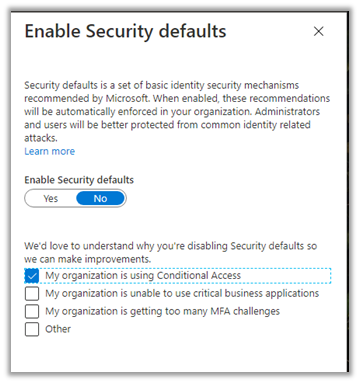
Before we can specify a new policy, we need to disable the Enable Security defaults.
Navigate to Azure Active Directory – Properties and click on Manage Security defaults link

Set “Enable Security defaults” to No
Next, Navigate to Security – Conditional Access

Activate the Azure AD Premium trial required to configure conditional access.

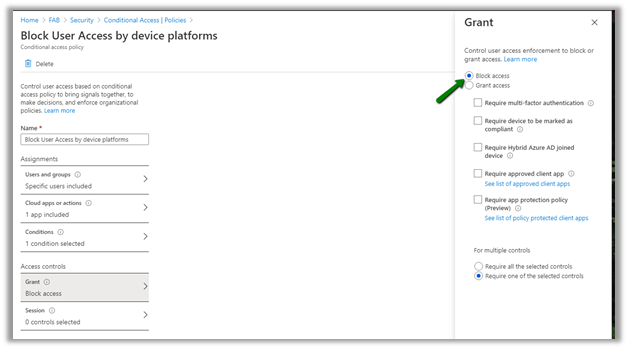
Create a new policy.


For Access Controls – Grant we have selected Block Access.
Enable the policy and save.


Let us login through the browser with the testuser1 in windows

Now let us try the same from the Dynamics 365 mobile app from Android.

And the same experience from browser within the Android.

As expected the users is not able to access Dynamics 365 from Android device, and the same user can access from the browser and Dynamics 365 Tablet app from Windows as shown below.
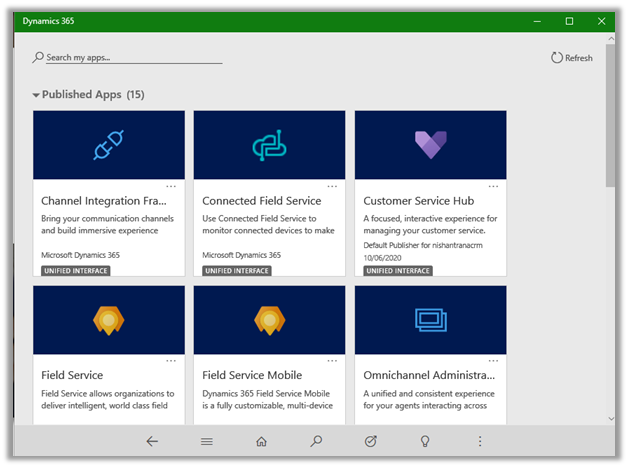

As expected, the user is not able to access both the browser as well as the app from the windows.
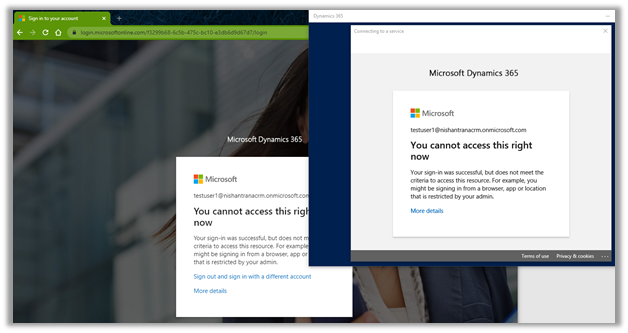
Update the policy and specify the below Client Apps condition for that
“Modern authentication clients”
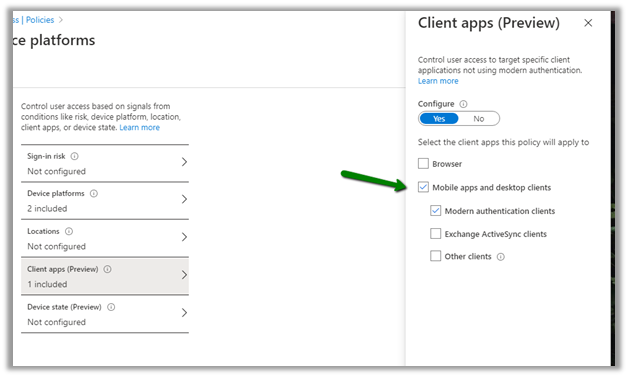
As expected, the user can access through the browser but not the app.

The same experience from within the Android phone.
From browser –

From the Dynamics 365 Mobile App –
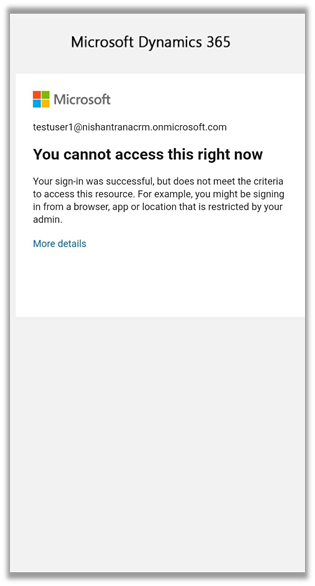
Thus we saw how easy it is to get the policy defined and enforced using Azure AD Conditional Access.
Understand the best practices with regards to Conditional Access in Azure Active Directory
https://docs.microsoft.com/en-gb/azure/active-directory/conditional-access/best-practices
Hope it helps..

In the previous posts, we learn about provisioning, setting up a live chat, and WhatsApp channel.
Posts on Omnichannel for Customer Service (Dynamics 365)
In this post, we’d see how to set up an Entity records channel.
Through the Entity records channel, we can route cases as well as other entities to the omnichannel agents.
To enable an entity for Routing, enable Queues for that entity.
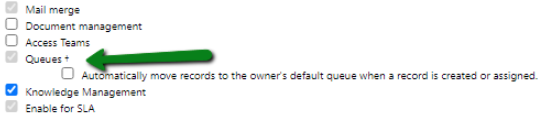
Leave the “Automatically move records to the owner’s default queue …” checkbox unchecked for automatic distribution of records to work.
We need to make sure Unified Routing is switched on and the record type or entity is enabled for record routing.
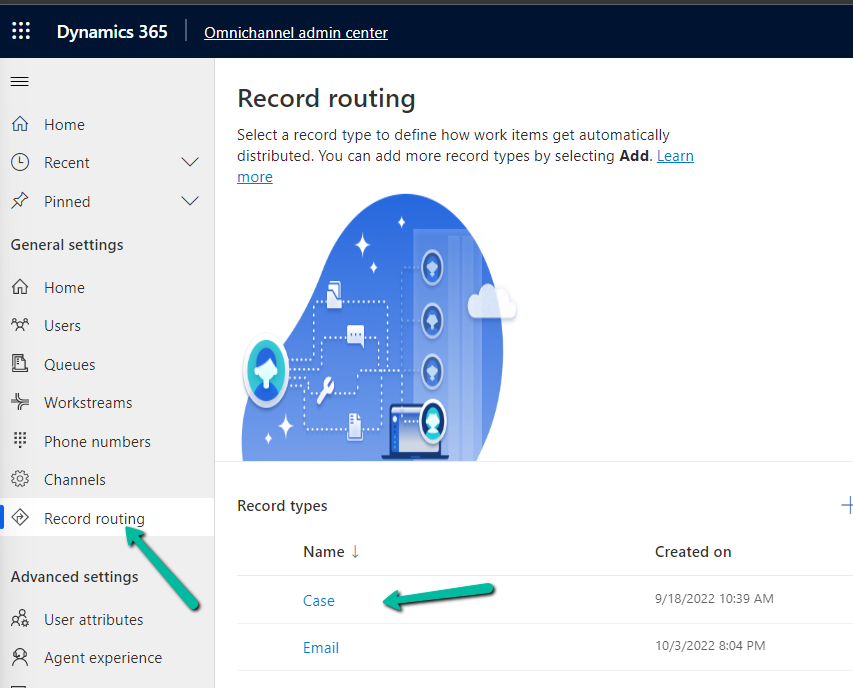
Inside the Omnichannel Administration app, navigate to Channels à Entity Records to create a new entity record channel.

A default workstream will be created automatically, we can also select an existing workstream.

Click on the Routing Rules tab to define the routing rule.

Add a new rule item i.e. for case type as a problem, route the record to Complaints Queue.

Activate the routing rule created.

Let us create a new case of type problem and apply routing to it.

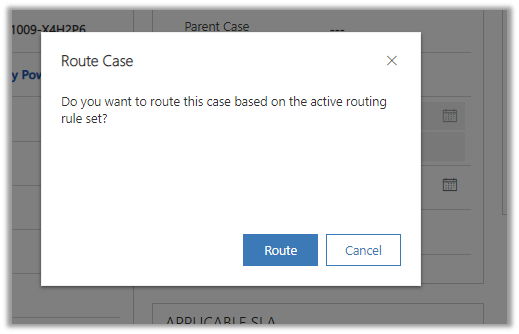
We can see the records added to open work items for agents to pick as defined in the CDS entity workstream.


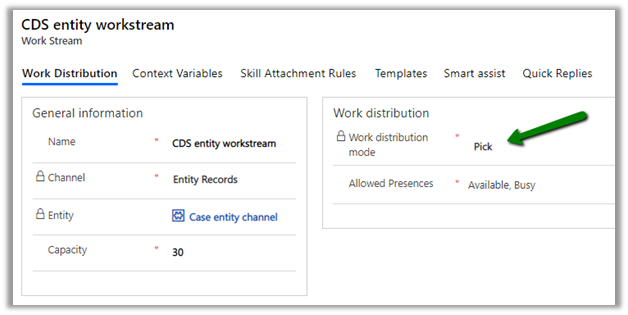
We can also set the Work distribution mode to Push that would send the notifications to the agent

To automatically route the record we can use Power Automate to define a flow that calls the Apply Routing Rule action.
Refer below blogs to learn in-depth about the Omnichannel
https://neilparkhurst.com/2020/05/29/omnichannel-for-customer-service-collection/
https://thecrm.ninja/omnichannel-for-dynamics-365/
along with Microsoft Docs
https://docs.microsoft.com/en-us/dynamics365/omnichannel/omnichannel-customer-service-guide
Hope it helps..

In the previous post, we provisioned the Omnichannel for Customer Service and had configured the Chat channel.
Posts on Omnichannel for Customer Service (Dynamics 365)
In this post, we’d see how to set up the WhatsApp channel (preview)
Within the Omnichannel Administration app, navigate to Channels à WhatsApp and create a new WhatsApp account record.
Provide the required consent

As a first step, let us set up the Twilio sandbox account to be used for WhatsApp channel configuration.
Create Twilio WhatsApp account
https://www.twilio.com/whatsapp
Navigate to console and copy the value of Account SID and AUTH TOKEN
https://www.twilio.com/console
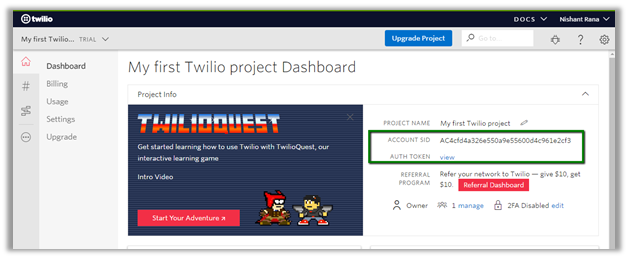
Specify Account SID and Auth token of the Twilio account created in the new WhatsApp channel record.
Saving the record will generate the Twilio inbound URL, copy that URL.

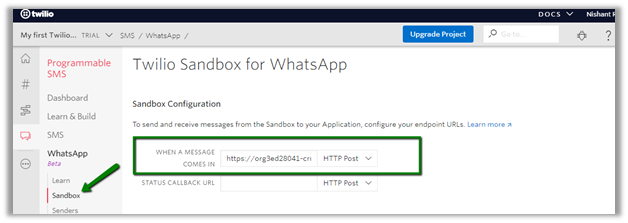
Navigate to Twilio Console à Programmable SMS à WhatsApp and activate the sandbox.

Follow the instructions to configure the sandbox.
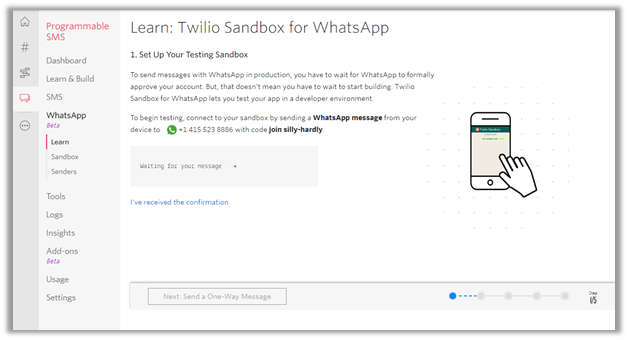
On successful confirmation, select Sandbox in the navigation menu and paste the Twilio Inbound URL generated eariler in the “When a message comes in” text box
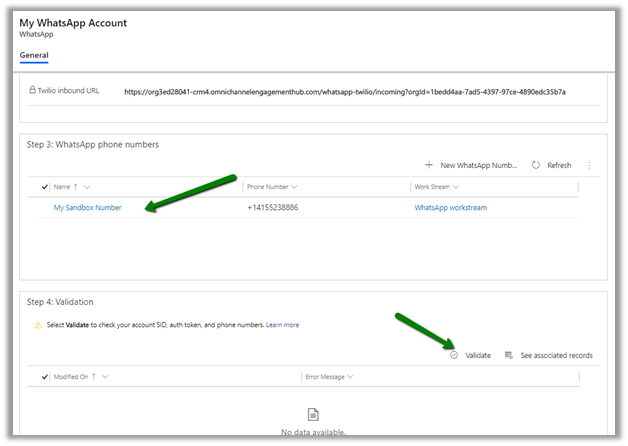
Back in our WhatsApp channel record, add the sandbox WhatsApp number configured

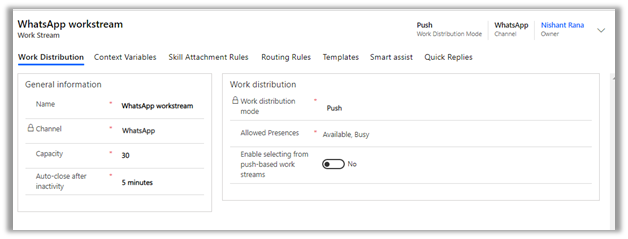
Specify the Twilio Sandbox WhatsApp number and select the out of the box WhatsApp workstream.

The default WhatsApp workstream
Next click on Validate to check the configuration
With validation successful now we are good to test it.

Send the message to the Twilio sandbox number

The agent will receive the notification from the WhatsApp channel configured.
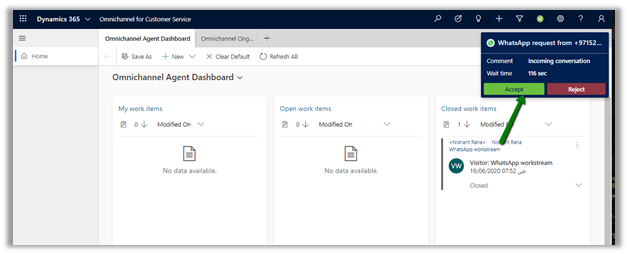
On accepting the notification, Agent can now communicate with the visitor.
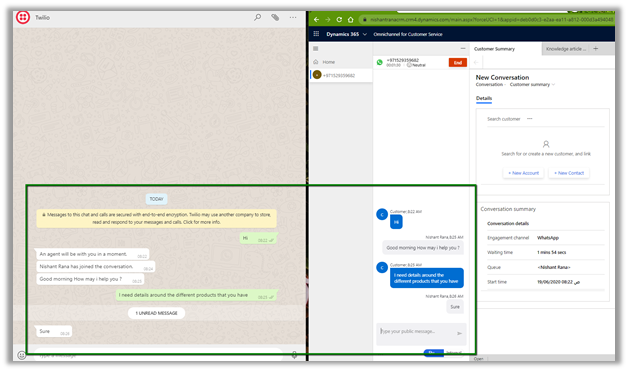
Thus, we saw how seamless it is to configure and get started with WhatsApp channel in Omnichannel for Customer Service.
Refer below blogs to learn in-depth about the Omnichannel
https://neilparkhurst.com/2020/05/29/omnichannel-for-customer-service-collection/
https://thecrm.ninja/omnichannel-for-dynamics-365/
along with Microsoft Docs
https://docs.microsoft.com/en-us/dynamics365/omnichannel/omnichannel-customer-service-guide
Hope it helps..