Deploy Web Resources and Plugin directly from Visual Studio using Kupp Code Analytics


In the previous posts, we covered the Overview and Key Features of Kupp Code Analytics, the installation and setup process of the extension, its Intellisense capabilities, and the analytics capabilities.

In this blog post, we will cover deploying Web Resources and Plugin directly from Visual Studio using the Kupp Code Analytics extension, which makes the process more efficient and less error-prone compared to doing it manually.

Suppose we have the following JavaScript and Image file that we want to deploy to our Dataverse / Dynamics 365.

We can right-click the file and select the option “Deploy to D365

In the Output window, we can see both the Web Resources created.

Now let us make changes to our JavaScript file – MySample.cs and click on Deploy to D365.

This time in the output window we can see the file getting updated instead of getting created.

We can see the Web Resources files created and updated for the connected environment inside the Maker Portal.

Similarly, we can deploy or update our Plugins from within Visual Studio. Here we need to make sure our Plugin Assembly is already registered.

Below we have the following assembly already registered.

Let us update our Plugin Class and select the “Deploy to D365” option for the plugin project. We have added a new plugin class called MySamplePlugin.

As expected we can see our plugin updated from the Output window.

From Plugin Registration Tool we can see our plugin assembly updated.

Hope it helps..

Advertisements

Analytics capabilities of Kupp Code Analytics


In the previous posts, we covered the Overview and Key Features of Kupp Code Analytics, the installation and setup process of the extension, and its Intellisense capabilities.

Here we’d have a quick look at the analytics capabilities of the extension.

To enable it, inside Visual Studio, navigate to Tools >> Options >> Kupp Code Analytics >> General or Extensions >> Kupp Code Analytics >> Analytics >> Configure Analytics

Set “Enable C# Code Analyzer” to “True”. Requires Visual Studio to be restarted on change.

To run the analytics, select Extensions >> Kupp Code Analytics >> Analytics >> Run

Below we can see the results of running the analytics on our sample plugin class.

Let us see the code analysis rules one be one.

PCA001: The lPlugin interface should not be used directly.

The suggestion is to use a custom base class instead to handle the call delegation, using the context information of the plugin.

PCA002: Plugins should be stateless. Remove all instances properties and values.

Plugins are instantiated on a per-request basis and handle specific execution contexts. The plugin instances are short-lived and should not be assumed to persist across multiple requests. Also if multiple plugin instances execute especially in the case of bulk operations, it could lead to concurrency issues.

PA002: Attribute collection should only include the changed attributes. Create a new entity for the update

While updating the table or entity, create a new Entity instance and only include those attributes that are changed.

PA001: Specify the required columns instead of retrieving all columns.

Specify the required attributes to be retrieved instead of all columns as this would impact the performance.

EBEA002: Late bound entities should be replaced with early bound entities.

SVA001: Entity Logicalname ‘myTable’ doesn’t exist.

It is suggested to use early bound entities as they provide Type Safety and IntelliSense Support decreasing the likelihood of runtime errors and can enhance productivity through auto-completing and context-aware suggestions.

These were a few of the examples, that show the key capabilities of the extension, for the complete list, please refer to the product documentation

Hope it helps..

Advertisements

Using IntelliSense with Kupp Code Analytics


In the previous posts, we covered the Key Features and Capabilities of Kupp Code Analytics and the Installation and Setup of the Visual Studio Extension.

In this blog post, we’ll cover one of its key features – IntelliSense.

As we saw in the last post the Kupp Analytics tool will download and cache the Metadata of the environment it is configured to, which it uses for IntelliSense.

To refresh the Metadata cache, or configure and manage the connection, navigate to Extensions >> Kupp Code Analytics >> Connection

Let us look at different places where we get the IntelliSense.

Starting with the entity or table, we can see it suggesting all the tables in that Environment.

If we have specified the entity name, when it comes to attributes or columns, we can see it suggesting all the attributes specific to that table.

Getting attributes with specific type lists only attributes having the same type.

For EntityReference – we can see it suggesting all the lookup fields.

Same for Money

And for OptionSetValue

It also suggests the attribute’s value in the case of Option Sets

IntelliSense also applies to Relationships, we can see it suggesting only contact-related relationships.

Apart from our Plugin and Console Applications (C#), we have the Intellisense feature available for our client-side code as well (JS/TS).

To configure we can navigate to Options >> Kupp Code Analytics >> General

Currently, the IntelliSense support is limited to retrieve operation only.

It suggests,

the name of the entity –

different query options

attributes specific to the entity –

Filter
operators

Query
functions

Thus using the IntelliSense feature that provides real-time suggestions, the development team can code efficiently, reduce typing errors, develop faster, and maintain code consistency.

Get all the details here –

https://docs.kuppsoft.com/Kupp-Code-Analytics/CA-Reference/CA-IntelliSense-(.NET)

https://docs.kuppsoft.com/Kupp-Code-Analytics/CA-Reference/CA-OData-IntelliSense

Hope it helps..

Advertisements

Getting Started – Installation and Setup Kupp Code Analytics


In the previous post, we covered key features and capabilities of Kupp Code Analytics – the powerful Visual Studio Extension for Power Platform and Dynamics 365 Developers.

You can refer to it here

In this blog post, we’d cover the installation and setup of the Kupp Code Analytics extension.

To get the extension, inside Visual Studio Marketplace, we can search for it and download the appropriate extension.

Below we can see that there are 2 versions of the extension available, one for Visual Studio 2022 and the other for Visual Studio 2019.

Visual Studio 2022 – https://marketplace.visualstudio.com/items?itemName=KuppSoftware.kca2022

Visual Studio 2019https://marketplace.visualstudio.com/items?itemName=KuppSoftware.KuppCodeAnalytics2019

We can also install it from inside Visual Studio, navigate to Extension, search for Kupp Code Analytics, and download the extension.

Click on Install / Modify (if already existing) to start/modify the installation.

Below we have successfully installed the extension for Visual Studio 2019.

Next, we need to specify and activate the License

We have 2 types of licenses available for the extension.

Community License (free)– Select type Single, enter the contact details and click on Activate to apply for the community license. Clicking on Activate activates the license instantly.

Enterprise License – This is paid license for the enterprise, that comes with additional features and capabilities not available in the Community license.

We can contact the sales team of Kupp for it – https://kuppsoft.com/contact/

Once added, we can see and manage the license information in Tools >> Options >> Kupp Code Analytics >> License

With Extension Installed, and the license activated, the next step is to configure the tool to connect to our Power Platform / Dynamics 365 Environment.

Navigate to Extensions >> Kupp Code Analytics >> Connection >> Configure

Select the appropriate connection or deployment type

Here to connect to Dynamics 365 Online, we keep the Deployment type as O365 and click on Load Organization

This opens the sign-in dialog where we can provide the appropriate account details.

After successful sign-in, we see all the environments populated to which the user has access. Select the environment, we want to connect to.

After selecting the environment, we can click on the Test D365 button and test the connection.

On a successful connection, we will get the success message as shown below.

Clicking on OK will close the connection dialog box, and the tool will start the process of downloading the metadata for the environment connected. The download should be complete in a matter of a few seconds.

This completes the installation and configuration part of the extension. In the next blog post, we’d cover the key features of the extension in detail.

Also don’t forget to check out the other intuitive products developed by Kupp Software GmbH –https://kuppsoft.com/our-products/

Hope it helps..

Advertisements

Overview and Key Features of Kupp Code Analytics (Visual Studio Extension for Dynamics 365 / Power Apps)


Kupp Software, Microsoft Partner, based in Austria, last year released their product Kupp Code Analytics (Code Analytic Tool) for Microsoft Dynamics 365, intending to help the teams to be more proficient through automating manual tasks, provide IntelliSense, code analysis, performance analysis, etc.

In this blog post, we’d have a brief look at Kupp Code Analytics. Kupp Code Analytics is a powerful Visual Studio Extension, for Microsoft Dynamics 365 and Power Platform (Dataverse). The technical team can use the tool to code faster, easier, and more efficiently, and at the same time can use the tool to analyze and get insights and adhere to best practices.

There are 2 versions of the products, the Community Version which is free, and other is Premium Version with additional capabilities.

The community version provides key features like

IntelliSense

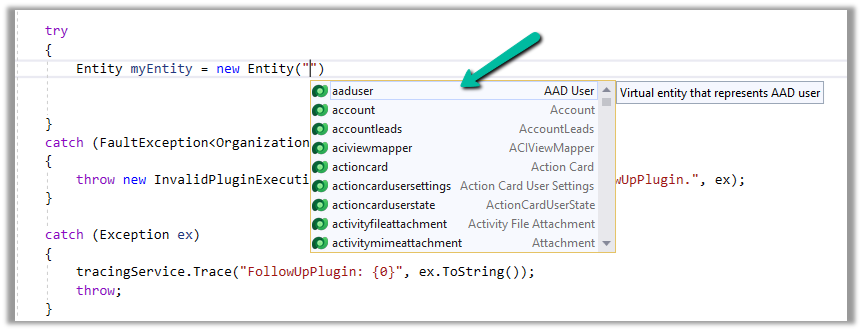
Below we can see IntelliSense in work, we get the name of the table suggested while writing the code.

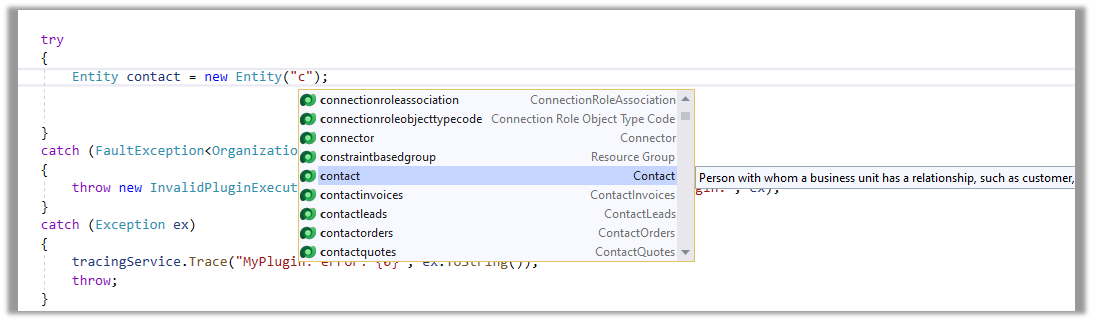
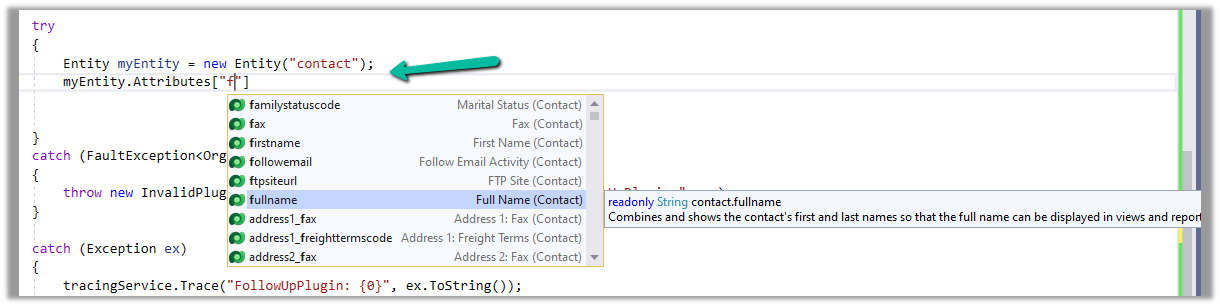
Also, we can see it listed down the corresponding attributes of the table in the context.

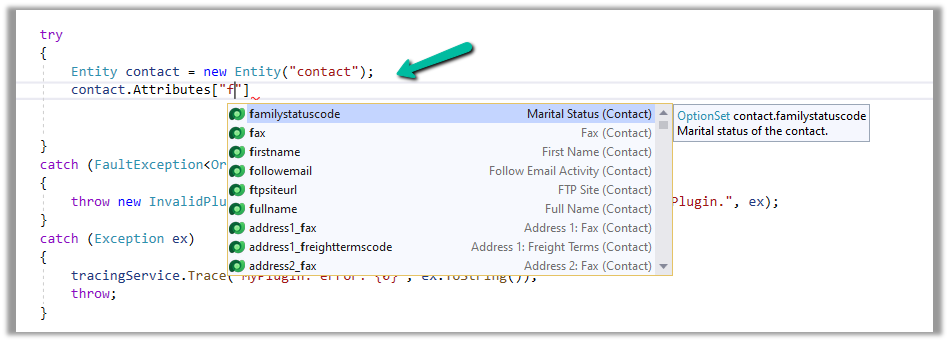
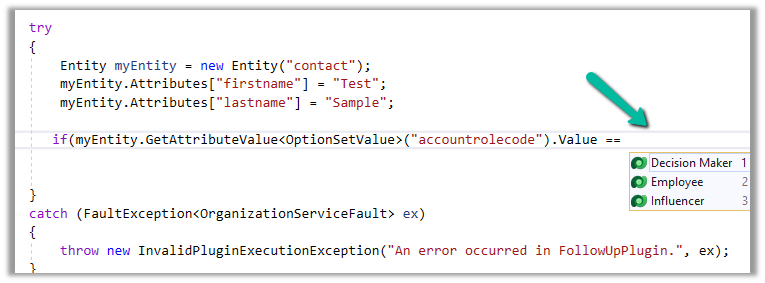
It also filters the suggestion based on the attribute or column type as shown below. We can see only the OptionSet type attributes being listed down.

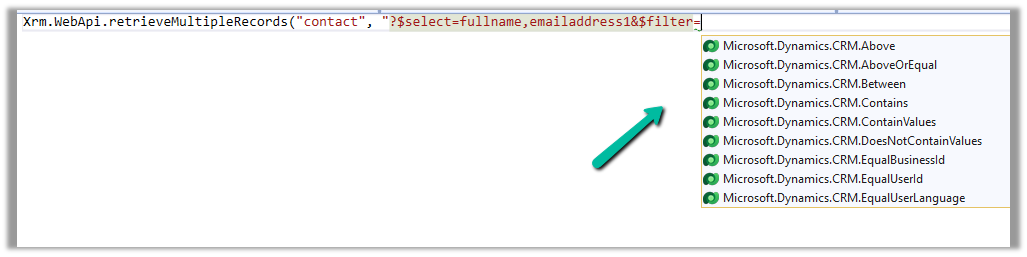
IntelliSense is not limited to C# code but also applies to OData. (Retrieve operations)

Below we can see it listing down different Query Options

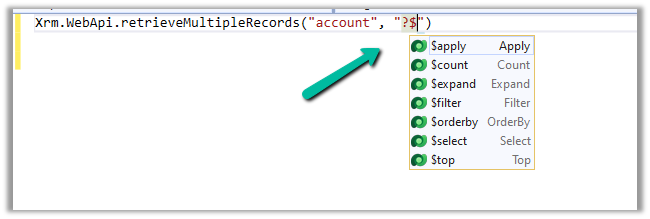
This allows us to write our OData queries that use the filter

Or any Query Functions

It also provides IntelliSense for some complex scenarios as well both, which we’d cover in detail in the forthcoming posts.

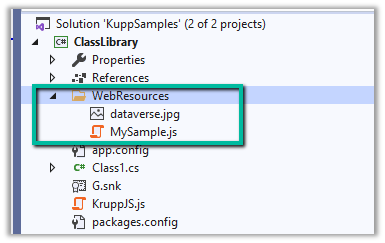
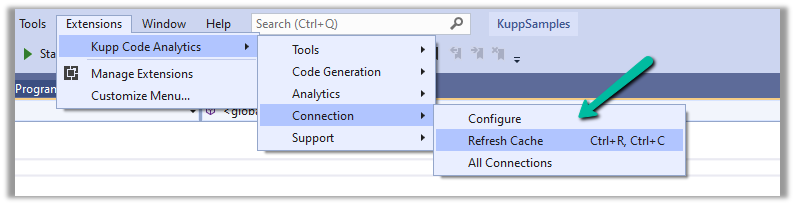
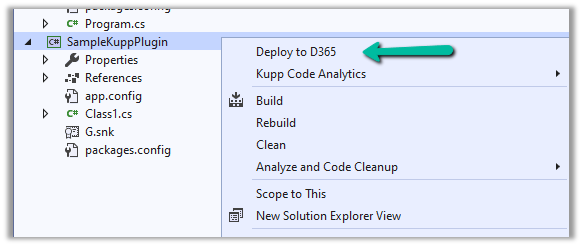
Deploy Assemblies and Web Resource

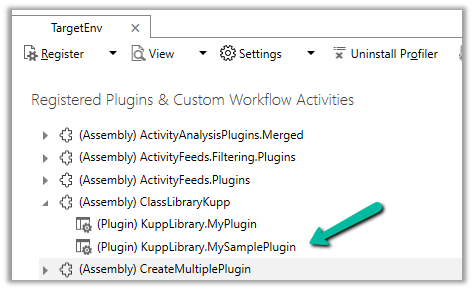
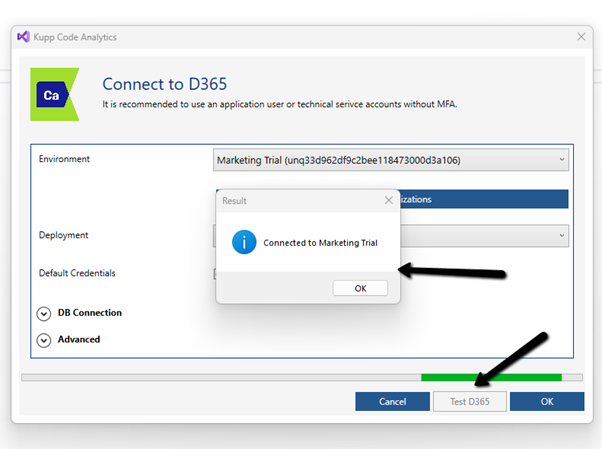
The developers can also quickly deploy/update plugins and web resources from within Visual Studio.

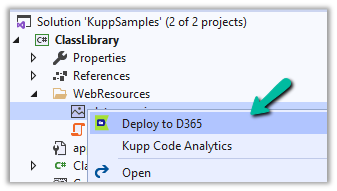
To deploy the plugin, right-click on the project and select Deploy to D365 option.

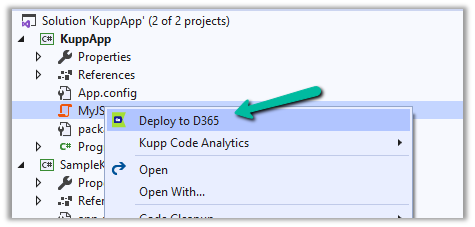
For the Web resource file, right-click and select the Deploy to D365 option.

Generate Early Bound Code and Convert Late Bound code to Early Bound

Developers can configure and quickly generate Early Bound Entities using the Code Generation feature of the tool.

Below is the code generation dialog for C#.

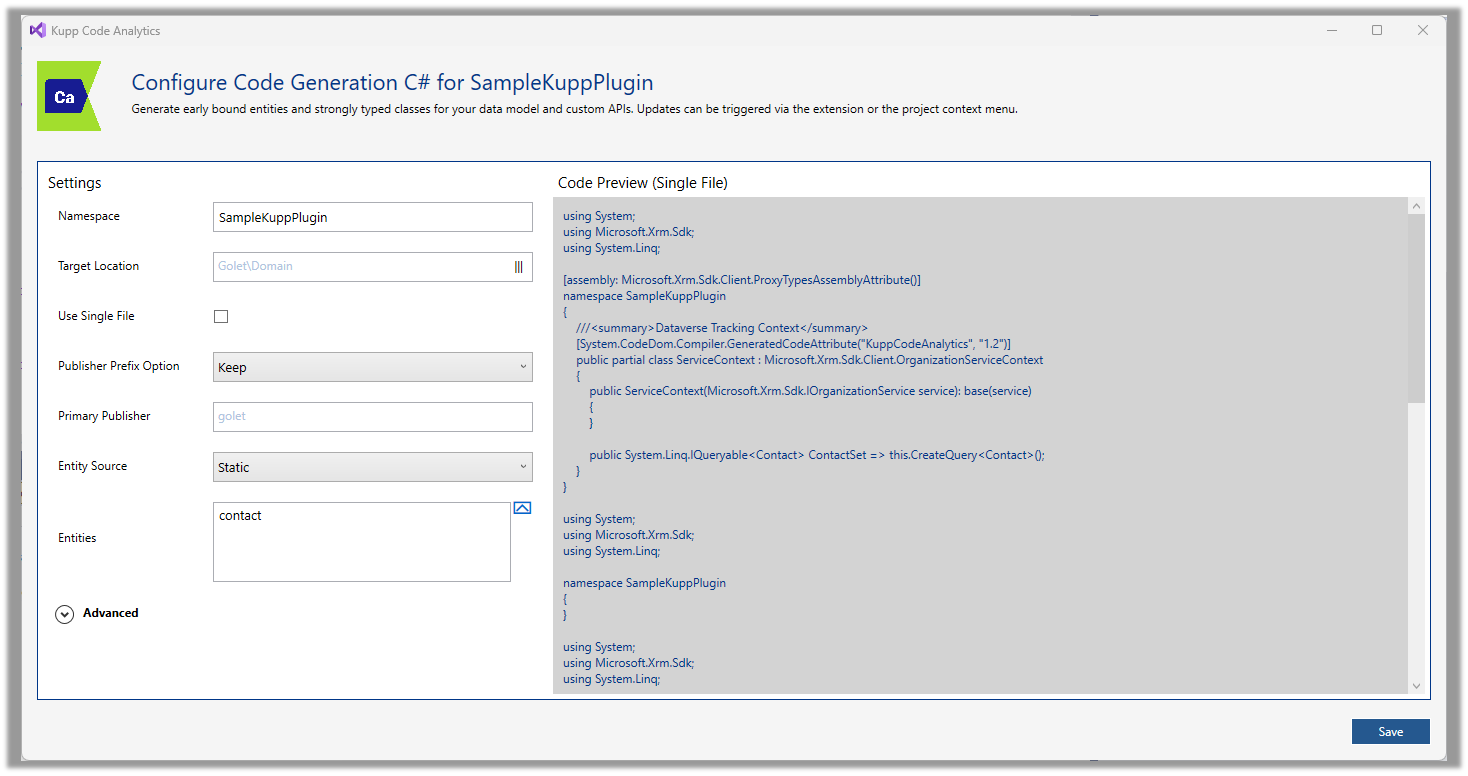
Similarly, early bound classes can be generated for TS/JS


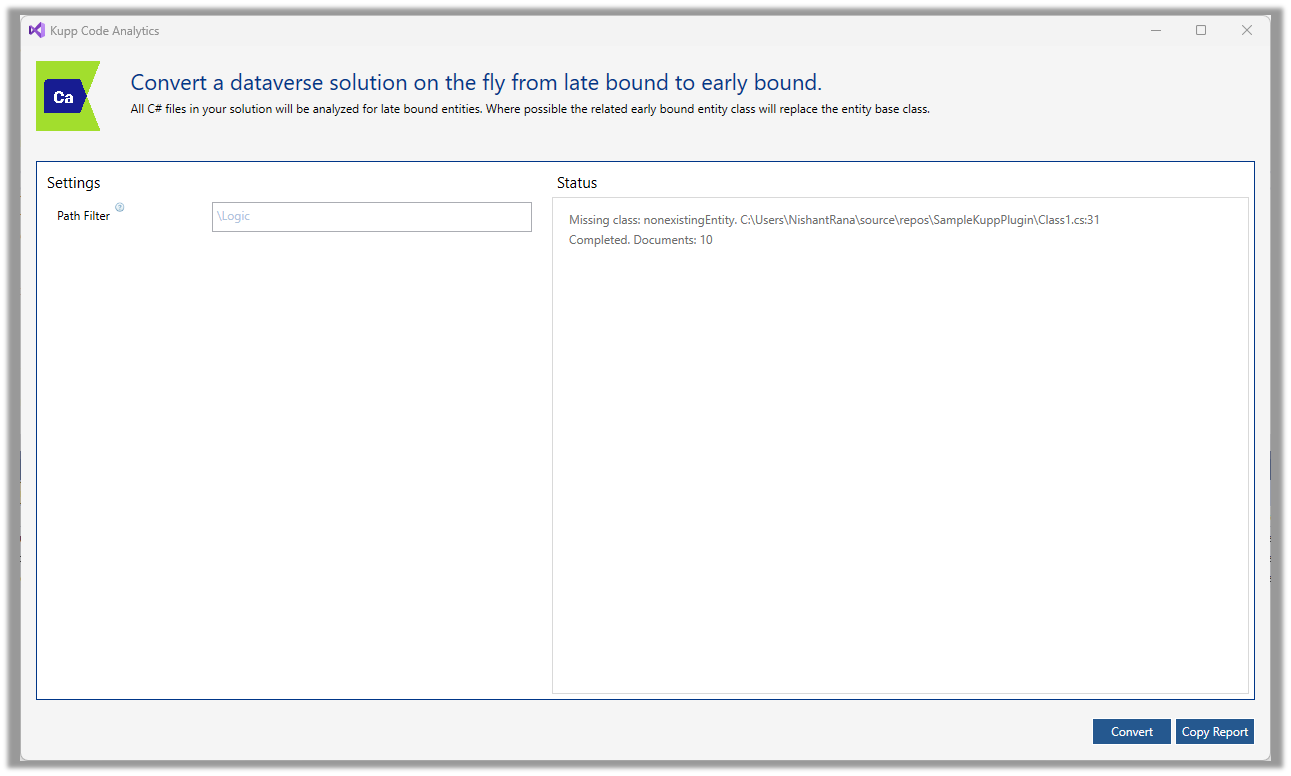
The users can also convert the late bound code to early bound with just one click.

In the premium version of the tool, the users get the below additional capabilities.

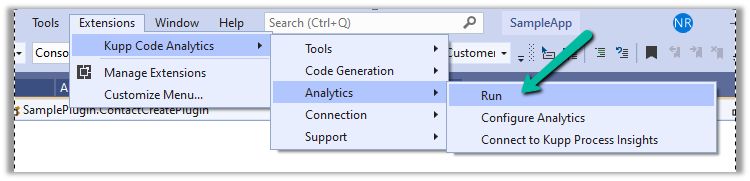
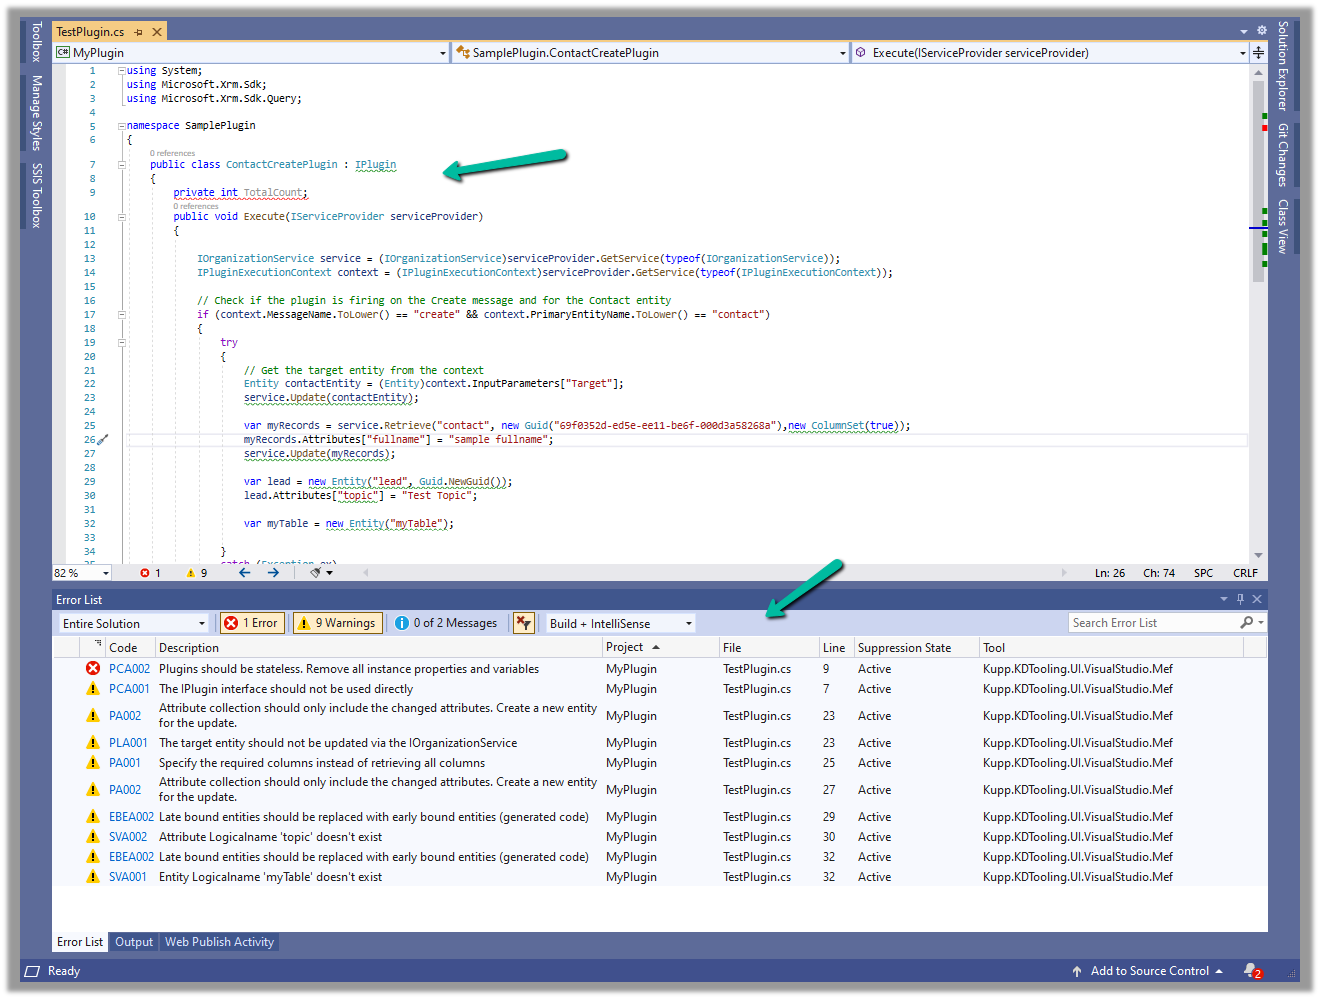
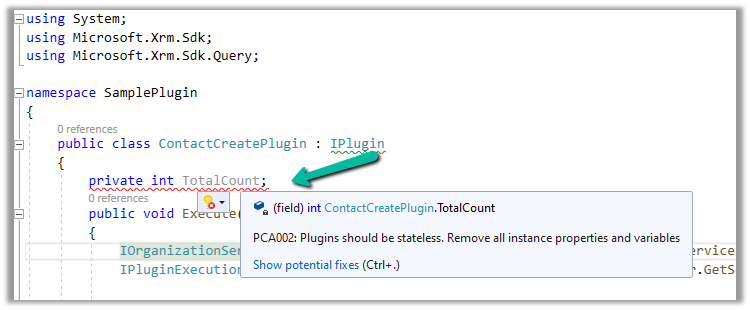
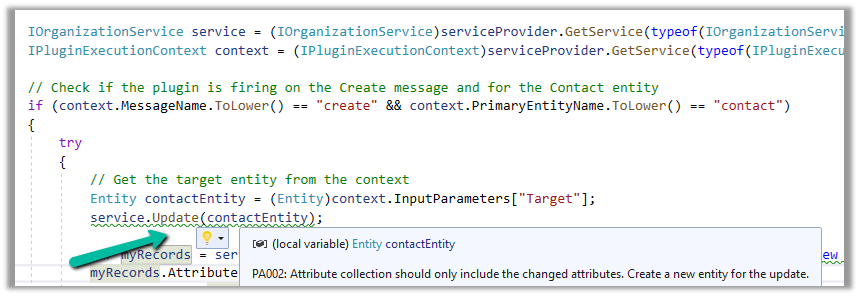
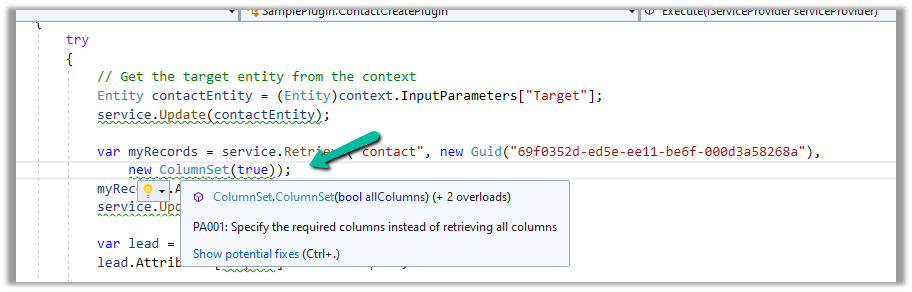
Code and Performance Analytics

The tool has a custom code analysis rule set defined that guides the developers while writing the code.

Below we can some of the rules like usage of early bound entity, specifying only required columns instead of all columns, in action. There are other rules also which we will cover in later posts.

Debug Plugin

Another feature that is available in the premium version of the tool is the option to debug the plugin.

Selecting the options Tools >> Debug Plugin generates a ready-to-use Unit test project to test the plugin with the required plugin context generated.

Here we covered some of the key capabilities of Kupp Code Analytics, check the below links to download it and learn more about it.

Hope it helps..

Advertisements