While trying to set the Start Location / End location to the Resource Address for Bookable Resource, we might get the below error
Exception Message: The latitude or longitude for the User record associated with this resource is invalid. Please provide a valid latitude and longitude and then set the start and end location for this resource again.
Here as the error message specifies we need to specify the latitude and longitude value for the corresponding resource type record associated with the Bookable Resource.
In the case of Contact, we can use the Geo Code option, and specify the address to populate the Latitude and Longitude details.
In the case of a User record we do not see the Geo Code option so there we can manually specify the values for it.
Now we will be able to update the Start / End Location as Resource Address in our Bookable Resource record, without getting any error.
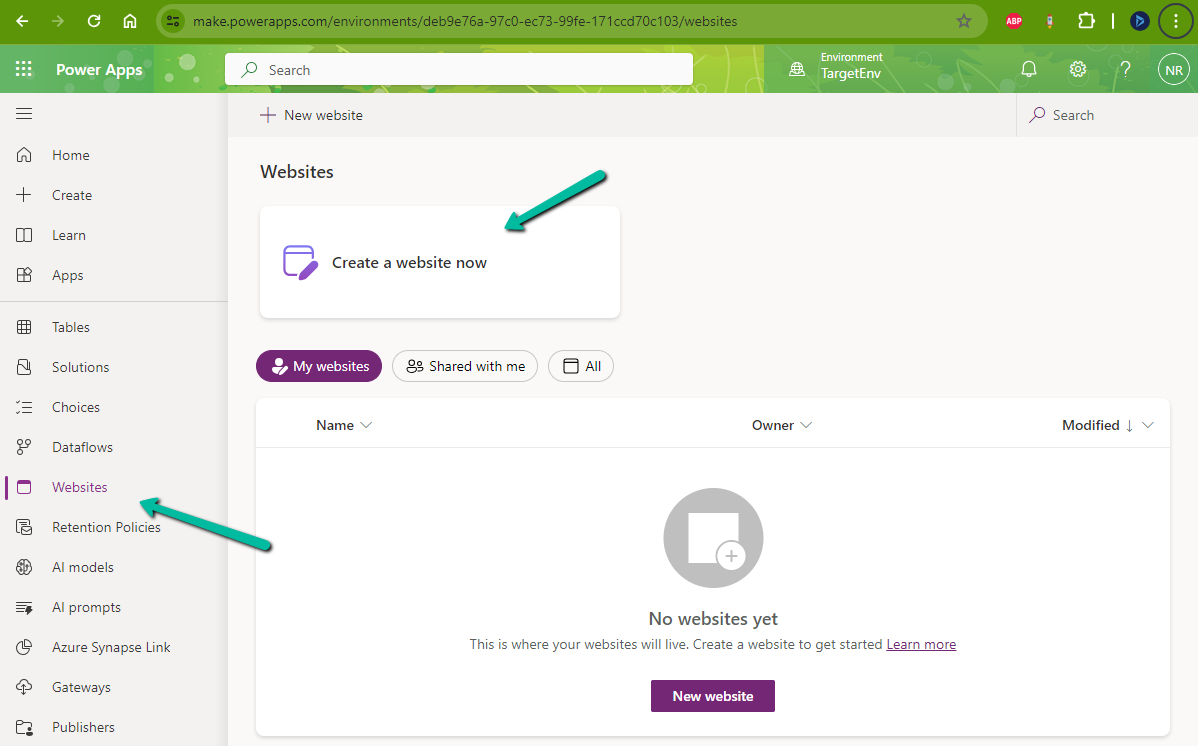
While trying to create a Website with Template – Partner Portal,
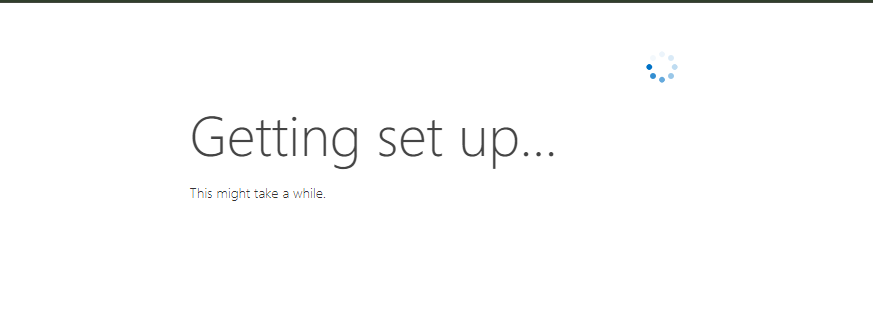
we observed the provisioning stuck at – Getting set up…
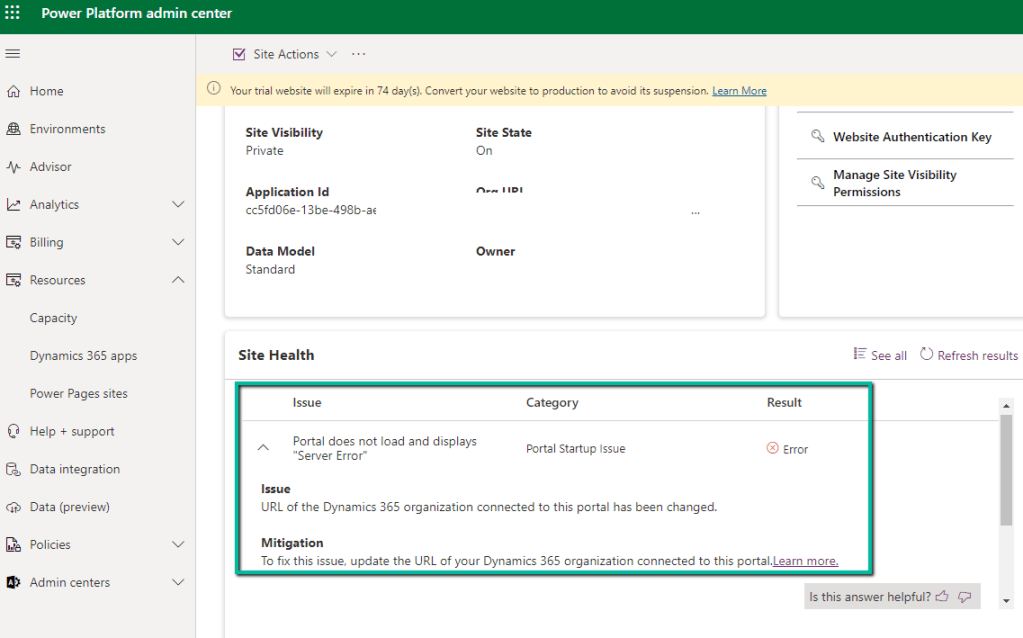
Also, it was showing the below error on checking the Site Health.
“URL of the Dynamics 365 organization connected to this portal has been changed.” Which wasn’t the case as the URL of the organization was correct.
Usually, the 1st Web Site takes time around an hour and then any new website is provisioned within 15-20 minutes (as the common / base solutions are already installed). This was the first website for that environment, however, when it was more than 24 hours, we then raised a Microsoft Support Ticket for it.
Microsoft acknowledged this as a bug and also got the fix ready, but there was a delay in deploying it because of dependencies internally.
In parallel, they also provided us with a workaround, which fixed the issue for us.
The steps are as follows –
Create Web Site with the Customer Self-Service Portal template.
Create Web Site with the Partner Portal template.
If Customer Self-Service Portal is not needed, the website can be deleted then, followed by deleting the below Managed solutions specific to Customer Self-Service.
Focused view in Dynamics 365 that allows users to view and manage all their records in one place, allowing them to be more productive, as they can stay on track and avoid getting sidetracked by switching between multiple screens to find the information they need.
We can enable and disable it for all the records from the Power Platform Admin Center
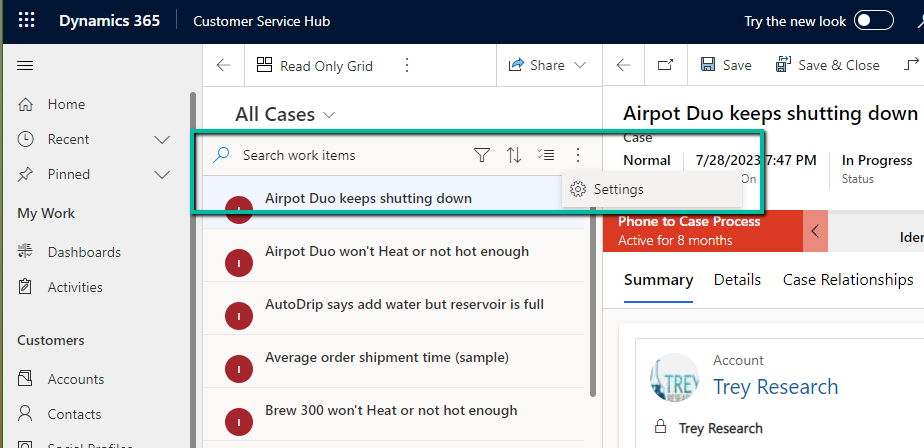
Let us select the Focused View for the Cases.
Focused View lists all the records of the view, from where we can select the record, and see its details, within the same screen.
We can search, filter, sort, select multiple records, and further customize it.
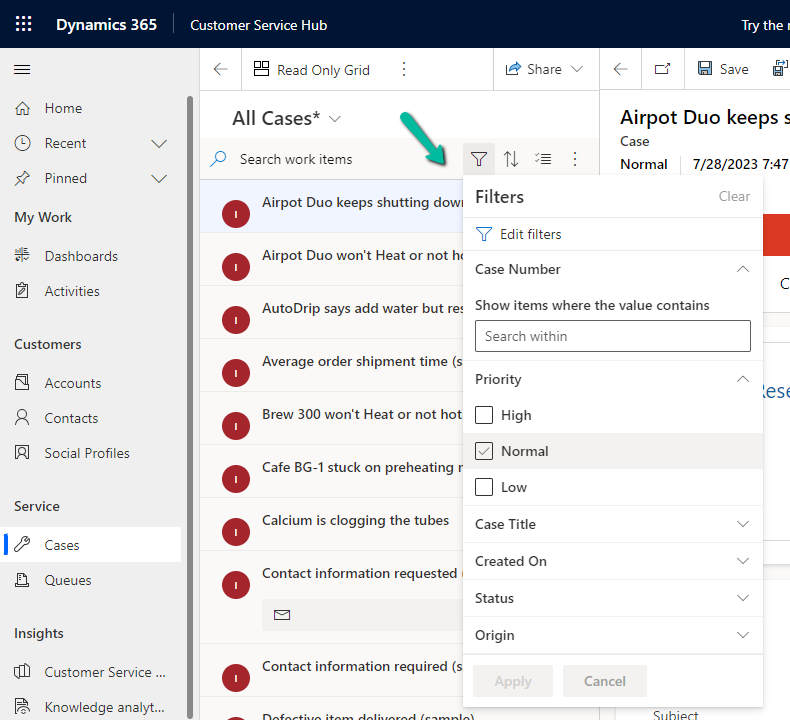
Search –
Filter –
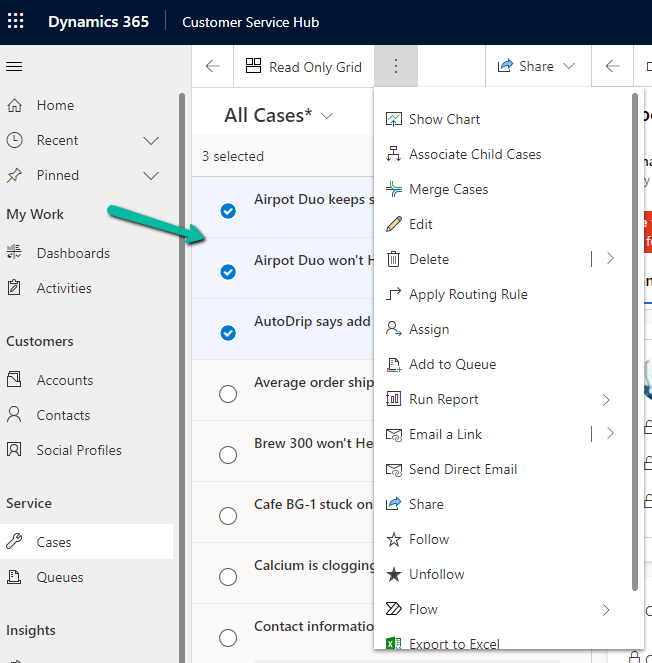
Select multiple records and perform bulk operations –
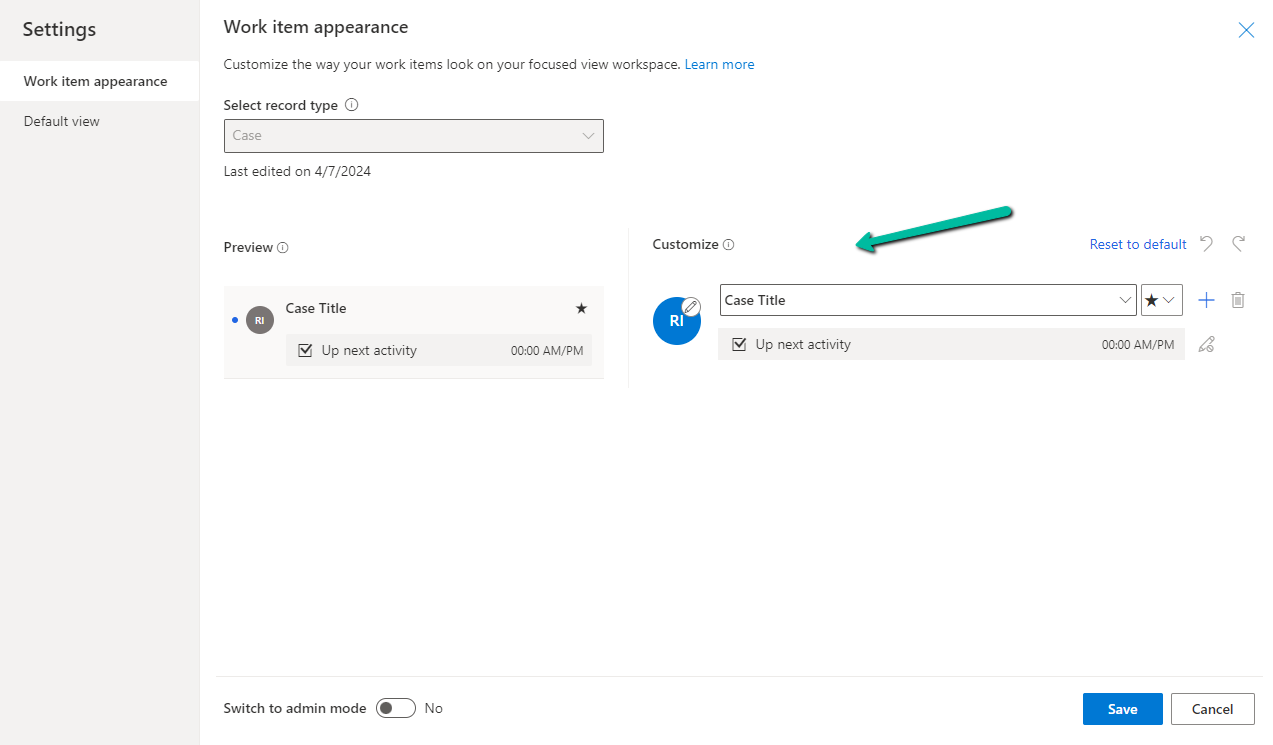
From Settings, we can customize the appearance of it –
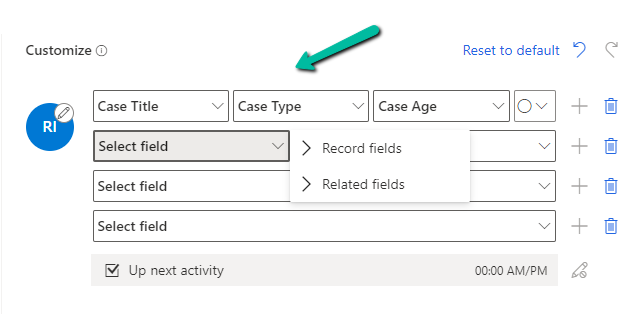
Here we can specify maximum 4 rows and each row can have a maximum of 3 columns added to it, it can be from the same record or the related record.
Here we have updated it as follows
Next, we have admin mode, where we can lock the customization so that users won’t be able to change it.
From the Default View settings, we can specify the tables on which we want focused view as default.
Below we can see the Focused View updated to show Case Title, Case type, Created by, and associated customer’s email address.
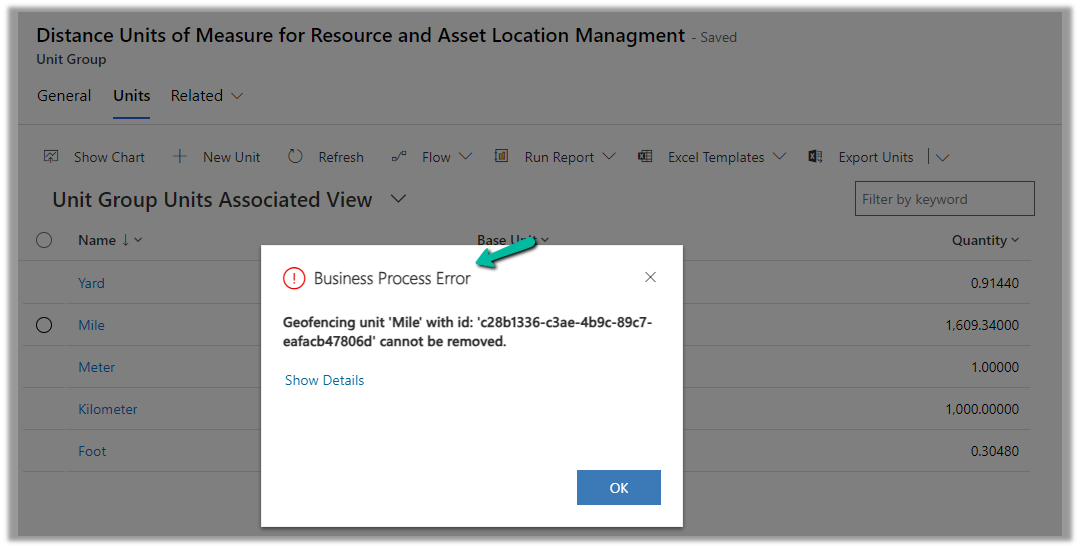
While trying to delete the Unit records related to the “Distance Units of Measure for Resource and Asset Location Management” unit group, we will get the below error
Geofencing unit ‘Mile’ with id: ‘<GUID>’ cannot be removed
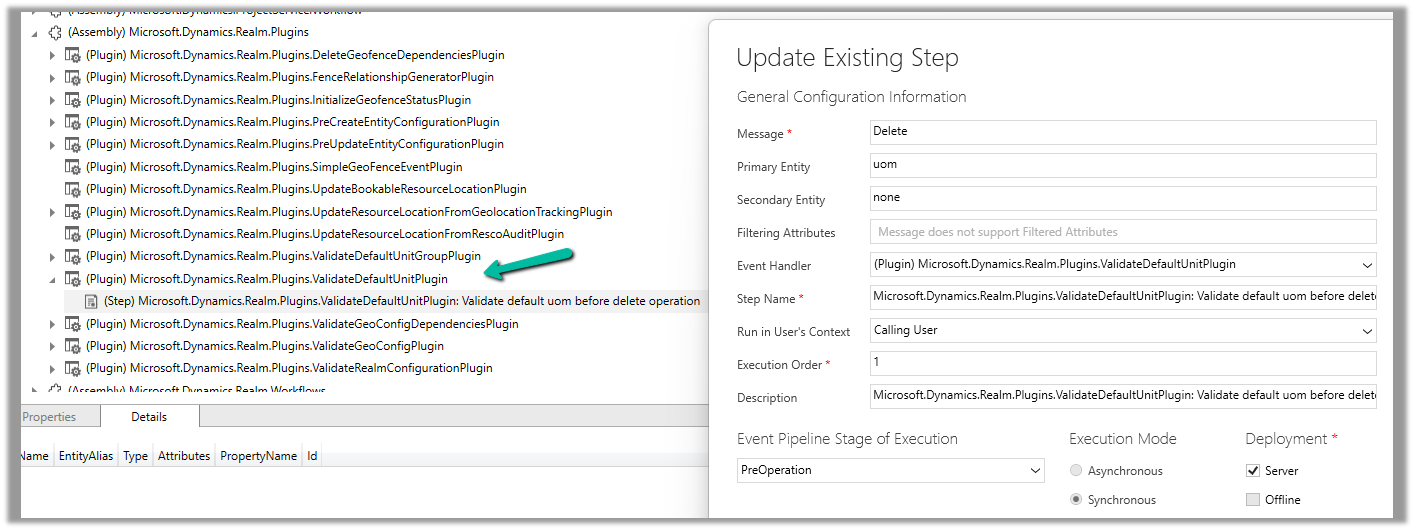
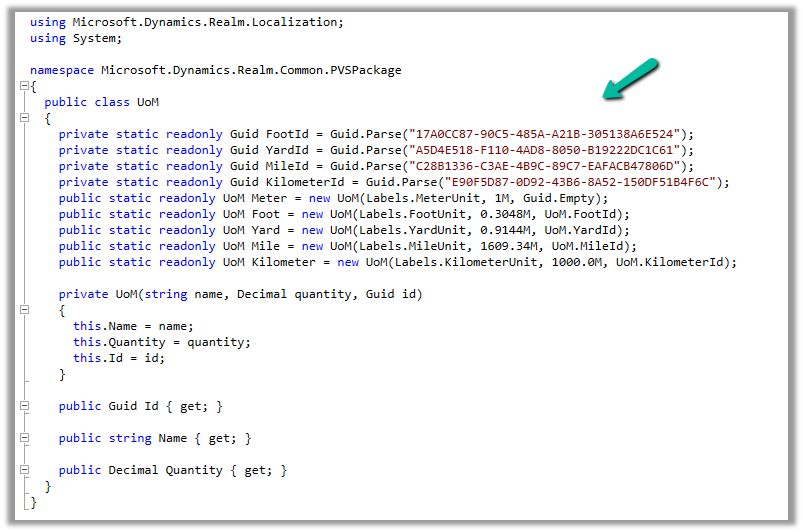
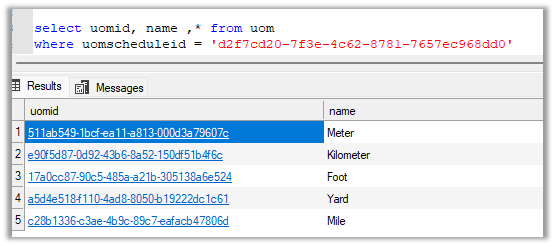
Below is the out of the box plugin that restricts the deletion of the unit
Recently we started getting the below error on the form load of the Work Order Service Task record, that also only in specific environments, and there was no changes made there.
Error Details:
Event Name: onload
Function Name: OnLoad
Web Resource Name: msdyn_/WorkOrderServiceTask/WorkOrderServiceTask.js
Solution Name: msdyn_FieldService_patch_update
Publisher Name: microsoftdynamics
From the error message also it was clear it was the error in the out-of-the-box javascript.
On raising the Microsoft Support Ticket, we were immediately informed that it was because of a change in the function definitions in the .js files along with its associated handlers which was done to prevent object definition collisions in the web resources.
This applied to forms of the below tables
Work Order (msdyn_workorder)
Work Order Service Task (msdyn_workorderservicetask)
Through booking rules, we can specify custom JavaScript methods, that can be used to run validation checks, before creation or update of a bookable resource booking record. Based on the result of the validation checks we can either warn the user or cancel the booking create or update event.
Booking rules are triggered when a resource is booked or a bookable resource booking record is either created or updated using the schedule board, schedule assistant, or booking form.
The booking rules are not triggered if the booking form has business process flow enabled. We can also disable the booking rule to be triggered on the save of the booking form by enabling the setting – msdyn_DisableProcessBookingRulesOnSaveBookingForm
Let us see it in action.
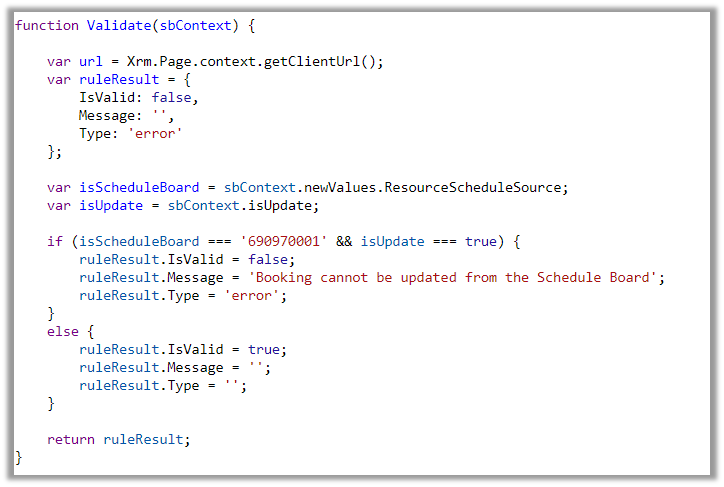
Below is our JavaScript method to be used as a Booking Rule.
function Validate(sbContext) {
var url = Xrm.Page.context.getClientUrl();
var ruleResult = {
IsValid: false,
Message: '',
Type: 'error'
};
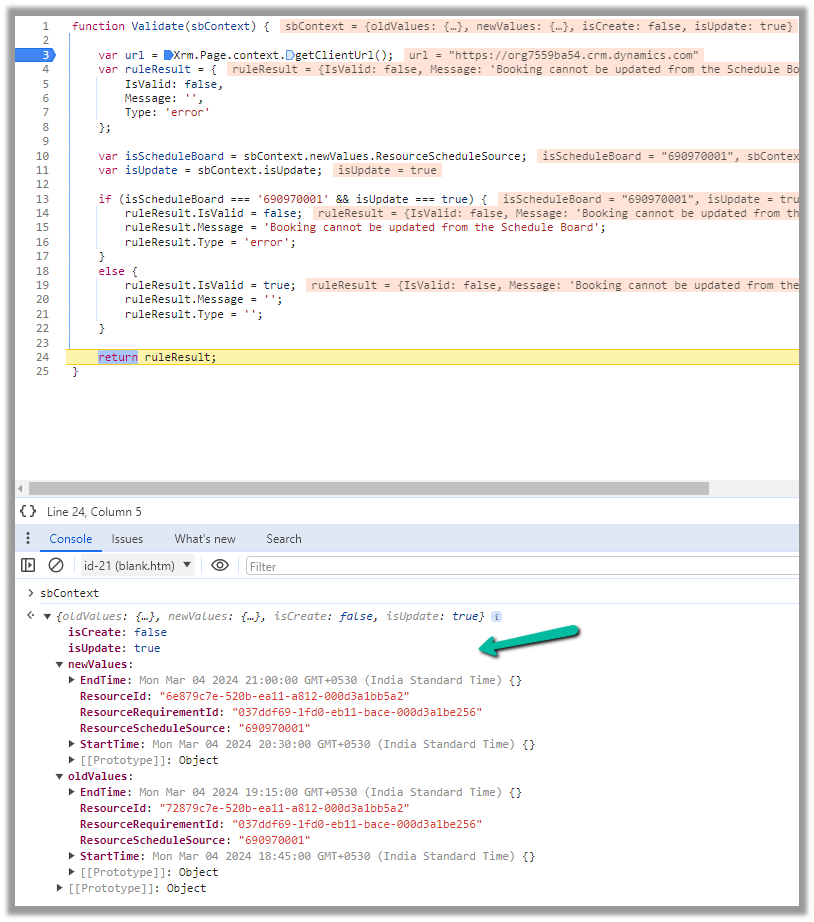
var isScheduleBoard = sbContext.newValues.ResourceScheduleSource;
var isUpdate = sbContext.isUpdate;
if (isScheduleBoard === '690970001' && isUpdate === true) {
ruleResult.IsValid = false;
ruleResult.Message = 'Booking cannot be updated from the Schedule Board';
ruleResult.Type = 'error';
}
else {
ruleResult.IsValid = true;
ruleResult.Message = '';
ruleResult.Type = '';
}
return ruleResult;
}
To create a Booking Rule, navigate to Resources >> Booking Settings >> Booking Rules inside the Dynamics 365 Field Service app and create a new booking rule, specifying the web resource and the method inside it.
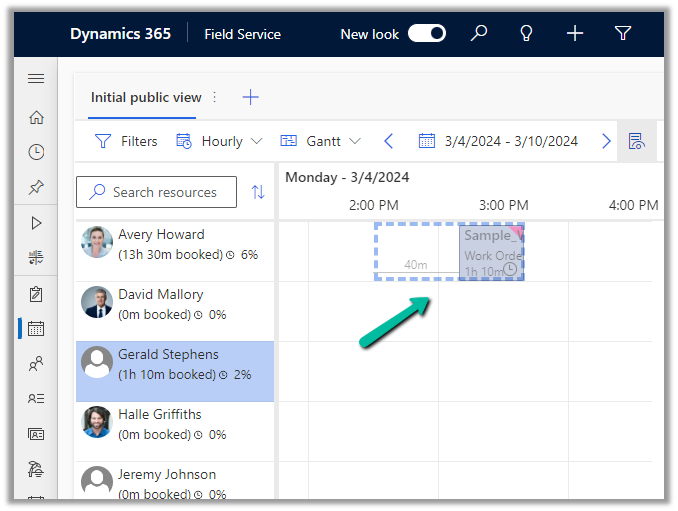
Let us try to update a booking from the schedule board.
This will trigger our booking rule and will pass the context object, which contains details like whether it is a create or update event, and details around old values and new values for start time, end time, resource details, etc. for that booking.
We can use these values passed in the context, fetch more details about the corresponding resource or work order, have our validation logic defined there, and finally pass the ruleResult object.
If we want to cancel the event, we can set IsValid as false, specify the error message, and set Type as an error in the ruleResult object. Similarly, if it passes the validation, we can set IsValid as true.
This is how the error message shows up, and the event is canceled inside the schedule board.
Below we can see the same booking rule being triggered from the Booking Resource Booking form.
We can deactivate the booking rule record created if we do not want it to trigger.