Step-by-Step: Configure Double Opt-In in Dynamics 365 Customer Insights – Journey (Real Time Marketing)


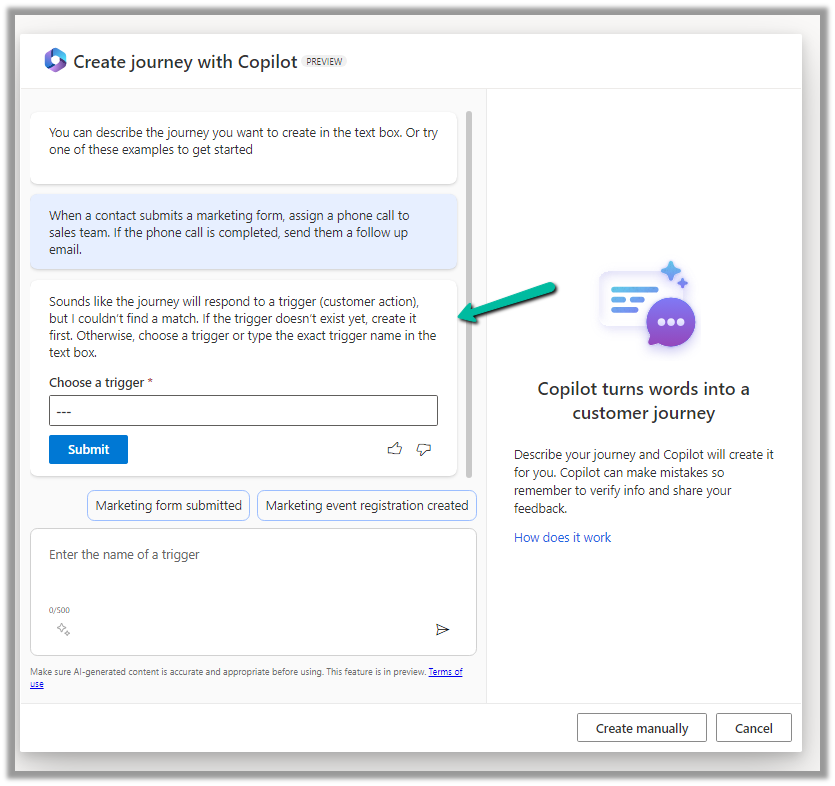
Double Opt-In is a two-step process for email subscription:

  • The contact fills out a subscription form (initial opt-in).
  • They receive an email with a confirmation link. Only after clicking that link is their subscription considered confirmed (final opt-in).

This process ensures that the person who signed up wants to hear from us—and that the email address is valid.

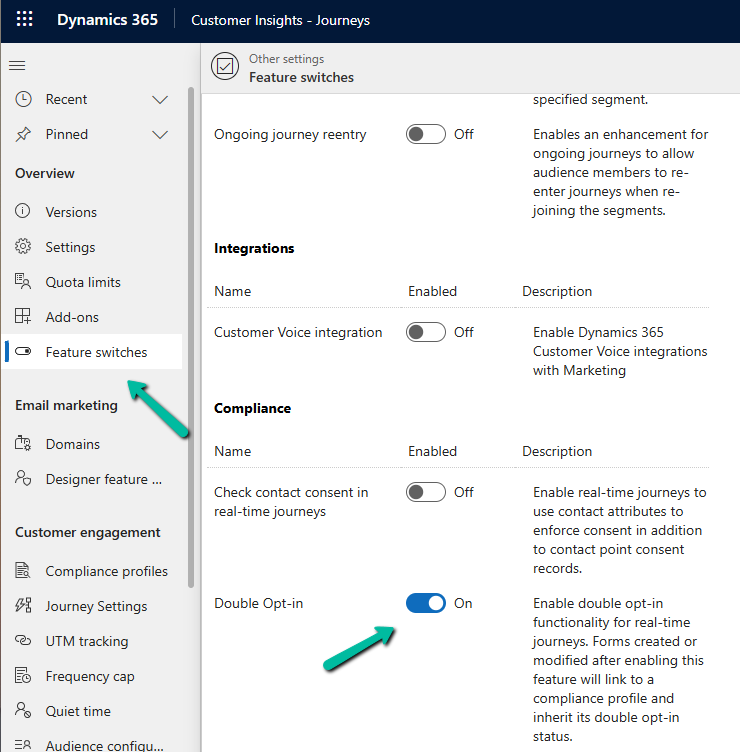
Enable the Double Opt-In Feature

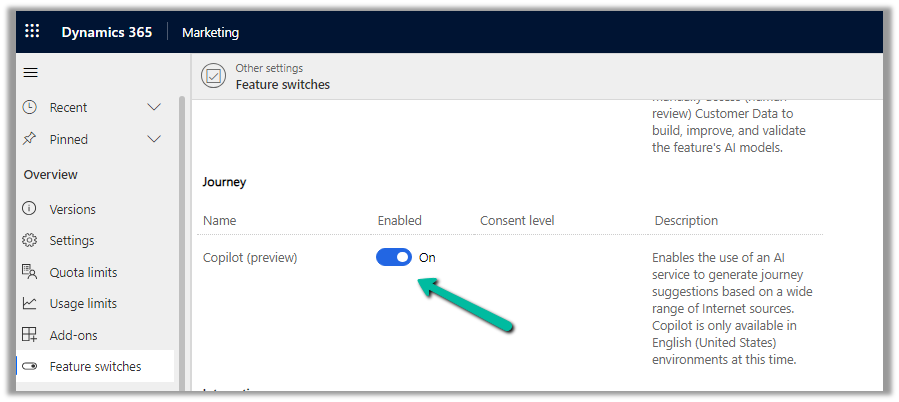
Below is how we can enable it in Dynamics 365 Customer Insights – Journey

Go to Settings > Feature Switches > Compliance (Double Opt-In)

Create or Configure a Compliance Profile

The Compliance Profile is what governs how consent is collected and managed in real-time marketing.

Go to Settings > Customer engagement > Compliance profiles

Here we will enable it in the existing default compliance profile. We can have different compliance profiles for different regions, languages, or purposes.

Navigate to the Double opt-in tab.

A screenshot of a computer

AI-generated content may be incorrect.

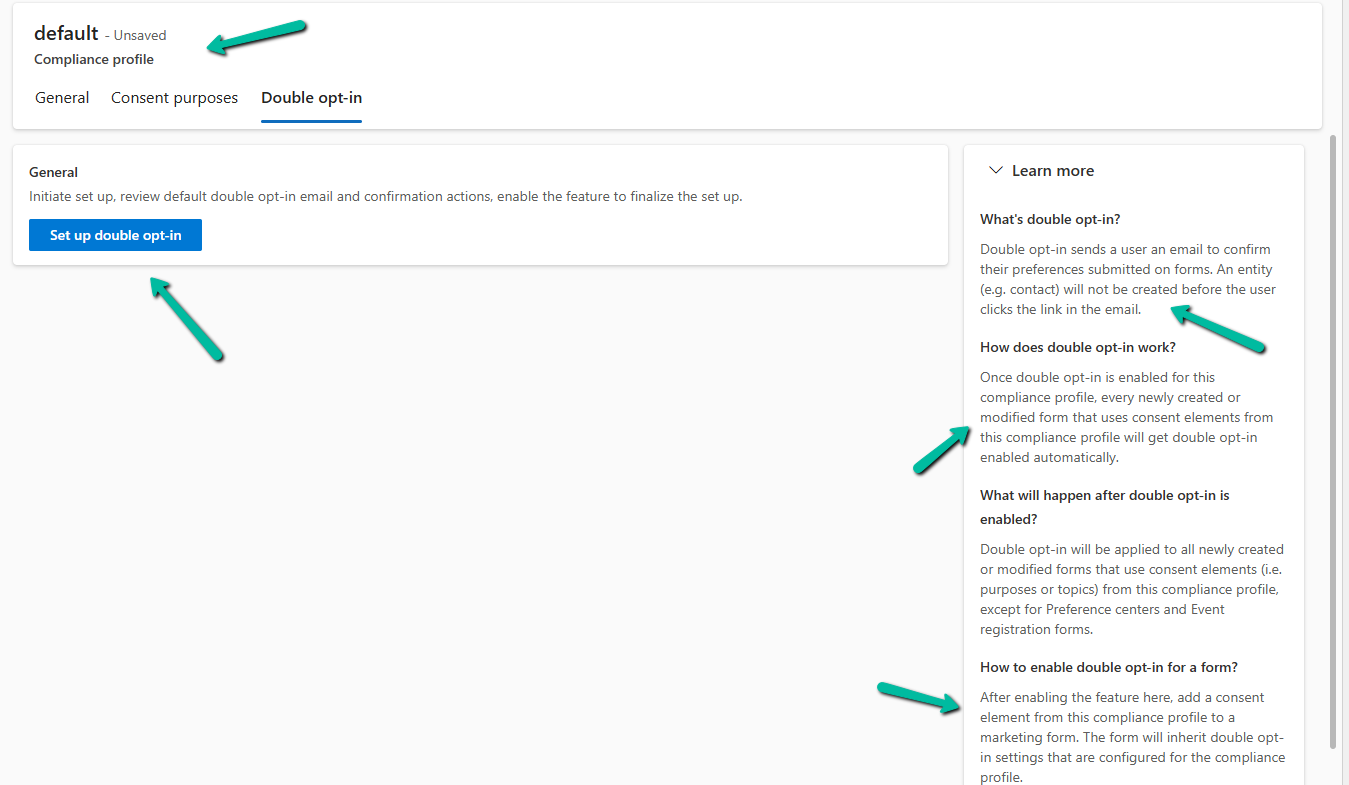
As part of the setup, the system creates the Double opt-in email and the journey required as part of the process for that particular compliance profile.

A screenshot of a computer

AI-generated content may be incorrect.

We can see it configured after a few minutes.

A screenshot of a computer

AI-generated content may be incorrect.

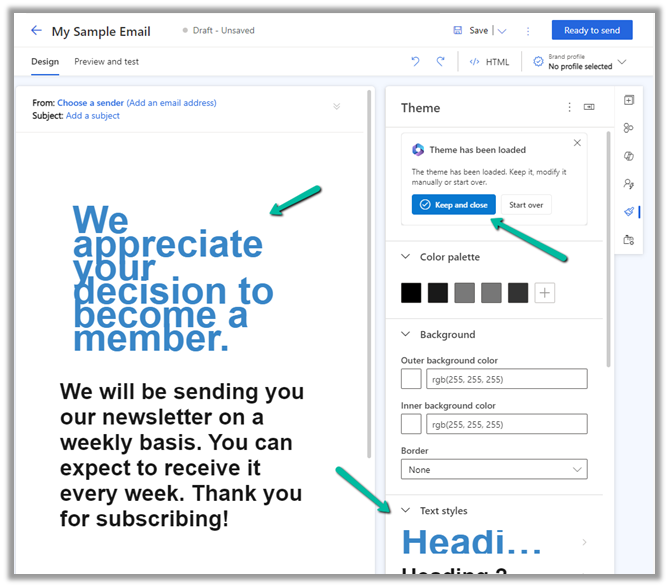
Below is the email created by the system that will be used for the journey generated. Notice its state will be Ready to Send.

A screenshot of a computer

AI-generated content may be incorrect.

Similarly, we will have the journey created, with Status = Live.

A screenshot of a computer

AI-generated content may be incorrect.

Link Compliance Profile to the Form

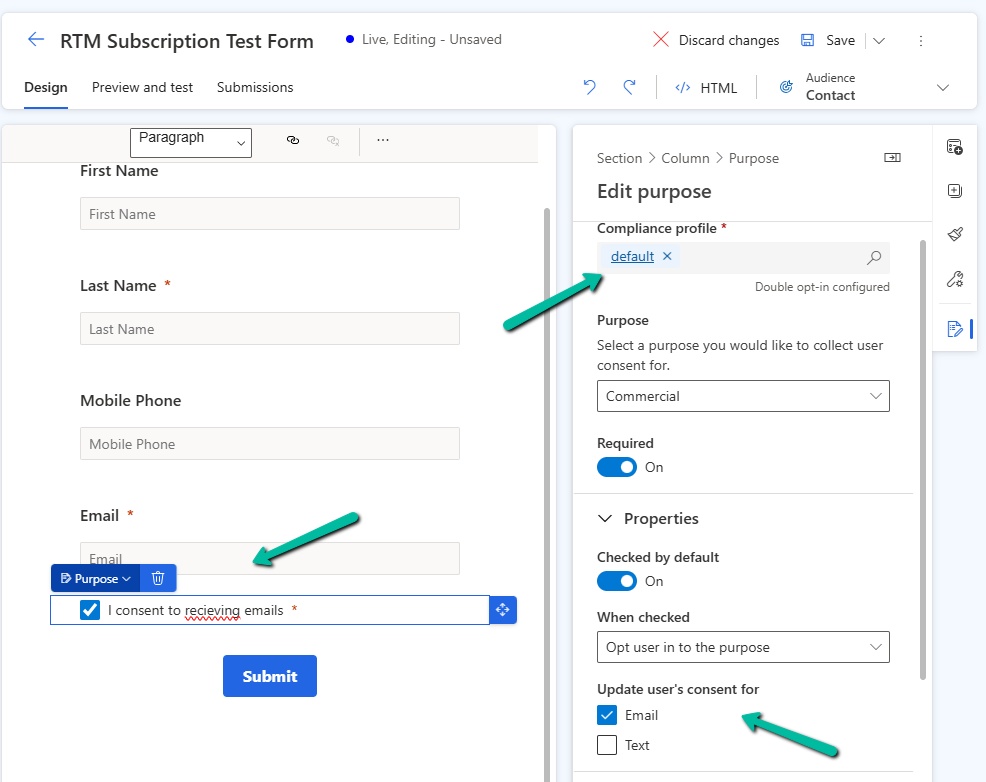
Open an existing marketing form or create a new one.

In the form editor, drag a Consent field.

A screenshot of a computer

AI-generated content may be incorrect.

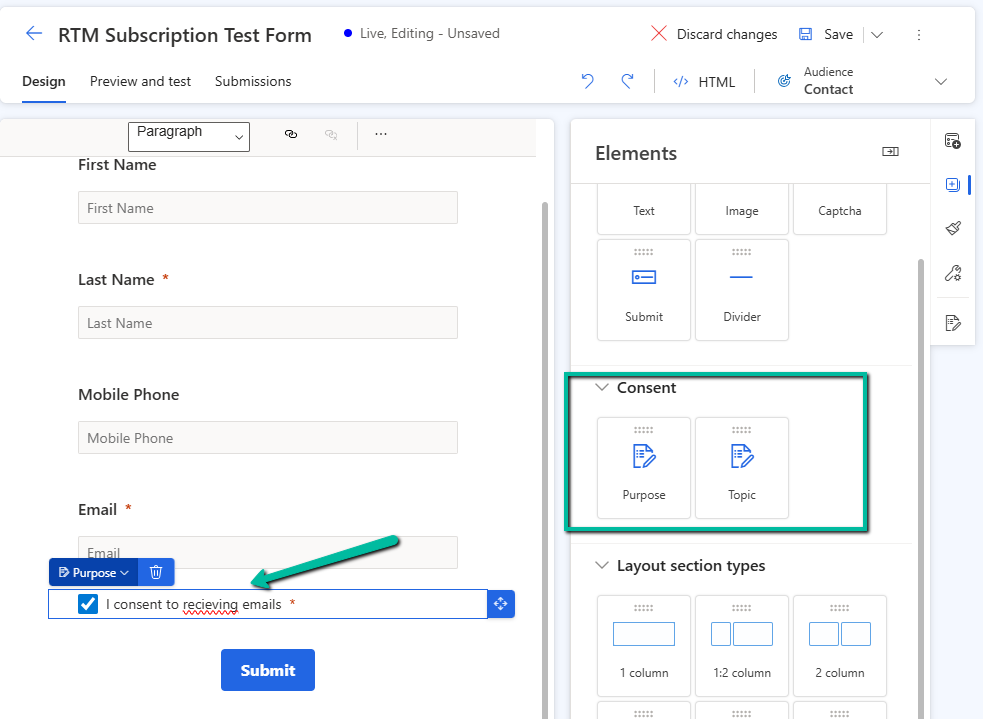
In the property pane for the Consent element, select the compliance profile (default one in our case), specify the purpose, and other required properties.

A screenshot of a computer

AI-generated content may be incorrect.

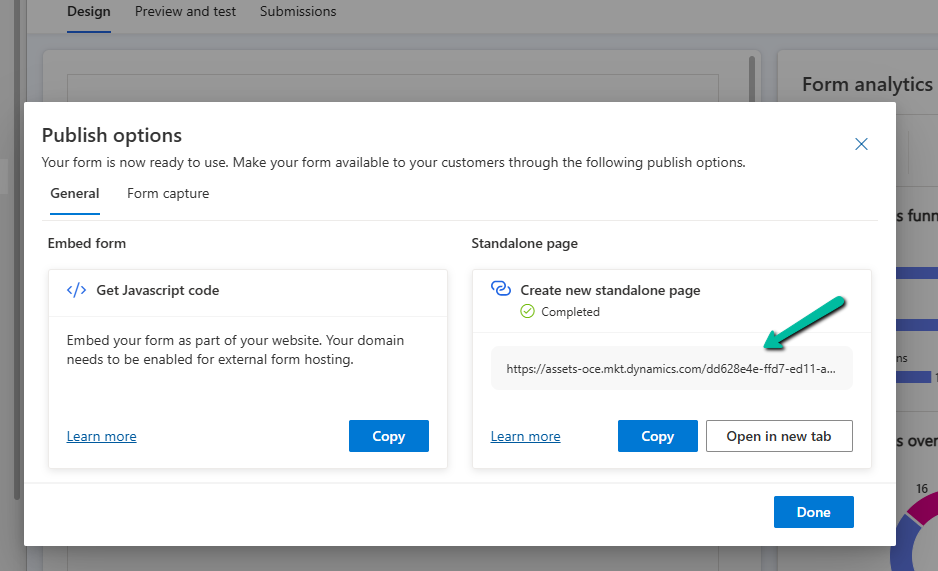
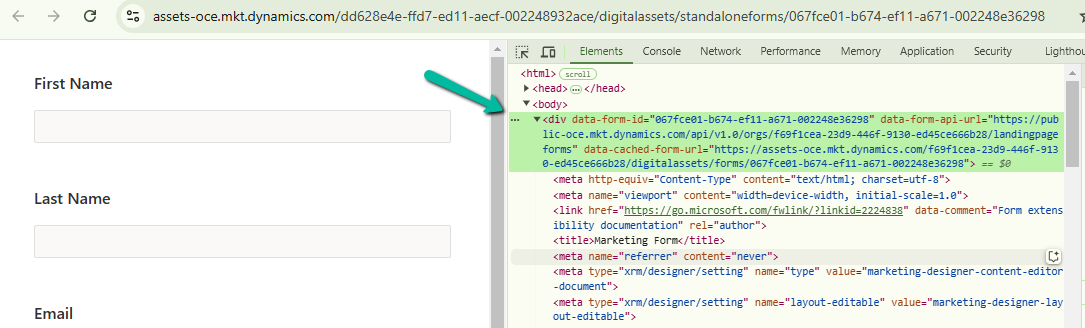
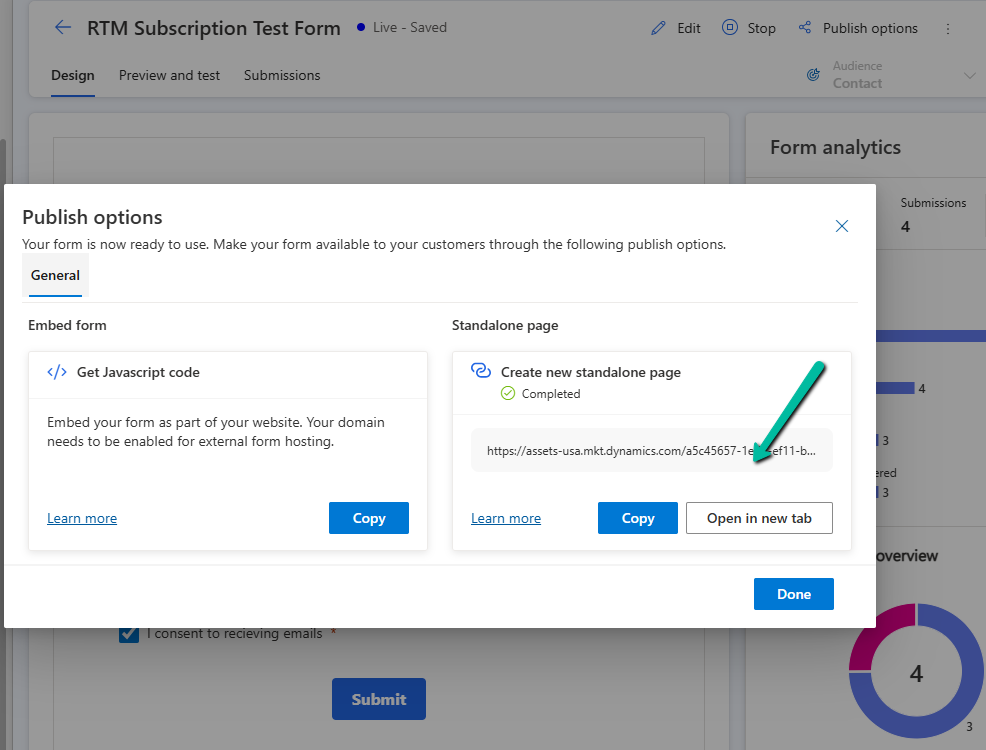
To see it in action let us submit the form using the standalone page.

A screenshot of a computer

AI-generated content may be incorrect.
A screenshot of a computer

AI-generated content may be incorrect.
A screenshot of a computer

AI-generated content may be incorrect.

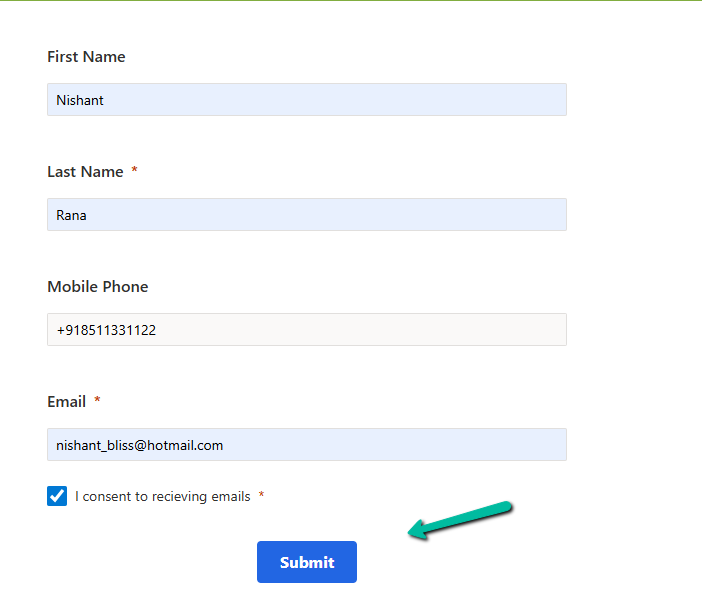
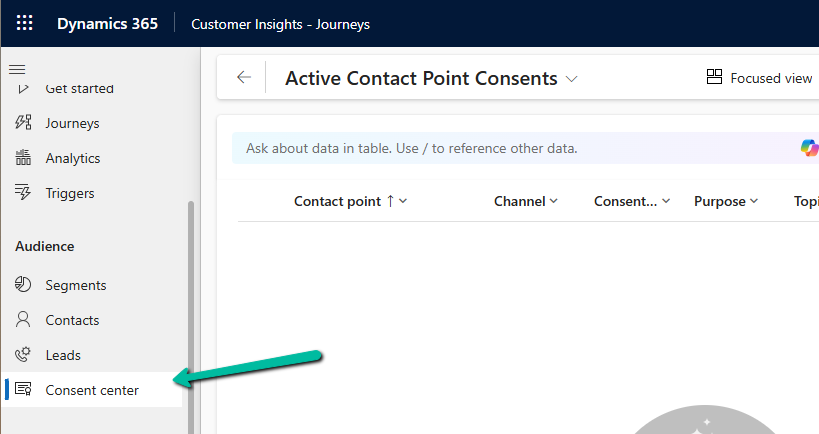
Till this point, we do not see any contact point consent record created.

A screen shot of a computer

AI-generated content may be incorrect.

We can see the confirmation email received in our mailbox. From there we can confirm it.

A screenshot of a computer

AI-generated content may be incorrect.
A paper with a check mark and a green circle

AI-generated content may be incorrect.

After confirmation, we can see our consent record created with the appropriate consent status.

A green pen pointing to a white box

AI-generated content may be incorrect.

Get all details

Also check out this wonderful tutorial – Dynamics 365 Customer Insights Journeys: How Consent Management Actually Works | Deep Dive Tutorial by Nathan Rose.

Hope it helps..

Fixed – Real-time marketing form’s Standalone page submitting to a different environment – (Dynamics 365 Customer Insights – Journeys)


Recently we migrated the Real-time marketing forms from our Dev environment to UAT environment using the Configuration Migration Tool. Here what we noticed was on submitting the form using the standalone page in UAT, the submissions were going back to the Dev environment instead of UAT.

A screenshot of a computer

Description automatically generated

This was because the data-form-api-url and data-cached-form-url property of msdynmkt_standalonehtml field of msdynmkt_marketingform record was still referencing the organization id of the Dev environment instead of UAT.

A computer screen shot of a computer screen

Description automatically generated
<div data-form-id='167fce01-b674-ef11-a671-002248e36298'
data-form-api-url='https://public-oce.mkt.dynamics.com/api/v1.0/orgs/f69f1cea-23d9-446f-9130-ed45ce666b28/landingpageforms'
data-cached-form-url='https://assets-oce.mkt.dynamics.com/f69f1cea-23d9-446f-9130-ed45ce666b28/digitalassets/forms/xxxfce01-b674-ef11-a671-002248e36298' ></div>

The f69f1cea-23d9-446f-9130-ed45ce666b28 is the development environment’s organization ID.

This information is stored in the msdynmkt_standalonehtml field of msdynmkt_marketingform record.

select msdynmkt_marketingformid,msdynmkt_standalonehtml,* from msdynmkt_marketingform where msdynmkt_marketingformid = ‘formGUID’

A screen shot of a computer

Description automatically generated

A screenshot of a computer
Description automatically generated

To fix we replaced the Dev’s Organization ID = f69f1cea-23d9-446f-9130-ed45ce666b28 with UAT’s Organization ID = dd628e4e-ffd7-ed11-aecf-002248932ace

<div data-form-id='167fce01-b674-ef11-a671-002248e36298'
data-form-api-url='https://public-oce.mkt.dynamics.com/api/v1.0/orgs/dd628e4e-ffd7-ed11-aecf-002248932ace/landingpageforms'
data-cached-form-url='https://assets-oce.mkt.dynamics.com/dd628e4e-ffd7-ed11-aecf-002248932ace/digitalassets/forms/xxxfce01-b674-ef11-a671-002248e36298' >

And updated the marketing form record.

Red text on a white background

Description automatically generated
update msdynmkt_marketingform
set msdynmkt_standalonehtml = '<div data-form-id=''067fce01-b674-ef11-a671-002248e36298''
 data-form-api-url=''https://public-oce.mkt.dynamics.com/api/v1.0/orgs/dd628e4e-ffd7-ed11-aecf-002248932ace/landingpageforms'' 
 data-cached-form-url=''https://assets-oce.mkt.dynamics.com/dd628e4e-ffd7-ed11-aecf-002248932ace/digitalassets/forms/067fce01-b674-ef11-a671-002248e36298'' >
 </div><script src = ''https://cxppusa1formui01cdnsa01-endpoint.azureedge.net/oce/FormLoader/FormLoader.bundle.js''></script>'
where msdynmkt_marketingformid = '067fce01-b674-ef11-a671-002248e36298'

After the update we can see submission reflecting back to the correct UAT environment.

A screenshot of a computer

Description automatically generated

The query we used to update all the forms with UAT’s Id

-- replace Dev Org ID with UAT Org ID in all the marketing forms 
UPDATE msdynmkt_marketingform
SET msdynmkt_standalonehtml = REPLACE(msdynmkt_standalonehtml, 'f69f1cea-23d9-446f-9130-ed45ce666b28', 'dd628e4e-ffd7-ed11-aecf-002248932ace')
where msdynmkt_standalonehtml is not null 

Hope it helps..

Advertisements

Use the theme assistant Copilot to style emails (Dynamics 365 Customer Insights – Journey / Marketing)


Using Copilot’s theme assistant we can fetch the styles from a website and apply it to our email. Microsoft strongly recommends using Theme Assistant only on websites owned and not on 3rd party websites.

To use this feature, open an existing email record, enter the Website’s URL in the theme assistant section, and click on the Fetch Styles button.

The theme assistant will fetch the styles from the website and apply them to the theme of the email. We can also see the changes in the email editor.

If we are happy with the theme applied we can select the Keep and
close option or we can select Start over to specify another website.

We can further edit the theme as required.

Get all the details

Hope it helps..

Advertisements

Use Copilot to create a journey – Dynamics 365 Marketing


We can make use of Copilot to create a journey for us, using everyday conversational language.

To enable it, navigate to

Settings >> Overview >> Feature Switches >> Journey (Copilot)

Let us see it in action, by creating a new journey record.

We get the option to select predefined
examples to start with.

Here we have selected the last example “When a contact submits a marketing form, assign a phone call….”

On selecting it, we are presented with the option to specify the Trigger.


We have selected the existing Marketing Form Submitted trigger record here.

After specifying the trigger, we get the option to specify the marketing form or to leave it empty to run it for all the form submissions and also the audience type, which could be either Contact or Lead.

Clicking on Submit gives the option to review and then eventually Create Journey.

Clicking on Create Journey generates the journey for us.

We can review the journey, add any further content required, modify it, etc.

For example, we need to specify the follow-up email to be sent, before we can save and publish it.

Once we are done with defining the journey, we can publish it.

Get more details here.

Hope it helps..

Advertisements

Use Content Ideas Copilot to generate email content ideas (Dynamics 365 Marketing)


Content Ideas Copilot can be used to quickly generate content ideas for emails based on topics (key points) and tone specified.

To enable it, navigate to Settings >> Feature Switches >> Email Editor (Copilot)

To see it in action, create or open an email record, and open the Copilot panel from the right panel or the email editor’s toolbox.

We can start with any of the suggested topics or select Custom to specify our key points.

Here we have selected the “Promotion” topic, and we can see the corresponding key points specific to it.

We can edit existing key points and add our key points.

We can also specify the Tone for the content.

Clicking on Get Ideas generates the content ideas.

We can review and add the most appropriate content to the email

We can also generate more ideas

Below we have added one of the ideas to our draft email.

Get all the details here

Hope it helps..

Advertisements

Use Query Assist Copilot to create Segments (Dynamics 365 Marketing)


Using Query Assist Copilot we can create segments easily through its Natural Language Processing (NLP) capability.

Create a new Segment from Real-Time Marketing >> Audience >> Segments

Specify the segment name and the target audience (either contact or lead)

Now in Query Assist, we can specify the details of the segment

It also provides us the suggestions.

Let us select the “Contacts who were created last year and make more than $50K” option and append “who work in Financial Industry to it”.

Clicking on Create will open the segment designer page along with the Query Assist panel, which shows the result of the Query.

Click on Use to use that query result.

We can add further conditions to it.

Here we selected the example “Contact who opened an email

We can then add the result through the “Use” option

The query gets updated with the new condition

We also get the option to generate a summary for the segment or get suggestions for improving the segment.

Clicking on View Summary generates the summary.

Get all the details here

Hope it helps..

Advertisements