Recently we had a requirement to make different sets of fields mandatory and non-mandatory on the Quick Create form for Contact, based on the parent record type it is opened from.
As we cannot have multiple Quick Create Form specified for different forms, we had to use JavaScript to identify the parent record type.
We can use the below properties for that.
- Xrm.Utility.getPageContext().input.data.parentrecordtype
- Xrm.Utility.getPageContext().input.createFromEntity.entityType
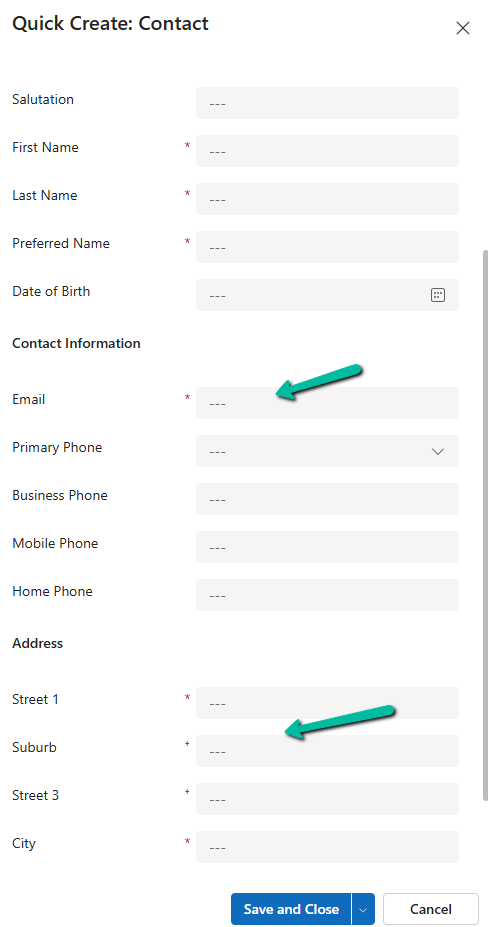
Below we have the contact’s quick create form opened from a custom table – custom_contract’s contact lookup.

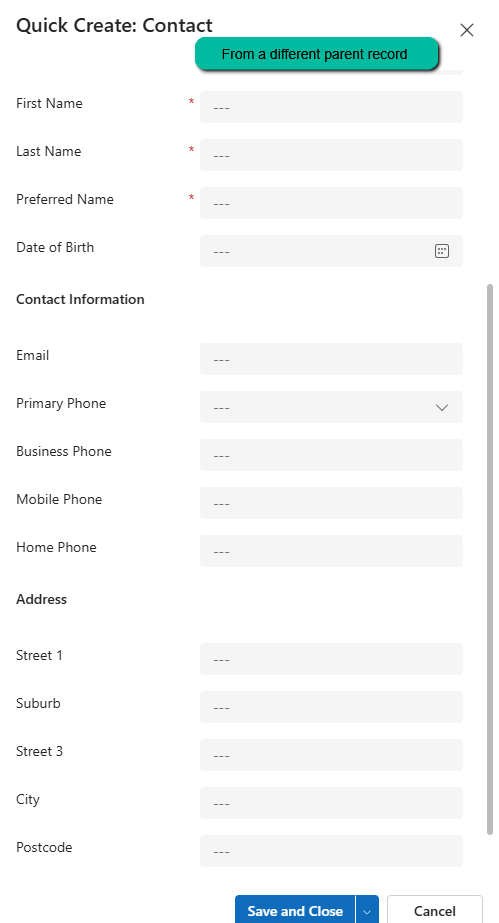
On using the above properties in our form load script for the quick create form, we can see different sets of fields set as required and recommended on the Quick Create Contact form based on the parent record it is opened from.
Parent A :
Parent B :
The helpful post – https://butenko.pro/2020/09/15/js-how-to-get-the-originating-record-reference-in-the-form-script-of-the-quick-create-form/
Hope it helps..