Had written a post on deleting the elastic table record earlier – How to Delete Elastic Table Records in Dataverse (SDK). We need to pass the partitionid value through an alternate key to delete the elastic table records. We will have the alternate key auto-created by the system when we create an elastic table. Earlier specifying an Alternate Key was not possible for the Delete action in the CDS Destination component. However, with the latest release (Version 25.1 – April 4, 2025), the Manually Specify and Alternate Key matching criteria support has been added when performing the Delete action as shown below. We also need to have the Use Homogeneous Batch Operation Message option checked, this uses DeleteMultiple request in the background.
On running the package, now we can see the elastic table records (having partitionid) getting deleted successfully.
After the successful run (here we are deleting 40K records), we can see the records deleted.
In Dynamics 365 / Dataverse, sometimes we want to show or hide a ribbon button based on a form field value. But when the button is on a subgrid, it does not refresh automatically when a field changes on the form. We can handle this requirement using gridContext.refreshRibbon(). It is a small but very useful method that helps to refresh the subgrid ribbon without saving or reloading the form.
Here we are taking a simple scenario to understand the usage.
We will only show the New Case button on the Case Subgrid if the Preferred Method of Contact = Any else we will hide it.
Below is our JavaScript function to check the field value and return true or false. This function will be used as CustomRule for our Add New button command’s EnableRule on the subgrid. This function checks if the Preferred Method of Contact is ‘Any’. If yes, it returns true. Otherwise, it returns false.
We are passing CRM Parameter = PrimaryControl here.
Depending on where the button lives (Form ribbon or Subgrid ribbon), the correct context is passed.
On a form: PrimaryControl is the formContext.
On a Subgrid: PrimaryControl gives the context of the parent form hosting the subgrid.
Below we have customized the Add New Subgrid button for Case and added a new Enable Rule for its command.
Now on the form load, the Add New button on the subgrid will be hidden on the form load event.
But when we change the value for the Preferred Method of Contact we will not see any effect on the Add New button. For it to work we need to use the refershRibbon method of the grid’s context as shown below.
We added it on the onChange event for the Preferred Method of Contact field so that when a user changes it, the subgrid ribbon refreshes.
Now, when a user changes the Preferred Method of Contact, the subgrid ribbon will refresh and check again if the button should be visible.
As a result, now the Add New button appears on the Case subgrid when the Preferred Method of Contact is ‘Any’.
The ribbon refreshes immediately when the field changes to Email or any other value except Any.No need to save or reload the form.
JavaScript –
function showAddNewButtonOnCaseSubgrid(primaryControl) {
    var formContext = primaryControl;
    var preferredMethod = formContext.getAttribute("preferredcontactmethodcode");
    var preferredMethodValue = preferredMethod.getValue();
    // Check if Preferred Method is 'Any'
    if (preferredMethodValue === 1) {
        return true;
    }
    else {
        return false;
    }
}
function refreshCaseSubgridRibbon(executionContext) {
    var formContext = executionContext.getFormContext();
    var gridContext = formContext.getControl("Subgrid_Cases");
    if (gridContext) {
        gridContext.refreshRibbon();
    }
}
When working with Choice fields (Option Sets) in Dataverse, we mostly use the label and internal numeric value. But there’s also a lesser-known property — External Value — which can be quite handy, especially in integration scenarios.
Below is the Priority column of the case table.
We have Severe, Moderate, and Minor external values specified for High, Normal, and Low choices respectively. These external values could be how the external third-party system is tracking the priority values to which we are integrating.
The external system sends us “priority”:” high” and we map that to the internal value 1 in Dataverse.
While sending data to the external system we convert the internal value to the external code i.e. 1 to. High
Below is how we can read the external values.
var myServiceClient = new CrmServiceClient(connectionString);
if (myServiceClient.IsReady)
{
var request = new RetrieveAttributeRequest
{
EntityLogicalName = "incident",
LogicalName = "prioritycode",
RetrieveAsIfPublished = true
};
var response = (RetrieveAttributeResponse)myServiceClient.Execute(request);
var picklistMetadata = (PicklistAttributeMetadata)response.AttributeMetadata;
foreach (var option in picklistMetadata.OptionSet.Options)
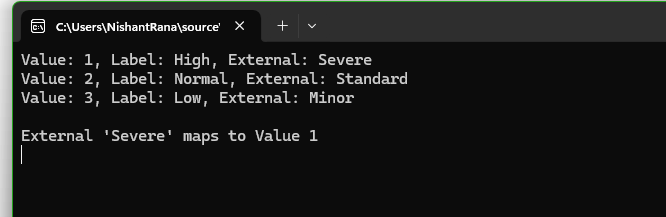
{
Console.WriteLine($"Value: {option.Value}, Label: {option.Label?.UserLocalizedLabel?.Label}, External: {option.ExternalValue}");
}
string ext = "Severe";
var match = picklistMetadata.OptionSet.Options.FirstOrDefault(o => o.ExternalValue == ext);
if (match != null)
{
Console.WriteLine($"\nExternal '{ext}' maps to Value {match.Value}");
}
}
Using External values, we can decouple integrations from the internal values that we use for our choice column. By using them, we can speak the language of the external system while still maintaining proper structure and metadata within Dataverse.
While working on a LINQ query using early-bound classes in a Dynamics 365 plugin, we encountered a familiar error.
“Could not find an implementation of the query pattern for source type. ‘Where’ not found”
At a glance, everything looked fine. The query was syntactically correct, and the early-bound class was generated properly.
After spending some time, we realized that the error message wasn’t due to the query or the early-bound class itself. It was because we forgot to include the following directive:
using System.Linq;
Without this, C# doesn’t recognize LINQ query methods like Where, Select, or ToList.
Adding this single line at the top of the file resolved the issue immediately, the LINQ query compiled and executed as expected.
Dataverse provides a flexible way to manage data through choice (option set) fields. One of the newer enhancements is the Hidden property, which allows administrators to hide specific choice values from selection while retaining them in the system.
To see it in action,
Navigate to Dataverse Table Designer in the Power Apps Maker Portal, and select the Choice (Option Set) field.
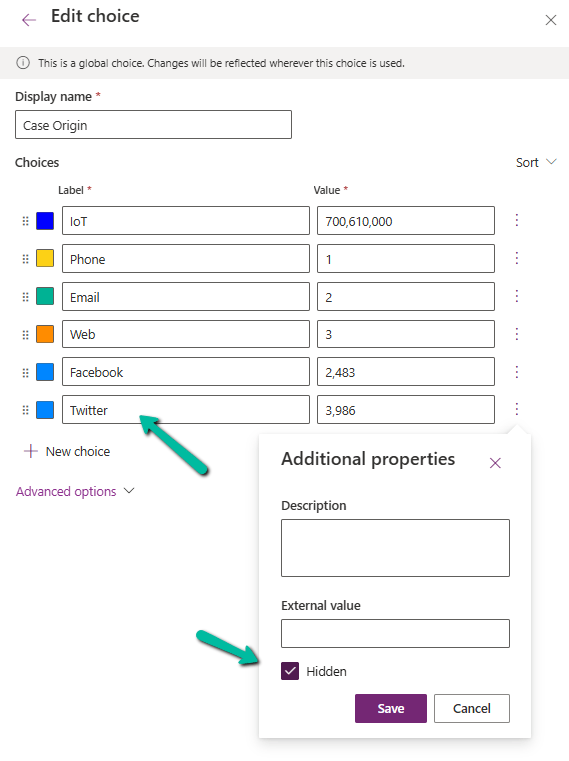
Here we have selected the Origin choice field of the Case table.
We have selected the Twitter choice value.
Click on a particular choice value and open Additional Properties, check the Hidden checkbox, and save and publish the changes.
After applying these settings,
Hidden choice values will not appear in dropdown lists when users create or update records.
Existing records with hidden values will still display them in forms and views.
We can see the option greyed out for the record having that existing hidden value.
Business rules and workflows can still reference hidden values.
The hidden choice remains in the metadata and can be retrieved using FetchXML, OData, or SDK queries.
Power Automate flows triggered on record updates will still recognize hidden values.
We can use this new feature for the deprecating values that should no longer be used but still need to exist in historical data. Also, we need to communicate changes to users to prevent confusion when certain values disappear from selection lists. And finally, we should consider data migration and cleanup if a value should never be used again.
Thus, the Hidden property for choice fields in Dataverse provides a powerful way for us to manage choice options dynamically without affecting existing records. By leveraging this feature, we can ensure a smoother transition when phasing out obsolete values while maintaining data integrity.
We all know how frustrating it can be to dig through records just to find key details. With AI-generated record summaries, users can instantly access important information—saving time, reducing effort, and boosting productivity.
We can now create AI-powered record summaries for any table in Power Apps using a simple, guided prompt builder. We get to choose the fields and details that matter most, ensuring users see the right information briefly. There’s even an online testing option to fine-tune the summary before rolling it out. Once set up, the record summary will be readily available in forms, making information access effortless.
To enable it inside the Power Platform Admin Center, select an environment and navigate to
Environment >> Settings >> Features >> AI insights cards
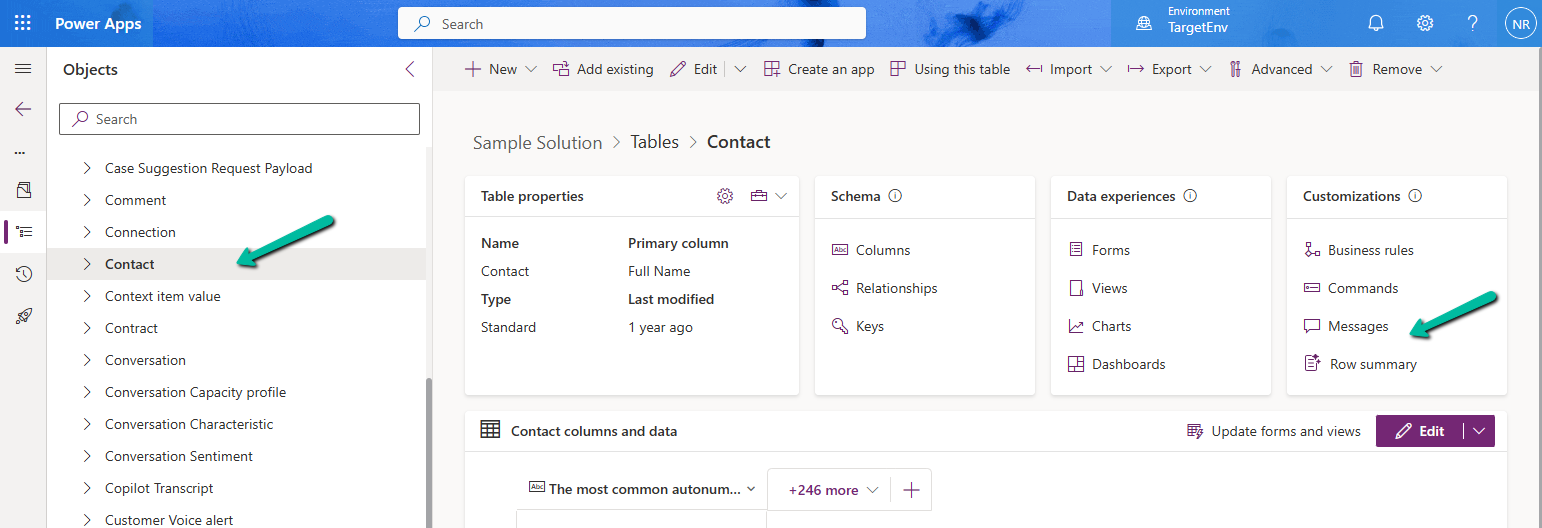
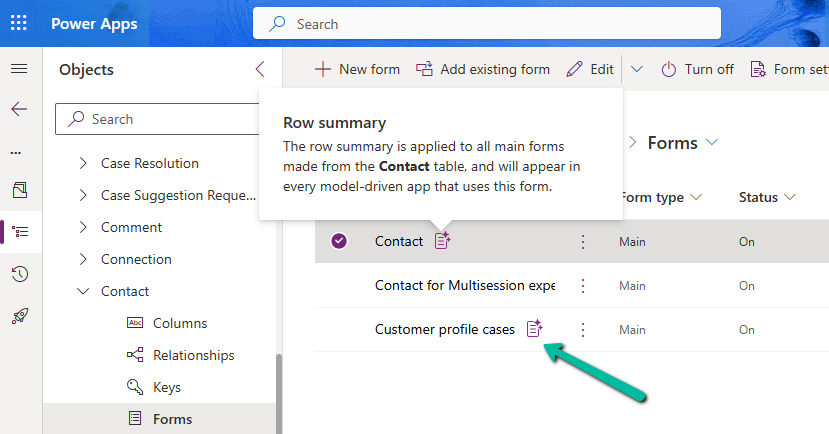
Inside Maker Portal, select the table, and from the Customizations section select the Row summary option.
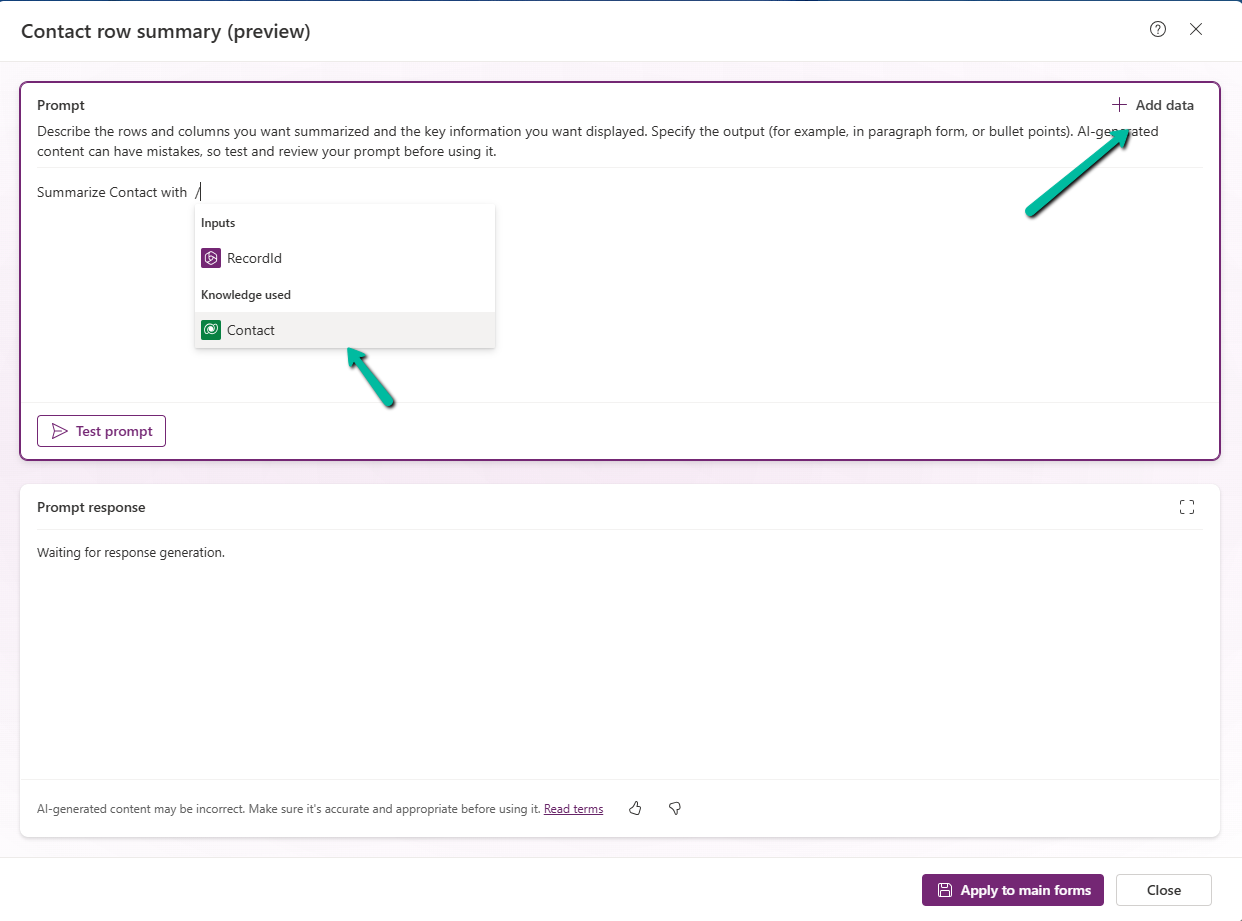
In the Prompt box, we can specify the columns we want to include as part of the summary.
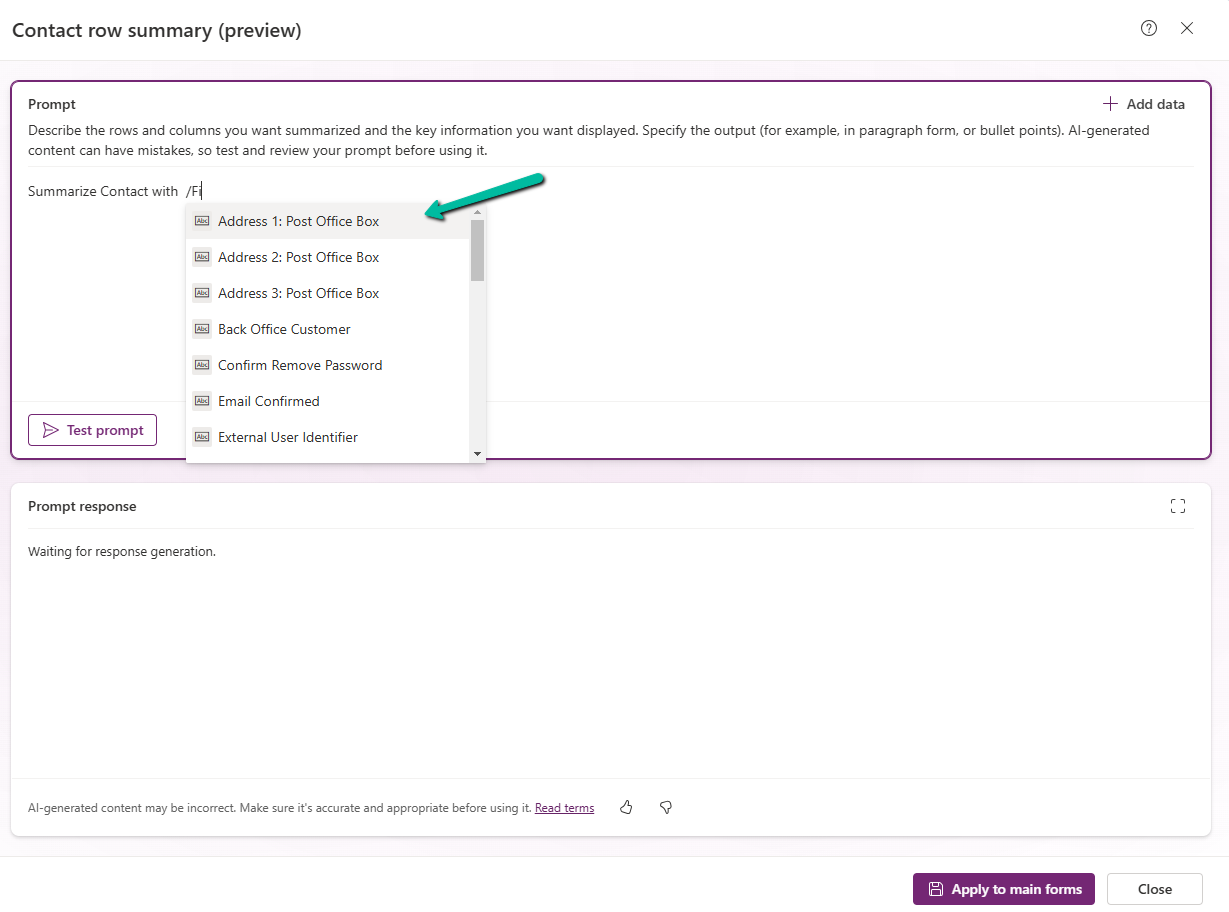
We can click on +Add data to do so can type the name of the field after “/”
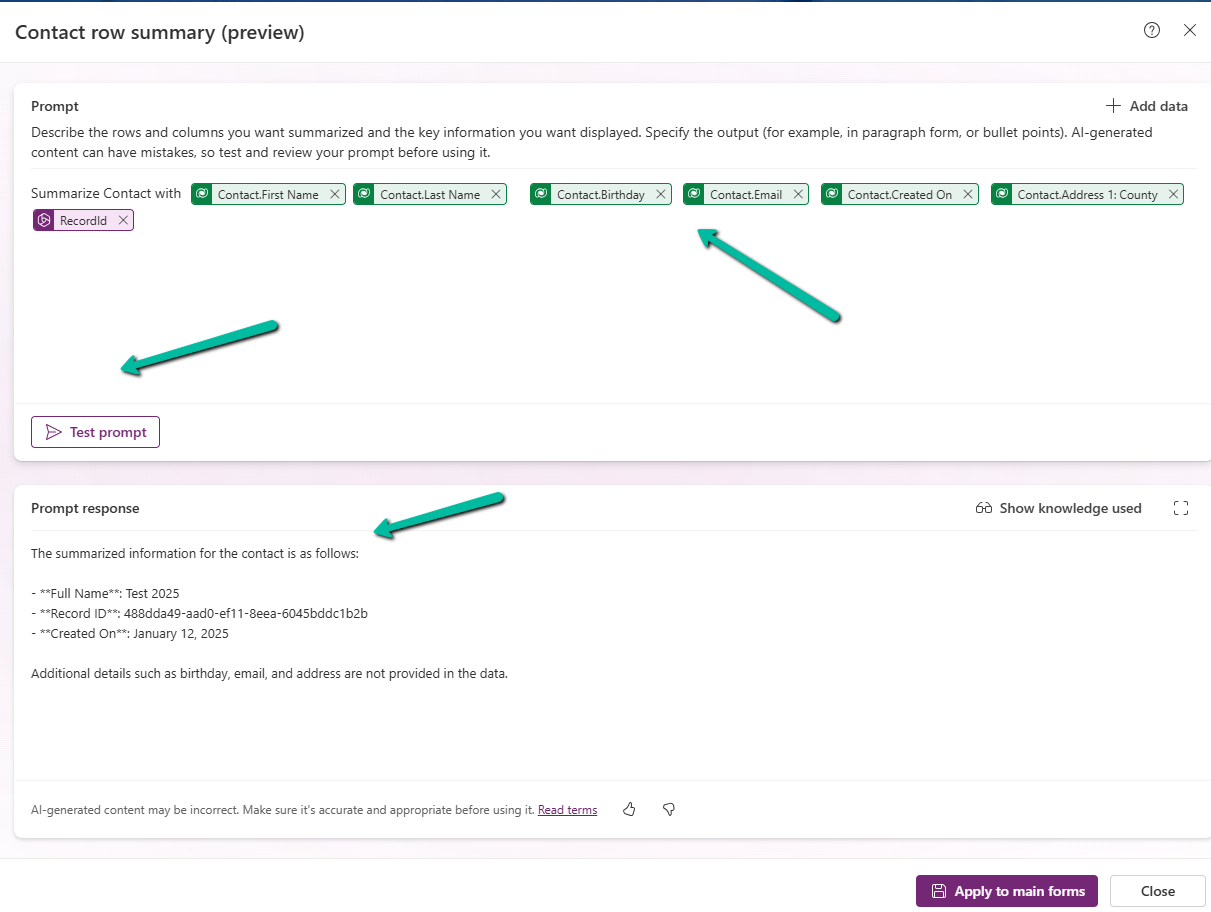
After specifying the fields, we can click on the Test prompt to see the response. And can fine tune it further.
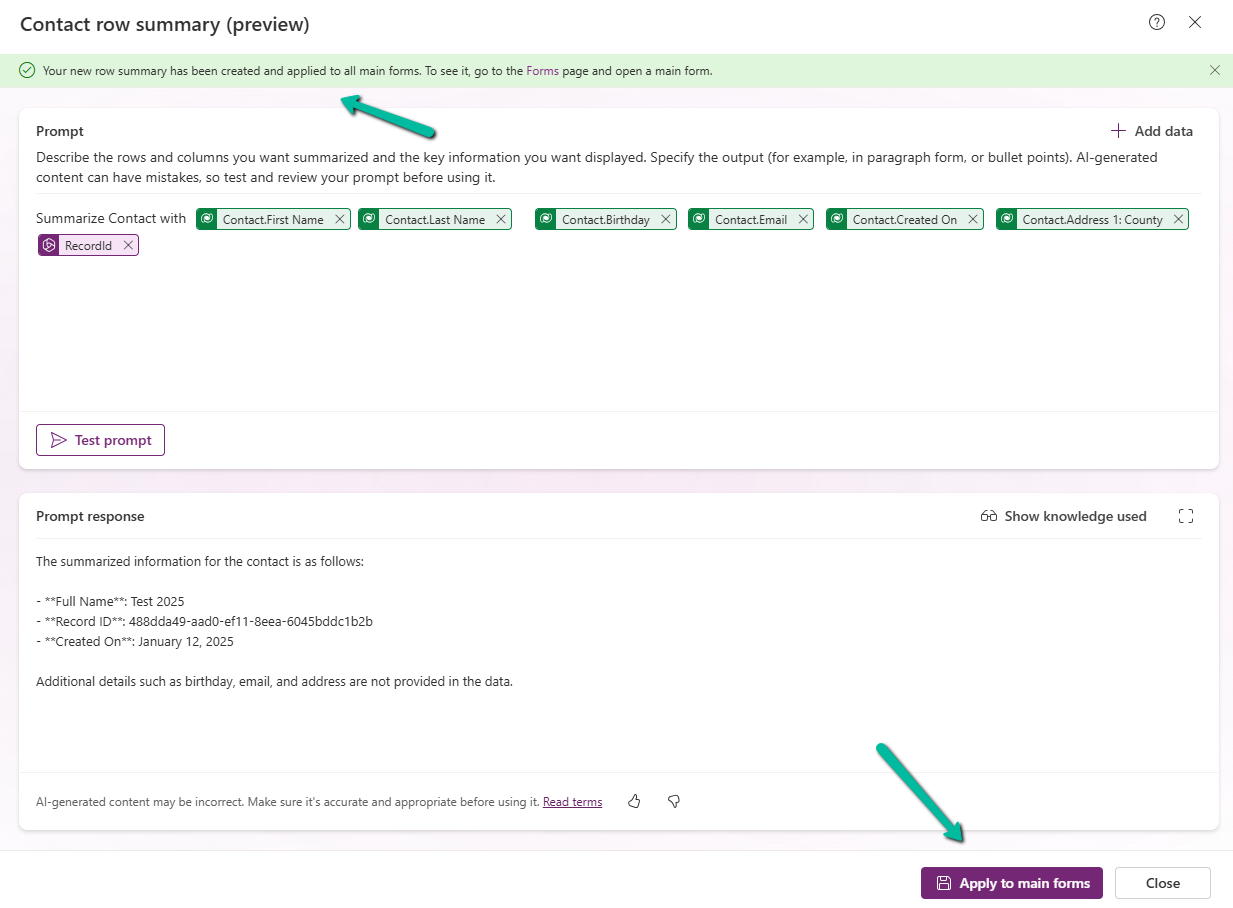
Clicking on Apply to main forms applies to all the main forms for the table.
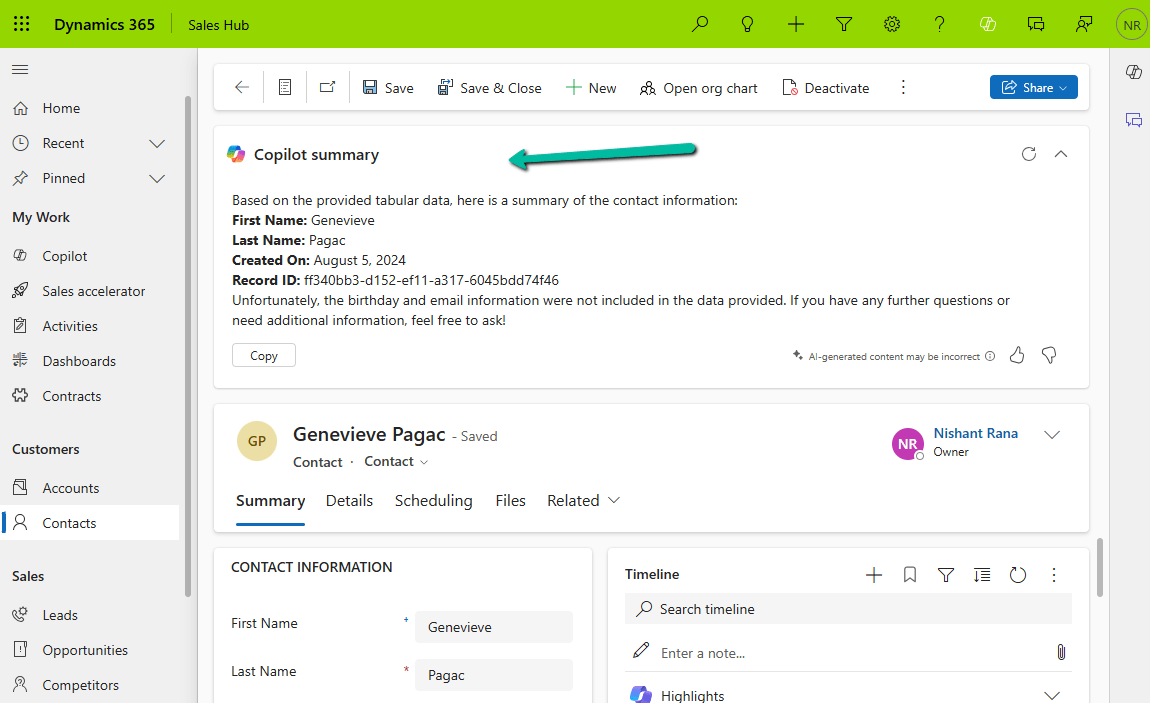
We can see the icon added next to the main forms.
The Row summary toolbar allows us to show, hide, and edit the summary.
Publish the changes.
Below we can see the summary generated for the Contact’s main forms.