Field Suggestions by Copilot for Canvas Apps apply to Gallery, Form Table controls both classic and modern for Dataverse, SharePoint, or SQL Server data source. It analyzes the schema of the table selected and recommends up to 10 fields that also include a maximum of 10 required fields of that table.
Let us see it in action.
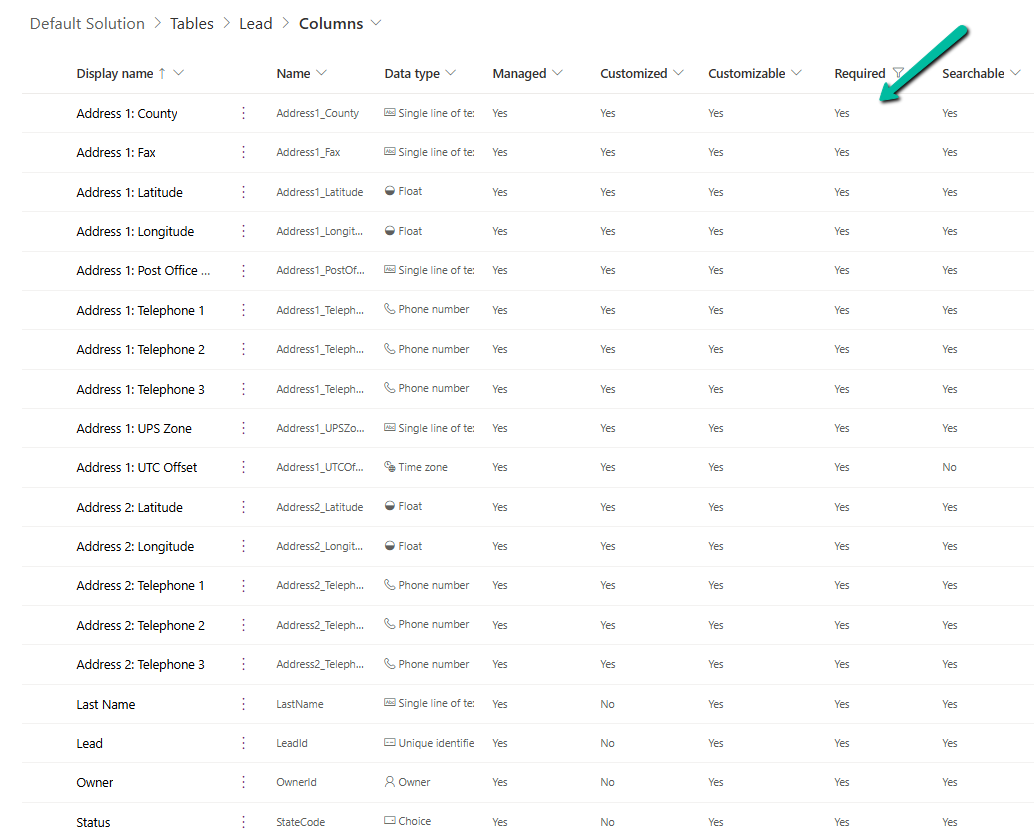
Below we have the following fields defined as required fields in the lead table.
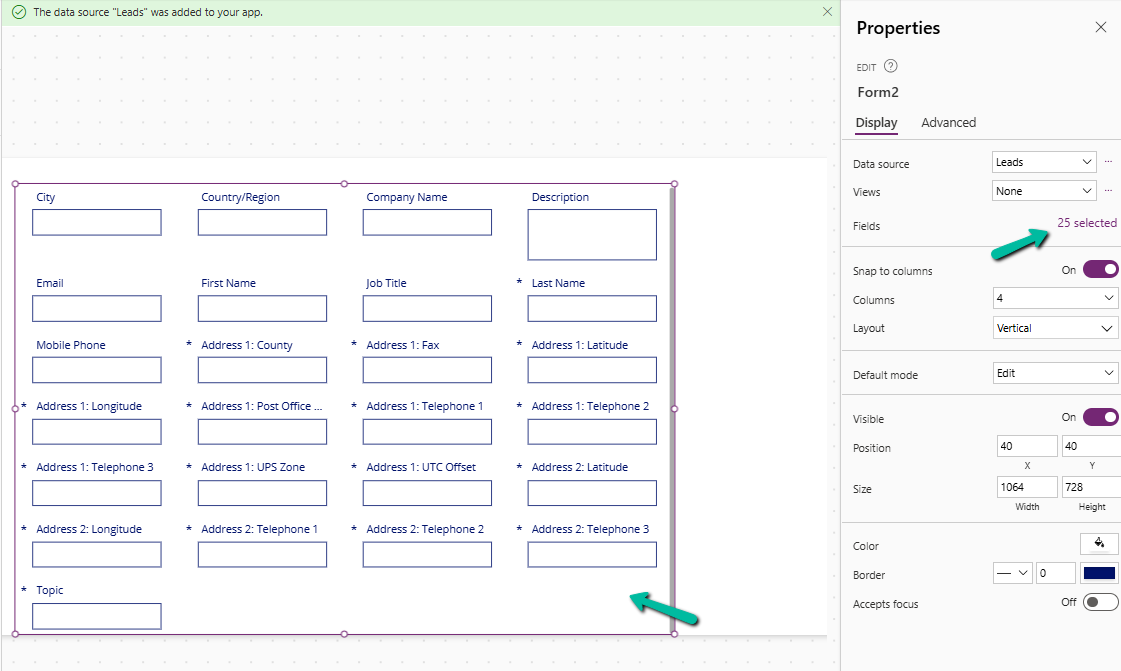
Now inside CanvasApp when we insert and bind the Modern Form / Table or the classic Edit Form / Display Form, Data Table to the lead table it automatically suggests the fields for binding.
Here we have selected Lead as the Data Source for the Edit form or Form (modern) control.
Here we can see it suggesting all the required fields of the lead along with other key fields of lead like City, Country, Email, First Name, etc.
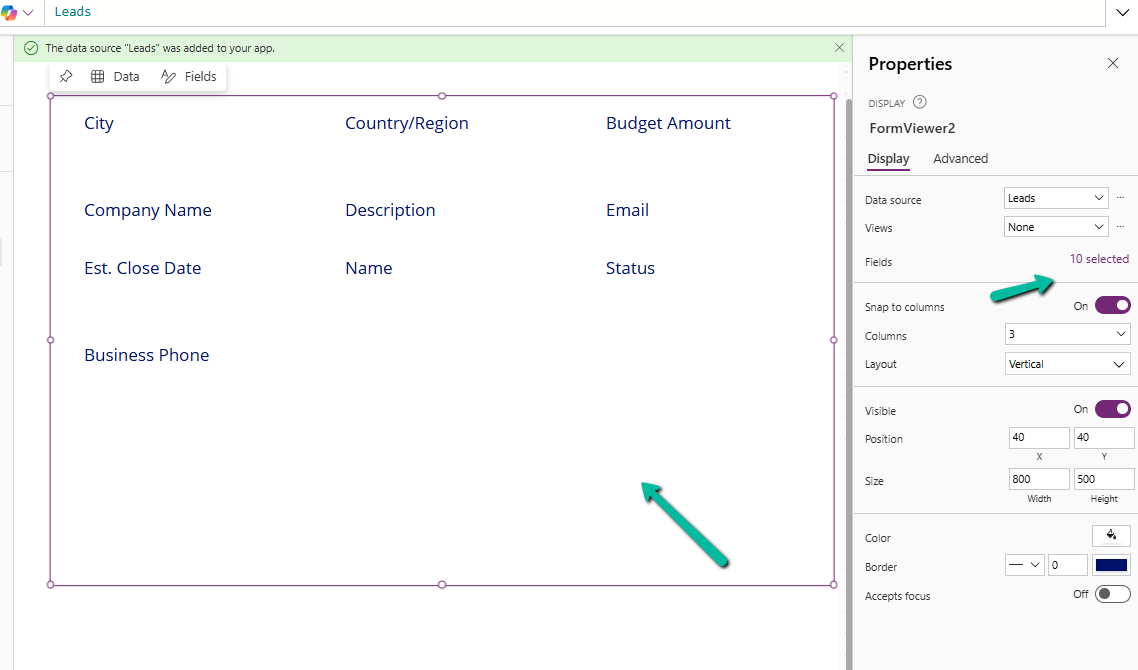
In the case of Table, we can see it suggesting the following 10 fields.
In the case of a custom table with very few fields in it, it suggested the below fields for Form and Table control.
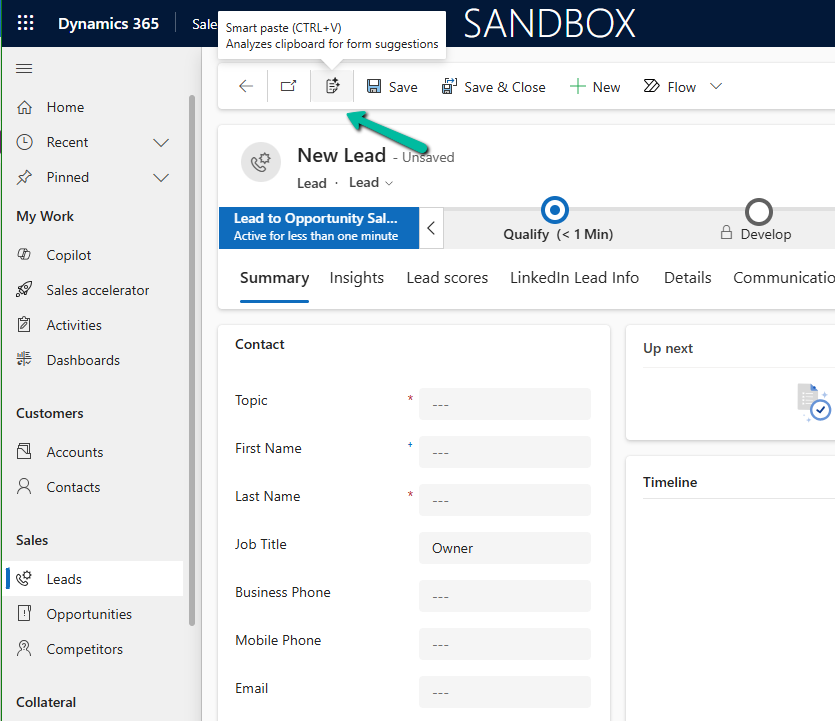
To enable this feature navigate to Power Platform Admin Center > Environment > Features > Enable smart paste (preview)
With the smart paste feature, we can copy the text to the clipboard that has the details we want to fill in for our form and click the smart paste button or use our normal CTRL + V. Copilot will analyze the pasted text and will provide suggestions for the different fields on the form.
Suppose we have copied the below text from an email received–
Below we have selected the Smart paste button.
We can see the notification that the Smart Paste is analyzing the clipboard data.
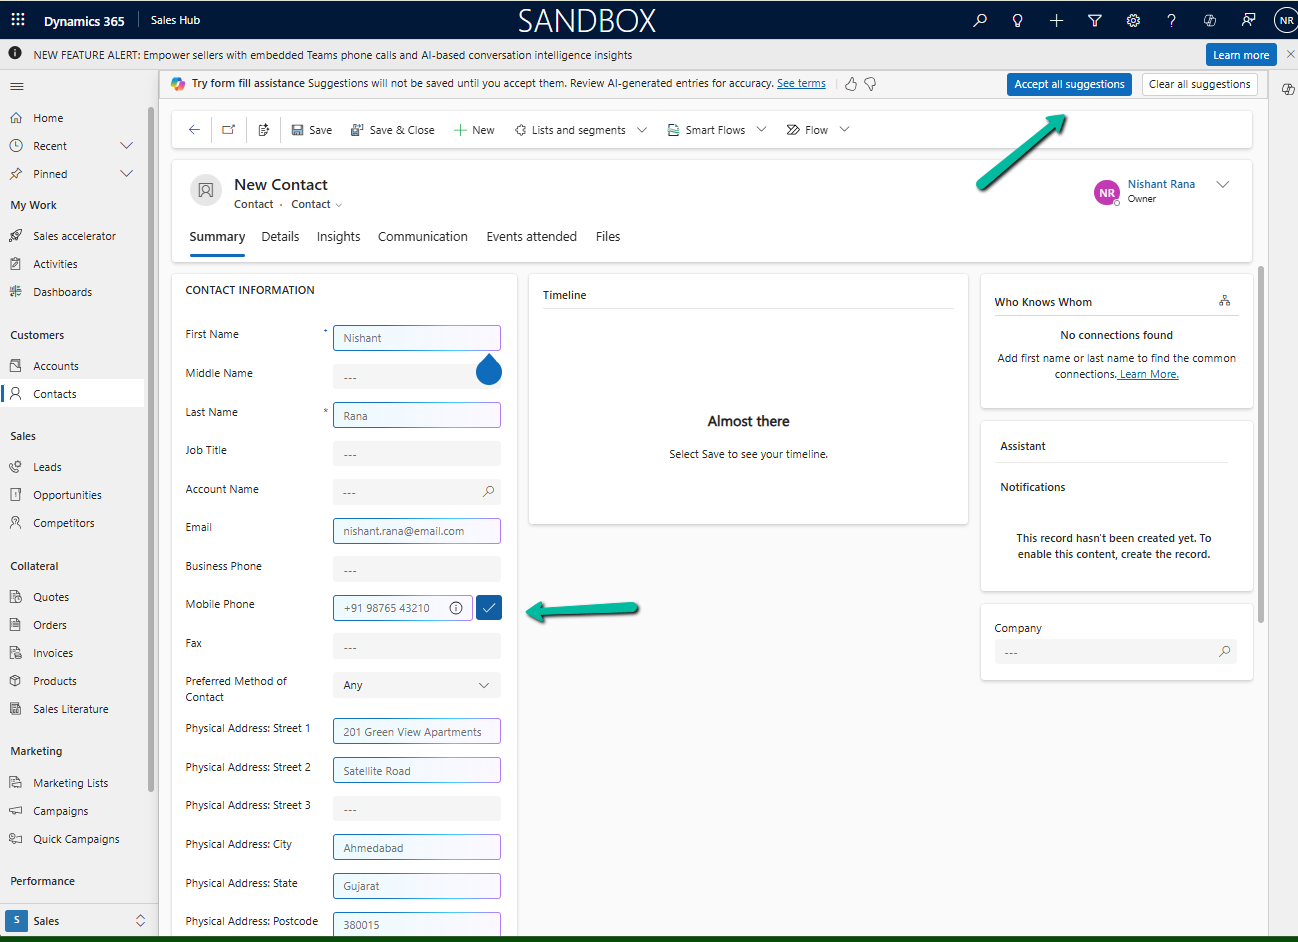
And can see it populating the suggestions for most of the fields from the text we had copied.
We can click on Accept all suggestions or select it for the individual fields.
On Accept all suggestions we can see the values auto-filled from the copied text in clipboard –
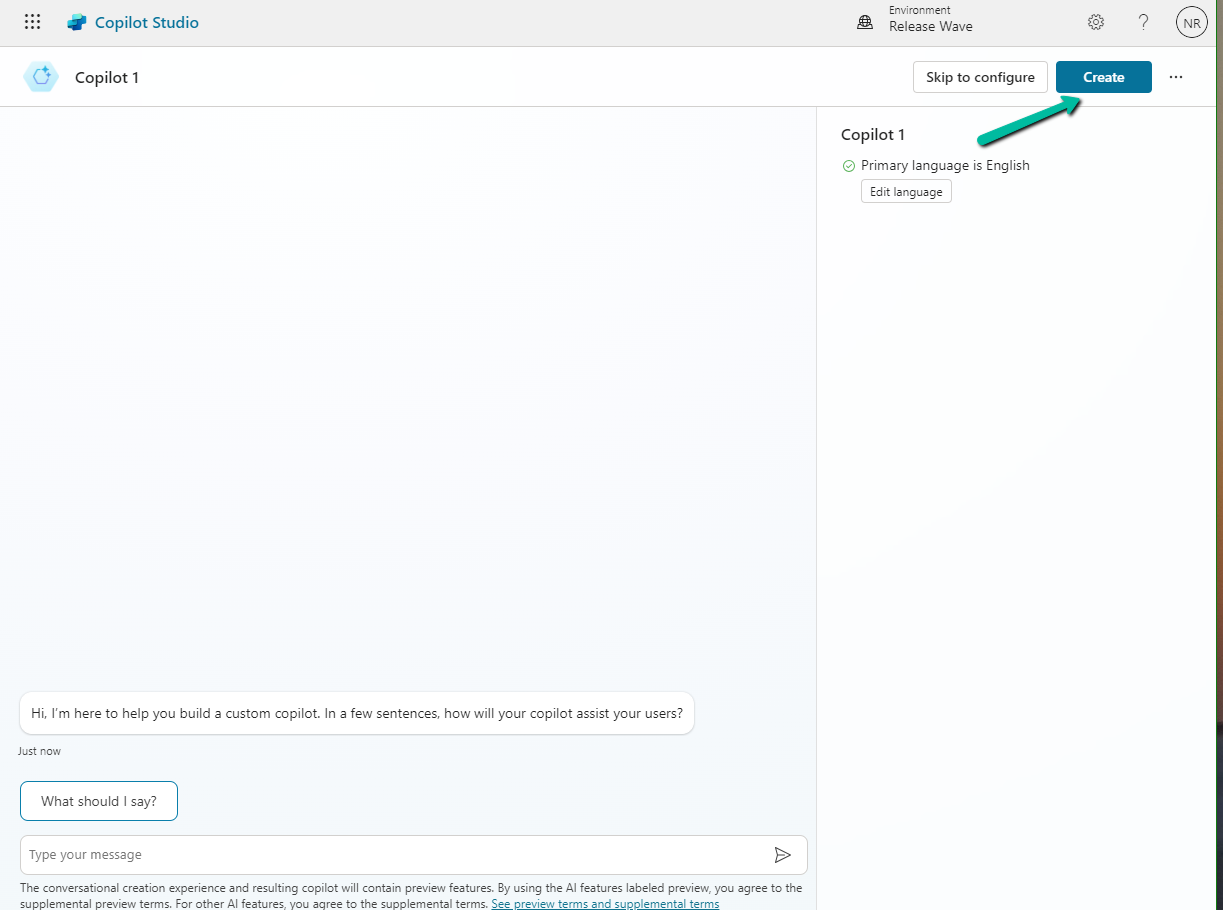
Select the appropriate environment and click on New copilot option (Create+)
Select Create
Here we have renamed the Copilot, next click on Add knowledge to add Dataverse as the source.
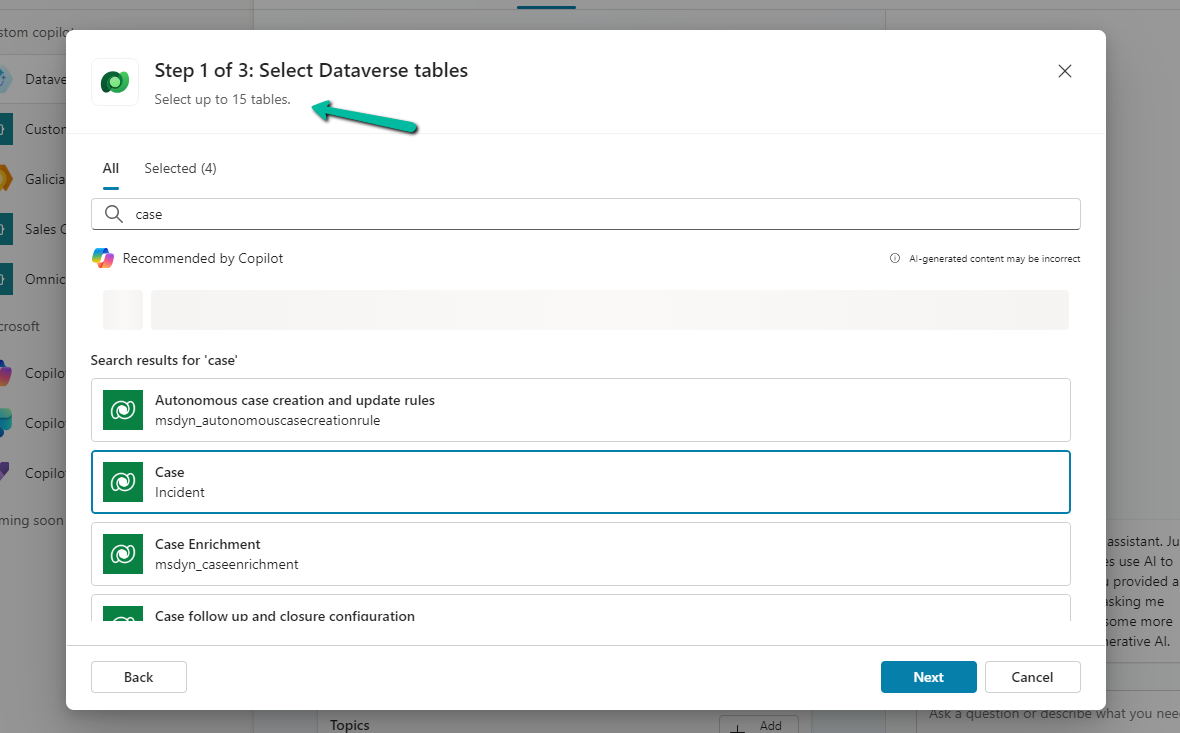
Add Dataverse
We can select up to 15 tables, and we have specified lead, contact, account, and case for now.
Next, we get the option to review the data for the tables selected.
In the last step, we get the option to review it. Here we can add/ edit the synonyms and glossaries that would make it easier for the copilot to understand and fetch the data. We’d skip it just to see how it works without configuring them.
Our copilot is ready now. The other things that we can do are to add actions, build topics, and publish which we’d leave as it is for now.
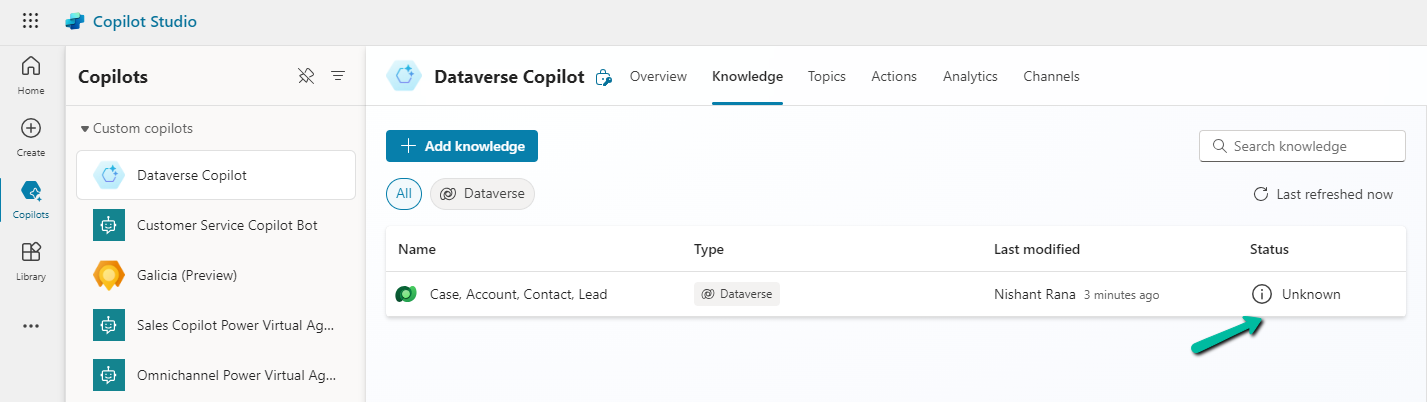
Click on the Knowledge tab. In a short time, we’d see the status changed to In Progress
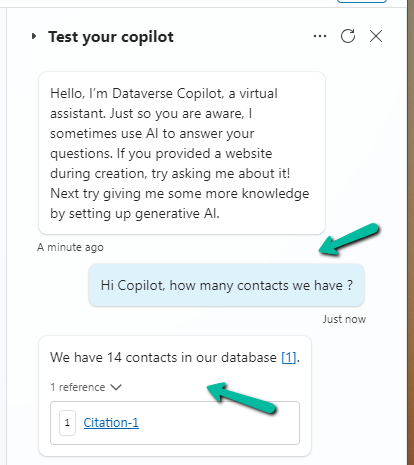
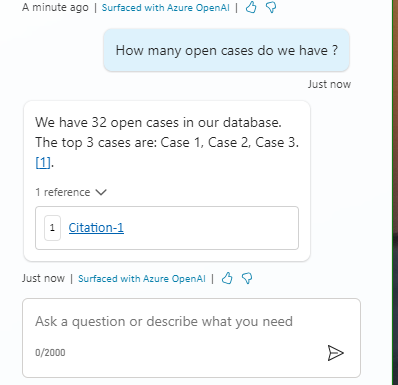
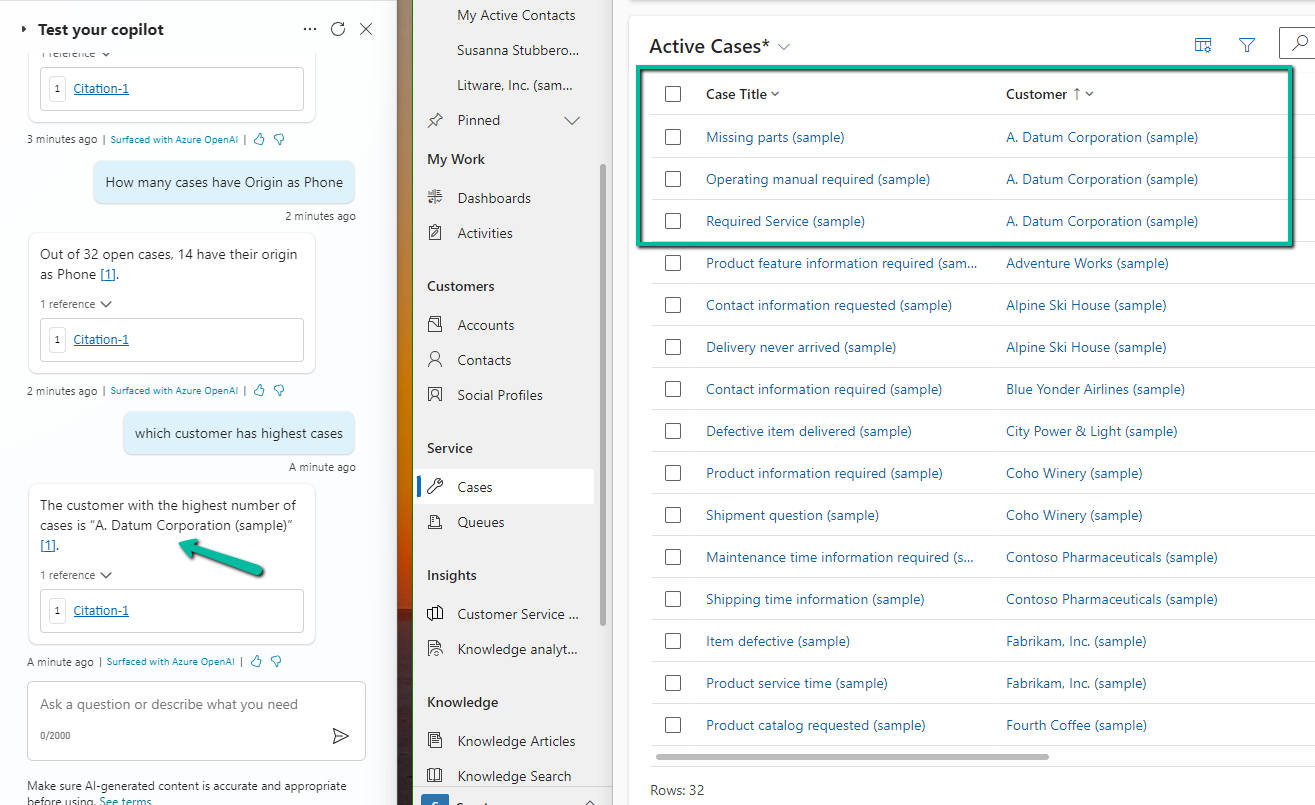
Meanwhile, we can still go ahead and test it.
As we are done with the testing let us try publishing it, before that let us check the authentication for it.
Navigate to Settings >> Security >> Authentication, here we can see Authenticate with Microsoft selected. We’d leave it like that.
Based on the Authentication mode selected, we will have different channels enabled / disabled.
Let us select the Microsoft Teams channel for our copilot.
Select Turn on Teams
Select Edit details
Add / Edit the details and click on Save.
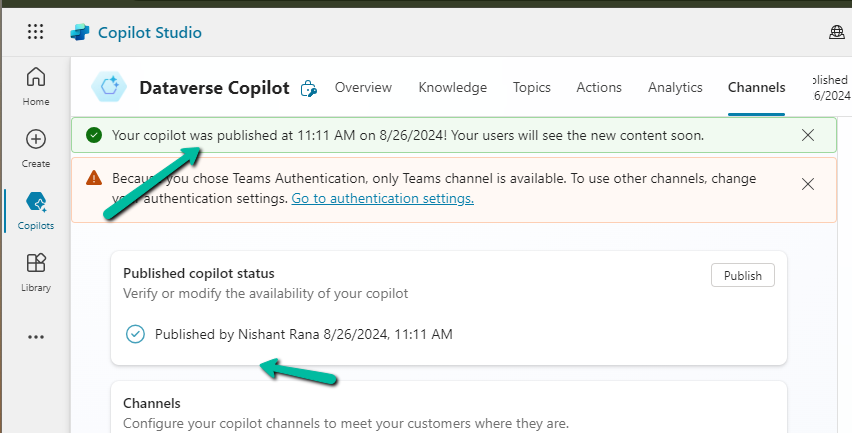
Now time to Publish our copilot.
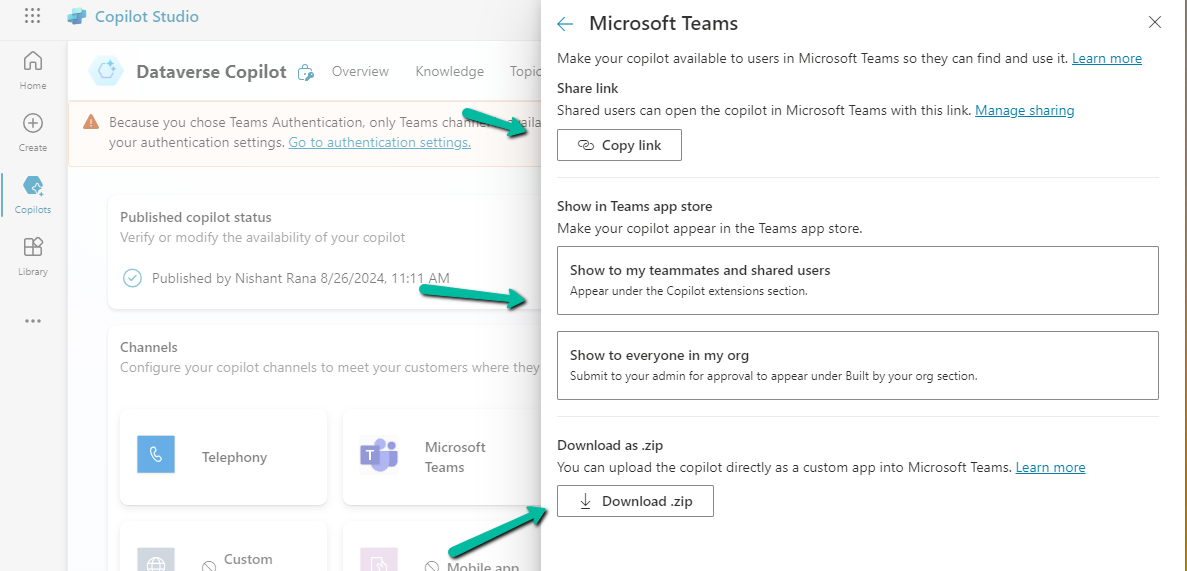
We can now again open the Microsoft Teams channel and select the Availability options.
Here we can see multiple options, one is to share the link, upload the zip, and show it in the teams store.
We selected the Show to my teammates and shared users option. We can add search and add users to share it with them.
The other option is to Copy link and share the link.
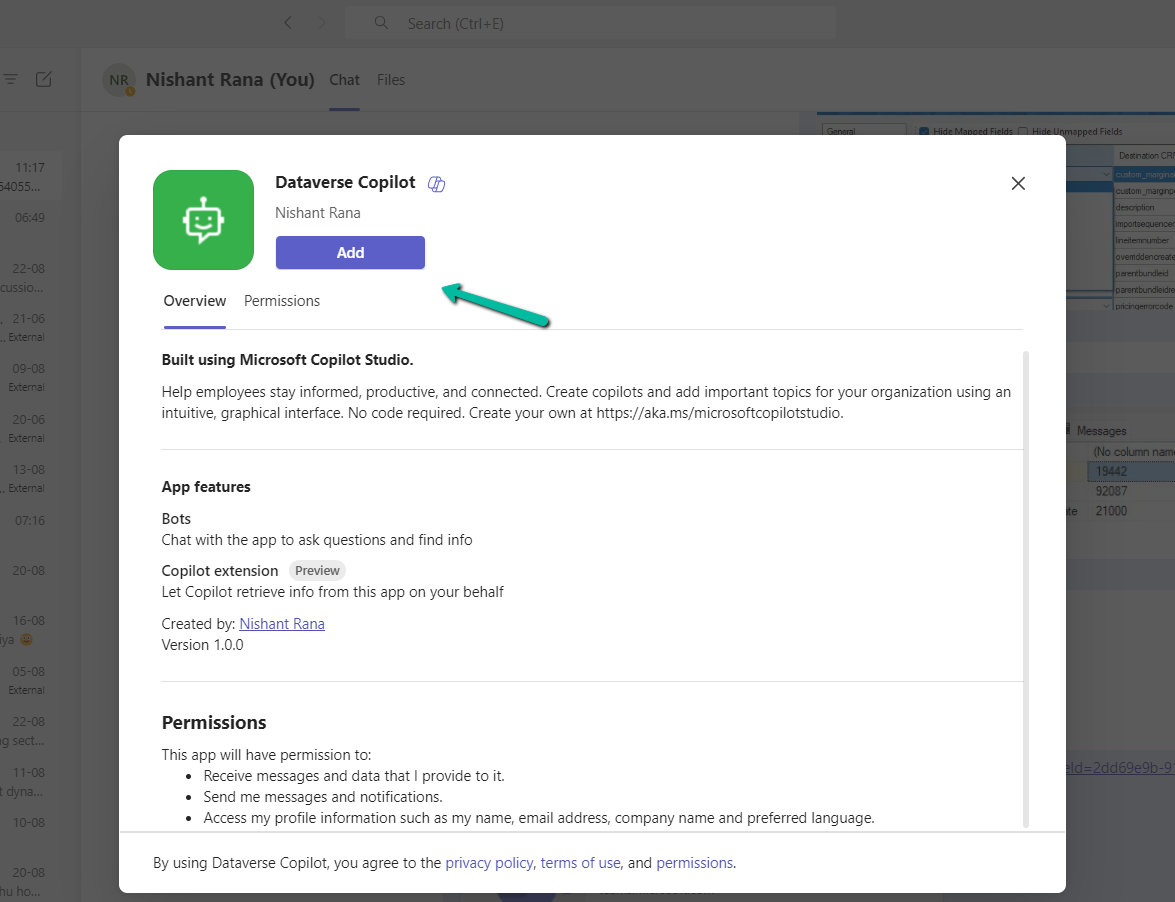
On opening the link, we get the option to add the app.
We can see our app added in the Manage your apps section in Teams.
Finally now we can start interacting with our copilot.
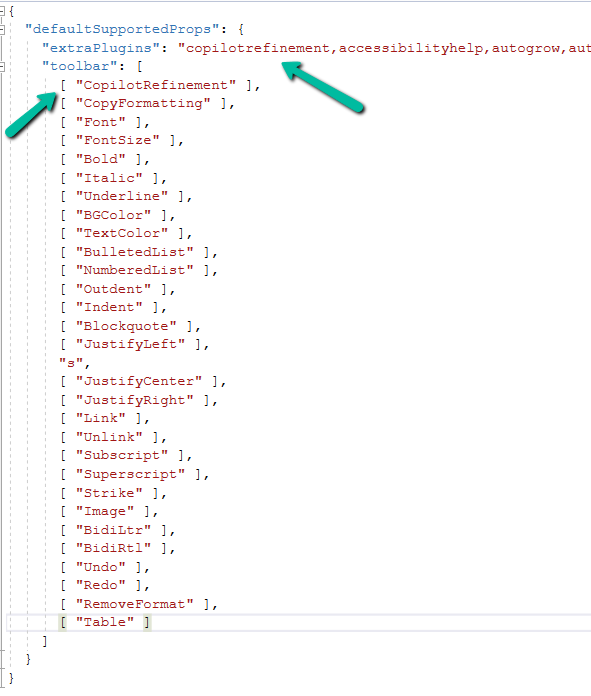
To enable Copilot for a specific instance of a Rich Text editor field, we first need to create a Web Resource where we need to specify the property we want to update/override as specified in the RTEGlobalConfiguration_Readonly.json, the base read-only configuration file for the Rich Text editor control.
We have created a JavaScript Web Resource file named rtecustom.js.
Added the copilitrefinement and CopilotRefinement values to the extraPlugins and toolbar properties existing values as shown to enable copilot.
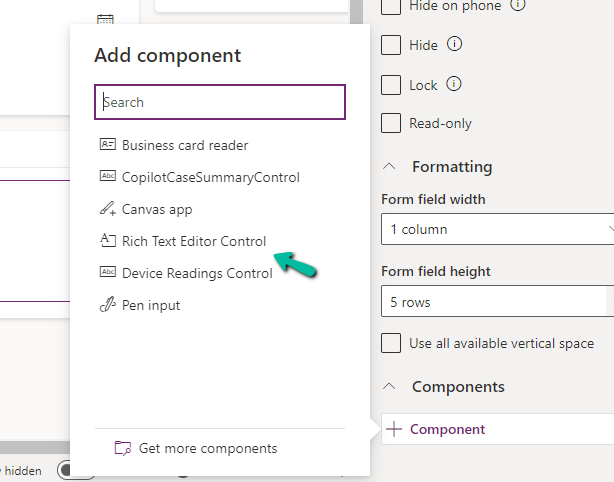
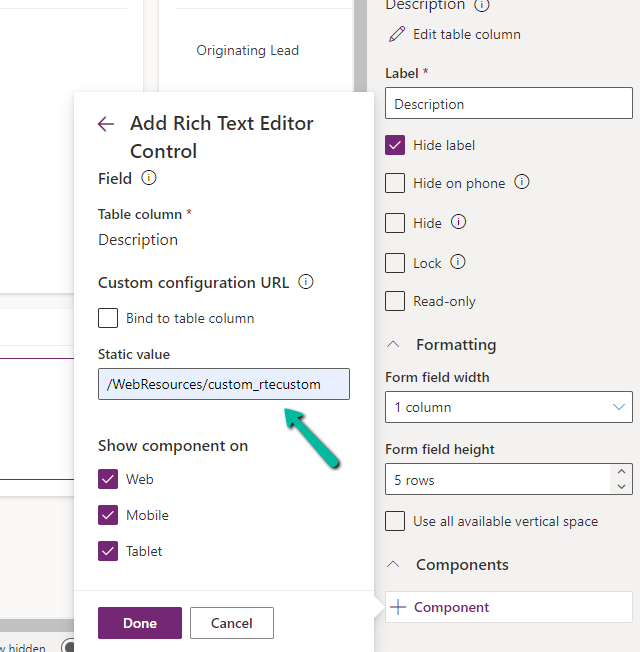
Next, we opened one of the Contact’s forms for Customization, selected the description field, and added the component – “Rich Text Editor Control” to it.
In the Static value property, we specified the relative URL of the Web Resource file. We can also specify the full path but then we would need to update it each time we move it to other environments.
Save and publish the changes.
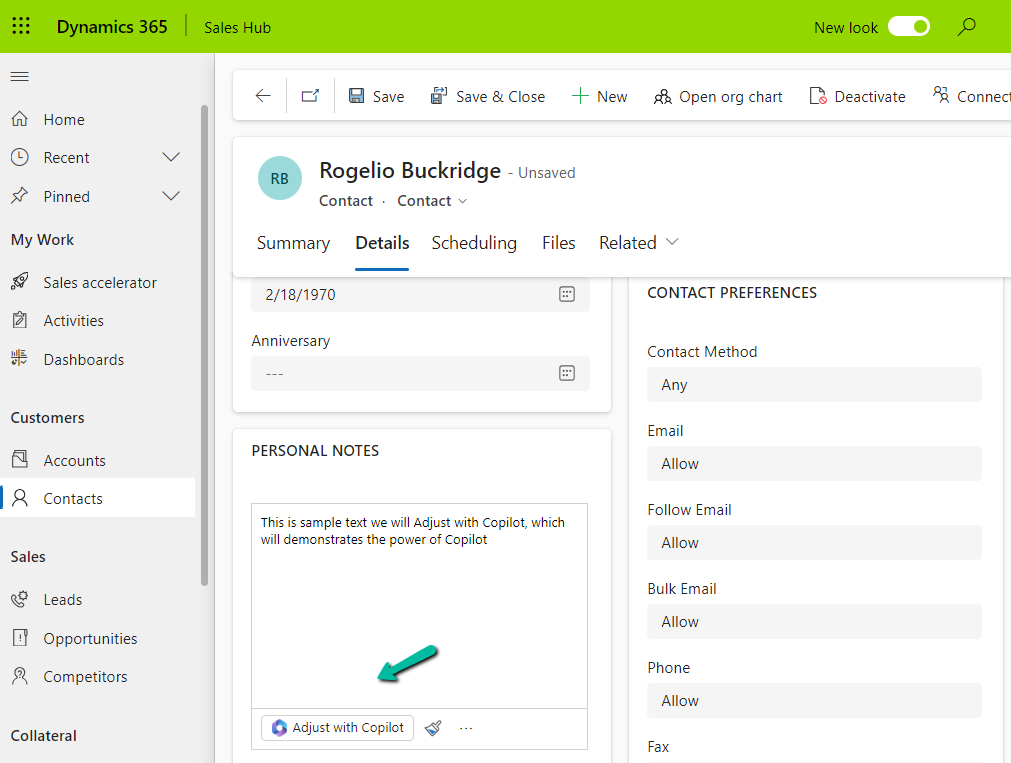
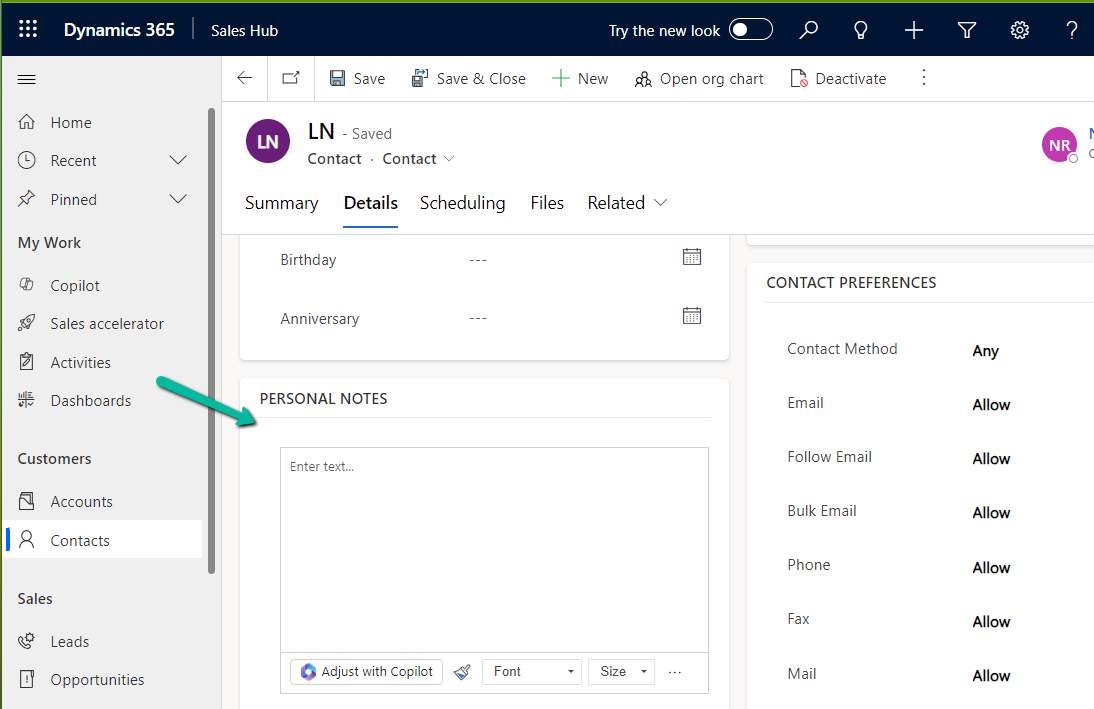
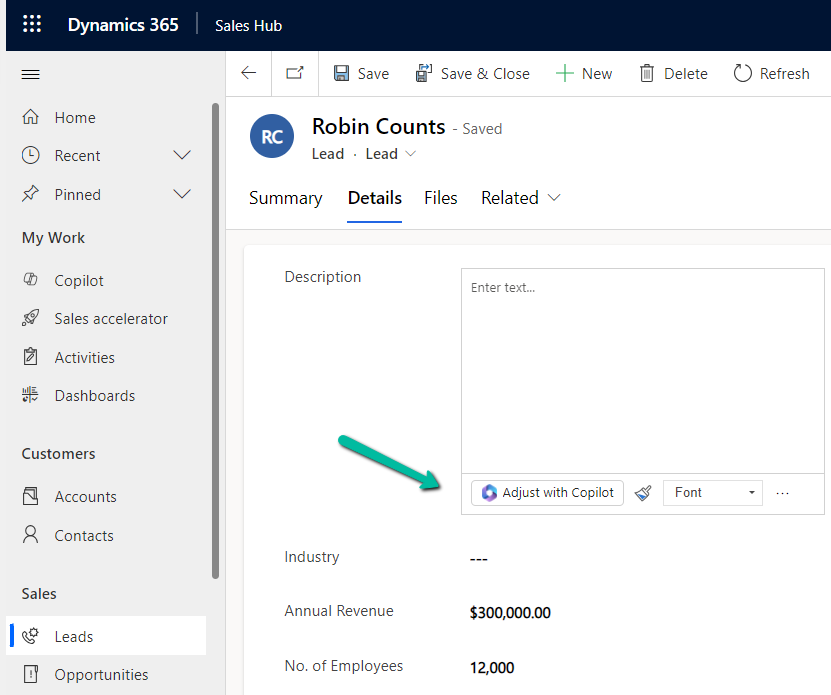
We can see the option Adjust with Copilot added to the toolbar for the control.
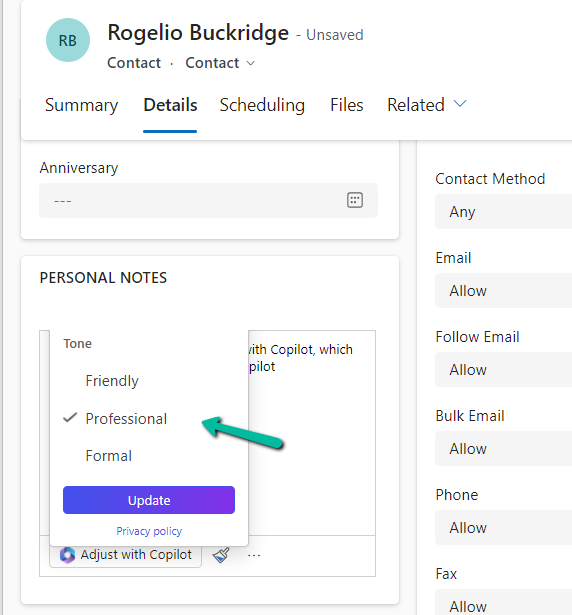
On selecting the text, and clicking on “Adjust with Copilot”, we get the option to update the Tone of the content.
On selecting a Professional tone, the text is updated in the control.
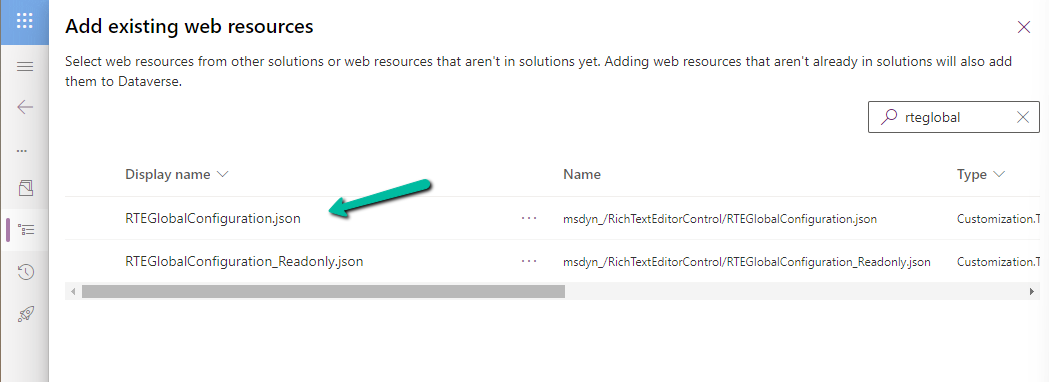
In case we want to apply to all the fields that are using Rich Text Editor Control instead of specifying it for individual fields, we need to update and add the same JSON to the existing RTEGlobalConfiguration.json file.
The file is blank by default, and we can specify properties to it that we want to override.
We updated the RTEGlobalConfiguration.json file, to use the same definition we used earlier for our custom web resource.
We can see the “Adjust with Copilot” added to the form even without specifying the URL in the static value while customizing the form.
On saving and publishing the changes, we can then see it rendered for all the Rich Text Editor fields.
Using the “Sales Copilot” we can get the list of leads and opportunities assigned to us in the last 15 days.
For this, we can use the “What’s newly assigned to me” prompt
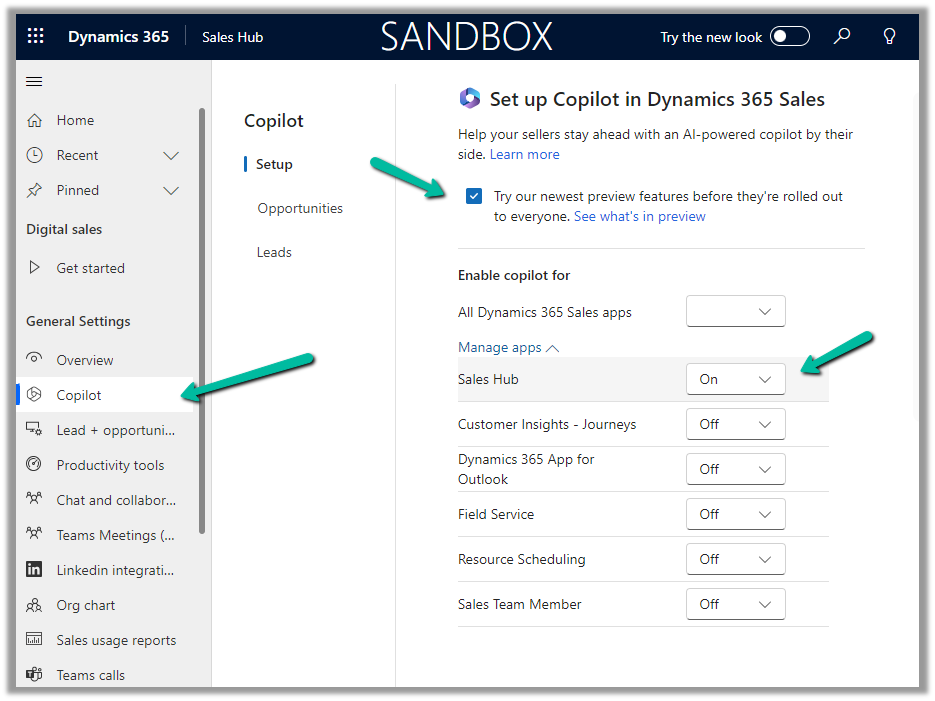
To enable Sales Copilot, Inside Sales Hub, navigate to App Settings >> Copilot (General Settings) and specify the Sales Apps in which we want the Sales Copilot to be enabled.
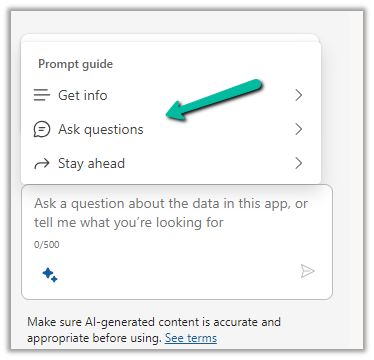
To see it in action, open the Sales Copilot Help Pane, select the Sparke Icon to open the Prompt Guide, then Ask questions >> What’s newly assigned to me
The result shows the list of leads and opportunities assigned to you in the last 15 days.
We can than select the record and click on Summarize to get the summary or can open the record to see the details.
Using the “Sales Copilot” we can get the list of opportunities assigned to us.
For this, we can use the “Show my pipeline” prompt
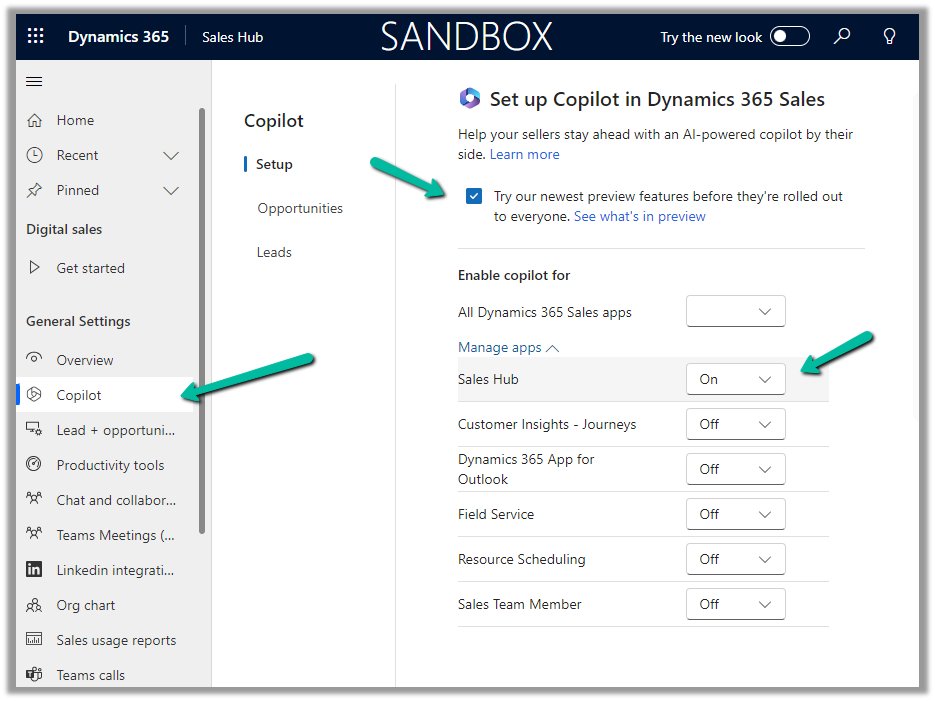
To enable Sales Copilot, Inside Sales Hub, navigate to App Settings >> Copilot (General Settings) and specify the Sales Apps in which we want the Sales Copilot to be enabled.
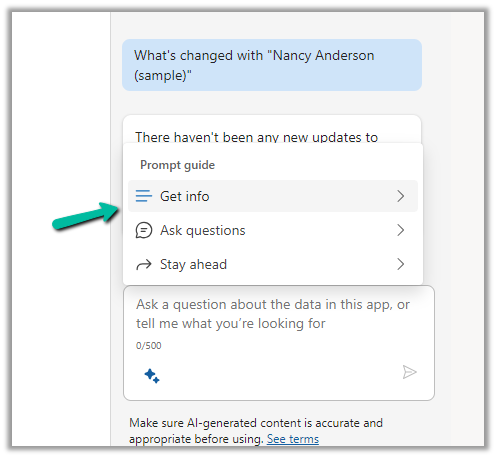
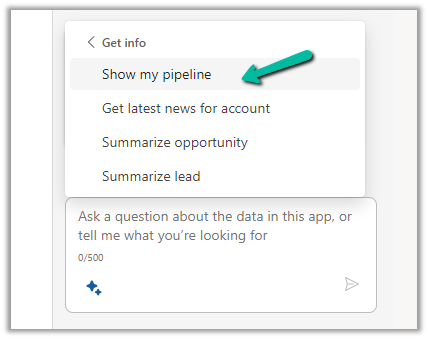
To see it in action, open the Sales Copilot Help Pane, select the Sparke Icon to open the Prompt Guide, then Get Info >> Show my pipeline
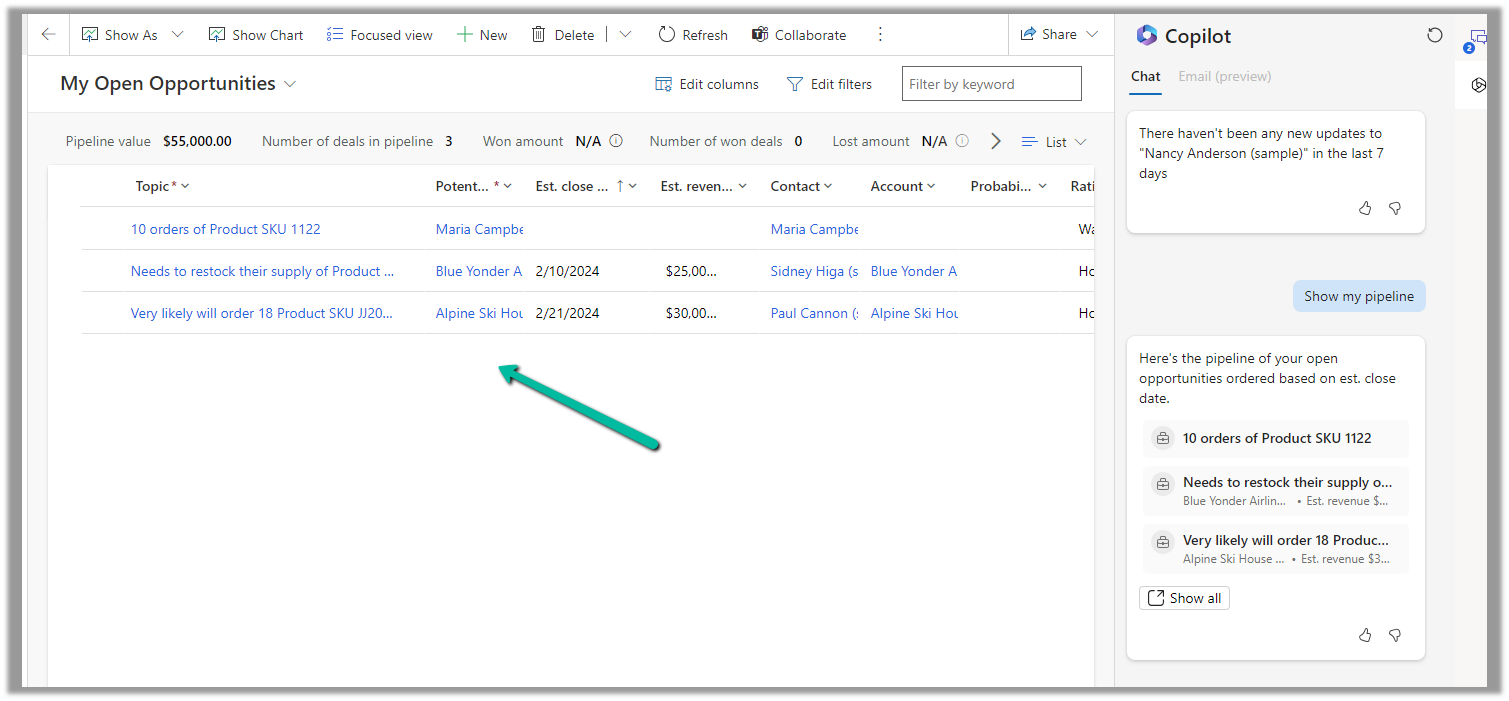
The result shows the opportunities sorted based on the estimated close date.
Clicking on “Show all” opens the corresponding opportunity view.