We might below error in our flow – BadRequest. Http request failed as there is an error: ‘Cannot write more bytes to the buffer than the configured maximum buffer size: 104857600.’.
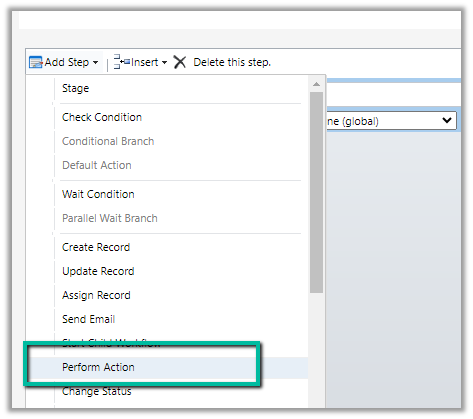
We might see some of the custom actions not appearing in the Actions list inside the Perform Action step of the workflow.
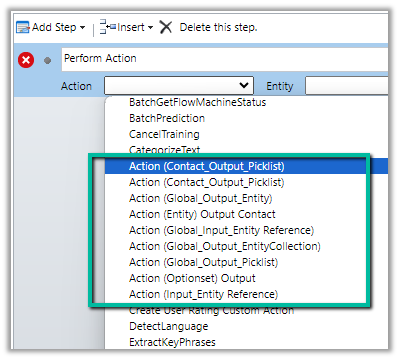
This is because the Custom Action would be using one of the following parameter types, which is not supported for Perform Action like
Picklist (Optionset)
Entity
Entity Collection
E.g. we have the following actions defined few are bound to the Contact table, some are Global, and have different types specified as either Input or output parameter.
Out of the above actions defined, we can see only the following actions listed inside the perform actions step of the workflow.
The action which has input as Entity Reference are the ones listed, as it is one of the supported types. For the unsupported types, if used as an output parameter, the actions are listed.
Using Solution Health Hub we can validate the environment’s configuration, which might get modified over time, to get an idea about the state of that environment and detect and resolve any issues. Solution Health Hub enables rules-based validations, which we can run periodically or manually if we encounter any issues. The rules also get triggered automatically when solutions are installed or updated by Microsoft. The rules check if some of the required processes are disabled or owned by a disabled user, if some of the required web resources are missing, if certain plugin steps are not active etc.
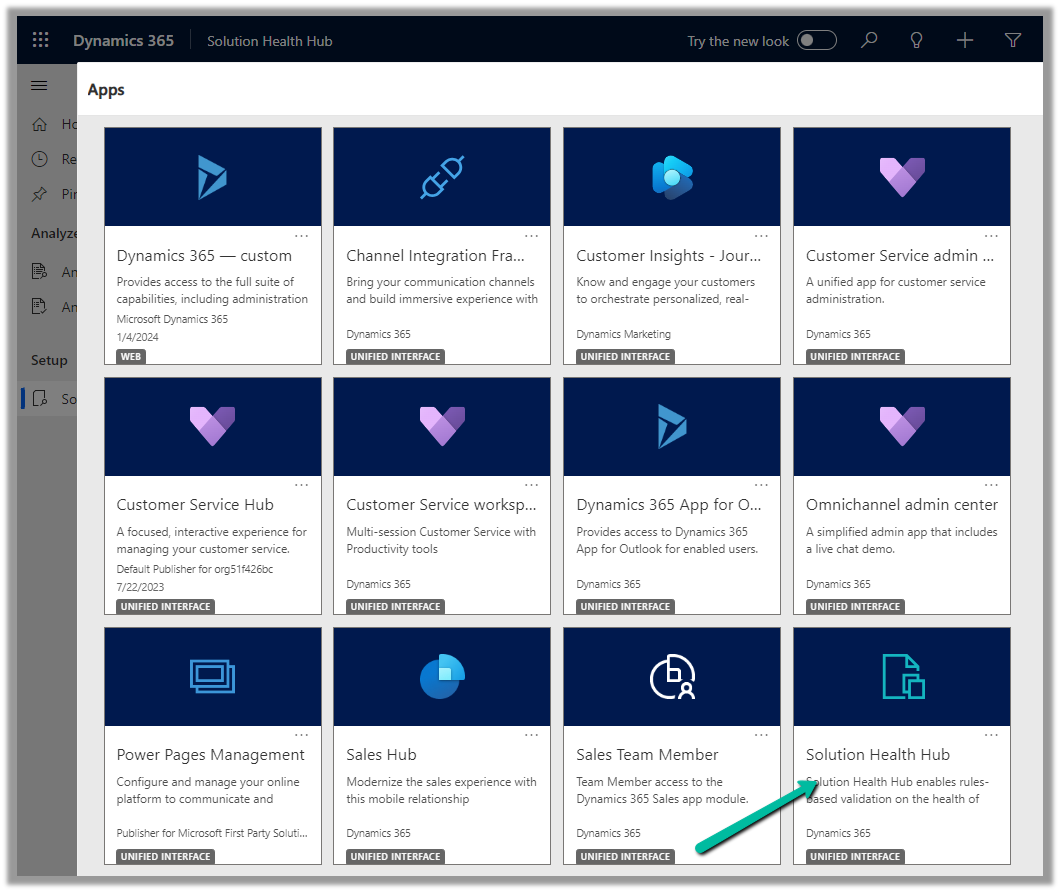
Let us open the Solution Health Hub app and see it in action.
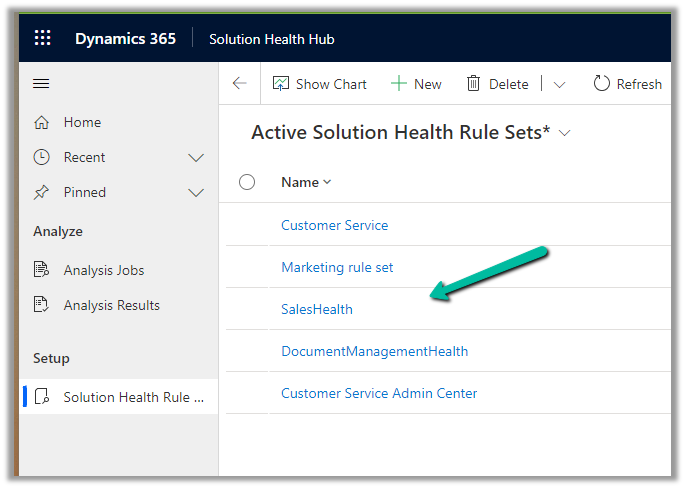
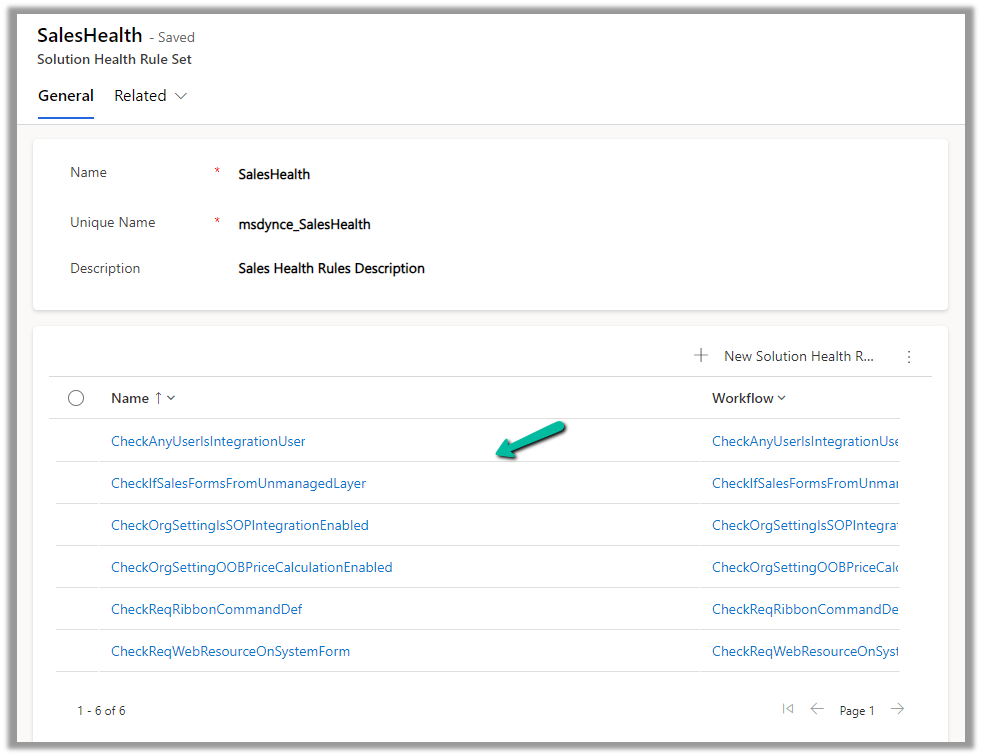
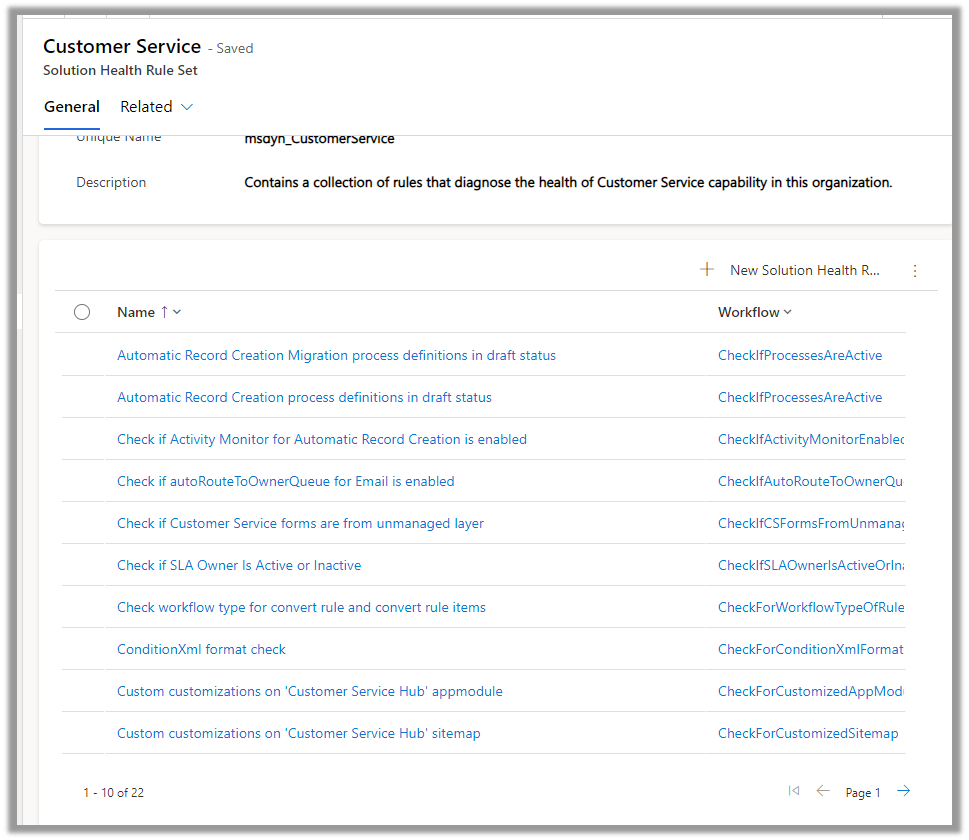
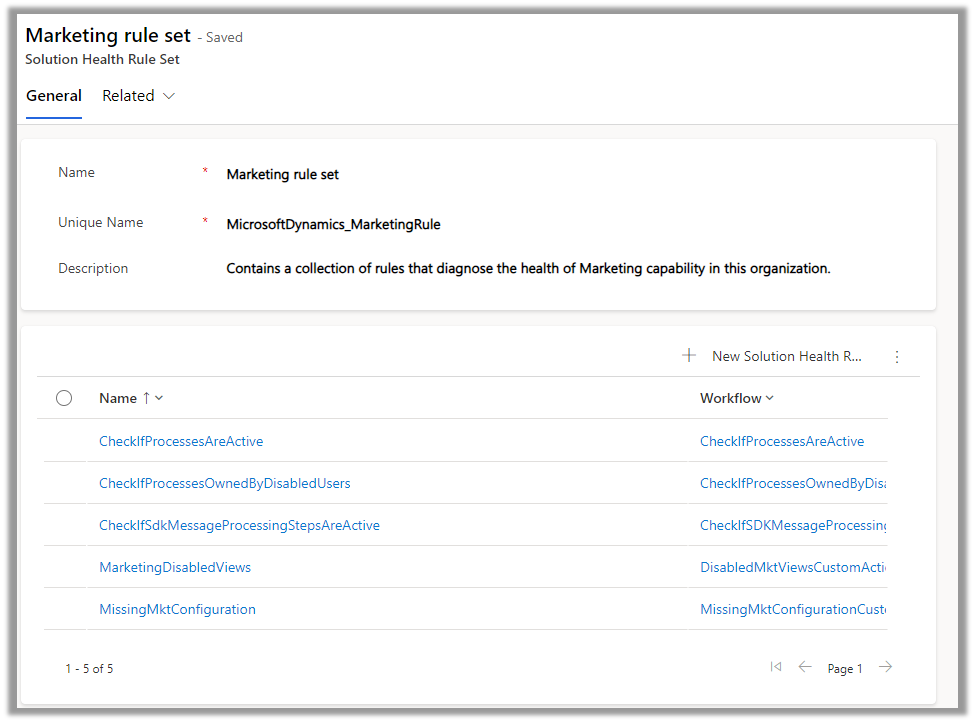
We can see the Rule Sets created specific to different areas (app) like Sales, Marketing, Customer Service, etc.
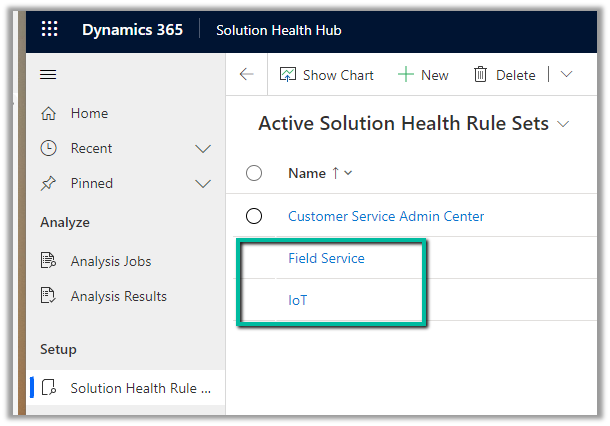
For an environment where Field Service is configured, we can see the following rule sets.
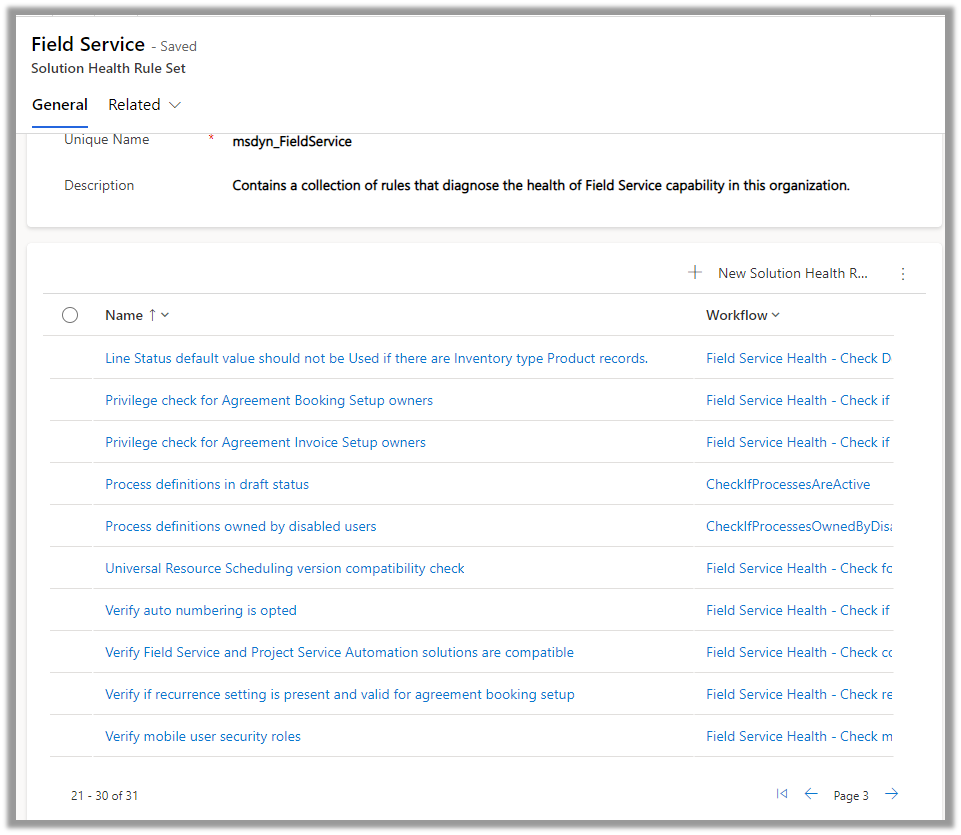
Let us open the Field Service Rule Set and see the rules defined for it.
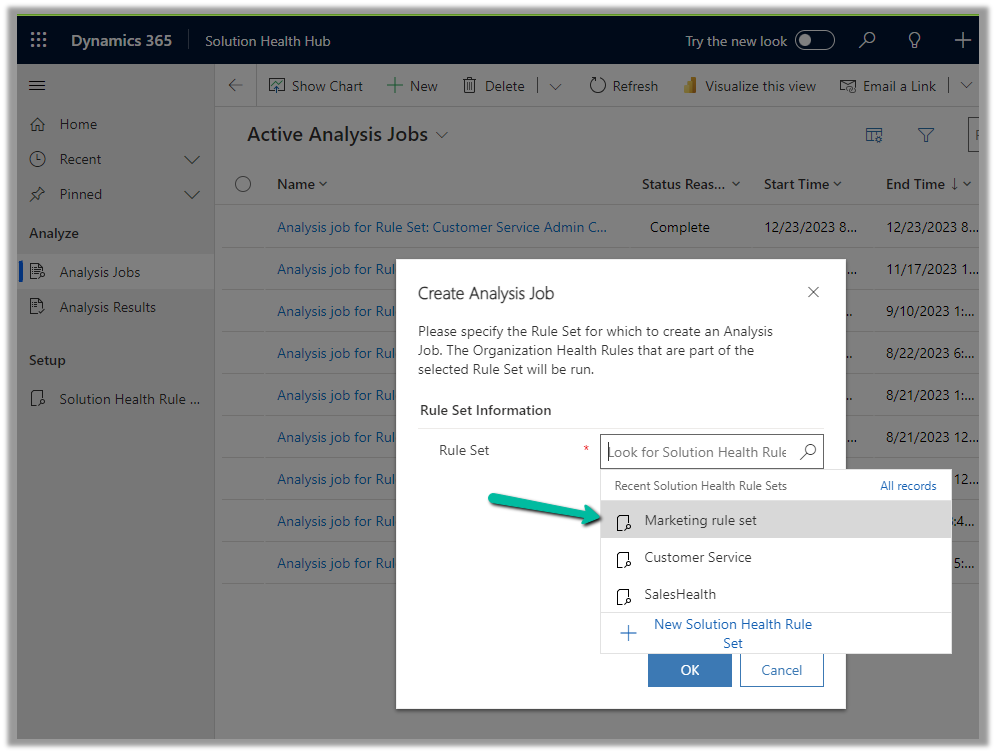
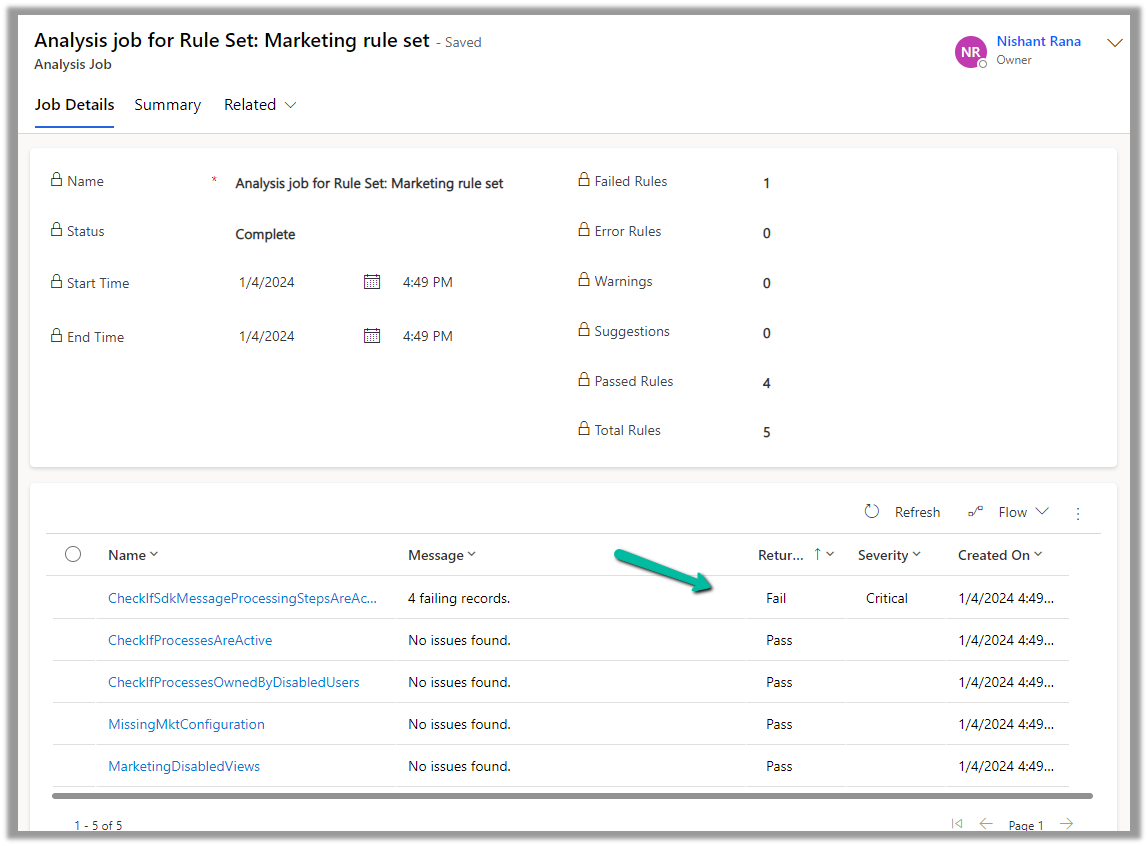
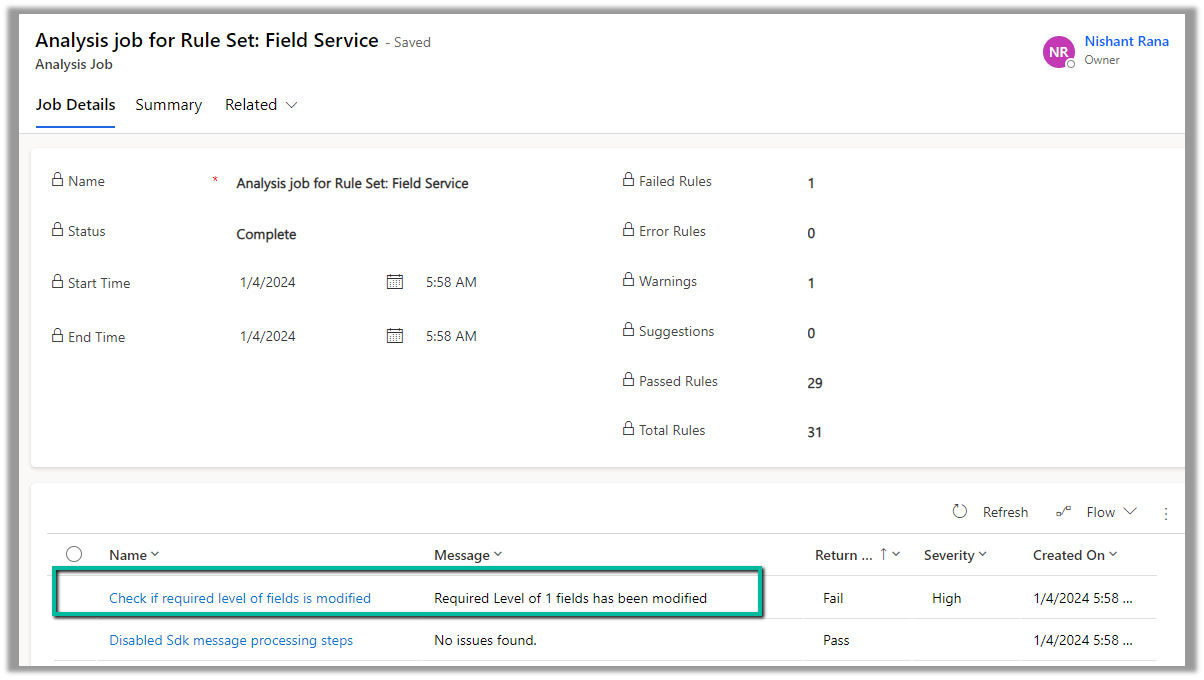
To run the Rules, we need to create a new Analysis Job record and select the corresponding Rule Set.
A summary of rule-set executions will be shown in a few seconds. (runs asynchronously)
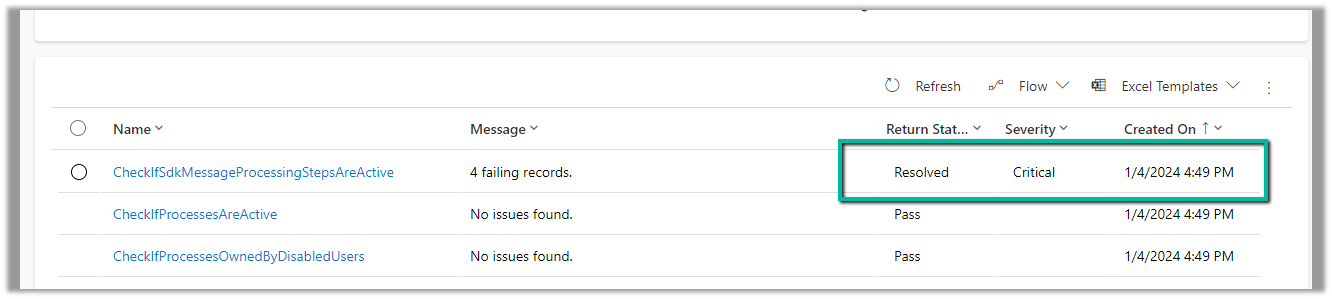
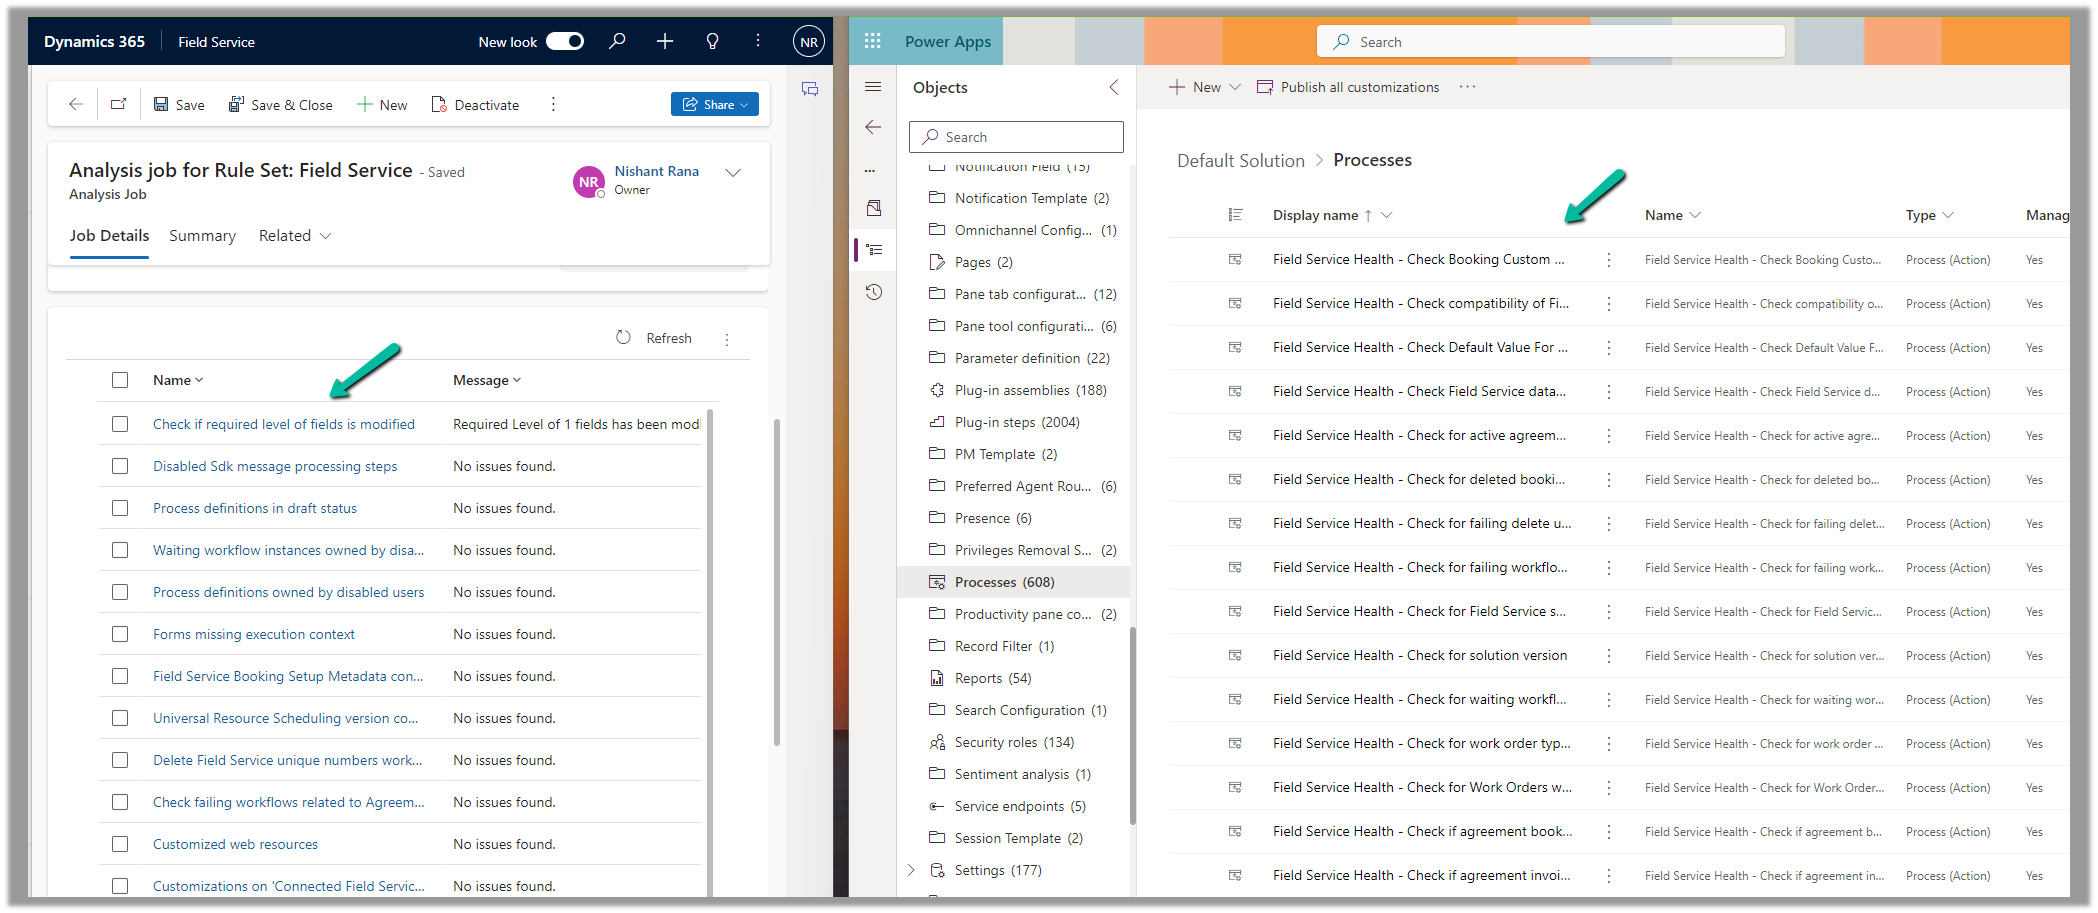
We can see one of the rules failed.
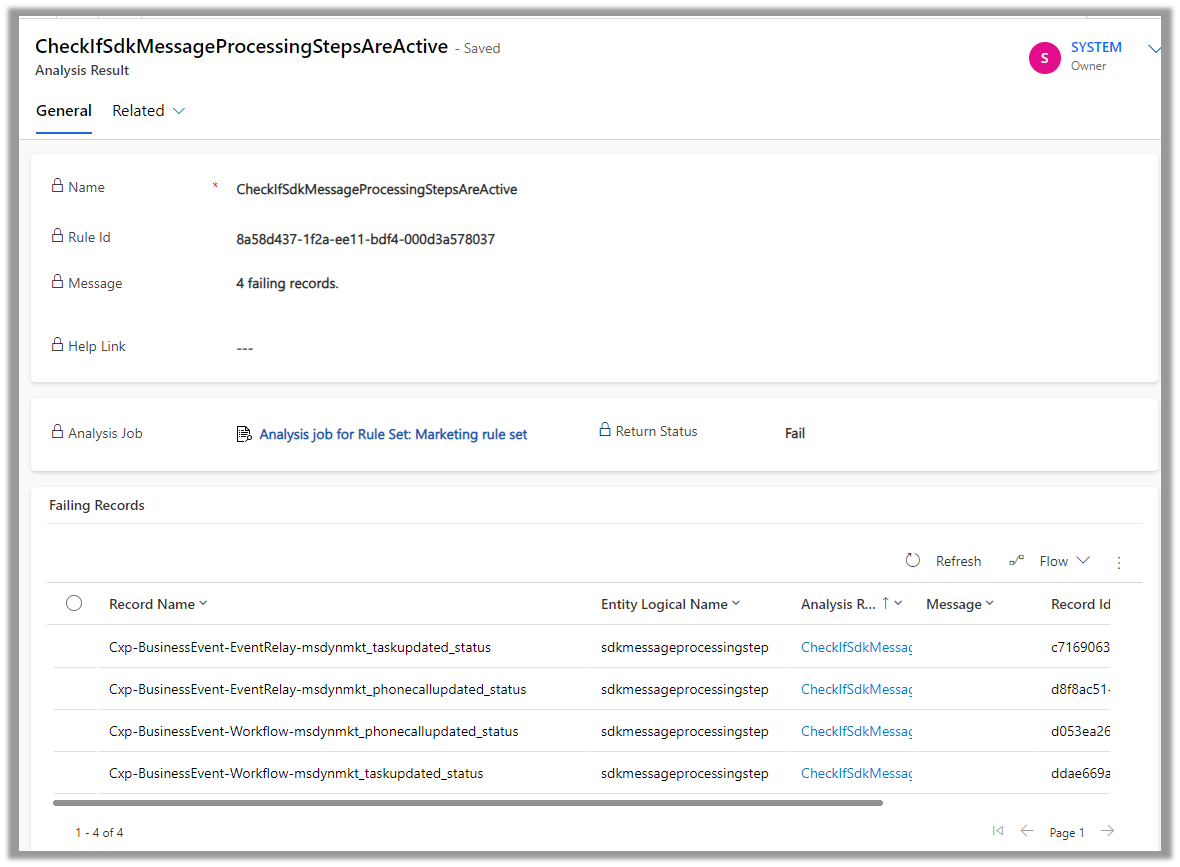
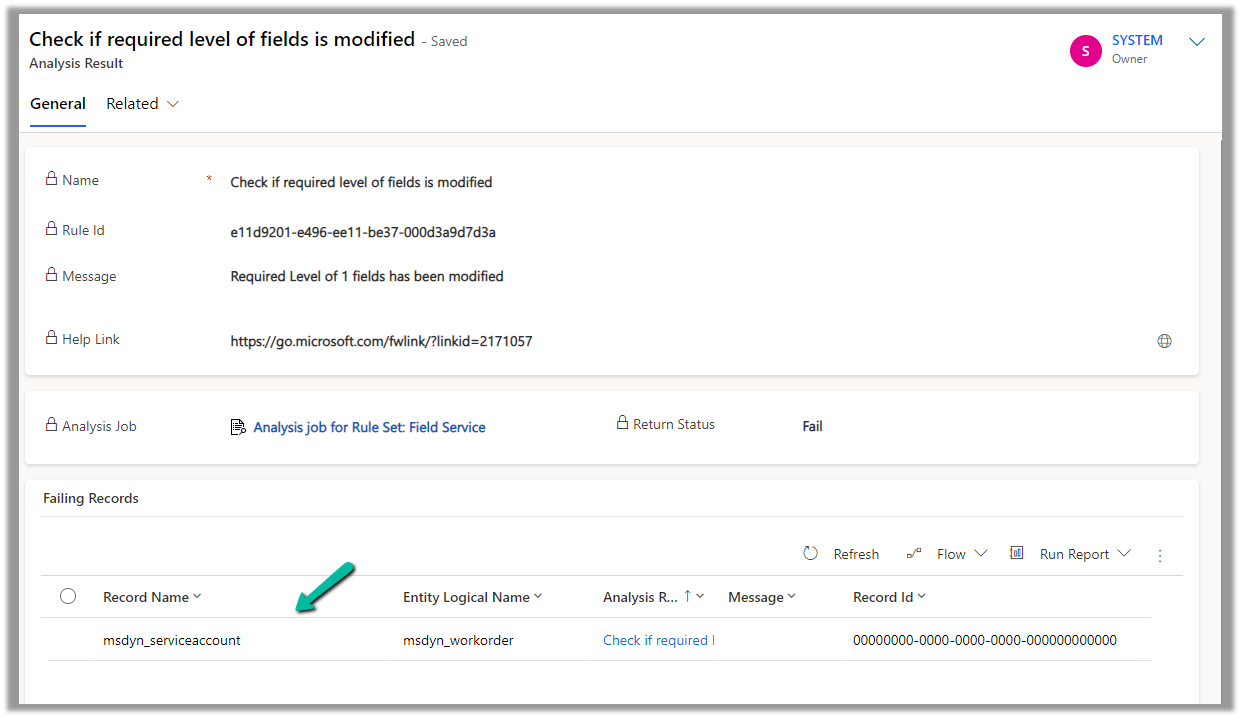
Opening the record, we can see the details.
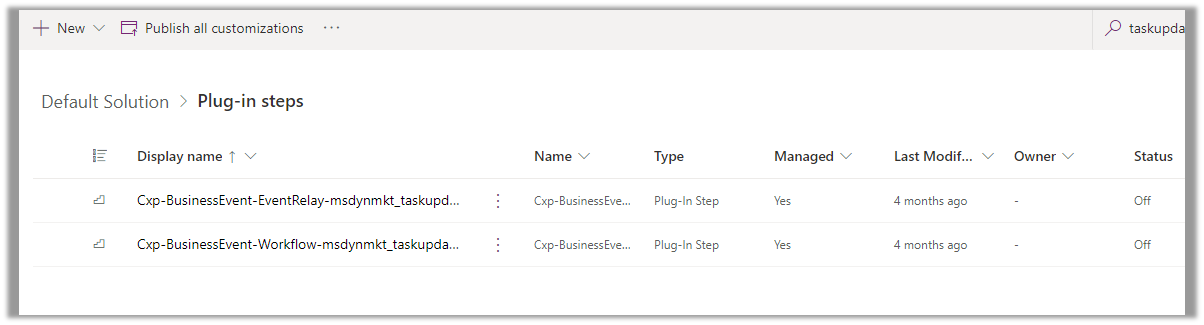
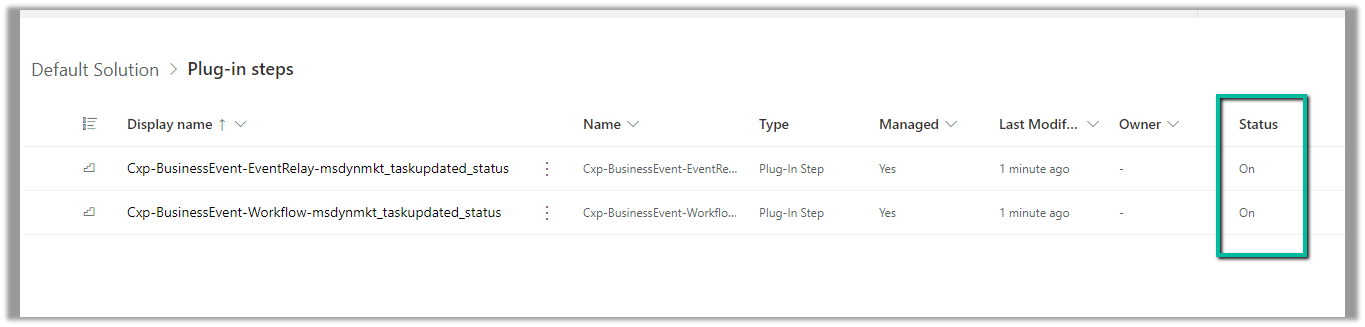
Back in our solution, we can see the steps in the disabled state.
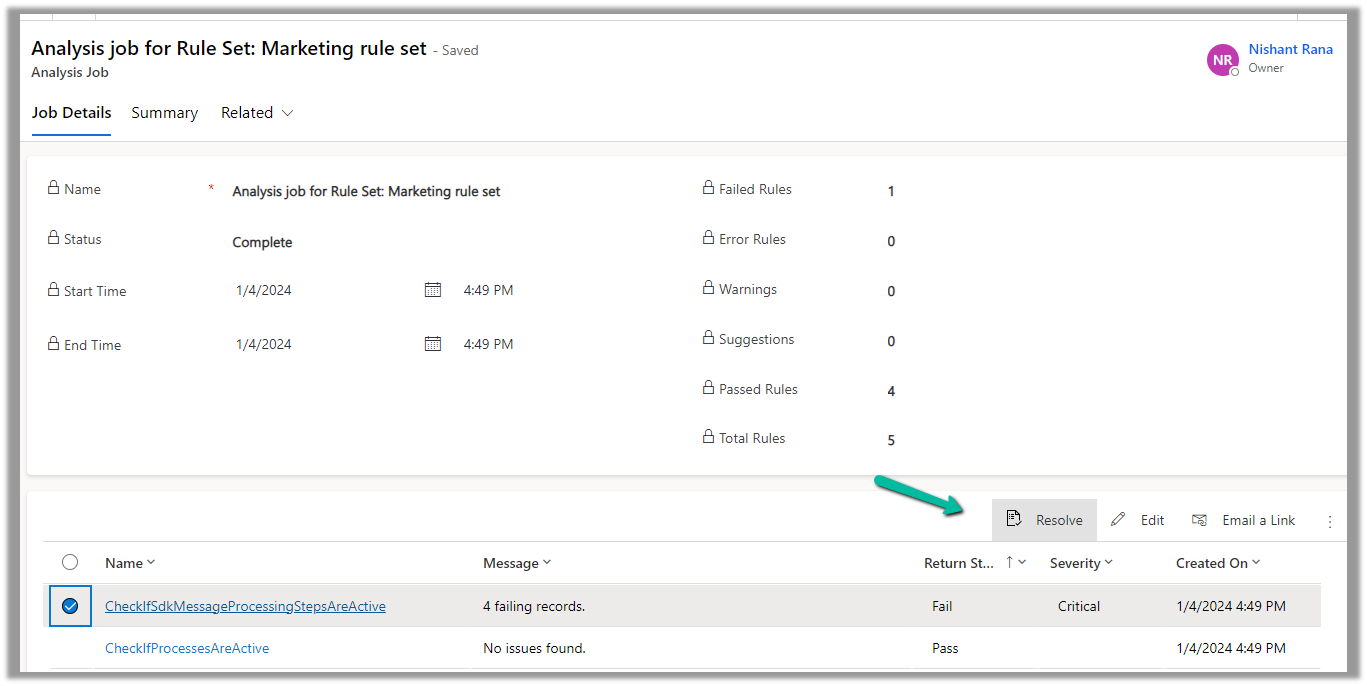
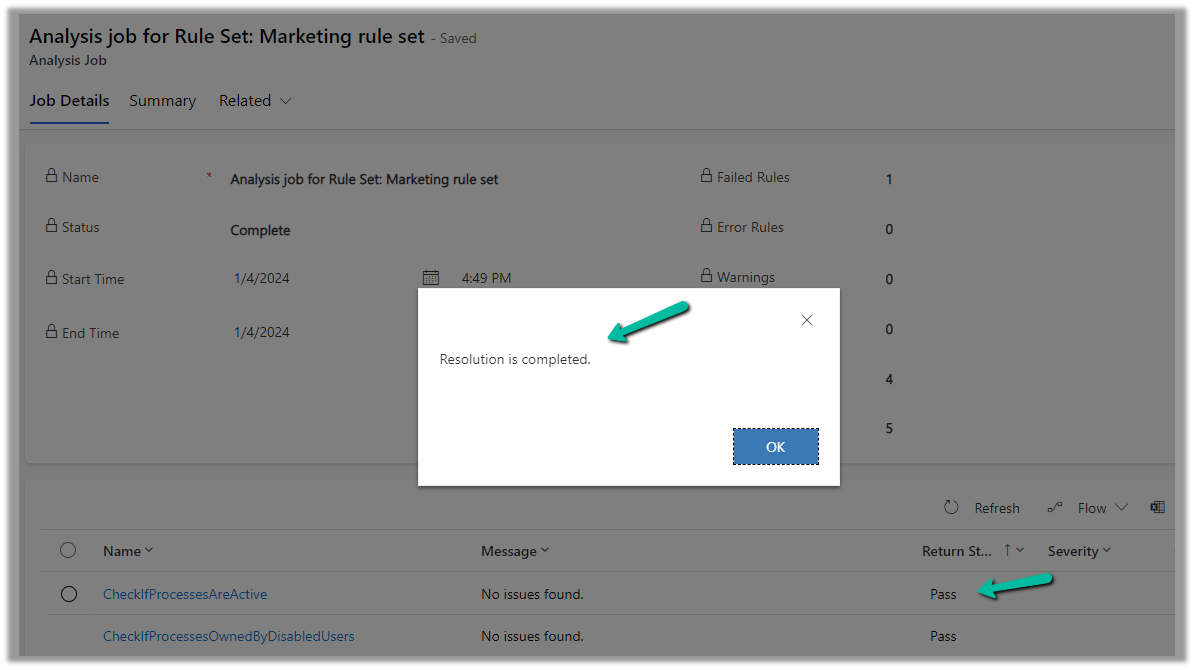
Back in our Analysis Job, let us select the failed rule and click on Resolve.
We can see the message “Resolution is completed.” and the rule passed.
Back inside our solution, we can also see the status as On for those steps.
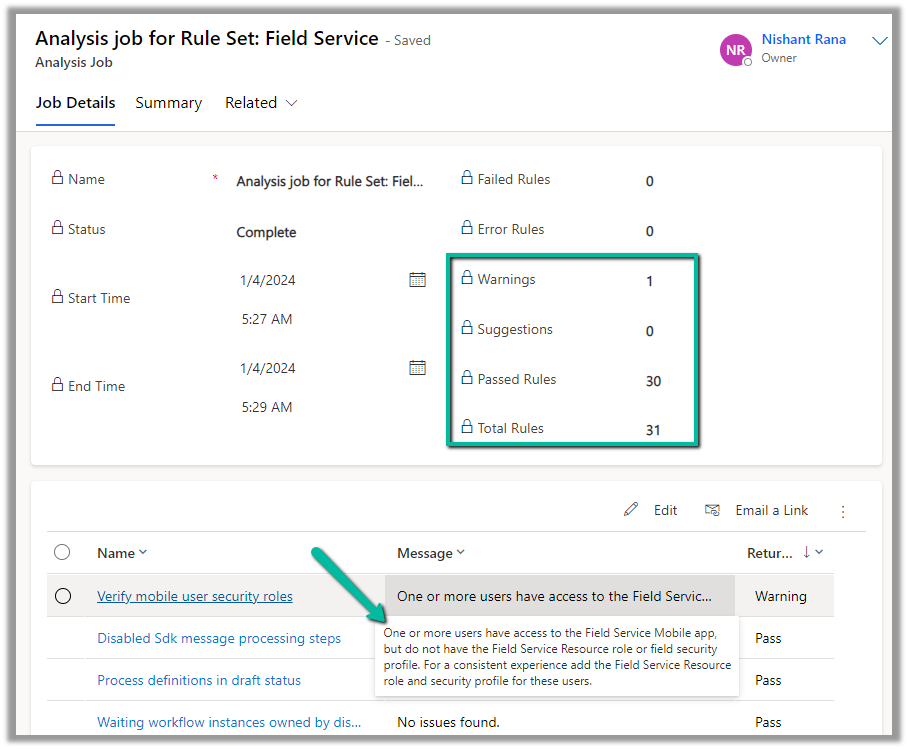
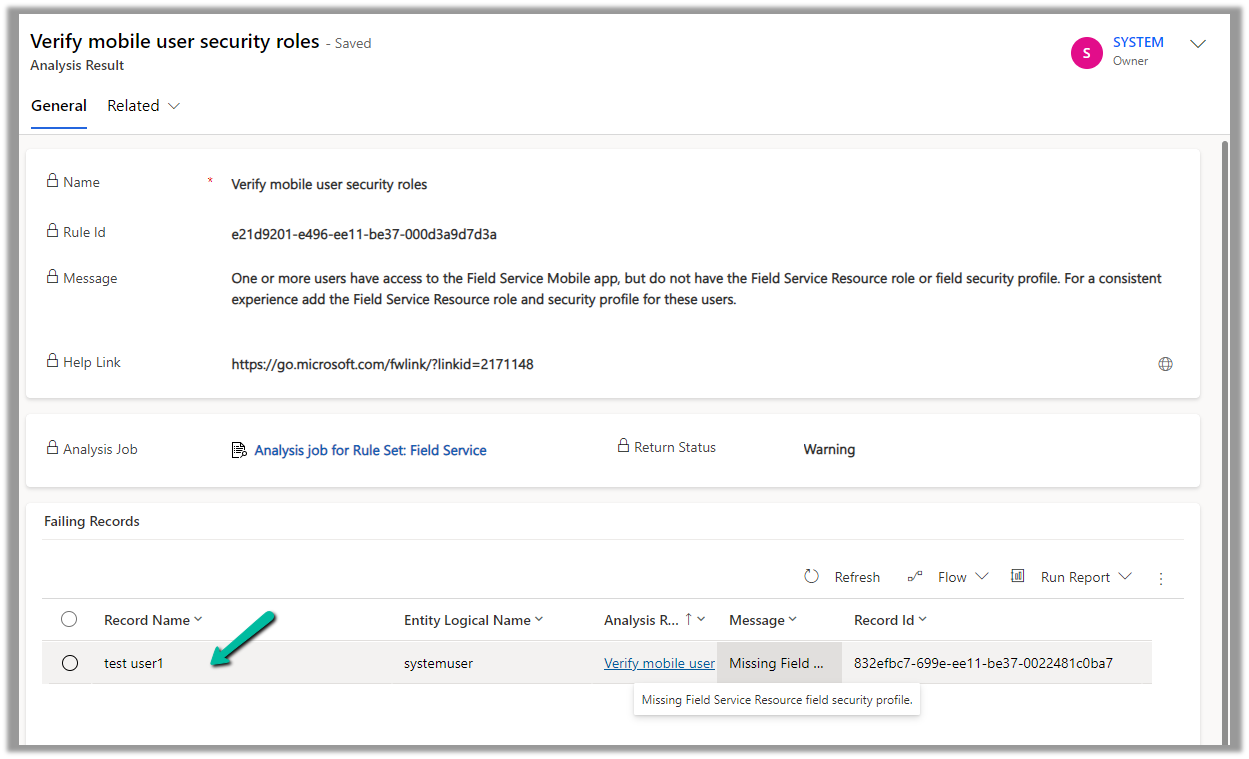
Now let us run an analysis job for Field Service
On opening the record, we can see the user for which the roles are missing.
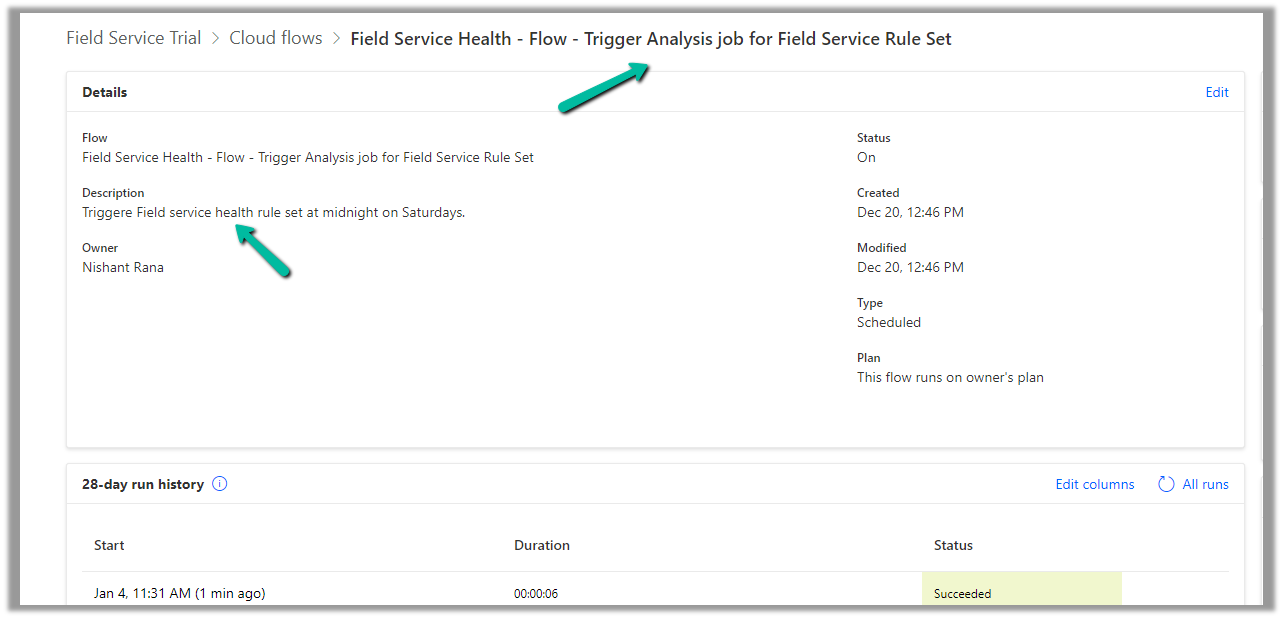
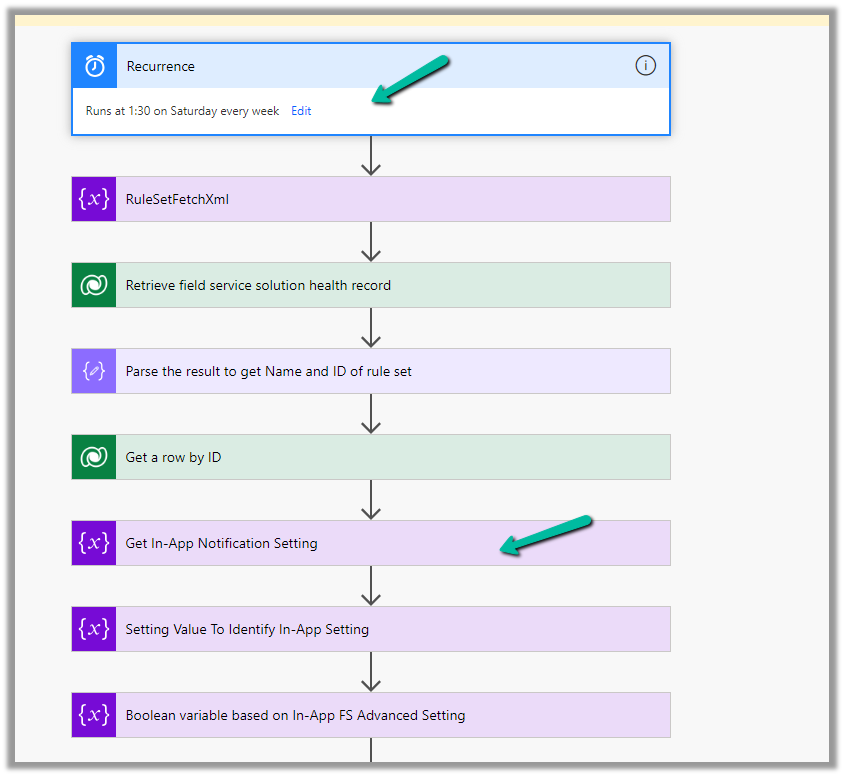
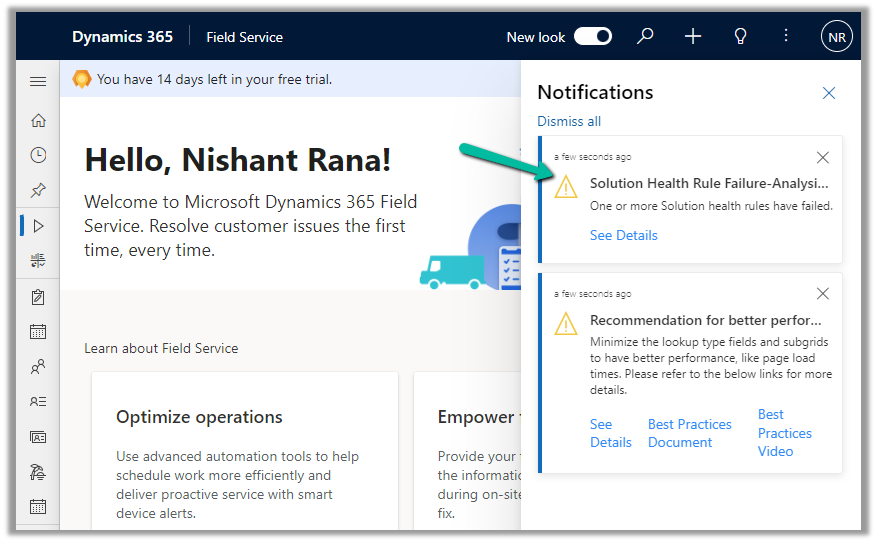
For Field Service, we can see an out-of-the-box cloud flow that runs at midnight on Saturdays to trigger the analysis job for the Field Service Rule Set.
And sends the In-app notifications.
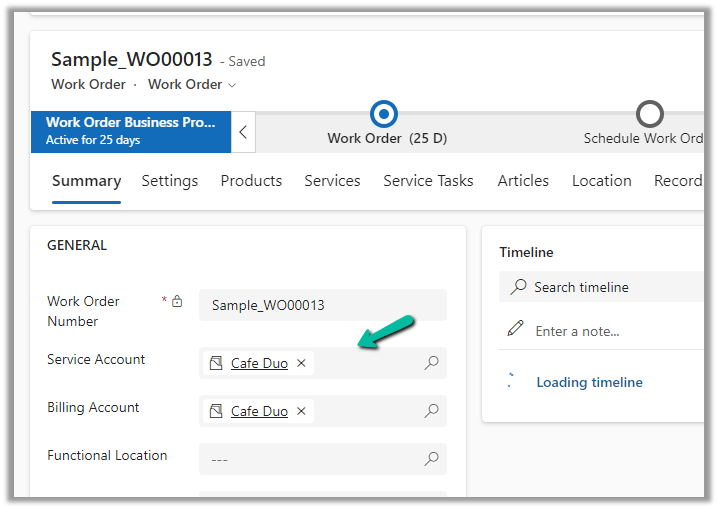
Now if a rule fails, we can get the in-app notifications, e.g. we had set the Service Account field as optional on the Work Order form.
In this blog post, we will cover deploying Web Resources and Plugin directly from Visual Studio using the Kupp Code Analytics extension, which makes the process more efficient and less error-prone compared to doing it manually.
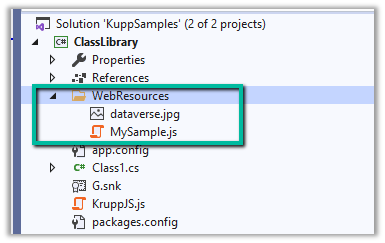
Suppose we have the following JavaScript and Image file that we want to deploy to our Dataverse / Dynamics 365.
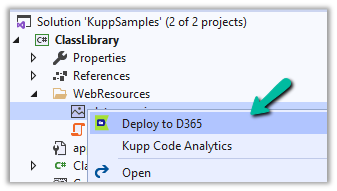
We can right-click the file and select the option “Deploy to D365“
In the Output window, we can see both the Web Resources created.
Now let us make changes to our JavaScript file – MySample.cs and click on Deploy to D365.
This time in the output window we can see the file getting updated instead of getting created.
We can see the Web Resources files created and updated for the connected environment inside the Maker Portal.
Similarly, we can deploy or update our Plugins from within Visual Studio. Here we need to make sure our Plugin Assembly is already registered.
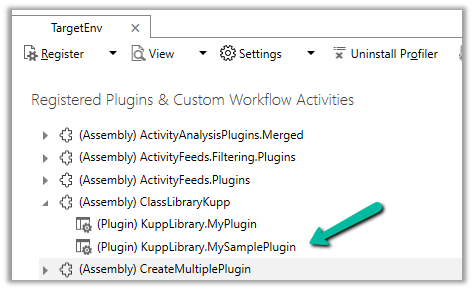
Below we have the following assembly already registered.
Let us update our Plugin Class and select the “Deploy to D365” option for the plugin project. We have added a new plugin class called MySamplePlugin.
As expected we can see our plugin updated from the Output window.
From Plugin Registration Tool we can see our plugin assembly updated.


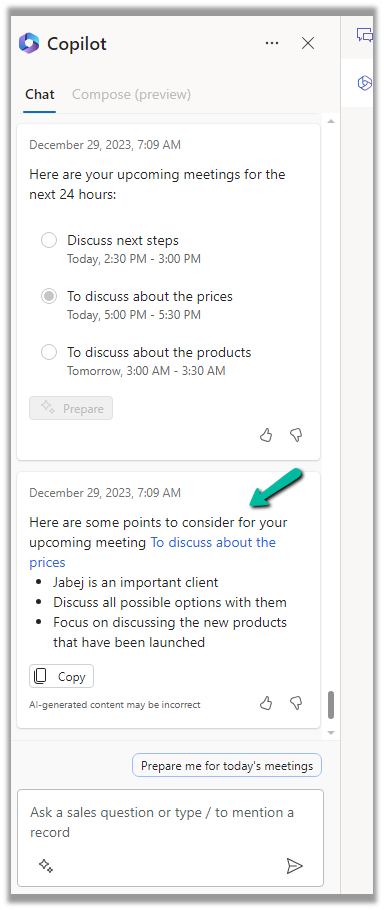
 or select the Sparke Icon and select “Prepare for upcoming meetings“